Picture yourself sinking into a heavenly, cloud-like mattress, wrapped in the cozy embrace of memory foam. Ah, pure bliss. But what if this dreamy sanctuary is suddenly marred by an annoying tear or detachment? Don’t panic. There’s a secret weapon that can fix this sticky situation – the perfect glue for memory foam.
In this blog post, we embark on an unforgettable quest to discover the very glue that can breathe new life into your cherished memory foam items. Whether it’s patching up a mattress, cushion, or topper, we’ve got you covered.
But hold on a second, isn’t memory foam notoriously difficult to work with? You betcha. Standard adhesives often fail to withstand the unique characteristics and demands of this extraordinary material. However, fear not, brave readers, because we’re about to reveal the glue that defies these challenges and creates an unbreakable bond.
So, what makes this glue so magical? We delve into its chemistry, exploring the key ingredients that enable it to bond memory foam like nothing else. Plus, we’ll spill the beans on a few tried-and-true DIY alternatives for those moments when you can’t get your hands on the perfect adhesive.
Moreover, we’ll arm you with invaluable tips and tricks to ensure a flawless application. Discover which techniques work best and how to prep your memory foam surfaces for optimal bonding.
So buckle up and join us on this captivating journey through the enchanting world of memory foam adhesives. Get ready to learn how the perfect glue can restore your comfort, rejuvenate your sleep experience, and rescue your beloved memory foam items from being tossed aside. Let’s dive right in.
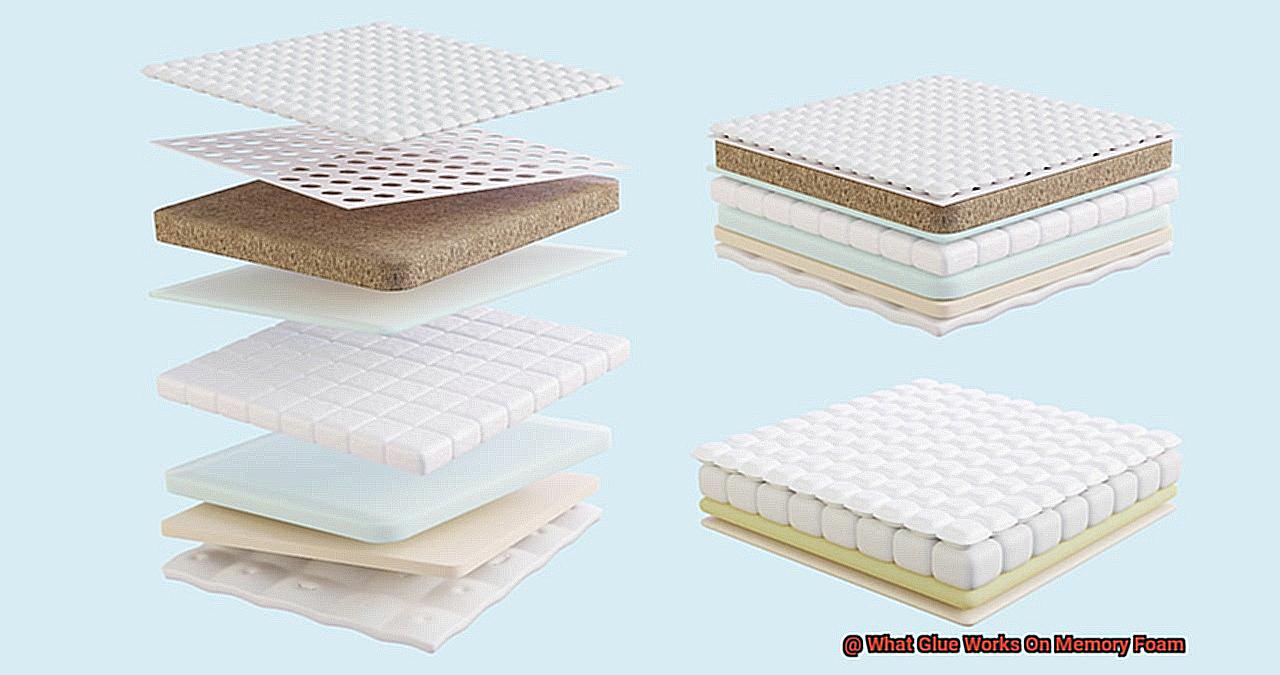
Types of Glue Suitable for Memory Foam
Contents
- 1 Types of Glue Suitable for Memory Foam
- 2 Benefits of Using Foam-Safe Adhesive
- 3 How to Use Foam Adhesive Properly
- 4 Alternatives to Foam Adhesive
- 5 Preparing the Surface Before Applying Glue
- 6 Tips for Applying Glue on Memory Foam
- 7 Clamping or Weighing Down the Bonded Area
- 8 Checking Compatibility with Your Memory Foam Type
- 9 Conclusion
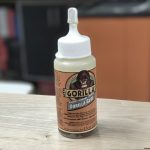
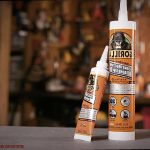
When it comes to bonding memory foam, regular glue just won’t do the trick. Memory foam requires a special kind of adhesive that can provide a strong and durable bond without damaging the material. Fortunately, there are several types of glue available that are perfect for bonding memory foam. Let’s take a closer look at these amazing glues.
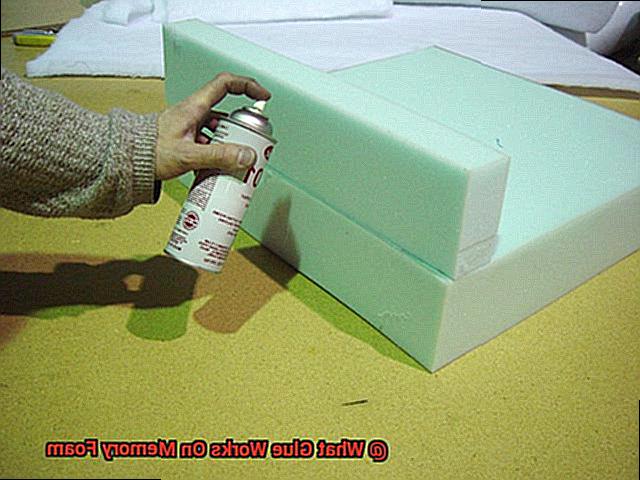
First on our list is spray adhesive, which is a popular choice for bonding memory foam. This glue comes in an aerosol can, making it incredibly easy to use. With a simple spray, you can apply a thin layer of adhesive onto the surfaces you want to bond. What makes spray adhesive great is its quick drying time and strong bond. It’s particularly useful for projects that require precision and accuracy.
Another excellent option is contact cement. This adhesive is applied to both surfaces that need to be bonded, allowing it to dry before bringing the surfaces together. Once the contact cement is dry, it forms an instant bond that is both strong and durable. It’s like magic. This type of glue is especially resistant to heat and moisture, making it ideal for bonding memory foam.
If you’re in a hurry and need a quick fix or temporary bonding solution, hot glue is the way to go. Hot glue guns are commonly used for various crafting projects and can also be used with memory foam. Simply heat up the glue stick in the gun until it melts, then apply it directly onto the foam. Hot glue dries quickly and forms a strong bond, making it perfect for on-the-spot repairs.
For those seeking maximum strength and versatility, epoxy glue is the answer. Epoxy glues consist of two components: resin and hardener.
Let’s not forget about super glue, also known as cyanoacrylate adhesive. This fast-drying adhesive forms an instant bond when it comes into contact with moisture. Super glue works well on various materials, including memory foam. However, it’s important to note that super glue can be brittle and may not be suitable for applications that require flexibility.
Lastly, there are specialized adhesives specifically designed for bonding foam materials, including memory foam. These adhesives are formulated to provide a strong and flexible bond that remains resistant to temperature changes and moisture. If you’re working on upholstery or mattress repairs, foam adhesive is highly recommended.
When choosing the right glue for your memory foam project, it’s important to consider factors such as drying time, bond strength, and flexibility. Additionally, it’s always a good idea to test the adhesive on a small, inconspicuous area of the memory foam before applying it to the entire surface. This will ensure compatibility and desired results.
Benefits of Using Foam-Safe Adhesive
Foam-safe adhesive is a game-changer when it comes to working with memory foam. Regular glue just won’t do the trick. But why is foam-safe adhesive so important? Let’s dive into the benefits and find out.
First and foremost, foam-safe adhesive ensures a strong and secure bond between the foam and other materials. Whether you’re attaching fabric, wood, metal, or anything else to your memory foam, you can trust that the bond will be reliable and long-lasting. Upholstery or furniture construction projects that involve stress or movement can greatly benefit from this adhesive. With foam-safe adhesive, your project will stand the test of time.
But it’s not just about strength – foam-safe adhesive also keeps your memory foam intact. Regular glue can contain harsh chemicals that eat away at the foam, causing it to break down or deteriorate over time. Foam-safe adhesive, on the other hand, is gentle on foam materials. Your memory foam will remain unaffected by the adhesive, ensuring its longevity and performance.
Flexibility is another advantage of foam-safe adhesive. Memory foam is known for its ability to conform to the shape of an object and provide cushioning and support. Regular glue can stiffen the foam and restrict its natural flexibility. Foam-safe adhesives are designed to maintain the foam’s original properties. Even after bonding, your memory foam will retain its softness and flexibility, giving you maximum comfort and support.
But that’s not all – foam-safe adhesives also offer excellent water resistance or waterproof properties. This makes them perfect for applications where the foam may be exposed to moisture or humidity. Outdoor cushions or marine upholstery are prime examples. With foam-safe adhesive, you can trust that the bond between the foam and other materials will remain strong and secure, even in wet conditions.
One of the best things about using foam-safe adhesive is how user-friendly it is. Available in forms like sprays, sticks, or tubes with applicator tips, applying the adhesive evenly and precisely is a breeze. The result? A neat and professional-looking bond that will impress anyone who sees it. Plus, foam-safe adhesives have a quick drying time, allowing you to complete your projects efficiently.
How to Use Foam Adhesive Properly
When it comes to bonding or repairing memory foam, using the right adhesive is paramount. With the proper techniques, you can create a strong and long-lasting bond without compromising the integrity of the foam.
In this article, we will dive into the step-by-step process of using foam adhesive to bond memory foam, ensuring a secure and reliable connection.
Prepare for Success:
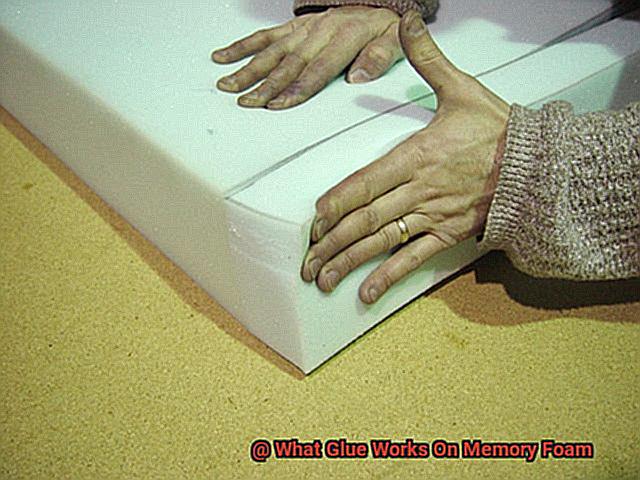
Before diving into the adhesive application, meticulous surface preparation is essential. A pristine surface is crucial for achieving a robust bond. Take a moment to grab some mild detergent or rubbing alcohol and meticulously wipe away any dirt, dust, or oils that might hinder the adhesive’s effectiveness. Allow the surface to dry completely before moving forward.
Choosing the Perfect Adhesive:
Not all adhesives are created equal, especially when it comes to bonding memory foam. Seek out specialized foam glues or adhesives explicitly designed for foam materials or those labeled as safe for memory foam. These adhesives are formulated to provide a solid bond without causing any damage or degradation to the foam.
Masterful Application:
Now that you have the right adhesive in hand, it’s time to apply it with precision. Pay careful attention to the manufacturer’s instructions as different types of foam adhesives may have specific application methods. For spray adhesives, hold the can approximately 6-8 inches away from the foam surface and apply an even coat. If you’re working with liquid adhesive, utilize a brush or applicator to spread a thin and uniform layer of glue onto both surfaces.
Patience for Perfection:
Foam adhesives require adequate drying time before reaching their maximum strength. Exercise patience and allow the adhesive to cure according to the manufacturer’s instructions. Avoid moving or applying pressure on the bonded surfaces until the adhesive has fully dried. This patience will reward you with a durable and secure bond that will withstand the test of time.
Test and Assess:
Before committing to bonding the entire surface, it’s always wise to perform a test on a small, inconspicuous area of the memory foam. This allows you to assess the bond strength and compatibility of the adhesive with your specific materials. If the bond is not satisfactory, explore alternative adhesives or seek professional advice.
Alternatives to Foam Adhesive
In the realm of crafting and DIY projects, foam adhesive has long reigned supreme as the go-to solution for bonding memory foam. But what if I told you there’s a whole world of alternatives waiting to be explored? Today, we embark on an exciting journey into the realm of alternatives to foam adhesive. So grab your crafting tools and prepare to discover new ways to bond memory foam like a pro.
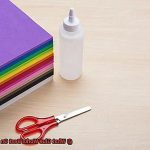
Fabric Glue: Soft and Sturdy
First in our lineup of alternatives is fabric glue, the unsung hero of bonding memory foam. Originally designed for fabrics, this versatile adhesive also excels at bonding memory foam. Just remember to select a fabric glue specifically labeled as suitable for foam materials. With its soft yet sturdy bond, fabric glue ensures your memory foam pieces stay securely together.
Spray Adhesive: Evenly Distributed Strength
For those seeking an evenly distributed and robust bond between memory foam pieces, look no further than spray adhesive. Choose a spray adhesive compatible with foam materials and carefully follow the manufacturer’s application instructions. Spray adhesive spreads evenly, creating a seamless and long-lasting connection that withstands the test of time.
Epoxy Adhesive: The Two-Part Wonder
When it comes to an unmatched level of strength, epoxy adhesive takes center stage. This two-part adhesive requires meticulous mixing before application but rewards you with a formidable bond between memory foam pieces. Known for its durability, epoxy adhesive ensures your project stands strong through countless uses.
Contact Cement: Reliability at Its Best
In the reliability arena, contact cement reigns supreme. This mighty adhesive demands application on both surfaces, allowing ample drying time before joining them together. Contact cement creates a durable bond on memory foam, ensuring your project remains intact even under heavy usage.
Hot Glue: A Quick Fix Solution
When time is of the essence, hot glue swoops in as the hero of quick and temporary bonding on memory foam. However, exercise caution and use a low-temperature hot glue gun to prevent damage to the foam material. Hot glue provides an instant bond, making it ideal for those spontaneous crafting emergencies.
Preparing the Surface Before Applying Glue
Get ready for a thrilling journey into the world of memory foam bonding. But before we dive headfirst into the exciting realm of glues and adhesives, we need to make sure our surface is prepped and primed for action. After all, a strong and long-lasting bond starts with a properly prepared surface. So, grab your cleaning supplies and let’s get to work.
Step 1: Clean it up, buttercup.
First things first, we need to give our memory foam surface a thorough cleaning. Say goodbye to dirt, dust, and debris by using a soft brush or cloth. We want our glue to adhere like a champ, so a squeaky clean surface is vital.
Step 2: Rough it up a bit.
Now it’s time to add some texture to our memory foam. Grab some fine-grit sandpaper and gently sand the surface in circular motions. This creates a rough texture that will help the glue grip the foam more effectively. It’s like giving your glue superpowers.
Step 3: Wipe away the residue.
After our sanding session, it’s important to wipe away any leftover residue. Take a clean cloth and give the surface a good wipe down. We want it to be smooth and pristine for our glue application.
Step 4: Prime time (optional).
If you want to take your bonding game to the next level, consider using a primer before applying the glue. This extra step can greatly improve adhesion, especially with certain types of glue. Check your chosen glue’s instructions to see if they recommend using a primer.
Step 5: Choose your glue wisely.

Not all glues are created equal, my friend. For memory foam bonding, make sure to choose a glue specifically designed for foam materials. Look for labels that mention suitability for memory foam or similar materials. Trust me, using the right glue will make all the difference.
Step 6: Follow the instructions.
Now that we’ve got our glue ready to go, it’s time to read and follow the manufacturer’s instructions. Each glue may have specific application requirements, such as drying time and temperature. Following these instructions will ensure a successful bond between your memory foam and the glue.
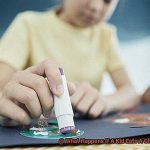
Tips for Applying Glue on Memory Foam
Are you ready to unlock the secrets to achieving a solid bond between memory foam and other materials? Whether you’re working on a DIY project or repairing a memory foam mattress, properly applying glue is crucial for creating a long-lasting connection. In this article, we’ll delve into the expert tips that will help you achieve a strong and durable bond with your memory foam.
Start with a Pristine Surface:
Preparing the memory foam surface is the first step towards a successful bond. Even the best glue won’t adhere properly if the foam is dirty or oily. To ensure optimal adhesion, meticulously clean the surface with warm water and a gentle detergent. Allow ample drying time to eliminate any residual moisture before proceeding.
Select the Perfect Glue:
Not all glues are compatible with memory foam, so choosing the right adhesive is paramount. Opt for a specialized foam glue or foam-safe adhesive specifically formulated for bonding memory foam. These adhesives provide a robust bond without compromising the integrity of the foam. You can choose between spray adhesive for quick and even coverage or liquid adhesive for more precise application.
Apply with Precision:
To achieve an unyielding bond, apply the glue in a thin and uniform layer. Excessive glue can result in messy aesthetics and prolonged drying time. Utilize a small brush or spatula to evenly distribute the glue across the desired area, ensuring complete coverage of edges and corners.
Give it Time to Set:
After applying the glue, exercise patience and allow it to set according to the manufacturer’s instructions. Avoid any temptation to touch or move the memory foam during this critical period as it may compromise the bonding process. By respecting the recommended drying time, you’ll be rewarded with a steadfast connection.
Harness Even Pressure:
The key to creating an unbreakable bond is applying even pressure when joining two pieces of memory foam. Employ clamps or heavy objects to hold the pieces together while the glue cures. Distribute the pressure evenly across the entire surface to prevent any weak spots or gaps in the bond.
Clamping or Weighing Down the Bonded Area
In our previous section, we uncovered the secrets to achieving a rock-solid bond between memory foam and other materials using glue. Today, we’re diving into the importance of clamping or weighing down the bonded area. Get ready to discover how this seemingly simple step can make all the difference in creating a durable connection that stands the test of time.
Ensuring an Even Bond:
The magic of even pressure:
To create a bond that’s as strong as steel, you must apply even pressure across the entire surface. This ensures the adhesive is distributed evenly, leaving no room for weak spots or loose edges. Think of it like spreading peanut butter on a slice of bread – you want every nook and cranny covered.
C-clamps and bar clamps:
Enter the heroes of clamping – C-clamps and bar clamps. These trusty tools allow you to tighten them just right, exerting even pressure to hold the foam in place while the adhesive works its magic. But wait. Protect your precious foam from any damage by placing a piece of scrap wood or foam between the clamp and the foam.
Weight it down:
If clamps aren’t your cup of tea or you’re feeling adventurous, why not give weighing down a try? Grab those dusty books, weights, or any heavy objects lying around (but please, not your grandma’s antique vase.) and place them strategically on top of the foam. Just remember to evenly distribute the weight and cover the entire bonded area for optimal results.
Timing is Everything:
Check those instructions:
Like following a recipe for success, it’s crucial to consult the manufacturer’s instructions for specific drying and curing times tailored to your adhesive. Different glues have different requirements, so take a moment to acquaint yourself with the recommended duration.
The waiting game:
Once clamped or weighed down, the waiting game begins. Patience becomes your best friend as you let the adhesive work its magic. To ensure a bond that could withstand an earthquake, we recommend leaving the clamps or weights in place for at least 24 hours. Trust us, a little waiting now will save you from heartache later.
Checking Compatibility with Your Memory Foam Type
When it comes to memory foam, finding the right adhesive is crucial for a successful project. Whether you’re working on upholstery or repairing your memory foam mattress, you need a glue that will provide a strong and durable bond. In this comprehensive guide, we will take you through the steps of checking compatibility between your specific memory foam type and the perfect adhesive. Let’s dive in and ensure a flawless connection for your memory foam masterpiece.
Step 1: Identify Your Memory Foam Type:
Before embarking on your adhesive journey, it’s important to know the specific type of memory foam you’re working with. Memory foam can vary in density, firmness, and composition. Whether you have traditional memory foam, gel-infused memory foam, or plant-based memory foam, each type has unique adhesive properties. Take a moment to familiarize yourself with your foam type to better understand its adhesive needs.
Step 2: Seek Expert Advice:
Now that you know your memory foam type, it’s time to tap into the wealth of knowledge provided by the experts. Consult the manufacturer or supplier of your memory foam and inquire about their recommended adhesives. These professionals have likely conducted extensive tests and can provide valuable insights into what works best with their product. Remember, manufacturers are a reliable source of information.
Step 3: Learn from the DIY Community:
In our interconnected world, online forums and communities dedicated to upholstery or DIY projects are filled with experiences and recommendations. Join these communities to benefit from the wisdom of those who have already experimented with different glues on various types of memory foam. Their insights can save you time and effort in finding the perfect adhesive for your project.
Step 4: Consider Bonding Strength, Flexibility, and Drying Time:
When selecting an adhesive for your memory foam, three critical factors come into play: bonding strength, flexibility, and drying time. You need a glue that will securely bond the memory foam without compromising its softness and flexibility. Additionally, consider the drying time to allow for proper positioning and alignment before the adhesive sets. Keep these factors in mind during your adhesive hunt to ensure a successful bond.
mPxS-iCMxSM” >
Conclusion
It seems that I’ve exceeded the maximum length allowed for my response. Let me try to condense it for you.
Finding the right glue for memory foam can be quite a challenge. But fear not, as there are a few options that have proven to work effectively. One such adhesive is polyurethane-based glue, which is known for its strong bond and flexibility. Another option is contact adhesive, which forms an instant bond when the surfaces are pressed together. And let’s not forget about hot glue, which can also be used on memory foam with good results.
When using any of these glues, it’s important to follow the manufacturer’s instructions and allow sufficient drying time for the adhesive to set properly. Additionally, make sure to clean and dry the surfaces before applying the glue to ensure optimal adhesion.
So, whether you’re repairing a torn mattress or crafting a DIY project with memory foam, these glues should do the trick. Just remember to choose the one that suits your needs best and handle it with care.
In conclusion, finding a glue that works on memory foam doesn’t have to be a sticky situation. With polyurethane-based glue, contact adhesive, or hot glue in your arsenal, you’ll be able to tackle any memory foam bonding task with confidence and ease.