Ever wondered how to securely attach items to brickwork? Look no further.
The right glue can be a game-changer when it comes to hanging decorations or mounting shelves. In this blog post, we’ll dive into the world of glue that sticks to brickwork.
We’ll explore different types of glue, how they work, and the challenges you might face along the way. From construction adhesives to specialized masonry glues, we’ve got you covered.
So put on your hard hat and let’s get started.
What is Construction Adhesive?
Contents
Construction adhesive, also known as construction glue or construction sealant, is a powerful and versatile adhesive designed specifically for use in construction and building projects. It is a high-strength adhesive capable of bonding a wide range of materials, including brickwork.
When it comes to bonding brickwork, construction adhesive offers several advantages. Firstly, it provides excellent adhesion strength, ensuring a strong and long-lasting bond between the adhesive and the brick surface. This is crucial when the bonded materials will be under significant stress or load.
Another advantage of construction adhesive is its resistance to moisture and weathering, making it suitable for both indoor and outdoor applications involving brickwork. Whether you’re repairing damaged bricks, attaching decorative elements to brick walls, or constructing entire structures using bricks, construction adhesive will maintain its bond integrity even in challenging environmental conditions.
Flexibility in application is another feature of construction adhesive. It can be applied as a continuous bead or in specific spots, depending on the project’s requirements. The adhesive also allows for some repositioning during the initial curing phase, making it easier to align and adjust the bonded materials before the adhesive fully sets.
However, it’s important to note that not all construction adhesives are suitable for bonding brickwork. It’s crucial to select an adhesive specifically formulated for this purpose. These adhesives offer the necessary strength and adhesion properties required to bond brick surfaces effectively.
How to Apply Construction Adhesive?
Preparing the Surface:
Before applying construction adhesive, it is crucial to prepare the surface of the brickwork. Start by meticulously cleaning the bricks, removing all traces of dust, dirt, and loose debris that could hinder proper adhesion. Use a stiff brush or a powerful vacuum cleaner to ensure a pristine surface. By doing so, you lay the foundation for optimal bonding.
Choosing the Right Adhesive:
Selecting the correct construction adhesive is paramount for a successful bond. Take into consideration factors such as the weight of the objects to be attached and the environmental conditions they will face. Carefully read the manufacturer’s instructions and choose an adhesive that best suits your specific project requirements. This will ensure a reliable and long-lasting bond.
Applying the Adhesive:
To begin applying construction adhesive, expertly cut the tip of the adhesive tube at a 45-degree angle using a sharp utility knife. The size of the bead will depend on the size of the bricks and the scale of your project. With precision and control, squeeze the adhesive gun trigger slowly and steadily, moving it along the desired line or area where you want to apply the adhesive. By maintaining consistent pressure, you achieve an even application that promotes maximum bonding strength.
Spreading and Smoothing Out:
For an impeccable finish, consider using a putty knife or a trowel to spread and smooth out the adhesive after applying it to the brickwork. This step ensures that the adhesive is evenly distributed, eliminating any potential air pockets and providing better contact between the bricks and the materials being attached. The result is a seamless connection that reinforces the integrity of your construction.
Pressing Objects Together:
After applying the adhesive, exert firm pressure to press the objects or materials firmly onto the brickwork. Employ slight twisting motions to ensure optimal contact and spread the adhesive evenly across the surface. If necessary, employ clamps or other tools to securely hold the objects in place while the adhesive sets. By doing so, you guarantee a solid bond that will withstand the test of time.
Allowing the Adhesive to Cure:
Once you have pressed the objects together, exercise patience and allow the adhesive to cure according to the manufacturer’s instructions. This typically takes anywhere from 24 to 48 hours, depending on variables such as temperature and humidity. Avoid disturbing or moving the bonded objects during this time to ensure a proper bond formation. By allowing ample curing time, you guarantee a strong and durable connection that will withstand the rigors of everyday use.
What is Epoxy Adhesive?
Epoxy adhesive is a powerful and durable glue that has earned a well-deserved reputation as a superhero in the world of bonding. Composed of two components – resin and hardener – epoxy adhesive undergoes a chemical reaction when mixed together, resulting in an adhesive so strong, it could hold the weight of the world (well, almost).
This incredible adhesive finds its place in various industries, including construction, automotive, and aerospace, thanks to its exceptional bonding properties. Its high strength and durability make it ideal for applications where a bond that withstands pressure is essential. Whether you’re repairing a cracked brick wall or constructing an architectural masterpiece out of bricks, epoxy adhesive is the trusty sidekick you can rely on.
One of the defining features of epoxy adhesive is its versatility. It can bond to a wide range of materials, including brickwork, concrete, and stone. So whether you’re working with traditional red bricks or experimenting with other materials, epoxy adhesive will be there to lend a helping hand.
But epoxy adhesive doesn’t just stop at bonding strength. It also boasts resistance to chemicals, water, and heat. Rainy weather? No problem. Heatwaves? Bring it on. Even the occasional chemical spill won’t faze this superhero adhesive. Its high tensile strength allows it to handle significant pressure without breaking a sweat.
Using epoxy adhesive on brickwork is straightforward, as long as you follow a few simple steps. First, ensure that the surface is clean and free from any debris or dust. Then, mix the resin and hardener according to the manufacturer’s instructions and apply it to the surface. Press the objects together with firm pressure like a true craftsman. Finally, sit back and watch as the adhesive cures and creates an unbreakable bond.
Of course, like any superhero, epoxy adhesive has its advantages and disadvantages. On the plus side, it’s strong, durable, and resistant to various factors. However, it can be a bit tricky to work with, requiring precise mixing and careful application. But with proper precautions and safety measures, like wearing protective gear and working in a well-ventilated area, you can unleash the full potential of this superhero adhesive.
How to Apply Epoxy Adhesive?
Well, strap on your gloves and get ready for an exciting journey of creating bonds that will withstand the test of time.
Preparing the Surface: Banishing Dirt and Debris.
Before we dive into the adhesive action, we must ensure that our brickwork surface is as clean as a whistle. Armed with a wire brush or scraper, meticulously eliminate any pesky dirt, dust, or debris that may cling to the bricks. We want a pristine canvas for our adhesive masterpiece.
Mix that Epoxy: The Perfect Recipe for Success.
Just like a master chef concocting a mouthwatering dish, mixing epoxy adhesive requires precision. Follow the instructions on the package and combine equal parts of resin and hardener, stirring them with gusto until they become inseparable partners in crime. Remember, a well-mixed epoxy is the secret ingredient for a bond that will never break.
Apply the Adhesive: Spreading Sticky Goodness.
Now comes the fun part – applying the epoxy adhesive. Armed with your trusty putty knife or trowel, unleash the sticky goodness onto the brickwork surface. Let it flow like honey, covering every nook and cranny where you desire that magical bond. Smooth it out with finesse, just like spreading butter on warm, golden toast.
Press and Hold: A Moment of Intimacy.
Once you’ve applied the epoxy adhesive, it’s time for a little love and affection – press those surfaces together firmly. Show them how much you care and hold them close for as long as the manufacturer recommends. This intimate embrace allows the adhesive to cure and forge an unbreakable connection between the bricks.
Clean Up: Farewell to Excess Epoxy.
After the adhesive has performed its enchantment, it’s time for a bit of cleanup duty. Take a moment to bid adieu to any excess epoxy that may have escaped during the bonding process. Utilize a solvent recommended by the manufacturer, treading lightly to avoid any harm to the surrounding brickwork while restoring pristine perfection.
What is Masonry Adhesive?
Also known as brick adhesive or construction adhesive, this magical glue is designed to tackle tough jobs that regular glue just can’t handle. So whether you’re building a brick wall or adding decorative elements to your home, masonry adhesive is the secret weapon you need.
But what makes masonry adhesive so special? Well, it’s formulated to create a strong and durable bond between different materials and masonry surfaces. It works wonders on bricks, stones, concrete blocks, and other masonry materials, even on those pesky porous surfaces. How does it do it? By seeping into the tiny pores and creating an unbreakable bond.
Now let’s dive into the different forms of masonry adhesive. First up, we have liquid adhesives – the most common type. These can be applied with a handy-dandy caulking gun or squeeze bottle. Then we have adhesive tapes and sheets for smaller applications or when precise placement is needed. Talk about versatility.
Before you start sticking things together, it’s important to prep your surface properly. Clean off any dust, dirt, grease, and loose mortar from your brickwork. If necessary, roughen or score the surface to improve adhesion. And when it’s time to apply the adhesive, make sure to do it evenly and generously for maximum stickiness.
So why choose masonry adhesive over traditional mortar? Well, for starters, it’s quick and easy to use with no mixing or curing time required. Plus, it gives you more flexibility in design and construction since it can bond different materials together. And let’s not forget those situations where mortar just won’t do, like attaching decorative elements or fixing small cracks.
How to Apply Masonry Adhesive?
In this comprehensive guide, we will walk you through the process of applying masonry adhesive, also known as construction adhesive, to ensure a strong and durable bond. With just a few simple steps, you’ll be able to stick it to brickwork like a pro.
Step 1: Prepare the Surface
Before applying masonry adhesive, proper surface preparation is crucial. Start by giving the brickwork a thorough cleaning. Use a stiff brush or a power washer to remove any dust, dirt, or loose particles. A clean surface is essential for achieving optimal adhesion.
Step 2: Read the Instructions
Different brands of masonry adhesive may have specific recommendations for application techniques and drying times. Take a moment to read and understand the instructions provided by the manufacturer. This will help you achieve the best results and ensure that your bond stands the test of time.
Step 3: Apply the Adhesive
Now it’s time to apply the masonry adhesive. Depending on the size of your project, you can use either a caulking gun or a trowel. For smaller repairs or projects, a caulking gun is more convenient and easier to control. For larger projects, a trowel will allow you to spread the adhesive evenly.
Step 4: Start with a Thin Layer
Begin by applying a thin layer of adhesive onto the back of the brick or masonry material. This initial thin layer helps achieve better adhesion and prevents excessive squeeze-out when you press it against the surface. Think of it as creating a solid foundation for your bond.
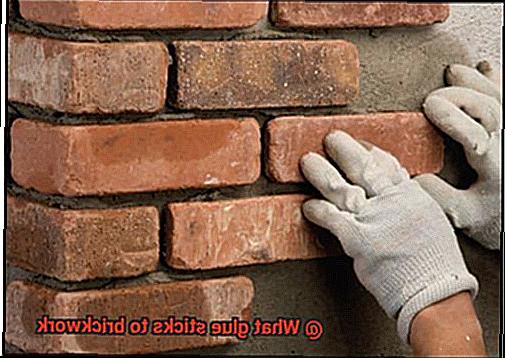
Step 5: Firmly Press and Align
Press the brick or masonry material firmly onto the surface where you want it to be bonded. Apply some pressure to ensure good contact between the material and the adhesive. Make sure it is aligned properly before the adhesive sets. This step is crucial for a strong and secure bond.
Step 6: Maintain Consistent Spacing
If necessary, use spacers or shims to maintain consistent spacing between bricks or masonry materials. This will help create an even and uniform appearance. Consistency is key in achieving a professional finish.
Step 7: Work in Small Sections
To ensure proper alignment and prevent the adhesive from drying too quickly, work in small sections at a time. By focusing on one area at a time, you can give your full attention to achieving the desired results. Working systematically ensures a neat and well-executed project.
Factors to Consider When Choosing a Glue for Brickwork
Choosing the right glue for brickwork is crucial to ensure a strong and long-lasting bond. Here are some factors to consider when making your selection:
- Adhesive strength: Look for glues specifically designed for bonding with bricks or masonry. They should be able to handle the weight of the bricks and provide a bond that will stand the test of time.
- Flexibility: Brickwork is prone to movement due to temperature changes, settling, or vibrations. Opt for flexible adhesives that can withstand these movements without losing their adhesive properties.
- Weather resistance: If it’s an exterior project, choose a glue that is weather-resistant. Rain, UV rays, and extreme temperatures can take a toll on adhesives, so choose one that can withstand these elements.
- Water resistance: Especially for areas prone to moisture or water exposure like bathrooms or kitchens, choose a water-resistant adhesive to protect your bricks from damage.
- Application method: Consider the method of application that suits your preferences and the complexity of your project. Some glues come in tubes or cartridges that can be applied with a caulking gun, while others may require mixing before application.
- Drying time: If you’re working on a tight schedule or need to complete the project quickly, opt for a glue with a quick drying time. However, if time isn’t an issue, you can choose one that takes longer to cure.
- Ease of use: Look for features like easy dispensing, non-drip formulas, and clear instructions for application. This will make the glue easier to use, especially if you’re a DIY enthusiast or have limited experience with adhesives.
- Viscosity: Thin glues easily penetrate the pores of the bricks for a strong bond, while thicker ones are better for filling gaps. Choose the viscosity that suits your specific brickwork needs.
Testing the Chosen Adhesive
When it comes to sticking something to brickwork, finding the right adhesive is crucial. Whether you’re hanging decorations or securing a sign, you need a glue that can handle the job. But how do you go about testing it to ensure it sticks like glue?
First and foremost, you must prepare the brick surface properly. Grab a brush or a vacuum cleaner and give it a thorough clean. Dust and loose particles can hinder your bond, so make sure to remove them. And don’t forget to lightly moisten the surface with water before applying the adhesive – this step will help create a stronger connection.
Now comes the exciting part – applying the chosen adhesive. Follow the manufacturer’s instructions carefully, as different adhesives may require different techniques. Once applied, press those two surfaces together firmly. You want to make sure they’re really sticking together, creating a bond that is unbreakable.
But patience is key in this process. Allow the adhesive enough time to fully set and bond with the brick. The curing time can vary depending on the type of adhesive, so refer to those instructions again. Good things come to those who wait.
Once the curing time is up, it’s time for the moment of truth – test that bond. Apply some gentle pressure or give it a little tug – does it hold firm? If so, congratulations. Your chosen adhesive is doing its job and sticking to brickwork like a champ.
But we’re not finished just yet. We also want to ensure that our adhesive can withstand Mother Nature’s elements. So, expose it to heat, cold, moisture, and UV radiation – put it through its paces. Does it still hold strong? If yes, then we’ve found ourselves a winner.
Last but not least, take a step back and evaluate the aesthetic appearance of your bonded surfaces. Does the adhesive leave any visible residue or marks? Does it blend seamlessly with the surrounding area? After all, we want our adhesive to not only be strong but also visually pleasing.
mA-xRl0Bzmo” >
Also Read: How to Glue Wood to Brick?
Conclusion
When it comes to finding the right adhesive for brickwork, it can be a sticky situation.
But fear not, for there are options available that will firmly bond your bricks together. Whether you’re repairing a crumbling wall or working on a craft project, you’ll want a glue that sticks like cement.
One reliable choice is construction adhesive, specifically designed to adhere to various surfaces including brick. Its strong and durable formula ensures a long-lasting bond that can withstand the test of time.
Another option is epoxy resin, known for its exceptional bonding properties. This versatile adhesive forms a powerful grip on brick surfaces, creating a secure connection that won’t let go.
This fast-setting glue provides an instant hold on brickwork, allowing you to get the job done efficiently.