Welcome to our blog post all about the awesomeness of adhesives and their incredible ability to stick to stainless steel.
Ever wondered which glue will work its magic on this notoriously stubborn material? Well, wonder no more.
Today, we’re diving headfirst into the world of stainless steel adhesive options, exploring a whole bunch of glues that can form an unbreakable bond with this sleek and shiny surface. Whether you’re a DIY fanatic, a crafting guru, or just someone who needs to fix that pesky stainless steel appliance, we’ve got your back.
So grab your goggles and get ready for an adhesive adventure like no other.
Adhesive Options for Bonding Stainless Steel
Contents
- 1 Adhesive Options for Bonding Stainless Steel
- 2 How to Choose the Right Adhesive for Your Project
- 3 Surface Preparation for Bonding Stainless Steel
- 4 Application Techniques for Bonding Stainless Steel
- 5 Factors That Affect Bond Strength of Stainless Steel
- 6 Testing the Adhesive Before Applying it on the Entire Surface
- 7 Consulting an Expert or Professional for Critical Applications
- 8 Conclusion
Stainless steel, renowned for its resilience and corrosion resistance, presents a unique challenge when it comes to bonding due to its low surface energy. In this comprehensive guide, we will explore various adhesive options for bonding stainless steel, discussing their respective strengths and limitations.
Epoxy Adhesives:
Epoxy adhesives are widely regarded as the go-to choice for bonding stainless steel due to their exceptional bonding capabilities. Offering high strength and excellent resistance to chemicals, heat, and moisture, epoxy adhesives come in one-component or two-component systems, allowing users to select an option that best suits their needs. However, it is important to note that epoxy adhesives may not be suitable for applications requiring long-term durability or resistance to harsh environmental conditions.
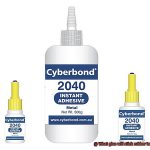
Cyanoacrylate Adhesives:
Cyanoacrylate, commonly known as super glue, is a fast-curing adhesive that provides high-strength bonds on smooth surfaces like stainless steel. It forms an almost instant bond but may not be ideal for applications requiring long-term durability or resistance to harsh environments.
Acrylic Adhesives:
Acrylic adhesives offer a combination of strength and flexibility while providing excellent resistance to chemicals and weathering. They create durable bonds with stainless steel surfaces and are often used in applications where both strength and flexibility are required.
Polyurethane and Methacrylate Adhesives:
Structural adhesives like polyurethane and methacrylate offer high-strength bonding and good resistance to environmental factors such as temperature variations and moisture. These adhesives create strong, long-lasting bonds that can withstand demanding conditions.
Surface Preparation:
Proper surface preparation is crucial when bonding stainless steel. To improve adhesion, the surfaces must be clean and free from oil, grease, and other contaminants. Abrading the surface with sandpaper or using a degreaser can enhance the adhesion of the chosen adhesive.
How to Choose the Right Adhesive for Your Project
Stainless steel is renowned for its durability and corrosion resistance, making it a popular choice for various projects. However, selecting the right adhesive for bonding stainless steel surfaces is crucial to ensure the success and longevity of your project. This comprehensive guide will walk you through the key factors to consider when choosing an adhesive for your stainless steel project.
Consider temperature resistance:
Stainless steel often encounters high temperatures, so it’s vital to choose an adhesive that can withstand these conditions without compromising its bonding properties. Look for adhesives specifically formulated for high-temperature applications, ensuring they can handle the heat and keep your project intact.
Strength and durability matter:
To support the weight of stainless steel and ensure a long-lasting bond, opt for adhesives with high tensile and shear strength, specifically designed for metal bonding. Investing in a strong adhesive will give you peace of mind knowing that your stainless steel project will stand the test of time.
Flexibility is key:
Stainless steel expands and contracts with temperature changes, so it’s crucial to choose an adhesive that can accommodate these movements without cracking or losing its bond. Look for adhesives with excellent flexibility and resistance to cracking or peeling, ensuring your project remains intact under varying conditions.
Surface preparation is crucial:
Before applying any adhesive, thoroughly clean, dry, and remove contaminants from the stainless steel surface. Some adhesives may require additional steps like priming or surface treatments, so carefully follow the manufacturer’s instructions to ensure optimal bonding.
Consider curing time:
Different adhesives have varying curing times, so be aware of this when planning your project timeline. Some adhesives may require specific curing conditions such as heat or pressure, so ensure you have the necessary resources to provide optimal curing.
Compatibility matters:
Certain adhesives may contain chemicals that can damage stainless steel or cause discoloration. To avoid potential issues, always test a small area before applying the adhesive to the entire surface. This will ensure compatibility and prevent any unwanted damage to your stainless steel project.
Surface Preparation for Bonding Stainless Steel
Surface preparation is crucial for achieving a strong and durable bond when bonding stainless steel with glue. By following these steps, you can ensure that your adhesive has maximum contact with the stainless steel surface, resulting in a reliable bond that will stand the test of time.
Thoroughly clean the stainless steel surface before anything else. Dirt, oil, grease, or contaminants can hinder the adhesive’s ability to bond effectively. Use a mild detergent or solvent that is compatible with stainless steel to scrub away any unwanted substances. Your goal is to have a squeaky clean surface that is free from any residue.
Roughen things up. Once your surface is clean, it’s time to roughen it up a bit. Grab some sandpaper or abrasive pads and start sanding or abrading the surface. The idea here is to create small scratches or micro-roughness that will improve adhesive bonding. Remember to sand in one direction to maintain consistency and avoid deep scratches that might affect the appearance of your stainless steel.
Bye-bye loose particles. After roughening the surface, it’s important to remove any loose particles or dust. Wipe it down with a lint-free cloth or use compressed air to blow away any debris. This step ensures that your surface is clean and ready for bonding.
Prime time. To further enhance adhesion, treat the surface with a primer specifically designed for stainless steel bonding. The primer promotes chemical bonding between the adhesive and stainless steel, ensuring a strong connection. Follow the manufacturer’s instructions on how to apply the primer and give it ample drying time before moving on to the next step.
Etch if necessary. If you’re dealing with highly polished or passivated stainless steel surfaces, you may need to pre-treat them with a chemical etchant. These surfaces have a protective oxide layer that can hinder adhesive bonding, so the etchant helps remove it and expose a fresh surface for bonding. Make sure to follow the instructions provided by the etchant manufacturer and take proper safety precautions.
Consider the environment. Temperature and humidity conditions during surface preparation and bonding are critical. Adhesive bonding is affected by environmental factors, so it’s crucial to work within the recommended temperature and humidity ranges provided by the adhesive manufacturer. Extreme temperatures or high humidity can negatively impact the adhesive’s performance and bond strength.
Application Techniques for Bonding Stainless Steel
When it comes to bonding stainless steel, it is essential to use the right application techniques to ensure a strong and durable bond. Stainless steel has a low surface energy, which makes it challenging for adhesives to stick effectively. However, with the proper preparation and application methods, you can achieve a successful bond.
The first step in bonding stainless steel is surface preparation. Thoroughly clean the surface to remove any dirt, grease, or contaminants that could interfere with the adhesive’s ability to bond. You can use solvents or degreasers specifically designed for stainless steel to get the job done.
Once the surface is clean, it’s time to roughen it slightly to improve adhesion. Use sandpaper or abrasive pads to lightly roughen the surface and provide some texture for the adhesive to grip onto. Remember, we’re not going for deep scratches here, just a little bit of texture.
Now let’s talk about adhesives. There are several options available, so it’s important to choose the right one for your specific needs. Here are some common adhesive options:
- Epoxy adhesives: These are often favored for bonding stainless steel due to their excellent strength and chemical resistance. They also have good gap-filling capabilities and can withstand high temperatures. However, keep in mind that epoxy adhesives require mixing before application and have a longer curing time.
- Cyanoacrylate adhesives (super glue): These provide fast bonding and are easy to use. They are a quick and easy option but may not offer the same level of strength and durability as epoxy adhesives.
- Polyurethane adhesives: These offer excellent flexibility and impact resistance, making them ideal for applications that involve movement or vibration. However, they may not have the same level of resistance to chemicals and high temperatures as epoxy adhesives.
- Acrylic adhesives: These are known for their bonding strength and resistance to impact and peel forces. They also perform well against UV radiation and weathering. However, they may not be the best choice for high-temperature environments.
Once you have chosen the right adhesive, it’s time to apply it. Follow the manufacturer’s instructions for application and curing, including applying the adhesive in the recommended thickness and ensuring proper contact between the surfaces being bonded. Clamping or applying pressure during curing can also help achieve a strong bond, especially with epoxy adhesives that require pressure for full contact.
After the adhesive has fully cured, it’s time to clean up any excess or visible adhesive. You can use solvents or mechanical means for this step, but be careful not to damage the bond or the stainless steel surface.
Factors That Affect Bond Strength of Stainless Steel
Stainless steel, renowned for its durability and resistance to corrosion, is a versatile material utilized in various applications. Whether you’re embarking on a DIY project or working on an industrial endeavor, achieving a strong bond between stainless steel surfaces is paramount for success. In this article, we will delve into the factors that can impact the bond strength between stainless steel surfaces and provide expert tips to ensure a reliable and long-lasting connection.
Surface Preparation: The Foundation of a Strong Bond
Properly preparing the stainless steel surface is crucial before selecting an adhesive. Thoroughly cleaning the surface removes contaminants such as dirt, grease, and oxide layers that could compromise bond strength. Depending on the extent and nature of contamination, methods like solvent cleaning, alkaline cleaning, or abrasive cleaning may be employed.
The Rougher, The Better: Surface Roughness Matters
When it comes to bonding stainless steel, a rough surface provides more interlocking points for the adhesive to grip onto, thus enhancing bond strength. Before applying the adhesive, consider using techniques like sanding or grit blasting to create a rough surface that promotes better adhesion.
Selecting the Perfect Adhesive:
Not all adhesives are created equal when it comes to bonding stainless steel. This material’s low surface energy and resistance to many adhesives necessitate careful consideration in adhesive selection.
Epoxy-based adhesives, cyanoacrylate adhesives (super glue), and polyurethane adhesives are commonly used for bonding stainless steel. Each adhesive possesses its own advantages and limitations; factors like cure time, temperature resistance, and specific application requirements should be considered when making your choice.
Temperature and Environmental Factors:
The operating temperature and environmental conditions in which the bonded stainless steel will be exposed can significantly impact bond strength. High temperatures can weaken or even cause the adhesive bond to fail altogether.
Additionally, exposure to harsh chemicals, moisture, or UV radiation can deteriorate the bond over time. Selecting an adhesive explicitly designed to withstand these anticipated conditions is crucial for a reliable and durable bond.
Joint Design: The Art of Maximizing Contact
The design of the joint where the stainless steel surfaces will be bonded together plays a pivotal role in determining bond strength. Factors such as joint geometry, gap thickness, and adhesive fillet size can impact the overall strength of the bond. Ensuring proper alignment and clamping of the stainless steel parts during the bonding process maximizes contact area and promotes a strong bond.
Testing the Adhesive Before Applying it on the Entire Surface
To guarantee a successful outcome, it’s essential to test the adhesive before applying it to the entire surface. This critical step allows you to evaluate its performance, compatibility, and bond strength. In this article, we will guide you through the process of testing adhesives on stainless steel, ensuring a strong and durable bond. So, put on your lab coat, grab your safety goggles, and let’s dive into the world of adhesive testing.
Step 1: Choose a Small Test Area:
To minimize potential damage or visible marks on your stainless steel surface, select a small, inconspicuous area to apply the adhesive. This ensures that any issues can be addressed without compromising the entire project.
Step 2: Prepare the Surface:
Thoroughly clean the stainless steel surface using mild soap and water or specialized stainless steel cleaners. Remove dirt, grease, or contaminants that could hinder adhesion. Ensure the surface is completely dry before proceeding.
Step 3: Apply the Adhesive:
Follow the manufacturer’s instructions and apply a small amount of adhesive to the prepared area. Use a thin layer to prevent excessive buildup or overflow. Different adhesives may require specific application methods, so carefully follow the guidelines.
Step 4: Allow for Curing:
Give the adhesive sufficient time to cure according to the specified timeframe provided by the manufacturer. Maintain optimal conditions such as temperature and humidity as instructed. This waiting period is crucial for accurate results and understanding how well the adhesive bonds with stainless steel under specific conditions.
Step 5: Inspect and Evaluate:
After the curing period, inspect the adhesion of the glue to the stainless steel surface. Look for signs of peeling, bubbling, or poor adhesion. Test the bond strength by gently attempting to separate the glued area from the surface. Take note of any concerns or issues that arise.
Step 6: Consider Aesthetics:
Evaluate the appearance of the adhesive on the stainless steel surface. Look for discoloration, residue, or other aesthetic concerns. Depending on your project’s requirements, you may need an adhesive that provides an aesthetically pleasing finish or one that can be easily concealed if visible.
Step 7: Document and Decide:
Document your findings and observations from the adhesive testing process. This information will help you make informed decisions about the suitability of the adhesive for your specific stainless steel application. Remember that different adhesives may perform differently under various conditions, so conducting multiple tests with different options is advisable.
Consulting an Expert or Professional for Critical Applications
- The right glue for the job: Not all adhesives are created equal. Stainless steel requires a specialized adhesive that can handle its unique properties – durability, corrosion resistance, and slick surface. Experts have the knowledge and experience to guide you towards the right adhesive that will create a strong and long-lasting bond.
- Avoiding costly mistakes: Imagine spending hours bonding your stainless steel components with a generic adhesive only to have it fail under stress or environmental conditions. This can lead to costly repairs or safety hazards. By consulting an expert or professional, you can avoid these headaches and ensure your application stands the test of time.
- Cutting-edge solutions: The world of adhesives is constantly evolving. Experts stay up-to-date with the latest advancements and know about specialized adhesive formulations designed specifically for stainless steel applications. By tapping into their knowledge, you gain access to cutting-edge solutions that can give your project that extra edge.
- Surface preparation techniques: Surface preparation is crucial for successful bonding. Experts know all about prepping stainless steel surfaces to ensure optimal adhesion. They can guide you on techniques such as cleaning, roughening, and priming, which can make all the difference in achieving a strong bond.
- Peace of mind: Safety and reliability are paramount in critical applications. By consulting an expert or professional, you can rest easy knowing that you’ve enlisted the help of someone who understands the nuances of bonding stainless steel and can guide you towards a successful outcome.
ispgFya1EXI” >
Also Read: How to Glue Vinyl to Metal?
Conclusion
In conclusion, the quest for the perfect adhesive to stick to stainless steel may seem daunting. However, fear not. This blog post has armed you with a wealth of information on the various adhesive options at your disposal, empowering you to make an informed decision for your project.
When it comes to bonding stainless steel, epoxy adhesives reign supreme. Renowned for their exceptional strength and resistance to chemicals, heat, and moisture, they are the go-to choice for many. But wait, there’s more. Cyanoacrylate adhesives (super glue), acrylic adhesives, and polyurethane and methacrylate adhesives also offer viable alternatives depending on your specific needs.
But hold on just a minute. Before diving headfirst into the adhesive abyss, we must address a crucial factor: surface preparation. A pristine stainless steel surface is key to achieving a solid bond. So roll up your sleeves and get ready to clean that surface with gusto. And don’t forget to roughen it up using sandpaper or abrasive pads – this will give your adhesive something to cling onto.
Now let’s talk about what really matters – finding an adhesive that can withstand the harshest conditions and stand the test of time. Temperature resistance? Check. Strength and durability? You got it. Flexibility? Absolutely. Curing time? Oh yeah. Compatibility? Without a doubt. Take these factors into account when selecting your adhesive superhero.
But wait, there’s more. Applying the adhesive correctly is just as crucial as choosing the right one. Follow those manufacturer’s instructions like they’re gospel truth. Make sure those surfaces are in close contact – no slacking off here. And once cured, remove any excess or visible adhesive with precision and care – we don’t want any unsightly blemishes on that beautiful stainless steel surface.
Remember folks, bond strength is affected by multiple factors: surface preparation, surface roughness, adhesive selection, temperature and environmental conditions, and joint design. Consider them all and you’ll be well on your way to achieving a bond that’s as solid as a rock.
But hold your horses. Before slathering that adhesive all over your stainless steel masterpiece, take a moment to test it on a small area. This mini-experiment will reveal the adhesive’s true colors – its performance, compatibility with stainless steel, bond strength, aesthetics – everything you need to know before committing.