If you’ve ever wondered how to stick PERSPEX to wood with glue, you’re in the right place. Whether you’re a craft enthusiast or a handy DIYer, finding the perfect adhesive is key to ensuring your project stays put.
So, if you’re itching to make that PERSPEX and wood combo stick like glue (pun intended), let’s jump right in.
What is PERSPEX?
Contents
- 1 What is PERSPEX?
- 2 Advantages of Bonding PERSPEX to Wood
- 3 The Best Glue for Bonding PERSPEX to Wood
- 4 Preparing the Surfaces for Bonding
- 5 Applying the Glue Properly
- 6 Mechanical Fastening Methods for Added Strength and Stability
- 7 Factors to Consider When Choosing an Adhesive
- 8 Following Manufacturer’s Instructions
- 9 Conclusion
When it comes to material selection, one name stands out among the rest – PERSPEX. This remarkable acrylic plastic has become a go-to choice in numerous industries, offering unparalleled versatility and an array of benefits. In this blog post, we will embark on a journey into the world of PERSPEX, exploring its composition, advantages, and disadvantages that have earned it such widespread popularity.
Composition and Appearance:
PERSPEX, also known as acrylic or PMMA (polymethyl methacrylate), is a transparent material that mesmerizes with its glass-like appearance. But don’t be fooled – it’s far more than meets the eye. Crafted from a synthetic polymer, PERSPEX combines the strength and durability of plastic with the crystal-clear optical properties of glass. The result? An extraordinary lightweight material that boasts exceptional optical clarity, making it an aesthetic wonder in any application.
Advantages of PERSPEX:
- Versatility: PERSPEX offers an extensive range of finishes, from transparent to opaque, textured to fluorescent. With this vast array of options at your fingertips, you can unleash your creativity like never before.
- Durability: Say goodbye to fragile glass. PERSPEX stands strong against impact, shattering the traditional limitations of materials. Its ability to withstand extreme temperatures also means it’s ready for any indoor or outdoor challenge.
- UV Stability: Bathed in sunlight? No problem for PERSPEX. Its exceptional resistance to UV radiation ensures it remains unblemished and vibrant over time. Perfect for windows, signages, and dazzling displays that demand longevity.
- Chemical Resistance: PERSPEX fearlessly confronts corrosive substances head-on with its outstanding chemical resistance. Whether you’re working in a laboratory or dealing with harsh environments, this material won’t let you down.
Disadvantages of PERSPEX:
- Scratches: While PERSPEX is tough, it’s not invincible. Handle it with care to avoid scratches. But don’t fret – a little polishing magic can easily restore its flawless appearance.
- Solvent Sensitivity: PERSPEX may be a superhero, but it does have a weakness – certain solvents can cause damage or discoloration. Choose the right adhesive and cleaning agents to ensure it remains unmarred.
Advantages of Bonding PERSPEX to Wood
In this blog post, we will explore the advantages of bonding PERSPEX to wood, uncovering a range of benefits that enhance durability, elevate aesthetics, and unlock endless design possibilities.
Enhanced Durability:
When PERSPEX is bonded to wood, a remarkable synergy is formed. The robustness of both materials combines, creating a structure that withstands impact and weathering with ease. This added durability ensures that your creations can stand the test of time, resisting wear and tear even in demanding environments.
Aesthetic Appeal:
Nothing spells elegance quite like the harmonious blend of PERSPEX and wood. The transparent or translucent nature of PERSPEX allows the natural allure of wood grain to shine through, elevating the overall aesthetic appeal. Whether you’re crafting furniture, decorative items, or architectural designs, this combination adds a touch of modern sophistication to any project.
Versatility:
The marriage between PERSPEX and wood unlocks a world of design possibilities. PERSPEX can be effortlessly shaped and molded into various forms, enabling intricate detailing and customization. When paired with wood’s innate versatility for carving and shaping, the creative options become boundless. Unleash your imagination and personalize your designs like never before.
Protection from Moisture and UV Rays:
PERSPEX has extraordinary resistance to moisture and UV rays, making it an ideal choice for outdoor applications. By bonding PERSPEX to wood, you create a protective shield against water damage, rot, and discoloration caused by prolonged exposure to sunlight. This advantage ensures that your outdoor furniture, signage, or structures remain resilient in the face of nature’s elements.
Easy Maintenance:
The seamless bond between PERSPEX and wood simplifies the maintenance process. Both materials are relatively easy to clean and maintain. PERSPEX can be effortlessly wiped clean with a damp cloth, while wood may require occasional polishing or sealing to maintain its luster. Say goodbye to hard-to-reach gaps and joints where dust or dirt can accumulate, as the bonded structure ensures a hassle-free cleaning experience.
Weight Reduction:
In certain applications, bonding PERSPEX to wood can result in an overall lighter structure compared to using solid wood alone. PERSPEX’s lightweight nature, when incorporated into a wooden frame or structure, significantly reduces weight without compromising strength or stability. This advantage is especially valuable in industries where weight is crucial, such as aerospace or automotive manufacturing.
The Best Glue for Bonding PERSPEX to Wood
When it comes to bonding PERSPEX to wood, selecting the right glue is crucial for achieving a strong and durable bond. After extensive research, several glues have emerged as top contenders for this task.
Epoxy resin is a two-part adhesive that forms an incredibly strong bond. It can withstand water, heat, and chemicals, making it a versatile option for various applications beyond just bonding PERSPEX to wood.
Polyurethane adhesive is another excellent choice. This waterproof glue offers flexibility, allowing it to accommodate temperature changes without compromising the bond. It creates a solid connection between PERSPEX and wood that is built to last.
If you prefer a glue specifically formulated for acrylic or PERSPEX materials, acrylic cement is the way to go. This adhesive chemically melts the surfaces of the materials, allowing them to fuse together seamlessly. However, working in a well-ventilated area and following the manufacturer’s instructions for safety is essential.
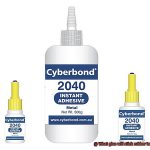
In addition to these options, some multi-purpose adhesives like cyanoacrylate (super glue) can also be used for bonding PERSPEX to wood. However, not all super glues are suitable, so it’s important to check the label or consult with the manufacturer before proceeding.
Keep in mind that the best glue for your project depends on various factors, such as the size and weight of the PERSPEX piece, the type of wood you’re using, and the intended use of the bonded materials. Proper surface preparation is also crucial – ensure both the PERSPEX and wood surfaces are clean and free from dirt or grease. A little sanding can also enhance the bond.
Whether you choose epoxy resin, polyurethane adhesive, acrylic cement, or a specific type of super glue, these glues will help you achieve a strong and durable bond between PERSPEX and wood. Just remember to follow the manufacturer’s instructions and use clamps to hold everything together while the glue cures.
Epoxy Resin
Epoxy resin, the superhero adhesive of the glue world, is a versatile and powerful two-part adhesive that can create a bond between PERSPEX and wood that is both strong and durable. With its impressive tensile strength, epoxy resin can withstand pulling forces like a champ, making it the go-to glue when you need a bond that can handle some serious stress. But its benefits don’t stop there – epoxy resin also offers exceptional resistance to moisture, heat, and chemicals, ensuring that your PERSPEX and wood combo will stay intact even in challenging environments.
To properly apply epoxy resin when bonding PERSPEX to wood, preparation is key. Both surfaces should be clean, dry, and free from any debris or gunk that could ruin your bond. A quick sanding session will create a rough texture on the surfaces, helping the epoxy resin adhere better.
Next up comes the mixing time. Follow the manufacturer’s instructions and mix the resin and hardener in the correct ratio. This step is crucial for activating the adhesive properties of epoxy resin, so take your time to ensure a thorough mix.
Once your epoxy resin is ready to go, apply an even layer to both the PERSPEX and wood surfaces. You can use a notched trowel or a brush for this step – just make sure the adhesive covers the entire surface area. Now comes the exciting part – press the PERSPEX and wood together firmly, applying even pressure across the bond line. This will help create a strong and secure connection.
But remember, patience is key with epoxy resin. Allow it enough time to cure completely. Depending on the product and curing conditions, this can take several hours or even overnight. Trust me, good things come to those who wait.
It’s important to keep in mind that epoxy resin can be a bit messy, so handle it with care. It’s also a good idea to work in a well-ventilated area or wear a mask if you’re sensitive to strong odors. Safety first, my friends.
Solvent-Based Adhesives
Solvent-based adhesives are a vital tool in the world of DIY, allowing you to bond PERSPEX to wood with ease and confidence. These adhesives contain solvents that evaporate as they dry, leaving behind a robust and long-lasting bond between the two materials. Let’s explore the three superheroes of solvent-based adhesives: cyanoacrylate glue, epoxy resin, and polyurethane adhesives.
Cyanoacrylate glue, also known as super glue, is the first member of our adhesive dream team. This adhesive is famous for its lightning-fast drying time and incredible bonding strength. With cyanoacrylate glue in your corner, you can rest assured that your PERSPEX-wood project will be held together like a match made in adhesive heaven. It’s also available in different viscosities, ensuring that it performs flawlessly on both vertical and horizontal surfaces.
Next up is epoxy resin, the dynamic duo that consists of a resin and a hardener. When these two components are mixed together, they form an unbreakable bond that can withstand water, heat, and chemicals. If your PERSPEX-wood masterpiece is destined for the great outdoors, epoxy resin will ensure that it stands strong against the test of time.
Last but certainly not least, we have polyurethane adhesives. These versatile powerhouses are known for their exceptional strength and ability to fill gaps with a foaming action. Whether you’re constructing an indoor marvel or an outdoor wonder, polyurethane adhesives have got your back. They can handle temperature changes and brave the elements without losing their grip.
Before you unleash the power of solvent-based adhesives, remember that proper surface preparation is essential. Clean those surfaces with meticulous care, removing any dirt or grease that might hinder adhesion. For an extra boost in bonding power, don’t forget to lightly sand the surfaces to create a roughened texture that enhances the adhesion process.
Cyanoacrylate (Super Glue)
One of the standout features of cyanoacrylate is its transparency. When using Super Glue, you can create a bond that is virtually invisible between your PERSPEX and wood surfaces. This makes it an excellent choice for projects where aesthetics are important, ensuring that your creations look amazing.
But it’s not just about looks – cyanoacrylate also delivers when it comes to strength. It forms a robust bond between PERSPEX and wood, keeping them securely attached. Whether you’re working on lightweight or heavy-duty projects, Super Glue has got you covered.
Time is of the essence, especially when you’re in the middle of a project. That’s where cyanoacrylate shines. This superhero adhesive sets in seconds or minutes after application, allowing you to move on with your project without having to wait for hours for the glue to dry. Less time spent holding or clamping your materials together means more time enjoying the satisfaction of a job well done.
Of course, like any superhero, proper preparation is key to success. Before applying cyanoacrylate, ensure that both your PERSPEX and wood surfaces are clean and free from any dust, grease, or debris. Giving the wood surface a light sanding can also enhance adhesion. By taking these simple steps, you’ll ensure that your bond is strong and long-lasting.
Polyurethane Adhesives
Polyurethane adhesives, the unsung heroes of the adhesive world, hold the secret to creating flawless connections between PERSPEX and wood. What makes them the ultimate choice? Let’s dive into the details:
- Unrivaled Bonding Strength: When it comes to bonding PERSPEX and wood, polyurethane adhesives reign supreme. Their incredible bonding strength ensures a secure connection that won’t let you down. Say goodbye to worries about your project falling apart.
- Waterproof Wonder: Imagine crafting a stunning wooden sculpture with PERSPEX accents, only to have it exposed to the elements. Fear not. Polyurethane adhesives are waterproof, making them ideal for outdoor applications or environments with high humidity. Mother Nature has finally met her match.
- Flexibility for the Win: Temperature changes can wreak havoc on adhesive bonds, causing them to become brittle and break over time. But fear not. Polyurethane adhesives offer excellent flexibility, allowing materials to expand and contract without compromising the bond. They’re like yoga instructors for your projects.
To achieve glue greatness, follow these tips:
- Prepare like a pro: Give both surfaces a little TLC by cleaning and sanding them before applying the adhesive. This extra step goes a long way in creating a strong bond.
- Even application is key: Spread the polyurethane adhesive evenly on both materials for optimal results. No playing favorites here.
- Patience is a virtue: Allow the adhesive to cure fully before subjecting your creation to stress or pressure. Good things come to those who wait.
So, there you have it, glue aficionados – polyurethane adhesives are your secret weapon for bonding PERSPEX and wood flawlessly. With their unmatched strength, resistance to moisture, and flexibility, your projects will stand the test of time.
Preparing the Surfaces for Bonding
When it comes to gluing PERSPEX to wood, proper surface preparation is essential to ensure a strong and durable bond. In this comprehensive guide, we will take you through the step-by-step process of preparing surfaces for bonding PERSPEX to wood, guaranteeing that your creations stand the test of time.
Step 1: Cleanliness – The Foundation of a Strong Bond
To start, it is imperative that both the PERSPEX and wood surfaces are immaculately clean. Any dirt, dust, or grease can hinder the adhesive’s effectiveness. Banish contaminants by using a mild detergent or rubbing alcohol, ensuring a pristine surface ready for bonding.
Step 2: Embrace a Little Roughness
To enhance bonding strength, lightly sand both surfaces with fine-grit sandpaper. This gentle sanding creates a subtly textured surface that allows the adhesive to firmly grip onto. Remember, moderation is key here; excessive sanding could result in damage or scratches on the materials.
Step 3: Dust Off Your Worries
After sanding, remove any residual sanding dust from both surfaces. Effortlessly whisk away loose particles using a clean, dry cloth or compressed air. This meticulous step guarantees that nothing interferes with the flawless bonding process.
Step 4: Prime Time (If Necessary)
Certain adhesives require primers to promote adhesion, particularly when bonding plastics like PERSPEX to wood. Consult the adhesive manufacturer’s instructions to determine if priming is necessary and which type of primer should be used. This extra step ensures an even stronger and more reliable bond.
Step 5: Dry it Out
Moisture can be the enemy of bonding. Prior to applying the adhesive, ensure that both surfaces are completely dry. Allow them to air dry naturally or use a clean cloth to wipe away any remaining moisture. This final preparation step guarantees a robust and steadfast bond.
Applying the Glue Properly
Creating a seamless connection between PERSPEX and wood requires proper glue application. In this guide, we will walk you through the step-by-step process of applying glue properly for the best results.
Step 1: Cleanliness is Key
Thoroughly clean both the PERSPEX and wood surfaces to remove any dust, dirt, or grease. Use mild detergent or soap followed by a thorough rinse with water. Ensure the surfaces are completely dry before proceeding.
Step 2: Roughen Up for Better Adhesion
Lightly sand both surfaces using fine-grit sandpaper to create a rough texture that promotes better adhesion. Wipe away generated dust with a clean cloth.
Step 3: Choosing the Right Glue
Select epoxy, cyanoacrylate (super glue), or polyurethane adhesive specifically designed for bonding plastic and wood. Read product labels to make an informed choice.
Step 4: Applying the Glue
Apply a thin, even layer of glue on both surfaces, avoiding excessive amounts. Use a brush or small applicator for even coverage.
Step 5: Aligning and Bonding
Carefully align the PERSPEX and wood together after applying the glue. Apply even pressure across the glued surfaces for good contact. Use clamps or weights to hold pieces in place while the glue dries. Follow manufacturer’s instructions for drying time.
Step 6: Test for a Strong Bond
Gently test the bond after the glue has dried completely by trying to separate the pieces. Apply additional glue if necessary and repeat the process for weaker spots.
Mechanical Fastening Methods for Added Strength and Stability
Achieving a bond that combines strength and stability is essential when joining PERSPEX and wood. While glue is popular, mechanical fastening methods provide an extra level of reinforcement. In this article, we will explore various mechanical fastening methods that enhance the connection between PERSPEX and wood, ensuring long-lasting masterpieces.
Screws and Nails:
Simple yet effective, screws and nails are go-to options for mechanical fastening. By drilling holes into both materials, these fasteners can be securely driven through, creating a robust connection. Pre-drilling holes in PERSPEX prevents cracking, while countersink drill bits ensure a seamless finish.
Dowels and Pins:
For a discreet solution, dowels and pins work wonders. Inserted into pre-drilled holes in both materials, these cylindrical rods or metal pins distribute the load evenly across the joint. This method provides a strong bond while maintaining a clean aesthetic.
Brackets, Clips, and Corner Braces:
When added support is needed, brackets, clips, and corner braces come to the rescue. Brackets are L-shaped metal pieces that can be screwed or nailed into both materials, providing extra reinforcement. Clips securely hold PERSPEX panels on wooden frames or structures. Triangular corner braces prevent movement or separation by being screwed onto joints.
Considerations:
To ensure optimal strength and stability, select the right size and type of fastener based on material thickness and load requirements. Longer screws or nails should be used for thicker pieces to ensure a secure bond. Choose fasteners with adequate strength to withstand project demands, avoiding weak connections that could compromise your masterpiece.
Factors to Consider When Choosing an Adhesive
Are you a DIY enthusiast or a professional carpenter looking to create stunning projects by combining PERSPEX and wood? If so, you’re in the right place. In this blog post, we’ll explore the key factors to consider when choosing an adhesive that will ensure a strong and durable bond between these two materials. So grab your tool belt and let’s dive in.
Compatibility: The Perfect Match
Like a match made in heaven, choosing an adhesive that is specifically formulated for bonding PERSPEX and wood is crucial. Not all adhesives are created equal, and using the wrong one could result in a weak bond or even failure. Look for adhesives that are designed to work with both materials to ensure a flawless connection.
Bond Strength: Built to Last
Imagine your masterpiece falling apart due to weak adhesive. Yikes. To prevent such nightmares, consider the weight and stress that will be placed on the bond. For heavier or high-stress applications, opt for adhesives with high bond strength. Remember, stronger is always better when it comes to creating long-lasting bonds.
Application Method: Choose Your Weapon
Are you a fan of liquid adhesives that can be applied using brushes or sprays? Or do you prefer the convenience of tape or double-sided adhesive sheets? Choose an application method that suits your project requirements and makes your life easier. After all, crafting should be fun, not frustrating.
Drying Time: Patience is Optional
In a time-sensitive world, waiting forever for glue to dry is simply not an option. Consider the drying time of the adhesive and ensure it aligns with your project timeline. Some adhesives dry quickly within minutes, while others may require hours or even days to fully cure. Plan accordingly and avoid any unnecessary delays.
Temperature Resistance: Heat or Cold, It’s All Good
Will your creation be exposed to extreme temperatures? If so, you need an adhesive that can handle the heat (or cold.). Look for adhesives with temperature resistance to ensure that your bond remains strong, regardless of the environment. Don’t let your masterpiece melt or crack under pressure.
Flexibility: Bend and Flex, No Stress
Do you anticipate any movement or expansion/contraction of the materials? PERSPEX, in particular, can be prone to these changes. To prevent bond failure, choose an adhesive with a certain degree of flexibility. This will allow it to accommodate slight movements without compromising the connection. Let your project bend and flex without worries.
Following Manufacturer’s Instructions
In this article, we will explore the importance of following the manufacturer’s instructions when it comes to this adhesive endeavor.
By understanding the unique properties of PERSPEX and wood, preparing the surfaces correctly, applying the glue in the right amount, allowing sufficient curing time, and considering outdoor applications and extreme temperatures, you can achieve a bond that is as strong as your imagination.
Choosing the Right Glue:
Start by understanding the unique properties of PERSPEX and the type of wood you are working with. Select a glue specifically designed for bonding your specific combination of PERSPEX and wood to ensure compatibility and maximize strength.
Surface Preparation:
Cleanliness is crucial. Remove dust, dirt, or grease from both surfaces before applying the glue. Consider lightly sanding for better adhesion. Follow any instructions regarding primers or surface treatments for optimal bonding performance.
Applying the Glue:
Remember, less is more. Follow the recommended amount of glue and application technique provided in the manufacturer’s instructions. Use a brush or spreader to evenly distribute the adhesive for a consistent bond.
Curing Time:
Patience is key. Allow sufficient time for the glue to dry and cure before subjecting your masterpiece to any stress or load. Rushing this process can compromise the bond’s integrity.
Outdoor Applications and Extreme Temperatures:
Consider the environment. Choose a glue specifically designed for outdoor use or exposure to extreme temperatures if needed. The manufacturer’s instructions will provide insights into its suitability for such conditions.
i_3L3YkgyVE” >
Also Read: How to Glue PVC to Wood?
Conclusion
When it comes to sticking PERSPEX to wood, finding the right glue is crucial. You want a bond that is strong, reliable, and long-lasting. But with so many options out there, how do you know which one to choose? Well, fear not. I am here to guide you through this sticky situation.
One of the best glues for attaching PERSPEX to wood is epoxy resin. This adhesive is known for its exceptional bonding properties and durability. It forms a strong and permanent bond that can withstand the test of time. Plus, epoxy resin dries clear, ensuring a seamless finish.
Another excellent option is cyanoacrylate glue, commonly known as super glue. This fast-acting adhesive creates an instant bond between PERSPEX and wood. It works well on both porous and non-porous surfaces, making it versatile for various woodworking projects.
If you’re looking for a more flexible bond, consider using polyurethane adhesive. This glue expands as it cures, creating a strong yet flexible connection between PERSPEX and wood. It’s ideal for applications where some movement or stress may occur.
For those concerned about environmental impact, there are also eco-friendly options available. Look for glues that are water-based or made from natural ingredients. These adhesives provide a secure bond while minimizing harm to the environment.
In conclusion, when it comes to sticking PERSPEX to wood, epoxy resin, cyanoacrylate glue (super glue), and polyurethane adhesive are all excellent choices. Consider your specific needs and preferences before selecting the right glue for your project. Remember to follow the instructions carefully for optimal results.