Title: “The Glue Down Laminate Flooring Guide: Unleashing the Power of Perfectly Bonded Floors.”
Introduction:
Picture this: you step into a room that immediately enchants your senses – the velvety touch, the eye-catching allure, and the undeniable sophistication that only high-quality laminate flooring can deliver. But behind these breathtaking floors lies a hidden secret: the glue that holds it all together.
Hey there, fellow floor enthusiasts. Get ready to dive into a world where expertise meets precision to create flawless floors. Today, we embark on an exciting journey through the realm of glue-down laminate flooring, uncovering its mysteries and answering the burning question: What’s the go-to adhesive for laminate flooring?
But first, brace yourself for an astonishing fact: Did you know that choosing the right glue can make or break your laminate floor installation? That’s right – the bond between your flooring and subfloor is what ensures durability, stability, and jaw-dropping aesthetics.
In this illuminating exploration, we’ll introduce you to the key players in the glue-down game – adhesives specifically designed for laminate flooring installations. We’ll delve into their unique characteristics, application techniques, and suitability for different installation scenarios.
But hold on tight because there’s more. We’ll also unveil a treasure trove of benefits and considerations that could influence your final decision. From moisture resistance to flexibility to user-friendliness, we’re leaving no stone unturned on this captivating journey.
So are you ready to embark on this awe-inspiring adventure? Where stunning visuals meet scientific precision? Grab your notepads because we’re about to decipher what it takes to flawlessly glue down laminate flooring.
Stay tuned as we reveal secrets that will turn your flooring dreams into a reality you can confidently stride upon.
Types of Laminate Flooring
Contents
- 1 Types of Laminate Flooring
- 2 What Adhesive to Use for Glue-Down Laminate Flooring
- 3 Choosing an Adhesive for Laminate Flooring
- 4 Selecting an Adhesive Based on Subfloor Material
- 5 Applying the Adhesive to the Subfloor
- 6 Considerations for Glueless Laminate Flooring
- 7 Manufacturer Guidelines and Warranties
- 8 Common Mistakes to Avoid with Glue-Down Laminate Flooring
- 9 Conclusion
Laminate flooring has gained popularity among homeowners for its durability, affordability, and easy installation process. But did you know that there are different types of laminate flooring available?
In this article, we will delve into the fascinating world of laminate flooring types and uncover their unique features and installation methods. Whether you’re a seasoned DIY enthusiast or seeking professional installation, you’ll find a laminate flooring type that perfectly suits your needs.
Glueless Laminate: Snap It Together.
Imagine witnessing a puzzle coming to life on your floor. Glueless laminate, also known as click or snap-together laminate, introduces an installation method without the need for adhesive. These planks are designed to interlock with each other seamlessly, just like puzzle pieces.
With a simple snap, you can create a sturdy and flawless floor that will amaze your loved ones. Glueless laminate is the go-to choice for DIY projects due to its ease of installation.
Glue-Down Laminate: Rock-Solid Stability
For those in search of extra stability and endurance, glue-down laminate is the ultimate solution. This type of laminate necessitates the use of adhesive to firmly attach the planks directly onto the subfloor. Various adhesive options are available, all ensuring a robust bond between the laminate and subfloor. Glue-down laminate shines in high-traffic areas or commercial spaces where durability is essential.
Pre-Glued Laminate: Convenience at Your Feet
If you desire a more traditional installation method without the inconvenience of separate adhesive application, pre-glued laminate is your answer. These laminates come with a layer of adhesive already applied to their edges. Simply moisten the adhesive with water or a special activator spray during installation, and witness the seamless bonding of planks. Pre-glued laminate offers convenience without compromising on quality.
Floating Laminate: A Dance with Flexibility
Ever imagined a flooring that “floats” on top of the subfloor? Floating laminate is precisely that. This type of laminate consists of interlocking planks that attach to each other but not to the subfloor. The floating installation method provides flexibility and accommodates slight movements in the subfloor without causing any damage. It’s an ideal choice for areas prone to moisture or temperature fluctuations.
Considerations and Recommendations
When selecting the ideal type of laminate flooring, it’s crucial to consider factors such as location, foot traffic, and personal preferences. Glueless laminate offers quick and effortless installation, while glue-down laminate ensures maximum stability. Pre-glued laminate combines convenience and quality, while floating laminate grants flexibility. Always consult the manufacturer’s instructions and specifications for proper installation guidance.
What Adhesive to Use for Glue-Down Laminate Flooring
Laminate flooring is a popular choice for homeowners seeking a beautiful and durable flooring option. However, when it comes to glue-down laminate installation, selecting the right adhesive is paramount for ensuring a strong and long-lasting floor. In this comprehensive guide, we will explore the different types of adhesives available, their unique benefits, and why choosing the correct adhesive is essential for a successful installation.
Moisture-Resistant Adhesive: Shielding Against Water Exposure
In areas prone to moisture and humidity, such as bathrooms or kitchens, using a moisture-resistant adhesive is imperative. This specialized adhesive is designed to withstand water exposure, safeguarding your laminate flooring from damage caused by fluctuating humidity levels. By opting for a moisture-resistant adhesive, you can rest assured that your floors will remain stable and beautiful even in the face of moisture challenges.
Solvent-Based Adhesive: Unyielding Strength and Versatility
For both residential and commercial applications, a solvent-based adhesive offers unparalleled strength. This adhesive creates an unbreakable bond, making it ideal for high-traffic areas like hallways or bustling commercial spaces. It’s important to note that applying solvent-based adhesives requires a specialized applicator to ensure an even distribution. By selecting a solvent-based adhesive, you can confidently rely on its steadfastness to keep your laminate flooring securely in place.
Environmentally-Friendly Water-Based Adhesives: Clean and Odorless Solutions
If sustainability is a priority for you, water-based adhesives are the way to go. Not only are these adhesives environmentally friendly, but they are also effortless to clean up. Homeowners who opt for water-based adhesives can enjoy a guilt-free installation process with lower odor levels compared to solvent-based alternatives. Whether your subfloor is concrete or wood, water-based adhesives provide a reliable and eco-conscious solution for glue-down laminate flooring.
Following Manufacturer’s Recommendations: The Path to Success
To ensure a successful installation and maintain warranty coverage, it is crucial to adhere to the manufacturer’s recommendations regarding adhesive selection. Each laminate flooring manufacturer may have specific adhesive requirements tailored to their product’s unique characteristics. By carefully following these guidelines, you can guarantee optimal adhesion, preventing issues such as floor buckling, shifting, or premature failure.
Choosing an Adhesive for Laminate Flooring
Laminate flooring is a homeowner’s dream come true – it’s durable, cost-effective, and easy to install. But here’s the secret ingredient that holds it all together: adhesive. As an expert in laminate flooring, I’m here to guide you through the adhesive selection process.
Get ready to discover the key factors, adhesive types, manufacturer recommendations, and expert advice that will help you choose the ideal adhesive for your laminate flooring project.
Adhesive Types: PVA Glue and Polyurethane Powerhouses
Let’s explore the two adhesive superheroes in the laminate flooring world – PVA glue and polyurethane adhesive. PVA glue, a water-based adhesive, is a DIY enthusiast’s best friend. It bonds the laminate planks to the subfloor effortlessly and can be easily cleaned up.
On the other hand, polyurethane adhesive is known for its Herculean strength and durability. It can handle high-moisture environments and heavy foot traffic like a champion. Just keep in mind that working with polyurethane requires patience due to its longer drying time and proper ventilation during installation.
Manufacturer Recommendations: Secrets for Success
To ensure your warranty stays intact and your laminate flooring performs optimally, pay close attention to the manufacturer’s recommendations. They have tested and approved specific adhesives that work best with their products.
Don’t underestimate the power of following these guidelines – they are your ticket to a successful installation.
Factors to Consider: Subfloors, Moisture Levels, and Foot Traffic
Choosing the right adhesive for your laminate flooring requires considering various factors. Begin by evaluating your subfloor type, moisture levels in the room, and expected foot traffic. Every adhesive has its unique properties that match specific needs. For example, if you’re transforming a bathroom or kitchen with laminate flooring, opt for a moisture-resistant adhesive to shield against water damage.
Read, Absorb, and Apply: The Manufacturer’s Instructions
Before diving into the adhesive application process, take a moment to immerse yourself in the world of manufacturer’s instructions. These valuable guidelines provide insights into application methods, drying times, and necessary precautions. By following these instructions diligently, you’ll set yourself up for a seamless installation.
Selecting an Adhesive Based on Subfloor Material
Selecting the perfect adhesive for your laminate flooring journey is like assembling a team of superheroes, each equipped to tackle a specific subfloor material. With so many options available, it’s crucial to consider the unique characteristics of your subfloor and match it with the right adhesive, creating an unbreakable bond between the laminate and the foundation beneath. So, let’s explore the world of adhesives and discover which adhesive superheroes are best suited for your specific subfloor material.
Concrete subfloors take the stage as our first contender. While concrete is a popular choice, it requires an adhesive designed specifically for its porous surface. Enter “concrete adhesive” or “concrete-friendly” adhesives, ready to penetrate and form an unyielding bond with this material. These moisture-resistant adhesives ensure your laminate stays firmly in place, defying the test of time.
Moving on to plywood subfloors, commonly found in residential buildings. To conquer this terrain, seek out adhesives labeled as “wood adhesive” or “plywood adhesive.” These adhesive heroes are formulated to create a stronghold with wood surfaces, guaranteeing a secure and stable installation. Plywood adhesives are your trusted allies when gluing down laminate flooring on these resilient foundations.
For those battling particleboard or chipboard subfloors, moisture resistance becomes the key. These materials are less stable and more susceptible to moisture damage than plywood. Shield yourself with adhesives specifically formulated for particleboard or chipboard subfloors – adhesives with water-resistant properties that fend off moisture-related harm. By selecting the right adhesive, you not only achieve a robust bond but also safeguard your particleboard or chipboard subfloor from potential moisture-induced troubles.
Vinyl or linoleum subfloors present their own set of challenges. The smooth surface demands an adhesive that can adhere flawlessly. Seek out adhesives specially crafted for vinyl or linoleum, armed with solvent-based properties. These heroes possess exceptional bonding abilities on smooth, non-porous surfaces. With the right adhesive in hand, you can create an unshakeable bond between the laminate and the vinyl or linoleum subfloor, ensuring a stable and long-lasting installation.
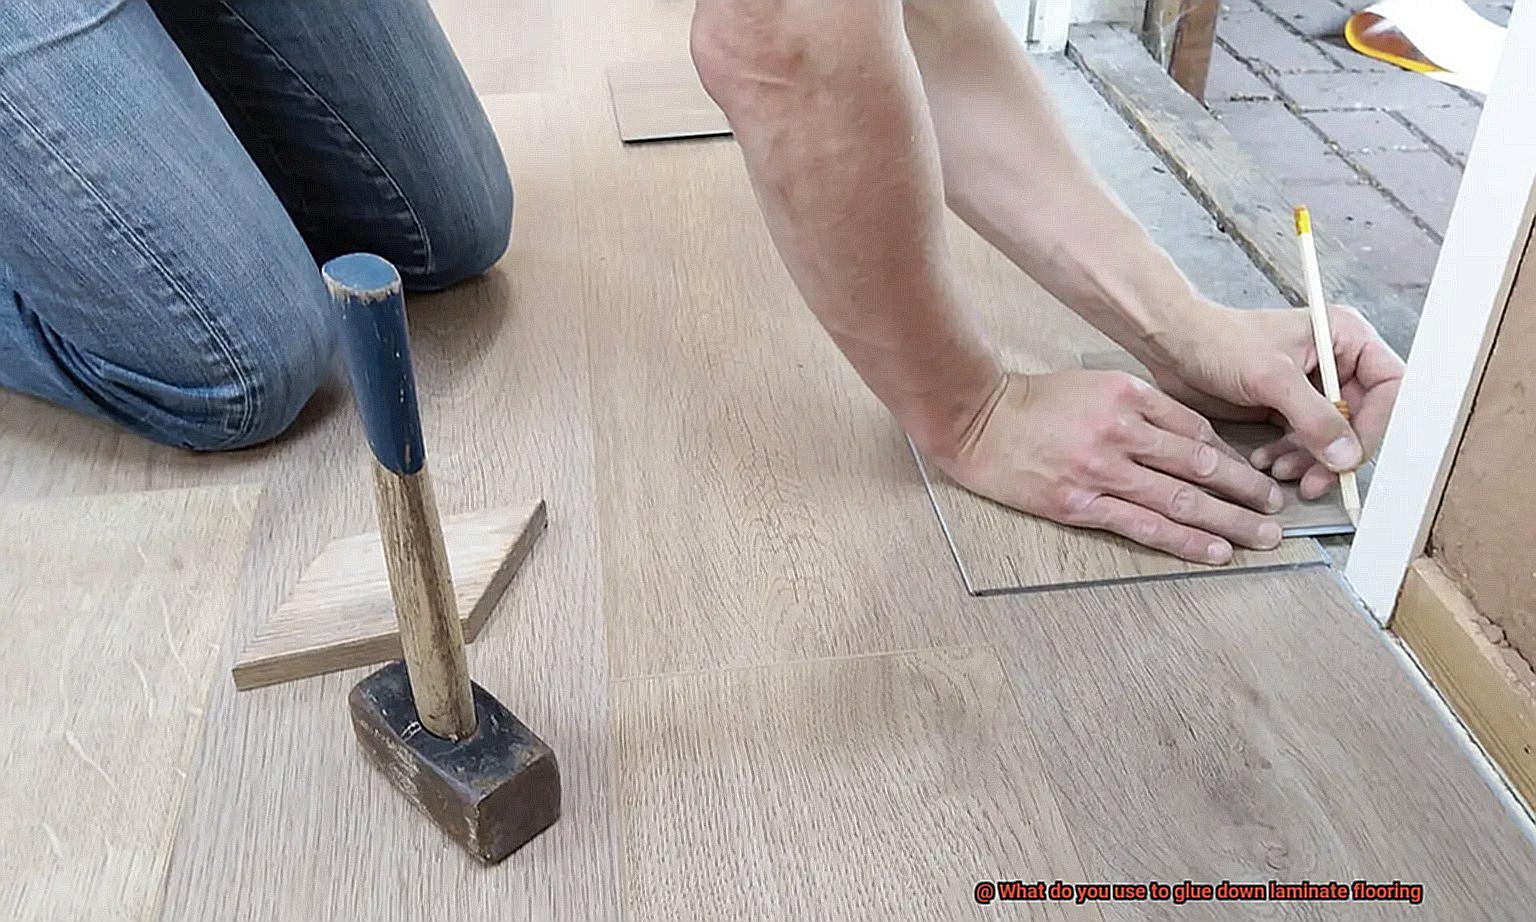
Applying the Adhesive to the Subfloor
This pivotal step is the key to creating a secure and long-lasting foundation for your stunning laminate floor. So, grab your notched trowel and prepare to embark on a thrilling adventure.
Subfloor Preparation: Laying the Groundwork for Success
Before we dive into the adhesive application process, it’s crucial to prepare our subfloor meticulously. Imagine it as crafting a flawless canvas for your masterpiece. Begin by giving your subfloor a thorough cleanse, banishing any debris or dust that might hinder the adhesive’s mighty grip.
Pay special attention to any uneven areas or imperfections, ensuring a level surface that sets the stage for your laminate’s brilliance.
Choosing the Right Adhesive: Finding Your Superhero Sidekick
Now that our subfloor is pristine, it’s time to select the perfect adhesive partner for our laminate flooring. Seek out adhesives specifically tailored for laminate, boasting the ideal blend of strength and flexibility. If moisture is a formidable foe in your space (think bathrooms and kitchens), arm yourself with a moisture-resistant adhesive capable of shielding against water damage.
The Application Process: Unleashing Your Adhesive Powers
With our trusty adhesive at the ready, it’s time to unleash its magic. Remember, every superhero possesses their unique set of moves, and your chosen adhesive is no different. Take a moment to immerse yourself in the manufacturer’s instructions – they hold the key to a triumphant application.
Begin by wielding your notched trowel, gracefully applying a thin layer of adhesive onto the subfloor. The size of the notches on your trowel will depend on the adhesive manufacturer’s recommendations. Aim for a 1/8-inch notch trowel size, the hero of most laminate flooring adhesives.
Like a skilled artist, spread the adhesive evenly across the subfloor, working in small, calculated sections. This is where meticulous planning and coordination come into play – prevent the adhesive from drying prematurely before laying the laminate flooring.
Considerations for Glueless Laminate Flooring
Get ready for a smooth ride as we explore the key considerations for choosing this versatile flooring option.
First off, let’s talk about the magic of glueless laminate flooring. This type of flooring, also known as floating laminate flooring, doesn’t require adhesive to secure each plank to the subfloor. Instead, it uses a locking mechanism that effortlessly connects the planks together, creating a flawless and captivating floor.
Now, let’s dive into the important details. The type of locking system used is a crucial consideration when selecting glueless laminate flooring. You have options like tongue and groove, click-lock, and angle-to-angle systems. Each has its unique advantages and disadvantages, so choose one that perfectly suits your specific needs and preferences.
Don’t forget about the quality of the locking mechanism. You want a durable system that can withstand regular foot traffic without falling apart like a poorly constructed Lego tower. Ensure you select a reputable brand that offers high-quality locking mechanisms to guarantee the longevity of your glueless laminate flooring.
But wait, there’s more. Before you embark on the installation journey, consider the condition of your subfloor. While glueless laminate flooring can be installed over most existing subfloors like concrete, plywood, and vinyl, an uneven or damaged subfloor can impact its stability and performance. Take the time to properly prepare your subfloor by leveling any uneven areas and repairing damages before installing your dream floor.

Moisture resistance is another critical consideration for glueless laminate flooring. While most options are designed to be resistant to moisture, they’re not entirely waterproof. Wipe up spills or leaks promptly to prevent moisture from seeping into the joints and causing damage. In areas with high humidity or moisture levels, such as basements or bathrooms, it’s advisable to use a moisture barrier underneath your flooring for extra protection.
Last but certainly not least, let’s talk aesthetics. Glueless laminate flooring offers a vast array of colors, patterns, and textures, allowing you to create the perfect look for your space. Consider the style of your existing decor and choose a laminate flooring that complements it beautifully. It’s like finding the missing puzzle piece to complete your interior design masterpiece.
Manufacturer Guidelines and Warranties
Today, we’re embarking on a thrilling journey into the realm of glueless laminate flooring installation. In our previous chapter, we marveled at the magic of puzzle-like planks that seamlessly come together to create a stunning floor.
But, as with any DIY project, there’s a secret ingredient that guarantees success – and that’s none other than the manufacturer’s guidelines and warranties. Join me as we unravel the significance of these essential resources and discover how they can shape your glueless laminate flooring adventure.
The Power of Manufacturer Guidelines:
When it comes to selecting the right glue for your laminate flooring installation, the manufacturer holds the key. Each brand has its own set of specific recommendations and requirements, ensuring the perfect adhesive application for their unique product.
By carefully reviewing the guidelines provided by the manufacturer, you gain invaluable insights into the type of adhesive to use, the recommended application method, and any special preparation or installation instructions. Trust me, sticking to these guidelines is the secret to a flawless and long-lasting installation.
Unveiling Warranties:
But wait, there’s more. Many laminate flooring manufacturers sweeten the deal by offering warranties on their products. These warranties serve as a seal of quality assurance and demonstrate the manufacturer’s unwavering faith in their flooring’s performance.
While the terms and conditions may vary between brands, most warranties cover defects in materials or workmanship. Some even provide coverage for issues specifically related to glue-down installations.
Cracking the Warranty Code:
Now, here’s where things get interesting. To fully benefit from your laminate flooring warranty, it’s crucial to read and understand every word of the fine print. Take note of what’s covered under the warranty, how long it lasts, and any specific requirements or limitations that may apply. Remember that using an adhesive not recommended by the manufacturer or failing to follow their installation guidelines may void the warranty.
So, stay on the manufacturer’s good side by faithfully following their instructions – this way, you’ll be eligible for any warranty claims that may arise in the future.
Common Mistakes to Avoid with Glue-Down Laminate Flooring
Embarking on a glue-down laminate flooring installation project is an exciting opportunity to revitalize your space. However, to achieve flawless and long-lasting results, it’s essential to steer clear of common mistakes that can compromise the beauty and durability of your new floor.
In this comprehensive guide, we will delve into the top mistakes to avoid when working with glue-down laminate flooring, equipping you with the knowledge to overcome challenges and emerge victorious.
Neglecting Subfloor Preparation: The Foundation for Success
The cardinal sin of glue-down laminate flooring installation is failing to prepare the subfloor adequately. Don’t fall victim to this pitfall. Ensure your subfloor is immaculately clean, bone dry, and level before applying any adhesive. Debris, dust, or moisture lurking on the subfloor can sabotage the bond between the laminate and the glue, leading to a shoddy and unreliable installation.
Dedicate ample time to meticulously clean the subfloor and address any unevenness or moisture issues early on, guaranteeing a rock-solid foundation for your new floor.
Choosing the Wrong Adhesive: A Sticky Situation
Why gamble with your flooring’s fate by using the wrong adhesive? This mistake can haunt you in more ways than one. Remember, not all adhesives are created equal. Opt for an adhesive that is specifically formulated for laminate flooring, ensuring compatibility with your chosen material. Heed the manufacturer’s recommendations regarding application techniques and be diligent in your selection process.
Using an ill-suited adhesive can result in lackluster adhesion, leaving you with loose or unevenly installed laminate planks that will undermine the integrity of your floor.
Balancing Act: Applying Adhesive Just Right
Finding equilibrium is key when it comes to applying adhesive during a glue-down laminate flooring installation. Overdo it, and you’ll be grappling with excessive squeeze-out that is arduous to clean up. Worse yet, it might seep into the joints between your planks, causing unsightly swelling or warping. On the other hand, applying too little adhesive will leave you with a weak and unstable floor.
Avoid these extremes by carefully following the manufacturer’s instructions regarding the recommended amount of adhesive per square foot. Strike the perfect balance for a sturdy and flawlessly installed floor.
KKKpOpWfbCk” >
Conclusion
When it comes to gluing down laminate flooring, there is one key product you need: adhesive.
This powerful substance is specifically designed to bond the laminate planks securely to the subfloor, ensuring a long-lasting and durable installation. The adhesive acts as a strong foundation, preventing any movement or shifting of the flooring over time.
It creates a solid connection between the planks and the subfloor, giving your laminate flooring a seamless and professional finish.