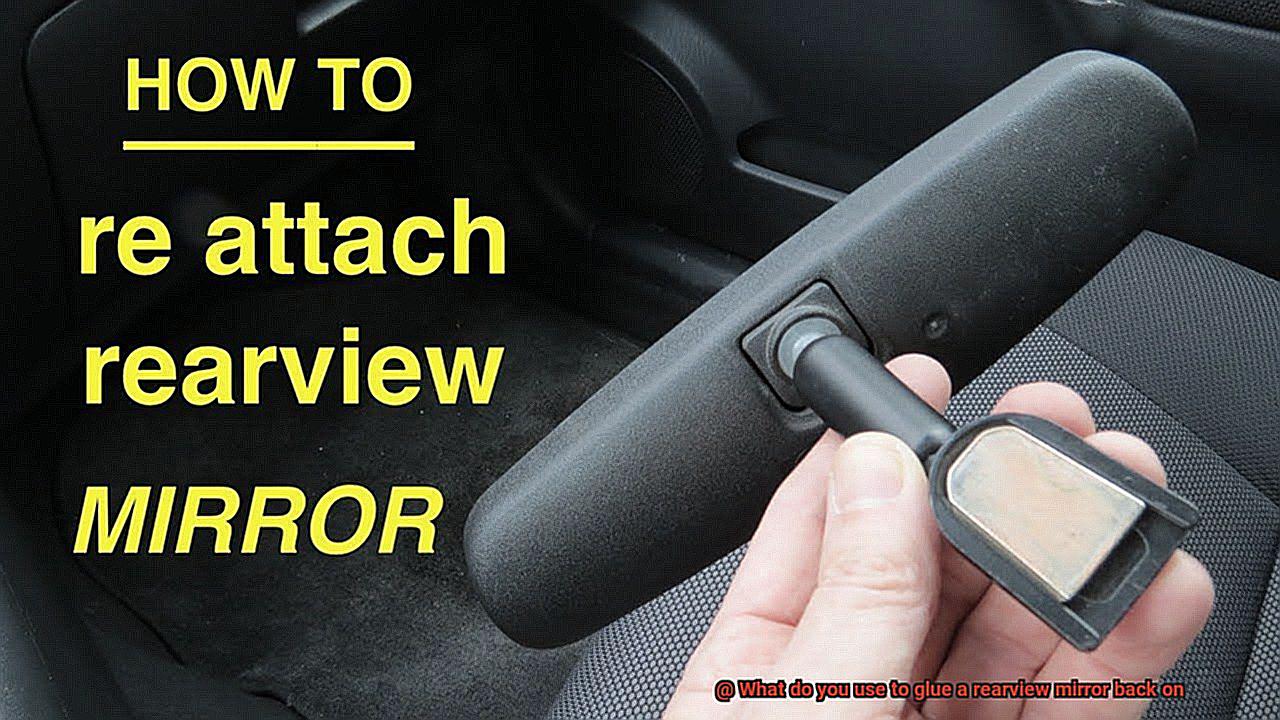
Picture this: you’re cruising down the highway, enjoying the ride, when all of a sudden your rearview mirror decides to take a dive. Not only is it scary, but it’s also incredibly dangerous. Fortunately, there’s no need to panic. With a few simple tools and some expert knowledge, you can easily fix this issue. In this blog post, we’ll explore what type of adhesive is best for gluing a rearview mirror back on.
First things first: not all adhesives are created equal. You need something strong enough to hold the mirror in place but gentle enough not to damage your car’s interior. Some popular options include super glue, epoxy, and silicone adhesive. However, it’s important to note that the best adhesive for your car may vary depending on its make and model.
Next up: preparation is key. Before you start gluing anything together, make sure the surface is clean and dry. Be sure to remove any old adhesive from both the mirror and the car.
Last but certainly not least: patience is a virtue. Allow ample time for the adhesive to fully dry before using your rearview mirror again. Rushing things could result in another mishap down the road (pun intended).
In conclusion, when it comes to reattaching your rearview mirror with glue, choosing the right adhesive is essential. Take your time preparing the surface and selecting an appropriate product for your vehicle. By following these simple steps, you’ll have your mirror fixed up in no time – ensuring safer driving experiences ahead.
Adhesive Options: What are the Different Types of Glue to Use?
Contents
- 1 Adhesive Options: What are the Different Types of Glue to Use?
- 2 Two-Part Epoxy: How Does this Work for Reattaching a Rearview Mirror?
- 3 Superglue: Is This an Option and How Do You Use It?
- 4 Silicone Adhesive: What Are the Benefits of Using This Type of Glue?
- 5 Hot Glue: Should You Use This for Reattaching a Rearview Mirror?
- 6 Tips for Applying Adhesives: What Should You Keep in Mind When Working with Glues?
- 7 Curing Time: How Long Should You Wait Before Driving Your Car Again?
- 8 Cleaning Up After Application: What Steps Should You Take to Ensure a Secure Bond and Minimize Damage?
- 9 Conclusion
If you’re struggling with a loose rearview mirror, fear not. There are various types of glue that can help you reattach it securely. Let’s delve deeper into the different adhesive options and how they work.
Super glue is a go-to option for smaller mirrors or mirrors made of plastic. Known for its quick-drying properties, it forms a strong bond between surfaces. However, not all super glues are suitable for automotive use, so it’s essential to look for a product specifically designed for cars. While super glue can provide a strong hold, it may not be the best choice for porous surfaces.
Epoxy is a two-part adhesive that creates a robust and durable bond. It’s ideal for attaching heavier mirrors to surfaces like glass or metal. To ensure optimal results, mix the resin and hardener thoroughly before applying them to the surface. Epoxy can withstand shock and vibration, making it a reliable option for long-term use.
Silicone adhesive is a flexible glue that bonds various materials together, including glass, plastic, and metal. It’s also waterproof and heat-resistant, making it an excellent choice for exterior mirrors that are exposed to different weather conditions. Its flexibility allows it to handle movements and expansions without cracking or breaking. However, it may not provide as strong of a hold as epoxy or super glue.
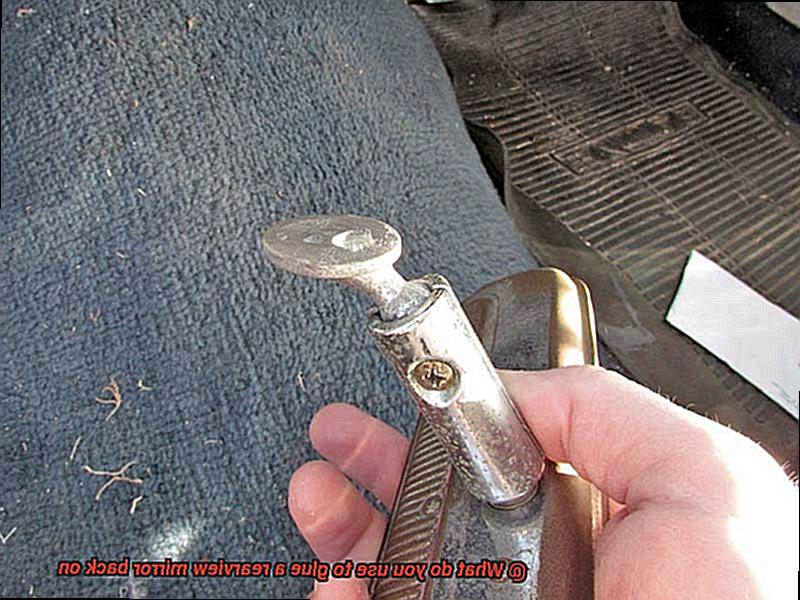
Automotive adhesive is specifically designed for bonding car parts together. It can handle heavy-duty applications such as attaching rearview mirrors to the windshield or body of the car. It provides a strong bond that can withstand extreme temperatures and vibration. It’s crucial to choose an automotive adhesive that won’t damage the glass or plastic components of your car’s interior.
Whichever type of glue you select, proper surface preparation is critical for success. Ensure that the surface is clean, dry, and free of debris or residue before applying the adhesive. Following the manufacturer’s instructions carefully is also essential to achieve optimal results. Allow the glue to fully cure before driving your car.
In conclusion, there are several types of glue available for reattaching rearview mirrors. Each has its unique advantages and disadvantages, depending on the surface being attached to and the strength of the bond required. Choose the right glue for your situation and follow the instructions carefully for a successful repair.
Two-Part Epoxy: How Does this Work for Reattaching a Rearview Mirror?
Look no further than two-part epoxy to provide a secure solution. As an expert in this field, I can attest to the reliability of this adhesive, which is known for creating a strong bond between the mirror and its surface.
So, what makes two-part epoxy so effective? It’s all in the chemistry. The adhesive is made up of two components – a resin and a hardener – that work together to create a chemical reaction. This results in a hardened mixture that forms a tough and durable bond.
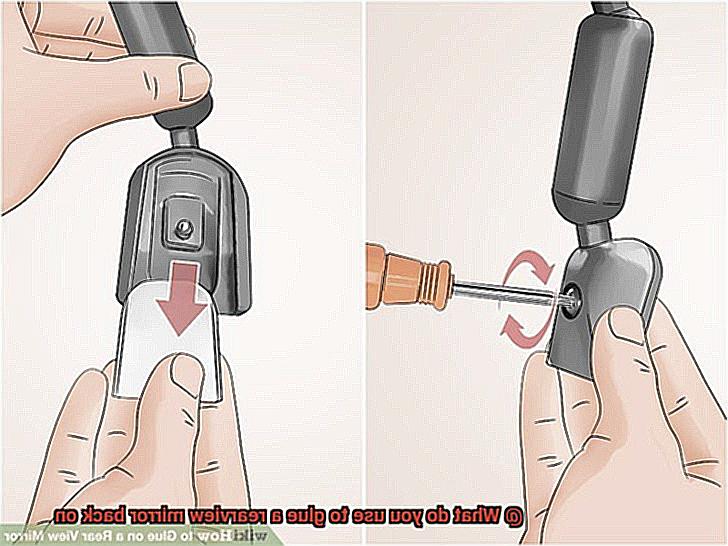
To use two-part epoxy for reattaching your rearview mirror, start by thoroughly cleaning the surface where the mirror will be attached. You can use rubbing alcohol or any other cleaning solution that will remove dirt and residue from the surface. Once the area is clean and dry, apply a small amount of the epoxy to both the mirror and the surface it will be attached to.
It’s important to note that two-part epoxy can take several hours to fully cure, so it’s essential to avoid touching or adjusting the mirror during this time. After the adhesive has cured, your mirror should be firmly attached and ready for use.
Two-part epoxy isn’t just great for reattaching rearview mirrors. It’s also versatile enough to be used for various other applications, thanks to its strength, durability, and resistance to water and chemicals. However, it’s important to follow the manufacturer’s instructions carefully and take necessary safety precautions, such as wearing gloves and working in a well-ventilated area.
Superglue: Is This an Option and How Do You Use It?
Superglue might just be the solution you’re looking for. Known as cyanoacrylate adhesive, superglue is a fast-drying, powerful adhesive that can bond almost anything together. But before you go ahead and use it, there are a few important things to keep in mind.
Firstly, ensure that the surfaces you plan to bond are clean and dry. Any dirt or debris on the surface can weaken the bond, so take a clean cloth and some rubbing alcohol to wipe down the mirror and mounting bracket. Let them dry completely before applying the glue to ensure a strong bond.
Secondly, use only a small amount of superglue. A little goes a long way, and using too much glue can cause it to seep out from under the mirror and onto your windshield. Apply just a small bead of glue to the mounting bracket and press the mirror firmly in place. Hold it there for 30 seconds to allow the glue to set.
It’s also important to note that superglue may not be strong enough for all types of mirrors. If your mirror is heavy or has a large surface area, consider using stronger adhesives like epoxy or silicone instead.
To summarize, here are some key takeaways:
- Clean and dry the surfaces before applying superglue
- Use only a small amount of glue
- Hold the mirror in place for 30 seconds
- Consider other adhesives for larger or heavier mirrors
Silicone Adhesive: What Are the Benefits of Using This Type of Glue?
If you’ve ever had the misfortune of a rearview mirror falling off while driving, you know how crucial it is to have a reliable adhesive on hand. While superglue may work in a pinch, it’s not always the best option for heavier mirrors. That’s where silicone adhesive comes in as the superhero of glues.
Silicone adhesive is a versatile glue with numerous benefits that make it perfect for reattaching your rearview mirror. Let’s explore some of these benefits in detail:
- Bonding strength: One of the most significant advantages of silicone adhesive is its impressive bonding strength. It can hold heavy objects securely in place, making it ideal for attaching rearview mirrors. You won’t have to worry about your mirror falling off or moving while driving; safety first, folks.
- Flexibility: Unlike other adhesives that can become brittle over time, silicone adhesive maintains its flexibility, making it more durable and long-lasting. It can withstand vibrations and temperature changes without cracking or breaking, which is essential for a rearview mirror exposed to constant motion.
- Water-resistant: Rearview mirrors are often exposed to moisture and humidity, which can cause them to become loose or rust over time. Thankfully, silicone adhesive is water-resistant, preventing these issues from arising and ensuring your mirror stays securely in place.
- Ease of application: Applying silicone adhesive is a breeze. It comes in tubes or syringes, making it easy to use for anyone, regardless of DIY experience. Once applied, silicone adhesive dries quickly within a few hours, allowing you to reattach your mirror and get back on the road as soon as possible.
- Durability: Unlike other adhesives, silicone adhesive has excellent resistance to extreme temperatures and UV rays. It can withstand exposure to sun, rain and snow without losing its adhesive properties.
Hot Glue: Should You Use This for Reattaching a Rearview Mirror?
If you’re looking to reattach a rearview mirror, it’s important to use the right adhesive. While hot glue may seem like a quick and easy solution, it’s simply not suitable for this task. Here’s why:
Firstly, hot glue lacks the strength and durability required for automotive use. It can’t handle the weight of a rearview mirror and will eventually melt and lose its adhesive properties. This can lead to dangerous situations on the road, such as your mirror falling off while driving.
Secondly, hot glue dries hard and brittle, making it prone to cracking and breaking under stress. This means that even if it holds up initially, any vibrations or bumps while driving can cause it to fail.
So what should you use instead? A specialized adhesive designed for automotive use. These adhesives are specifically formulated to withstand heat, vibrations, and other stresses that occur while driving. They’re also strong enough to hold the weight of your rearview mirror securely.
One excellent example of an automotive adhesive is two-part epoxy. This powerful adhesive consists of a resin and hardener that are mixed together before application. Once applied, the epoxy sets quickly and forms a strong bond that can withstand the rigors of driving.
Tips for Applying Adhesives: What Should You Keep in Mind When Working with Glues?
When it comes to applying adhesives, there are a few key tips you should keep in mind to ensure that your bond stays strong and reliable. Here are five important sub-sections to consider:
Choose the Right Adhesive
Choosing the right adhesive is crucial to achieving a strong and long-lasting bond. Different adhesives have different properties and work best for specific materials or applications. For example, a two-part epoxy is a common adhesive used for repairing rearview mirrors due to its strength and durability, while silicone adhesive or super glue may be better suited for other types of projects. Make sure you select an adhesive that is appropriate for the materials you are bonding.
Prepare the Surfaces
Properly preparing the surfaces you plan to bond is essential for ensuring that the adhesive can create a strong hold. This involves cleaning both surfaces thoroughly with rubbing alcohol to remove any dirt, oil, or residue that could affect the bond between the two surfaces. It’s also important to ensure that both surfaces are completely dry before applying the adhesive.
Follow Manufacturer’s Instructions
Adhesive manufacturers provide specific instructions for how to use their products effectively. It’s important to follow these instructions carefully, including mixing two-part epoxies correctly and applying them evenly to both surfaces. Some adhesives may require a certain amount of time to set before attaching the two surfaces, so be sure to read and follow the instructions carefully.
Avoid Over-Applying
It’s tempting to think that using more glue will result in a stronger bond, but this is not always the case. Over-applying glue can actually weaken the bond and make it more likely to fail over time. Instead, apply a thin, even layer of adhesive and press the two surfaces together firmly.
Let it Dry Completely
Finally, it’s essential to give the adhesive enough time to dry completely before using or adjusting the bonded object. Depending on the type of adhesive used and the temperature and humidity of your environment, this can take anywhere from a few hours to overnight. Be patient and allow enough time for the adhesive to fully cure before using your glued object again.
Curing Time: How Long Should You Wait Before Driving Your Car Again?
Hold on, speed racer. Before taking off, you should consider curing time. This crucial factor ensures that your mirror stays securely in place and doesn’t become a safety hazard while driving. In this blog post, we’ll dive into how long you should wait before driving your car again after re-attaching your rearview mirror.
Firstly, let’s define curing time. It refers to the period required for the adhesive to bond and dry completely, ensuring that your rearview mirror stays securely in place. The curing time varies based on several factors such as the adhesive type, temperature, and humidity levels in the environment.
So, how long should you wait before hitting the road? Generally, most adhesives require at least 24 hours to cure correctly before using your rearview mirror again. However, it’s best to wait even longer for optimal results.
It’s essential to note that driving your car before the adhesive has fully cured can cause the rearview mirror to fall off while driving. Therefore, it’s important to give the adhesive enough time to cure properly.
Here are some sub-topics you should consider:
- Adhesive type: Different types of adhesives may require different curing times. Check the manufacturer’s instructions for specific information.
- Temperature and humidity: High temperatures and humidity levels can speed up the curing process, while low temperatures and humidity can slow it down.
- Avoid using the car: It’s best to avoid using your car for at least 24 hours after attaching the rearview mirror. If possible, wait even longer for optimal results.
Cleaning Up After Application: What Steps Should You Take to Ensure a Secure Bond and Minimize Damage?
Before applying any new adhesive, the first step is to remove any remaining adhesive from the previous mirror attachment. Use a razor blade or scraper to gently remove any leftover adhesive without damaging the windshield. This step is crucial as any residue left behind can compromise the bond between the mirror and windshield.
Next, wipe down the area where the mirror will be attached with a clean cloth and rubbing alcohol. This will eliminate any dirt or grime that might interfere with the adhesive bond. Afterward, give the surface a thorough cleaning with a glass cleaner to ensure that there are no remaining traces of dirt or debris.
Now that the surface is clean, let it air dry completely before applying any new adhesive. Any moisture present could weaken the strength of the bond, so it’s crucial to wait until it’s dry.
Finally, apply your new adhesive according to the manufacturer’s instructions and allow it to cure fully before driving your car again. Keep in mind that driving before the adhesive has fully cured can be dangerous as it could cause the rearview mirror to fall off while driving.
bGPod_EQVVo” >
Conclusion
In conclusion, reattaching a rearview mirror with glue may seem like a simple task, but it requires attention to detail and patience. The first step is selecting the right adhesive for your car’s make and model. Not all adhesives are created equal, so consider options such as super glue, epoxy, silicone adhesive, or automotive adhesive.
Once you have chosen the appropriate adhesive, preparation is key. Make sure that both the mirror and the car surface are clean and dry before applying any glue. Take your time to remove any old adhesive residue to ensure a strong bond.
It’s important to exercise patience when allowing the adhesive to dry completely before using your rearview mirror again. Rushing things could lead to another mishap down the road.
Different types of adhesives have varying advantages and disadvantages depending on the surface being attached to and the strength of bond required. For example, two-part epoxy creates a strong bond between surfaces while silicone adhesive offers flexibility and water resistance.
Proper application of adhesives is critical for achieving a secure bond that lasts. Follow the manufacturer’s instructions carefully, avoid over-applying glue, and let it dry completely before using your mirror again.
Lastly, cleaning up after application involves removing any remaining adhesive from previous mirror attachment without damaging the windshield. Wipe down surfaces with rubbing alcohol followed by glass cleaner and air-dry completely before applying new adhesive according to manufacturer’s instructions.

