Are you looking for a fast and cost-effective way to bond silicone to plastic? If so, this blog post is for you.
We’ll explore the different adhesive options available, how to prepare the surface before gluing, and share some tips and tricks for a successful bond.
So if you want to know how to glue silicone to plastic like a pro, let’s get started!
What is Silicone?
Contents
- 1 What is Silicone?
- 2 What is Plastic?
- 3 What Glue Can You Use for Silicone to Plastic?
- 4 How to Prepare Silicone and Plastic Before Gluing
- 5 Different Types of Glue for Gluing Silicone to Plastic
- 6 Step-by-Step Guide on How to Glue Silicone to Plastic
- 7 Tips and Tricks for Gluing Silicone to Plastic
- 8 Troubleshooting Common Mistakes When Gluing Silicone to Plastic
- 9 Conclusion
Silicone is a remarkable synthetic material that is composed of silicon, oxygen, and other elements.
Its unique properties make it an ideal choice for a variety of applications, from sealants and adhesives to lubricants and insulation.
What’s more, silicone is non-toxic and can be used in medical and food-grade products.
It’s also incredibly durable, heat-resistant, and flexible, making it the perfect solution for any job that requires long-term use.
What is Plastic?
Plastic is a ubiquitous material that can be found in almost every aspect of our lives. It’s incredibly versatile, lightweight, and durable and is used for everything from packaging to furniture to electronics.
Plastic is divided into two main categories: thermoplastics and thermosets. Thermoplastics are easily melted and reformed while thermosets are rigid and cannot be reshaped once they have been cured.
Additionally, there are several different types of plastic based on their chemical structure such as polyethylene (PE), polypropylene (PP), polyvinyl chloride (PVC), acrylonitrile butadiene styrene (ABS), polycarbonate (PC) etc.
Each type of plastic has its own unique properties which makes it suitable for different applications.
From the plastic packaging we use to store food to the phone in our pockets, we owe a lot of modern convenience to the amazing properties of this material.
What Glue Can You Use for Silicone to Plastic?
Silicone-based adhesives are your best bet. Not only are they strong and durable, they can also withstand high temperatures, making them the ideal choice for this job.
However, if you don’t have access to silicone-based adhesives, epoxy and cyanoacrylate can also do the trick. Just keep in mind that these adhesives aren’t as strong or durable as traditional ones.
Before you start gluing, make sure both surfaces are clean by wiping them down with isopropyl alcohol or a similar cleaning solution. This will ensure that your glue has a strong bond. When applying the adhesive, use an even amount and spread it out evenly on both surfaces with a brush or other tool.
Finally, let the glue dry for at least 24 hours before using the plastic and silicone together for optimal results.
How to Prepare Silicone and Plastic Before Gluing
Cleaning the Surfaces
Gluing silicone to plastic requires a clean surface for maximum adhesion. To ensure this, use a damp cloth or an alcohol-based cleaner, such as rubbing alcohol, to wipe down both the silicone and plastic surfaces.
This will remove any dirt, smoke, or rubble that could prevent proper adhesion. Both surfaces should be completely dry before attempting to glue them together.
Surfaces Roughening
The Surfaces Roughening up the silicone and plastic’s surfaces before gluing them together can help create more surface area for the glue to bond with. This can be carried out using sandpaper or a file. Abrading the surfaces in this manner will also help ensure better adhesion between the two materials.
Using an adhesive primer before gluing the silicone and plastic surfaces together will help promote better adhesion between them and ensure they stay together for longer periods of time.
Before applying primer, it is important to use a solvent such as acetone or alcohol to remove any oils or waxes on either surface in order to increase adhesion and reduce the chances of air bubbles forming between the two materials.
Test Fitting
Before applying any glue, test fit both pieces together first in order to make sure they are aligned properly and that there are no gaps between them that need filling in.
Knowing whether or not additional preparation is required before gluing, such as adding more sandpaper or filing down a rough edge, will help you decide whether or not gluing is necessary.
Solvents
If necessary, use acetone or alcohol to clean any oils or waxes off the surfaces before gluing silicone and plastic together. These solvents will break down these materials without damaging either surface while allowing for improved adhesion when it comes time to apply glue. Make sure both surfaces are completely dry before trying to glue them together.
Different Types of Glue for Gluing Silicone to Plastic
Gluing silicone to plastic can be a tricky task, but with the right type of glue, it can be done quickly and effectively. Here are some of the various types of glue that can be used for this purpose:
Silicone adhesives are specifically designed for bonding silicone to plastic surfaces. They provide a strong and reliable bond, making them the most cost-effective option for this job.
Epoxy adhesives are also an effective way to bond silicone and plastic surfaces. They may require more preparation time than silicone adhesives, but they will still get the job done.
Super glue is a fast-drying adhesive that can be used for gluing silicone to plastic; however, it is not as strong or reliable as the other types of glue mentioned above.
Hot glue is another popular choice for gluing silicone to plastic, but it is not as strong or reliable as the other types of glue mentioned above.
Acrylic adhesives can also be used for gluing silicone to plastic, but they are not as strong or reliable as the other types of glue mentioned previously.
Step-by-Step Guide on How to Glue Silicone to Plastic
Gluing silicone to plastic can be a tricky task, but with the right techniques and materials, it’s easy to do. Here is a step-by-step guide on how to glue silicone to plastic.
First, start by cleaning the surfaces of both materials. Use a damp cloth to remove dirt, dust, oils, and other debris from the surfaces. Make sure that the surfaces are completely dry before proceeding.
Next, prepare the glue according to the manufacturer’s instructions. For example, some glues may require mixing two parts together before use or may need an activator before use.
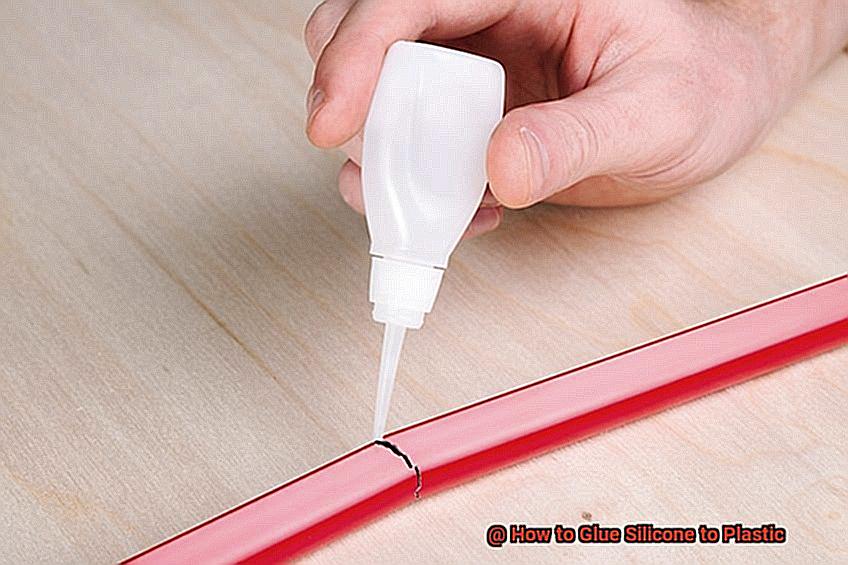
Apply a thin layer of glue to one surface and spread it evenly with a brush or roller. Allow the glue to set for the recommended amount of time specified in the instructions before continuing.
Place the silicone onto the plastic and press firmly into place. Ensure that there are no gaps between them and that they are securely bonded together.
Finally, let the glue cure for at least 24 hours before using or handling it again. This will guarantee that it has completely cured and is strong enough for use in your project or application.
Tips and Tricks for Gluing Silicone to Plastic
Gluing silicone to plastic can be a tricky process, but if done correctly, your project will last for years. Here are 8 tips and tricks for gluing silicone to plastic that will help you create a strong bond between the two surfaces.
Clean Surfaces
Before applying any glue, make sure to clean the silicone and plastic surfaces with rubbing alcohol or a similar cleaning agent. This will help ensure that no dust or debris interferes with the glue’s adhesion and allows for maximum adhesion strength.
Quality Glue
When it comes to gluing silicone to plastic, it’s important to use a high-quality glue specifically designed for this purpose. Both Loctite Super Glue and E6000 Glue are excellent choices and will create a strong bond between the two surfaces.
Even Distribution
When applying your glue, make sure to spread it evenly over both surfaces so that there is an even layer of adhesive on each surface before pressing them together. When they are finished drying, this will help ensure maximum adhesion between them.
Allow Time
Make sure to allow ample time for the glue to dry before handling or moving the pieces together, as this can cause them to break or become misaligned. If using a two-part epoxy, mix it in equal parts and apply quickly, as it will dry quickly if left too long without being applied correctly.
Secure Joints
To ensure that your joint is secure while drying, use clamps or weights to hold the pieces together until they are completely dry. When they finish drying, this will help them stay in place and create a stronger bond between them.
Adhesive Promoter
If you need extra stability in your bond, try an adhesive promoter on one of the surfaces before applying your adhesive, as this will help increase its adhesion strength even more when applied properly.
Heat Guns
If possible, use a heat gun to warm up both surfaces before applying your adhesive, as this helps establish an even stronger bond between them when they are pressed together and dried completely.
Sealant Protection
Consider using a sealant over their joint after gluing silicone and plastic together, as this will help protect the joint from moisture and other environmental factors that can degrade their bond over time.
Troubleshooting Common Mistakes When Gluing Silicone to Plastic
Gluing silicone to plastic can be tricky, but with the right tools and techniques, you can create a secure bond. To help you avoid making common mistakes when gluing silicone to plastic, here are some simple tips.
First, make sure that the surfaces are clean and dry before gluing. Any dirt, dust, or moisture will prevent the glue from adhering properly. Additionally, ensure that you have the correct type of glue for your project. Different types of silicone require different types of glue for a strong bond.
When applying the glue, use only enough—too much will cause excess mess and make it difficult to clean up afterwards. To keep your pieces together while they set, use a clamp or another device to hold them in place. Furthermore, for the best results, read and carefully follow all instructions on the packaging of your glue.
If you’re having trouble with the bonding process, try heating up the surfaces before gluing them together, as this will help create a stronger bond between them.
Conclusion
Gluing silicone to plastic can be tricky, but it’s simple with the right equipment and materials.
From selecting the appropriate adhesive to following manufacturer instructions, there are many steps involved in creating a strong bond.
With this comprehensive guide, you now have all the knowledge you need to complete your project like a pro.