Welcome to our blog post all about the drying times of vinyl flooring glue. Whether you’re a DIY fanatic or just curious about this stuff, we’ve got your back.
Ever wondered how long it takes for that vinyl flooring glue to dry? Well, you’re definitely not alone.
Get ready to learn the secrets behind getting that flawless, squeaky clean vinyl floor – because timing is key.
Factors that Influence Vinyl Flooring Glue Drying Time
Contents
- 1 Factors that Influence Vinyl Flooring Glue Drying Time
- 2 Types of Vinyl Flooring and Adhesives
- 3 Humidity Levels and Drying Time
- 4 Temperature Conditions and Drying Time
- 5 The Impact of Excessive Heat on Vinyl Flooring Glue
- 6 Acclimation Periods for Vinyl Flooring and Adhesive
- 7 Tips to Accelerate the Drying Time
- 8 Conclusion
Factors That Influence Vinyl Flooring Glue Drying Time: What You Need to Know
Introduction:
Installing vinyl flooring requires careful consideration of the drying time for the glue used. The success and durability of the installation depend on understanding the factors that influence drying time. In this article, we will explore the key factors that affect vinyl flooring glue drying time, providing you with the knowledge you need for a successful installation.
Type of Glue:
Different types of vinyl flooring glue have varying drying times. The chemical composition and formulation of the glue play a significant role in determining how quickly it dries. Carefully read the manufacturer’s instructions to understand the expected drying time for the specific glue you are using.
Temperature and Humidity:
The ambient temperature and humidity levels in the installation area greatly impact drying time. Higher temperatures and lower humidity levels promote faster drying, while cooler temperatures and higher humidity levels can prolong the process. Maintain temperatures between 65°F and 85°F and humidity levels between 35% and 65% for optimal drying conditions.
Subfloor Condition:
The condition of the subfloor is crucial for proper adhesion and timely drying. A smooth, clean, and well-prepared subfloor provides a better surface for the glue to bond with, resulting in quicker drying. Remove dirt, dust, and debris from the subfloor to expedite drying.
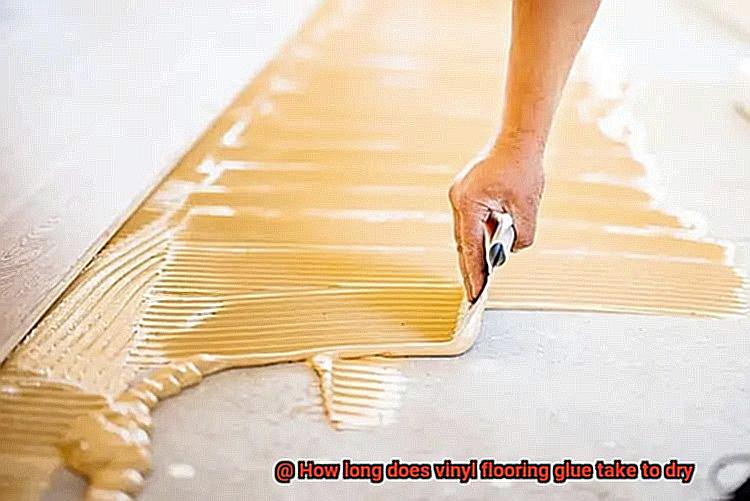
Amount of Adhesive Applied:
The quantity of adhesive applied during installation also affects drying time. Applying too much adhesive results in a thicker layer that takes longer to dry, while applying too little may compromise adhesion and require additional drying time. Follow manufacturer guidelines for optimal coverage rate and application thickness.
Ventilation and Airflow:
Adequate ventilation contributes to faster drying. Proper air circulation helps remove moisture from the adhesive, expediting evaporation. Open windows, use fans, or utilize HVAC systems to create a well-ventilated environment that promotes efficient drying.
Thickness of Vinyl Flooring:
The thickness of the vinyl flooring being installed can impact drying time. Thicker flooring materials require more time for the adhesive to fully dry and bond with the subfloor. Thinner options may dry more quickly due to their reduced mass and moisture content.
Types of Vinyl Flooring and Adhesives
In this comprehensive guide, we will explore the various types of vinyl flooring and their corresponding adhesives. Additionally, we will discuss the installation requirements and drying times for each type, ensuring a successful flooring project.
Types of Vinyl Flooring:
Sheet Vinyl:
Sheet vinyl is a versatile option that comes in large rolls and can be cut to fit any space. It is commonly used in high-traffic areas due to its durability and ease of maintenance. Sheet vinyl can be installed with or without adhesive, depending on the manufacturer’s instructions.
Vinyl Tiles:
Vinyl tiles are individual pieces that can be installed one by one, providing endless customization options. They come in various sizes and designs, allowing you to create unique patterns. Vinyl tiles can be self-adhesive, with adhesive backing that sticks directly to the subfloor, or they can be glued down using vinyl flooring adhesive.
Luxury Vinyl Planks (LVP):
LVP mimics the look of hardwood planks and is available in various lengths and widths. It offers a realistic wood-like appearance with the added benefits of durability and easy maintenance. LVP can be installed as floating floors, without adhesive, or it can be glued down using vinyl flooring adhesive.
Luxury Vinyl Tiles (LVT):
LVT replicates the look of natural stone or ceramic tiles while providing the same durability as other vinyl flooring options. It is easy to install and maintain, making it a popular choice for kitchens and bathrooms. LVT can be installed using adhesive or as floating floors.
Types of Vinyl Flooring Adhesives:
Pressure-Sensitive Adhesive:
Pressure-sensitive adhesive is commonly used for self-adhesive vinyl tiles. This type of adhesive remains tacky even after it dries, allowing for easy replacement or repositioning of tiles if needed. Pressure-sensitive adhesive typically dries within 24 hours.
Hard-Set Adhesive:
Hard-set adhesives are used for glue-down installations of vinyl flooring. They provide a strong bond between the subfloor and the vinyl material. Depending on the product, hard-set adhesives can take anywhere from 24 hours to several days to fully dry and cure.
Moisture-Cured Adhesive:
Moisture-cured adhesives are designed for areas with high moisture levels, such as bathrooms or basements. They offer excellent water resistance and typically have a faster drying time compared to other adhesives. Drying times can range from a few hours to one day, depending on humidity and temperature conditions.
Humidity Levels and Drying Time
You’ve made the decision to elevate your home with stunning vinyl flooring. You’ve done your homework, carefully selected the perfect style, and now it’s time to embark on the installation process. But hold on. Did you know that humidity levels can wield a powerful influence on the drying time of vinyl flooring glue? Yes, indeed, my friends. The level of moisture in the air can either extend or expedite the drying process, making it crucial to comprehend how humidity plays a pivotal role in achieving that picture-perfect flooring installation.
Now, let’s delve into the intricacies and get down to brass tacks:
- High Humidity, Slow Drying: When the air is saturated with moisture, as is often the case in tropical paradises or during those sticky summer months, excess humidity can impede the rapid evaporation of glue. Consequently, this elongates the drying time, demanding a healthy dose of patience for your flooring venture.
- Low Humidity, Rapid Drying: Conversely, in regions with low humidity levels like dry desert oases or frosty winters, where moisture is scarce in the atmosphere, the glue’s moisture evaporates at an accelerated pace. Consequently, this expedites the drying time and may pleasantly surprise you with how swiftly your vinyl flooring glue solidifies.
But here’s the rub:
Extreme humidity levels, be they high or low, can wreak havoc on your glue bond and overall installation. Unwanted consequences such as adhesive failure and uneven drying may rear their ugly heads. Hence, it is highly recommended to maintain a moderate humidity level ranging from 40% to 60% during installation.
To help you maintain optimal humidity levels and achieve ideal drying time, here are some valuable tips:
- In areas with high humidity, consider employing dehumidifiers or air conditioners to regulate moisture levels and facilitate quicker drying.
- In excessively dry environments, employ the aid of humidifiers or lightly mist the area to introduce some moisture and prevent rapid evaporation.
Remember, closely monitoring and adjusting humidity levels throughout the installation process is vital for a successful and long-lasting vinyl flooring installation.
So, whether you’re embarking on a DIY project or entrusting professionals with the task, comprehending the impact of humidity on drying time can make all the difference. Take command of your environment, maintain those optimal humidity levels, and welcome a flawlessly installed vinyl floor that will withstand the test of time.
Temperature Conditions and Drying Time
Now, let’s dive into the nitty-gritty details of the installation process. One crucial factor that often goes unnoticed is the impact of temperature conditions on the drying time of vinyl flooring glue. In this article, we’ll explore how temperature affects the drying process, ensuring your vinyl flooring installation is a success. So, grab a cup of coffee and let’s embark on this journey into the world of temperature-controlled drying.
Imagine this: you’ve meticulously applied the vinyl flooring glue, eagerly awaiting its transformation from sticky to solid. But here’s where things get interesting – temperature conditions have a significant say in determining the drying time. Let’s break it down into three temperature tales:
Too Cold, Too Slow:
As the mercury drops, so does the speed of evaporation. Vinyl flooring glue craves warmth, preferring a cozy environment of around 65°F (18°C) for optimal drying. Lower temperatures can drastically extend the drying time, requiring patience as your new best friend.
Scorching Heat Alert:
While cold temperatures can be frustrating, excessive heat brings its own set of challenges. High temperatures cause the glue to dry too quickly, resulting in inadequate adhesion or even damage to the flooring material itself. So, take caution and avoid installing vinyl flooring in areas with direct sunlight or extreme heat.
Humidity Hijinks:
Humidity levels play their part in the drying time equation as well. High humidity slows down evaporation, frustratingly prolonging the drying process. To achieve the best results, aim for a relative humidity level of around 50% during installation.
Ventilation is Key:
Now that we’ve explored temperature conditions, let’s talk about the importance of ventilation. Proper airflow becomes your secret weapon in expediting the drying process by whisking away excess moisture. Open those windows, switch on fans, or crank up the air conditioning – good ventilation is essential for faster and more effective drying.
Follow the Guidelines:
To ensure a successful vinyl flooring installation, always heed the manufacturer’s instructions regarding temperature and humidity conditions. Each product may have its own temperature range and drying time specifications. Ignoring these guidelines can compromise the overall quality of your installation.
Patience Pays Off:
Lastly, exercise patience and allow sufficient drying time before subjecting your vinyl flooring to the ultimate test. Heavy foot traffic or placing heavy furniture too soon can wreak havoc on your hard work. So, resist the urge to rush the process and give your flooring ample time to dry.
The Impact of Excessive Heat on Vinyl Flooring Glue
Welcome back, flooring enthusiasts. Today, we are going to dive into the captivating realm of vinyl flooring glue and its intricate dance with excessive heat. If you’ve ever pondered how those scorching summer days can affect your stunning vinyl floors, then keep on reading.
Let’s begin with the delicate matter of drying time. Vinyl flooring glue craves the perfect temperature range to dry flawlessly. However, when the mercury rises beyond that sweet spot, things can get a little sticky (pun intended). Excessive heat can cause the glue to dry too quickly, resulting in a feeble bond between the vinyl flooring and the subfloor. And nobody wants a floor that’s as loose as a goose.
But hold on tight, because extreme heat has more tricks up its sleeve. It can also slow down the drying process. High temperatures can obstruct the efficient evaporation of moisture in the glue, leaving your floors hanging in limbo for longer than desired. And let’s face it, nobody has time for that.
Yet, there’s still more to this sizzling tale. Excessive heat can make your vinyl flooring swell and contract like an accordion player performing a mesmerizing melody. This constant movement takes a toll on the durability and longevity of your floors. We certainly don’t desire your resplendent vinyl tiles resembling a wild roller coaster ride, do we?
It’s important to note that not all vinyl flooring glues are created equal when it comes to heat resistance. Some glues may have higher tolerances for hot temperatures than others. So, it’s always wise to consult with your professional installer or manufacturer for specific recommendations tailored to your climate and location.
To safeguard a robust bond and minimize the detrimental impact of excessive heat, it’s best to install vinyl flooring in an environment where temperatures can be controlled. This way, your glue can dry at an optimal pace, forging an unyielding connection between your floors and subfloor.
So there you have it, folks. Excessive heat can indeed throw a wrench in the works when it comes to vinyl flooring glue. But armed with knowledge and expert advice, you’ll be well-prepared to keep your floors looking splendid, no matter how scorching the weather gets outside.
Acclimation Periods for Vinyl Flooring and Adhesive
This crucial step can spell the difference between a flawless flooring installation and a disaster waiting to happen. So, grab a cup of coffee and join me as we explore the ins and outs of this important process.
In essence, an acclimation period refers to the time needed for both vinyl flooring and adhesive to adjust to their new environment before installation. Think of vinyl flooring as a finicky diva – it craves the perfect conditions to perform at its best. By allowing it to acclimate, we’re giving it the opportunity to expand or contract in response to the temperature and humidity levels of the room. This prevents unsightly issues like buckling, warping, or those dreaded gaps in your floor.
Now, you may be wondering – how long should this mysterious acclimation period be? Well, my friend, that depends on various factors. The type of vinyl flooring, the installation method, and even the environmental conditions all come into play when determining the recommended timeframe. Generally speaking, manufacturers suggest an acclimation period ranging from 24 to 72 hours. I know it sounds like a long time, but trust me, it’s worth the wait.
During this acclimation period, it is crucial to keep those vinyl flooring boxes or rolls right where they’ll be installed. This allows them to soak up all the temperature and humidity goodness of the room. And let’s not forget about the adhesive. Even glue needs its own acclimation time. Be sure to follow the manufacturer’s instructions for this sticky stuff.
Now, I understand that waiting can be tough when you’re eager to see your new floor come to life. But let me tell you – rushing through or skipping the acclimation period can have dire consequences. We’re talking about potential floor failure, adhesive failure, and premature wear and tear – not exactly what you had in mind for your dream flooring, right?
Tips to Accelerate the Drying Time
Properly drying the adhesive or glue is crucial for a successful vinyl flooring installation. With the right tips and techniques, you can accelerate the drying time and enjoy your new floor sooner. This article will provide you with five effective methods to speed up the drying process of vinyl flooring glue.
Optimize Temperature Control:
Maintaining a consistent temperature between 65°F and 85°F in the room is essential for faster drying. Extremes in temperature, whether too hot or too cold, can slow down the process. Avoid direct sunlight and turn off underfloor heating during installation to prevent overheating.
Enhance Ventilation:
Proper ventilation is key to expediting the drying time of vinyl flooring glue. Open windows and doors to allow fresh air to circulate throughout the room. Strategically place fans in the area to enhance airflow and help evaporate moisture from the adhesive.
Combat Humidity:
High humidity can significantly prolong drying time, so it’s important to control moisture levels in the room. Consider using dehumidifiers during installation, especially if you live in a humid climate or during rainy seasons. Lowering humidity levels will create a drier environment, aiding in faster drying.
Apply Thin Layers:
Applying a thin layer of glue can help speed up drying time. Thicker layers take longer to dry because there’s more moisture that needs to evaporate. Follow the manufacturer’s instructions regarding the recommended thickness of the glue layer for optimal drying results.
Choose Fast-Drying Adhesives:
When purchasing vinyl flooring glue, look for products labeled as “fast-drying” or “quick-set.” These specially formulated adhesives are designed to dry more rapidly, reducing overall installation time. Using fast-drying adhesives can be a game-changer when you’re in a hurry to complete your flooring project.
Conclusion
In conclusion, the drying time of vinyl flooring glue depends on a variety of factors. The type of glue, temperature and humidity levels, subfloor condition, amount of adhesive applied, ventilation and airflow, and the thickness of the vinyl flooring all play a role in how long it takes for the glue to dry. It’s crucial to consider these factors to ensure a successful and long-lasting installation.
Different types of vinyl flooring glue have different drying times. To know how long it will take for your specific glue to dry, carefully read and follow the manufacturer’s instructions.
Temperature and humidity levels are major factors that affect drying time. Maintaining temperatures between 65°F and 85°F and humidity levels between 35% and 65% creates ideal conditions for faster drying.
The condition of the subfloor is also important for proper adhesion and timely drying. A smooth, clean, and well-prepared subfloor provides a better surface for the glue to bond with.
The amount of adhesive applied during installation also influences drying time. Using too much or too little adhesive can result in longer drying times or compromised adhesion.
Proper ventilation is key to expediting evaporation. Open windows, fans, or HVAC systems help remove moisture from the adhesive, speeding up the drying process.
Lastly, keep in mind that thicker vinyl flooring materials take longer to dry. The thicker the flooring, the more time it needs for the adhesive to fully dry and bond with the subfloor.
By understanding these factors and following manufacturer guidelines, you can ensure that your vinyl flooring glue dries properly and achieves a flawless finish.