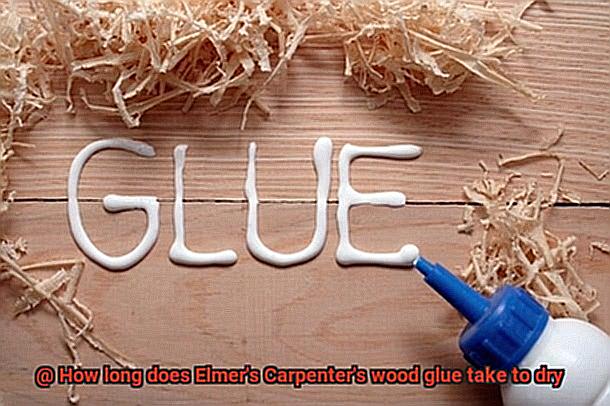
Are you a DIY enthusiast who loves getting your hands dirty with woodworking projects?
If so, you know that finding the right wood glue is essential for creating sturdy and beautiful pieces. Elmer’s Carpenter’s wood glue is a go-to choice for many craftsmen, thanks to its reputation for strong adhesion.
But let’s face it – waiting for glue to dry can feel like an eternity when you’re itching to continue working on your masterpiece. So, how long does it take for Elmer’s Carpenter’s wood glue to dry?
In this blog post, we’ll dive into the nitty-gritty of the drying process and give you all the vital information you need. By the end, you’ll have a clear idea of when you can move forward with your woodworking adventures.
Let’s jump right in.
What is Elmer’s Carpenter’s Wood Glue?
Contents
- 1 What is Elmer’s Carpenter’s Wood Glue?
- 2 Factors that Affect Drying Time
- 3 Estimated Drying Times
- 4 Tips for Faster Drying Times
- 5 Tips for Ensuring a Strong Bond
- 5.1 Apply the glue evenly:
- 5.2 When applying the glue, use a brush or spreader to distribute it evenly across the surface. Avoid applying too much glue, as excess adhesive can squeeze out and weaken the bond. Similarly, applying too little glue may result in incomplete coverage and a weaker connection. Take your time and apply the glue with precision.
- 5.3 Use clamps or weights:
- 5.4 To hold the glued surfaces together, consider using clamps or weights. Clamps act like hugging arms, keeping the surfaces in tight contact as the glue dries. Similarly, weights exert pressure, ensuring a secure connection. Just like holding hands tightly makes you feel safe, clamping or weighting the glued surfaces prevents any movement during drying, resulting in a stronger bond.
- 5.5 Allow sufficient drying time:
- 5.6 During the drying time, avoid disturbing or moving the glued surfaces to ensure a strong bond. If you need to check the progress, gently touch the surface without applying pressure. Remember, a strong bond takes time to form, so allow the glue sufficient drying time for maximum effectiveness.
- 5.7 Maintain ideal temperature and humidity:
- 6 How to Clean Up Excess Glue
- 7 Advantages of Using Elmer’s Carpenter’s Wood Glue
- 8 Disadvantages of Using Elmer’s Carpenter’s Wood Glue
- 9 Conclusion
When it comes to woodworking projects, finding the right adhesive is crucial for ensuring a strong and durable bond between wood pieces. Elmer’s Carpenter’s Wood Glue stands out as a top choice for professionals and DIY enthusiasts alike, thanks to its exceptional bonding capabilities and user-friendly features. In this article, we will explore the key features and benefits of this versatile adhesive, empowering you to create stunning woodwork with confidence.
Unleash the Strength and Durability:
Elmer’s Carpenter’s Wood Glue is renowned for its impressive strength and durability. Once fully dried, it forms a bond that can withstand the test of time, ensuring your woodworking creations hold up to everyday use and demanding applications. From constructing furniture to performing intricate woodworking repairs, this glue provides the reliability and longevity your projects demand.
A Safer Choice for Indoor Use:
Unlike solvent-based adhesives that emit harmful fumes, Elmer’s Carpenter’s Wood Glue features a water-based formula that is safe to use indoors. Say goodbye to noxious odors and potential health risks associated with other adhesives. This non-toxic glue offers peace of mind during your woodworking endeavors, protecting both you and the environment.
Precision Application Made Easy:
With its thick, viscous consistency, Elmer’s Carpenter’s Wood Glue allows for precise and controlled application. Bid farewell to messy drips and uneven coverage that compromise the quality of your bond. This glue spreads smoothly and evenly across wood surfaces, ensuring maximum contact and promoting a strong, seamless bond that enhances the overall integrity of your work.
Patience Pays Off:
While Elmer’s Carpenter’s Wood Glue dries to the touch within 20 to 30 minutes, patience is key when it comes to achieving optimal bond strength. To ensure the glue sets properly, it is recommended to allow it to dry undisturbed for at least 24 hours. Remember, the type of wood, temperature, and humidity levels in your workspace can influence drying times, so plan accordingly for the best results.
Tips for Success:
- Use clamps or weights to hold glued pieces together during the drying process, ensuring a tight bond.
- Consider environmental factors – higher temperatures and lower humidity expedite drying, while lower temperatures and higher humidity may lengthen the process.
- Follow the manufacturer’s instructions and recommendations to achieve optimal bonding results.
- Wipe away excess glue with a damp cloth before it dries completely for a clean finish.
Factors that Affect Drying Time
In this article, we reveal the hidden secrets behind Elmer’s Carpenter’s Wood Glue drying time and explore the various factors that can impact this crucial stage. So, don your apron and join us on this captivating journey into the world of glue.
The Wood Type:
Just like people, different woods have distinct personalities. Softwoods like pine or cedar are thirsty for glue and dry quickly, while denser hardwoods such as oak or mahogany require patience due to their lower porosity. Choose your wood wisely, as it can significantly affect drying time.
Temperature and Humidity:
Mother Nature has a say in drying time too. Higher temperatures work like a turbocharger, speeding up the process, while cooler ones act as speed bumps. Likewise, low humidity levels create the perfect environment for swift drying, while high humidity can put a damper on things. Achieve the right balance between temperature and humidity to ensure timely results.
Application and Coverage:
Remember, less is more. Thick layers or excessive amounts of glue take longer to dry, so resist the temptation to go heavy-handed. Apply an even layer of Elmer’s Carpenter’s Wood Glue for optimal results. It’s all about finding that delicate equilibrium between application and finesse.
Glue Formula:
Elmer’s Carpenter’s Wood Glue is specially formulated for woodworking projects, boasting a formula that typically dries within 24 hours under ideal conditions. However, always consult the product instructions for accurate drying time information as different formulas can vary.
Clamping Time:
Sometimes, love needs a little pressure. To create a strong bond with Elmer’s Carpenter’s Wood Glue, clamping is often necessary. The recommended clamping time may vary, but it’s generally advised to keep the pieces clamped for at least 30 minutes to an hour before releasing them into the wild.
Ventilation:
Who said glue doesn’t need a breath of fresh air? Adequate ventilation is crucial for a successful drying process. Proper airflow helps evaporate moisture, accelerating drying time. Find a well-ventilated workspace or use fans to keep things breezy during the bonding process.
Estimated Drying Times
Understanding the estimated drying times of Elmer’s Carpenter’s wood glue is crucial for achieving optimal bonding results. In this comprehensive guide, we will delve into the factors that influence drying times and provide you with practical tips to ensure a strong and durable bond. So, let’s embark on a journey to unlock the secrets of glue drying times.
Factors Affecting Drying Time:
- Wood Type: Like a thirsty sponge, different types of wood absorb moisture at varying rates, directly impacting drying times. Hardwoods such as oak and maple take longer to dry compared to softer woods like pine or cedar. Consider the characteristics of your chosen wood to gauge the expected drying time.
- Humidity Level: The ambient humidity in your workspace plays a significant role in glue drying times. High humidity prolongs drying, as moisture in the air impedes evaporation. Conversely, low humidity accelerates drying by facilitating faster moisture evaporation. Aim for an ideal humidity level ranging between 40% and 60% to optimize drying times.
- Temperature: Just as seasons affect our moods, temperature influences the rate at which glue dries. Higher temperatures speed up the drying process by stimulating molecular activity, while lower temperatures slow it down. Working within a temperature range of 50°F to 90°F (10°C to 32°C) creates an environment conducive to efficient drying.
- Amount of Glue Applied: The thickness of the glue layer applied significantly impacts drying times. Thin, even layers dry faster compared to thicker layers. Remember, when it comes to glue application, less is often more.
Estimated Drying Times:
- Initial Setting: Elmer’s Carpenter’s wood glue typically sets within 20 to 30 minutes. During this time, the glue undergoes a transformation, transitioning from a liquid to a gel-like consistency as it begins to harden and bond the wood pieces together.
- Full Drying and Curing: While the initial setting may occur relatively quickly, it is vital to allow sufficient time for full drying and curing. This process can take up to 24 hours or longer, depending on the previously mentioned factors. Patience is key to ensuring a strong and enduring bond.
Ensuring a Strong Bond:
To ensure the strength and longevity of your bond, follow these best practices:
Avoid Disturbance: Once glued, allow the pieces to remain undisturbed during the drying and curing process. Applying pressure or stressing the joint prematurely can weaken the bond and compromise its durability.
Tips for Faster Drying Times
Waiting for glue to dry can be a test of patience, especially when working on woodworking projects. Luckily, there are simple tips and tricks that can help speed up the drying time of Elmer’s Carpenter’s wood glue. In this article, we’ll explore five helpful tips to get your projects completed faster than ever before.
Tip 1: Thin Application
Less is more when it comes to using Elmer’s Carpenter’s wood glue. Apply a thin layer of glue to both surfaces before joining them together. This reduces the amount of moisture that needs to evaporate, resulting in faster drying times. Remember, a little goes a long way.
Tip 2: Optimal Temperature
Just like a cozy warm blanket in winter, higher temperatures accelerate the drying process. Aim for an environment with a temperature range of 70-80°F (21-27°C) for optimal drying time. So turn up the heat or find a warm spot to work in. Your glue will thank you.
Tip 3: Moderate Humidity
Finding the right humidity level is crucial for faster drying times. High humidity levels can slow down the process, while low humidity levels facilitate quicker drying. Aim for a moderate humidity level of around 40-50% for optimal results. Don’t let humidity dampen your progress.
Tip 4: Enhance Ventilation
Good airflow is key to speeding up drying times. Open windows or use fans to enhance air circulation in the room where the glue is applied. The moving air helps carry away moisture from the glue, allowing it to dry more quickly. Let the fresh air work its magic.
Tip 5: Clamping Power
For larger or heavier projects, clamping can be a game-changer. Applying even pressure using clamps or weights helps squeeze out excess moisture between the surfaces, promoting faster evaporation and drying. Don’t underestimate the power of a good clamp.
Tips for Ensuring a Strong Bond
When it comes to woodworking projects, ensuring a strong bond is essential for the longevity and durability of your creations. One reliable adhesive that can help you achieve this is Elmer’s Carpenter’s wood glue. In this article, we will explore some tips and techniques to maximize the bond strength when using this adhesive.
Apply the glue evenly:
To create a strong bond, it’s crucial to apply the glue evenly on both surfaces you wish to join. Imagine spreading peanut butter on bread – you want a nice, even layer to ensure every part sticks together firmly. This uniform application helps prevent weak spots or gaps that can compromise the overall bond strength.
When applying the glue, use a brush or spreader to distribute it evenly across the surface. Avoid applying too much glue, as excess adhesive can squeeze out and weaken the bond. Similarly, applying too little glue may result in incomplete coverage and a weaker connection. Take your time and apply the glue with precision.
Use clamps or weights:
To hold the glued surfaces together, consider using clamps or weights. Clamps act like hugging arms, keeping the surfaces in tight contact as the glue dries. Similarly, weights exert pressure, ensuring a secure connection. Just like holding hands tightly makes you feel safe, clamping or weighting the glued surfaces prevents any movement during drying, resulting in a stronger bond.
When using clamps, position them strategically along the glued area to distribute pressure evenly. Tighten them enough to ensure a firm hold without causing excessive displacement of the glue. If using weights, make sure they are evenly distributed and provide enough pressure to keep the surfaces in contact.
Allow sufficient drying time:
Patience is key. Elmer’s Carpenter’s wood glue requires adequate drying time to achieve optimal bonding strength. Depending on factors like temperature and humidity, drying times may vary. Rushing the process could weaken the bond, just like pulling apart sticky candy before it’s fully set. Follow the manufacturer’s recommendations and wait patiently for a solid connection.
During the drying time, avoid disturbing or moving the glued surfaces to ensure a strong bond. If you need to check the progress, gently touch the surface without applying pressure. Remember, a strong bond takes time to form, so allow the glue sufficient drying time for maximum effectiveness.
Maintain ideal temperature and humidity:
Temperature and humidity play significant roles in glue drying. Think of glue as a plant that needs the right conditions to grow – it thrives at temperatures between 70-80°F (21-27°C) and around 50% relative humidity. Extreme weather conditions, like scorching heat or dampness, can interfere with drying, affecting the bond’s strength. Find the Goldilocks zone for your glue.
How to Clean Up Excess Glue
Glue is a versatile tool for bonding materials together, but dealing with excess glue can be a sticky situation. Fortunately, we’ve got you covered with our comprehensive guide on how to clean up excess glue. From quick action to specialized solvents, we’ll walk you through the process step by step.
Act quickly, act smart:
When it comes to cleaning up excess glue, time is of the essence. Glue dries fast, so the quicker you address the issue, the easier it will be to remove. Keep a damp cloth or sponge handy to gently wipe away any wet glue immediately. Be careful not to spread it around or push it further into the surface; instead, lift it off in one smooth motion. This prevents the glue from seeping into pores or crevices and causing more damage.
Dealing with dried glue:
If your excess glue has already dried and hardened, don’t panic. You have options. Use a sharp razor blade or scraper to carefully scrape away the dried glue. Take care not to scratch or damage the surface beneath. Work at a shallow angle and apply gentle pressure to minimize any potential damage. For delicate surfaces, such as wood or plastic, use a plastic scraper instead of metal to avoid scratches.
Soften and scrape:
Another technique to tackle dried glue is by applying heat. Grab your trusty hairdryer and set it to low heat. Aim it at the glue spot, moving it back and forth at a distance of about six inches. Within seconds, you’ll notice the glue becoming more pliable and easier to remove. Once softened, gently scrape away the glue using a plastic scraper or even your fingernail. For larger areas of dried glue, consider using a heat gun on its lowest setting.
Adhesive removers for stubborn stains:
For those stubborn dried glue stains that refuse to budge, turn to adhesive removers or solvents specifically designed for removing glue. Look for products like acetone or rubbing alcohol, which are effective at dissolving glue residues. Follow the product instructions carefully, and always test it on a small, inconspicuous area before applying it to the entire surface. Different surfaces may require different cleaning methods, so refer to manufacturer recommendations.
Post-cleanup TLC:
After successfully removing the excess glue, give the area some extra love by cleaning it with mild soap and water. This ensures any residue is completely removed, preventing potential damage or discoloration to the surface. Rinse thoroughly and pat dry with a clean cloth. For delicate surfaces, such as painted or varnished wood, use a mild cleaner specifically formulated for those materials.
Advantages of Using Elmer’s Carpenter’s Wood Glue
When it comes to woodworking projects, choosing the right adhesive is crucial for creating strong and durable bonds between wood surfaces. Elmer’s Carpenter’s Wood Glue is a standout choice that offers numerous advantages. In this blog post, we will explore the benefits of using this versatile adhesive, so you can confidently tackle your woodworking projects.
- Strong Bond: Elmer’s Carpenter’s Wood Glue is specifically formulated for woodworking projects, ensuring a strong and reliable bond. With this glue, you can say goodbye to cracked or separated joints. It can withstand heavy loads and provide long-lasting durability, ensuring your creations stand the test of time.
- Versatility: This adhesive works wonders on various wood materials, including hardwoods, softwoods, and plywood. Whether you’re building furniture, making cabinets, or repairing carpentry projects, Elmer’s Carpenter’s Wood Glue is a reliable choice that offers excellent adhesion across different wood types. You won’t need multiple glues for different projects – this one does it all.
- Easy Application: Applying glue shouldn’t be a hassle, and with Elmer’s Carpenter’s Wood Glue, it certainly isn’t. Its smooth consistency allows for easy spreading and even distribution. You won’t have to struggle with clumps or uneven coverage. Plus, it dries quickly, so you can work efficiently without unnecessary waiting time.
- Non-Toxic and Safe: Safety should always be a priority when working with adhesives. Elmer’s Carpenter’s Wood Glue is non-toxic and emits no harmful fumes or odors during application. This makes it an ideal choice for both professionals and DIY enthusiasts alike. You can work in a well-ventilated area without worrying about toxic fumes. Clean-up is a breeze too – simply use soap and water.
- Sandable and Paintable Finish: Achieving a seamless finish is essential in woodworking projects. Luckily, Elmer’s Carpenter’s Wood Glue dries to a sandable and paintable finish. After the glue has fully cured, you can easily sand the surface to perfection, ensuring an invisible bond after painting or staining. You won’t have to worry about visible glue lines ruining the aesthetic of your project.
- Long Shelf Life: Don’t you hate it when adhesives dry out before you can complete your projects? With Elmer’s Carpenter’s Wood Glue, that’s not a concern. It boasts an impressive shelf life, allowing you to store it for extended periods without losing its effectiveness. This is great news for occasional woodworkers or those who tackle projects sporadically. You can trust that the glue will still work perfectly even if it has been sitting on your shelf for a while.
Disadvantages of Using Elmer’s Carpenter’s Wood Glue
When it comes to woodworking projects, Elmer’s Carpenter’s Wood Glue is often touted as a go-to adhesive due to its reliability and ease of use. However, like any product, it has its fair share of disadvantages that may impact your project’s success.
In this blog post, we will delve into the drawbacks of using Elmer’s Carpenter’s Wood Glue, offering insights for both beginners and seasoned woodworkers.
Lengthy Drying Time:
Elmer’s Carpenter’s Wood Glue is known for its strong bond, but this strength comes at a cost – a long drying time. With an average curing period of 24 hours, patience is key when using this glue. If you’re working on time-sensitive projects or simply lack the patience to wait, you may find this disadvantage frustrating. It is important to plan your project timeline accordingly to account for the extended drying time.
Lack of Water Resistance:
While Elmer’s Carpenter’s Wood Glue excels in many areas, water resistance isn’t one of them. Unlike other wood glues that offer waterproof or water-resistant properties, this glue is not designed to withstand moisture exposure. If your project will be subjected to high humidity or regular water contact, such as outdoor furniture or kitchen/bathroom fixtures, it may not be the best choice. Consider using a different type of glue that offers better water resistance to ensure the longevity of your project.
Limited Compatibility:
Elmer’s Carpenter’s Wood Glue is formulated for use on porous materials like softwoods and plywood. Unfortunately, it may not deliver the same strength on hardwoods or non-porous surfaces. This limitation restricts its versatility and may require you to explore alternative glue options for specific projects. It is crucial to assess the type of wood you are working with and choose a glue that is compatible to ensure a strong and durable bond.
Gap-Filling Challenges:
When it comes to gap-filling capabilities, Elmer’s Carpenter’s Wood Glue falls short compared to some other wood glues. As it dries, it tends to shrink rather than expand and fill gaps. Consequently, larger gaps or imperfections in the wood may not be effectively addressed, compromising joint strength and stability. If you are working on projects with significant gaps or uneven surfaces, consider using a gap-filling wood glue specifically designed to address these challenges.
Limited Shelf Life:
Elmer’s Carpenter’s Wood Glue boasts a relatively short shelf life compared to its competitors. Once opened, it is recommended to use the glue within a year for optimal performance. If you’re an occasional woodworker or have long-term projects, this limitation may result in wastage or diminished effectiveness. To avoid potential issues, it is important to check the expiration date on the bottle before use and consider purchasing smaller quantities if you anticipate infrequent use.
U0hhFjjW5EU” >
Conclusion
Elmer’s Carpenter’s wood glue is known for its exceptional drying time. You won’t have to wait around for hours on end, twiddling your thumbs and hoping for the glue to set. No, with this remarkable adhesive, you can get back to work in no time.
In fact, Elmer’s Carpenter’s wood glue typically dries within 20-30 minutes. That means you can swiftly move on to the next step of your woodworking project without any unnecessary delays.
But wait, there’s more. Not only does this glue dry quickly, but it also forms a strong bond that will withstand the test of time. Your wooden creations will be held together securely, ensuring their longevity and durability.
So, whether you’re a professional carpenter or a DIY enthusiast, Elmer’s Carpenter’s wood glue is the perfect choice for all your woodworking needs. Say goodbye to long waiting periods and hello to efficient and reliable adhesion.