Today, we’re diving headfirst into the world of adhesive wonders as we uncover the secrets of Gorilla Super Glue Gel. If you’ve ever found yourself in a sticky situation (pun intended) where a secure bond is a must-have, this incredible product is your knight in shining armor. With its unique gel formula designed for precision application and unmatched durability, Gorilla Super Glue Gel revolutionizes the art of sticking things together. So, buckle up and get ready to become a master of bonding with these easy-to-follow steps.
In this blog post, we’ll explore the versatility and strength of Gorilla Super Glue Gel, revealing insider tips and techniques that guarantee optimal usage. Whether you’re fixing a cherished heirloom, crafting a jaw-dropping DIY masterpiece, or tackling everyday household repairs, this glue is your ultimate companion. No matter the project at hand, stick around as we unveil its tremendous capabilities and simplify the process for you.
Get ready to unleash the power of Gorilla Super Glue Gel and take your bonding game to a whole new level. Fasten your seatbelts, folks; we’re about to embark on an adhesive adventure that will have you sticking with Gorilla for life. Let’s dive in.
What is Gorilla Super Glue Gel?
Contents
- 1 What is Gorilla Super Glue Gel?
- 2 Preparing the Surfaces for Bonding
- 3 Opening and Applying the Gorilla Super Glue Gel
- 4 Joining the Surfaces Together
- 5 Holding the Bonded Surfaces in Place
- 6 Cleaning Up Excess Glue
- 7 Curing and Setting of Bonded Surfaces
- 8 Cleaning and Storing the Gorilla Super Glue Gel Tube
- 9 Conclusion
This powerful adhesive is the ultimate solution for those seeking strong and long-lasting bonds. Whether you’re repairing broken items or working on DIY projects, Gorilla Super Glue Gel is the go-to glue that will exceed your expectations.
Quick-Drying Formula:
Bid farewell to the frustration of waiting hours for your glue to dry. Gorilla Super Glue Gel sets in just 10-30 seconds, ensuring fast and efficient bonding. This quick-drying feature is especially beneficial when you need to fix something urgently or when working on small projects that demand precision.
Unparalleled Strength:
Once cured, Gorilla Super Glue Gel forms an unbreakable bond that can withstand heavy-duty use. Say goodbye to worrying about your repair job falling apart. This adhesive guarantees a durable hold, providing you with peace of mind that your project will endure the test of time.
Versatile Application:
Gorilla Super Glue Gel is a true multi-tasker, capable of bonding various materials such as metal, wood, ceramics, plastics, rubber, and more. Its versatility makes it an indispensable adhesive for a wide range of projects. From household repairs to crafting endeavors, this glue has got your back.
Resilience in the Face of Adversity:
This adhesive not only boasts strength but also exhibits impressive resistance to impact, moisture, and extreme temperatures. Whether it’s indoor or outdoor applications, Gorilla Super Glue Gel can handle it all. Trust this adhesive to withstand the harshest environmental conditions without compromising its performance.
Precision Application Made Easy:
The gel consistency of Gorilla Super Glue Gel ensures greater control and precision during application. Unlike runny liquids that tend to drip or slide off surfaces, this gel formula stays in place, minimizing messes and ensuring accurate placement. The precision tip on the bottle makes it a breeze to dispense the glue precisely where you need it.
Preparing the Surfaces for Bonding
Before diving into any bonding project with Gorilla Super Glue Gel, it’s essential to lay the groundwork for success. Properly preparing the surfaces that will be bonded together is the key to achieving a strong and long-lasting bond. So, grab your cape and let’s get started.
- Cleanliness is Key: Ensure your surfaces are clean and free from any dirt, dust, grease, or oil. These pesky contaminants can interfere with the bonding process and weaken the bond. Give them a good scrub using a mild detergent or soap and water solution. A soft brush or cloth will do the trick in removing any dirt or debris. Rinse thoroughly and allow the surfaces to dry completely before moving forward.
- Tailored Cleaning for Specific Materials: Certain materials, like plastics or metals, may require specific cleaning methods. Don’t worry, though – just consult the manufacturer’s instructions or guidelines for these materials to ensure proper cleaning and preparation.
- Roughen Up for Better Adhesion: Sometimes, your surfaces need a little roughening up to enhance adhesion. No, we’re not talking about starting a fight – just lightly sanding the surfaces with fine-grit sandpaper. The goal is to create a slightly textured surface that allows the glue to grip more effectively. But remember, be gentle. Applying too much pressure can damage or deform the surfaces. And don’t forget to remove any dust or debris resulting from sanding before moving on.
- Priming for Porous Materials: Bonding porous materials like wood or fabric requires an extra step. In these cases, applying a primer or adhesive promoter before using Gorilla Super Glue Gel can work wonders. These products help seal the surface and improve adhesion. Just follow the manufacturer’s instructions for applying the primer or adhesive promoter and allow sufficient time for drying or curing before proceeding with the glue application.
- Align and Secure: Before applying Gorilla Super Glue Gel, ensure that the surfaces are properly aligned and fit together snugly. This will help ensure that the bond is strong and secure. Use clamps or other suitable methods to hold the surfaces in place while the glue cures. And speaking of curing, make sure to follow the manufacturer’s instructions for the recommended curing time, as it may vary depending on the materials being bonded.
- Safety First: Oh, and one more thing – safety first. Remember to work in a well-ventilated area and wear appropriate personal protective equipment, such as gloves or eye protection when handling and applying Gorilla Super Glue Gel. We want to keep our superhero powers intact, after all.
Opening and Applying the Gorilla Super Glue Gel
Today, we embark on a journey into the realm of Gorilla Super Glue Gel. This remarkable product has earned its reputation for exceptional strength and versatility, making it the ultimate choice for all your bonding needs.
In this comprehensive guide, we will walk you through the process of opening and applying Gorilla Super Glue Gel, ensuring that you achieve the robust and enduring bonds you desire. However, before we delve into the details, always prioritize safety by carefully reading the instructions on the packaging and taking necessary precautions.
Let’s dive right in.
Step 1: Prepare the Surfaces
To unleash the full potential of Gorilla Super Glue Gel, meticulous surface preparation is paramount. Cleanliness reigns supreme. Ensure that the surfaces you intend to bond are clean and dry, as this guarantees optimal adhesion. If necessary, roughen up smooth surfaces using sandpaper to enhance grip.
Step 2: Unlock the Tube
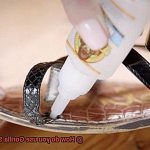
Now, it’s time to unlock the secrets concealed within the Gorilla Super Glue Gel tube
Begin by twisting off the cap in a counterclockwise motion, revealing the precision tip applicator. Exercise caution during this step to avoid unintentional spills by refraining from squeezing the tube.
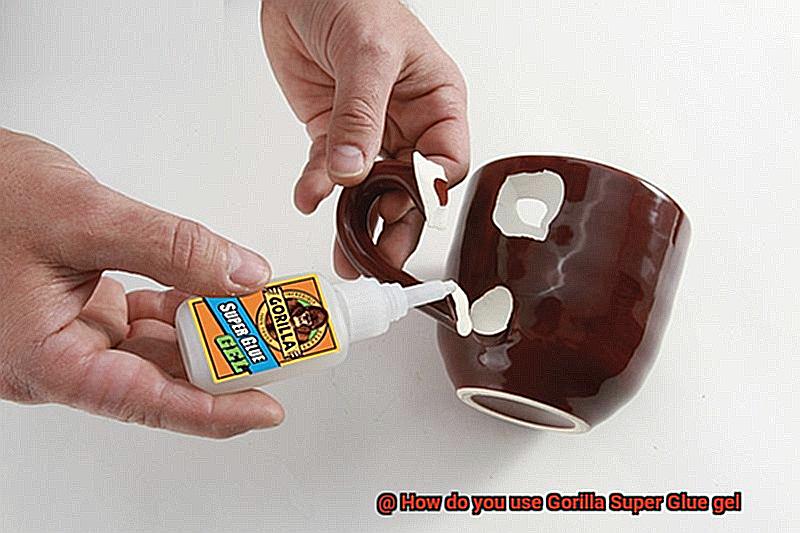
Step 3: Apply with Precision
With the precision tip applicator unveiled, gently squeeze the tube to release a small amount of Gorilla Super Glue Gel onto one of the surfaces you wish to bond. Remember, a little goes a long way. Rest assured that our gel formula ensures controlled application, alleviating concerns about messy drips.
Step 4: Forge an Unbreakable Union
Having applied the glue, carefully align and press together the two surfaces. Time is of the essence as Gorilla Super Glue Gel dries swiftly. Prior to exerting firm pressure for a few seconds, ensure the alignment is correct. Congratulations. You have forged a bond of unparalleled strength.
Step 5: Tidy Up
After completing the bonding process, eliminate any excess glue using a dry cloth. In the event of dried glue residue, employ acetone or nail polish remover for clean-up. Always adhere to safety guidelines and operate in well-ventilated spaces.
And there you have it. The art of opening and applying Gorilla Super Glue Gel has been unveiled before your eyes. Armed with these effortless steps, you can confidently tackle all your DIY projects, secure in the knowledge that your bonds will be unyielding and long-lasting.
Joining the Surfaces Together
Joining surfaces together can be a challenging task, but with Gorilla Super Glue gel, you can achieve a strong and lasting bond. This adhesive is known for its reliability and effectiveness, making it a worthy choice for DIY projects and repairs.
Before you begin the bonding process, it’s crucial to prepare the surfaces properly. Cleanliness is key here, so ensure that the surfaces are free from dirt, dust, and moisture. This will allow the adhesive to work its magic without any obstacles.
Once the surfaces are clean and dry, it’s time to apply the Gorilla Super Glue gel. Remember, a little goes a long way with this adhesive. Apply a small amount to one of the surfaces, being precise and avoiding excessive use.
Now comes the crucial part – joining the surfaces together. Press them firmly, ensuring accurate alignment for a proper bond. Applying pressure helps the glue spread evenly, creating a strong connection.
Hold the surfaces in place for at least 30 seconds. This initial contact time allows the adhesive to start bonding. But don’t stop there. To achieve a complete bond, let the glued surfaces sit undisturbed for at least 24 hours. This will ensure maximum strength and durability.
Keep in mind that Gorilla Super Glue gel works best on porous materials like wood, ceramics, fabric, and some plastics. It may not be suitable for all types of materials, so always read the manufacturer’s instructions or conduct a small test before using it extensively.
Accidents happen, and if you find yourself with excess glue or it squeezes out while joining the surfaces, don’t panic. Quickly wipe off the excess with a damp cloth or use acetone if necessary. Just remember that once this glue dries, it becomes difficult to remove.
To maintain optimal performance and longevity, store Gorilla Super Glue gel in a cool and dry place. Seal the container tightly after each use to prevent drying out.
When working with adhesives like Gorilla Super Glue gel, exercise caution. Keep it away from children, avoid contact with your skin and eyes, and in case of accidental contact, rinse thoroughly with water and seek medical attention if necessary.
Holding the Bonded Surfaces in Place
This powerful adhesive is ideal for joining surfaces, but it’s essential to understand how to hold those surfaces in place for a robust and long-lasting bond.
In this comprehensive guide, we will explore the best practices and techniques for securely holding bonded surfaces when using Gorilla Super Glue gel, ensuring that your projects stand the test of time.
Clean and Dry Surfaces:
The first step in achieving a strong bond is preparing the surfaces you intend to bond. Before applying Gorilla Super Glue gel, ensure that the surfaces are clean and dry. Remove any dirt, oil, or moisture that could potentially interfere with the bonding process.
A pristine surface allows the glue to adhere more effectively, resulting in a stronger bond.
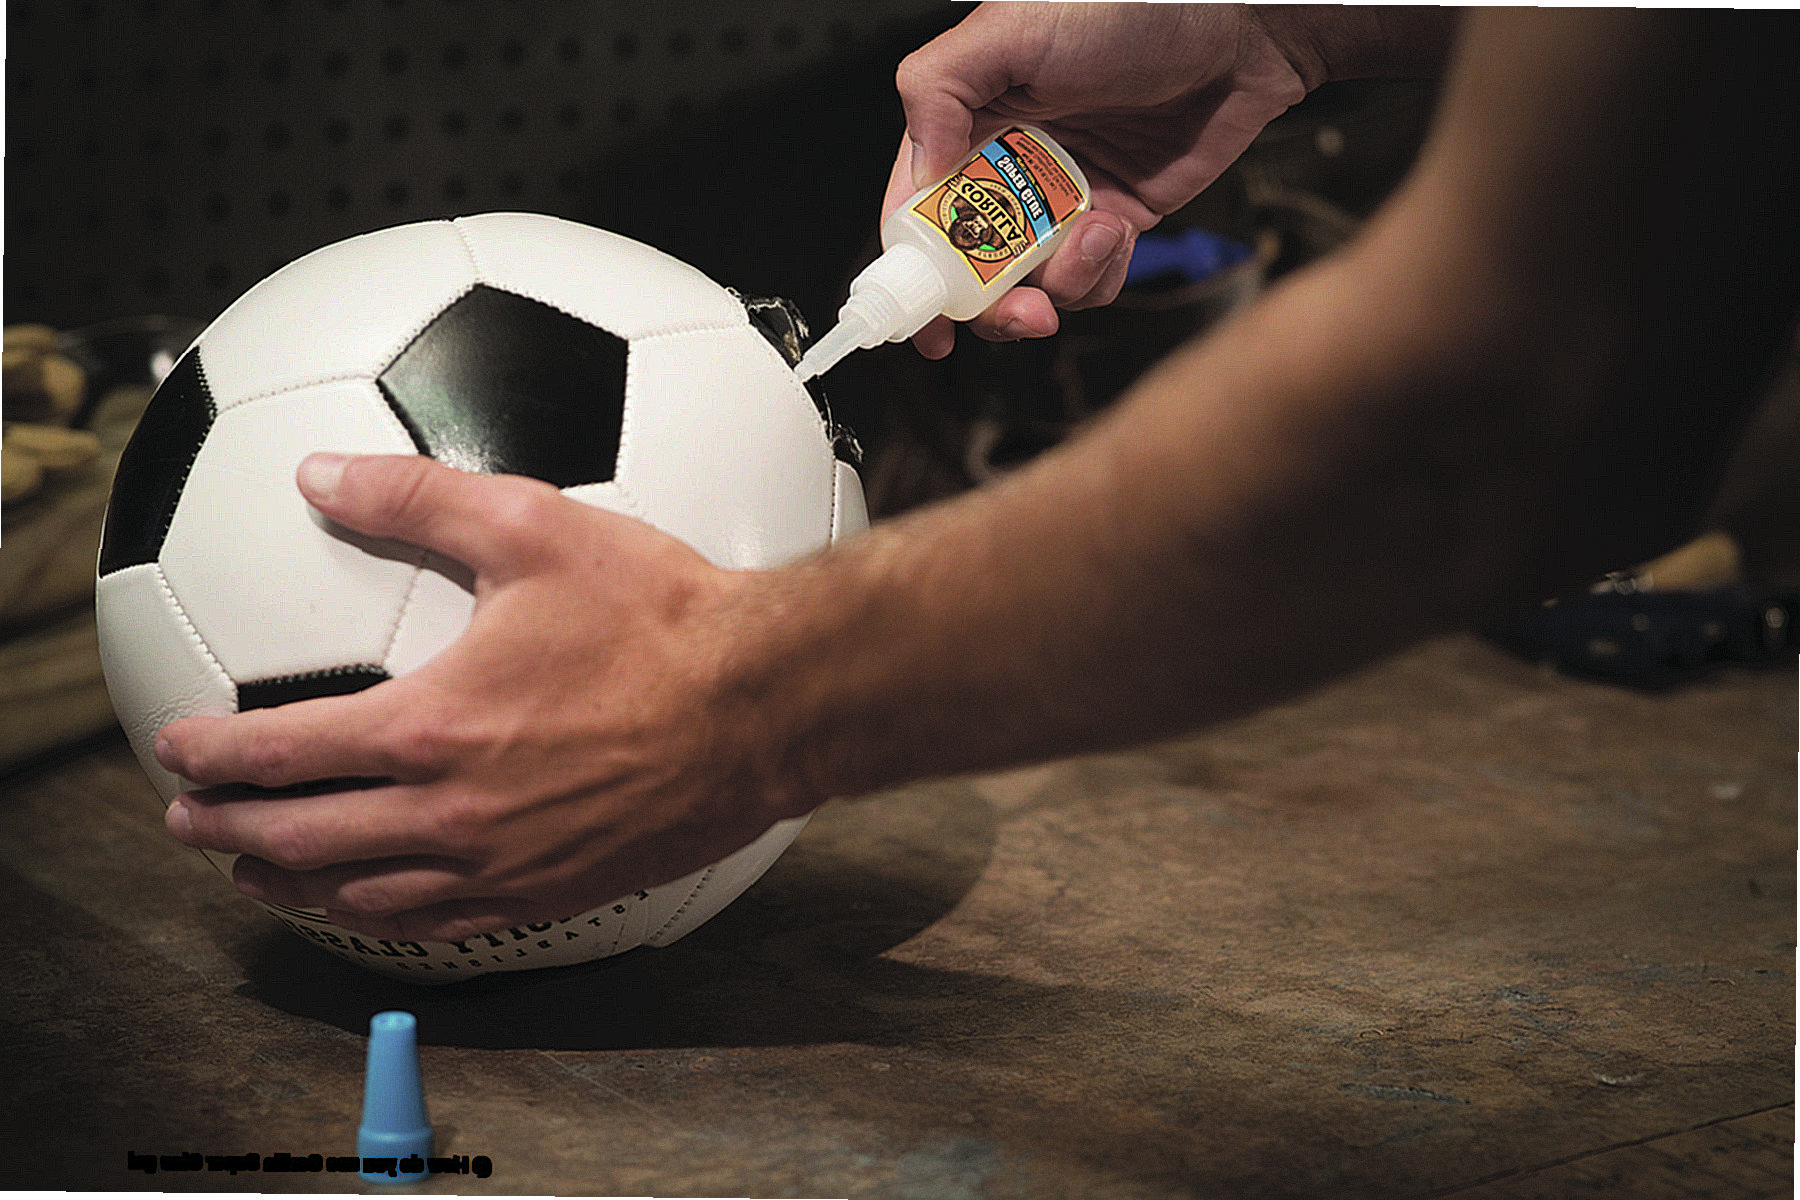
Precise Application:
Gorilla Super Glue gel features a precision nozzle that allows for easy application and control. To achieve optimal results, apply a small amount of glue onto one of the surfaces. It is recommended to use approximately one drop per square inch of surface area.
The gel formula ensures smooth application and precise distribution, enhancing the overall bond strength.
Firmly Press Surfaces Together:
Once the glue is applied, firmly press the two surfaces together. This initial contact is crucial for creating a strong foundation for your project. It ensures even distribution of the adhesive and promotes maximum bond strength.
Hold the surfaces in place for at least 30 seconds, allowing the glue to begin bonding effectively.
Consider Clamping for Added Stability:
For larger or heavier objects, such as furniture repairs or crafting projects, additional stability during the bonding process may be necessary. Utilizing clamps or other tools can prevent any movement that could weaken the bond and ensure a secure hold. Consider using clamps to hold the surfaces together while the glue sets, providing added stability and peace of mind.
Avoid Disturbing the Bond:
While Gorilla Super Glue gel starts setting within minutes, it is crucial to avoid touching or moving the bonded surfaces during the drying process. Any disturbance can disrupt bond formation and compromise its strength. Allow a full 24 hours for the glue to cure completely and reach its maximum bond strength. Patience during this crucial period ensures a durable and reliable bond.
Remove Excess Glue:
After the glue has fully cured, you can remove any excess by gently scraping it off with a sharp tool or sanding it down if necessary.
This final step not only ensures a clean and professional finish but also eliminates any potential weak points or unevenness in the bond.
Cleaning Up Excess Glue
Cleaning up excess glue can be a frustrating and messy task, but with the right techniques, it can be easily tackled. If you find yourself in a sticky situation with Gorilla Super Glue gel, here are some steps to help you clean up the mess:
- Act quickly: Time is of the essence when dealing with excess glue. The longer it sits, the harder it becomes to remove. So, don’t waste any time and get to work right away.
- Wipe away wet glue: Start by using a clean cloth or paper towel to gently wipe away any excess glue that is still wet. Be careful not to spread the glue further or push it deeper into the material.
- Soften dried glue: If the excess glue has dried and hardened, you can use acetone or nail polish remover to soften it. Apply a small amount of acetone onto a cloth or cotton ball and gently rub the dried glue until it starts to soften and come off.
- Test surfaces: Keep in mind that acetone may not be suitable for all surfaces, so it’s important to test it on a small, inconspicuous area first to ensure it doesn’t cause any damage.
- Soak in warm soapy water: Another option for removing dried Gorilla Super Glue gel is to soak the affected area in warm water with dish soap for a few minutes. This will help soften the glue. Then, using a soft brush or sponge, gently scrub away the glue until it loosens and can be wiped away.
- Scrape off excess glue: In some cases, scraping off the excess glue may be necessary. Use a plastic scraper or a blunt knife and carefully scrape off the dried glue, applying gentle pressure. Be cautious not to damage the surface.
- Use adhesive removers: If none of these methods work, there are specialized adhesive removers available in the market that can effectively dissolve and remove dried glue. These removers are designed specifically for removing tough adhesives and should be used according to their specific instructions.
- Clean the area thoroughly: After successfully removing the excess glue, make sure to clean the area thoroughly to ensure no residue remains. Use warm soapy water or a mild household cleaner and gently scrub the surface to remove any leftover glue or cleaning agents.
- Rinse and dry: Finally, rinse the area with clean water and dry it thoroughly. This will help prevent any potential damage or discoloration caused by the glue or cleaning agents.
Curing and Setting of Bonded Surfaces
Curing and setting of bonded surfaces is a crucial process in ensuring a strong and long-lasting bond when using Gorilla Super Glue gel. This fast-acting adhesive is known for its quick curing time, making it a popular choice for various projects. Here’s everything you need to know about this process, from proper alignment to bond strength.
First and foremost, proper alignment of the bonded surfaces is essential before applying the glue. Once the glue sets, repositioning becomes difficult, so taking the time to align them correctly is crucial.
Gorilla Super Glue gel boasts a fast curing time, starting to set within seconds of application. This means that you don’t have to wait around for hours for the glue to dry. However, it’s important to note that full curing takes about 24 hours, allowing the adhesive to reach its maximum strength.
To ensure a strong bond, it is recommended to apply pressure on the bonded surfaces for at least 30 seconds after applying the glue. This can be achieved by using clamps or firmly holding the surfaces together. Applying pressure helps the adhesive penetrate into any pores or crevices of the materials, enhancing the bond’s strength.
During the curing process, it’s crucial to avoid any movement or disturbance of the bonded surfaces. Even slight movements can weaken the bond and affect its overall strength. For vertical or overhead applications, using a support or temporary brace can help keep the surfaces in place until the glue fully cures.
Once the glue has cured, it forms a durable and strong bond that can withstand various stresses and strains. You can trust that your bonded surfaces will hold up well over time.
In case of excess glue or spills, don’t panic. Act quickly and wipe away wet glue. If the glue has dried, you can soften it with acetone or nail polish remover (after testing on a small area). Soaking in warm soapy water can also help remove excess glue. If necessary, you can carefully scrape off any remaining glue. Adhesive removers can be used as a last resort, followed by thorough cleaning and rinsing.
Cleaning and Storing the Gorilla Super Glue Gel Tube
When it comes to cleaning up spills or excess glue from the Gorilla Super Glue Gel Tube, time is of the essence. Act quickly to prevent the glue from drying and hardening. Grab a cloth or paper towel and gently wipe away as much of the glue as possible before it sets. Avoid using water initially, as it can activate the glue and make it stickier.
If you find that the glue has already dried on a surface, there are a couple of methods you can try for removal. One option is to use acetone or nail polish remover. Apply a small amount to a cloth or cotton swab and gently rub the affected area until the glue starts to loosen. Take caution when using acetone on delicate surfaces, as it can cause damage or discoloration.
Another effective method for removing dried Gorilla Super Glue Gel is applying heat. Get your trusty hairdryer out and set it to low heat. Direct the warm air towards the glued area, and watch as the heat softens the glue, making it easier to peel or scrape off. Be careful not to overheat or damage the surface.
Once you have successfully cleaned up any spills or excess glue, it’s time to store the Gorilla Super Glue Gel Tube properly. Ensure that the cap is securely tightened to prevent air from entering and potentially drying out the glue inside. It is recommended to store the tube in a cool and dry place, away from direct sunlight or extreme temperatures.
To further extend the life of your Gorilla Super Glue Gel, consider storing it in a ziplock bag or an airtight container with a moisture-absorbing packet. This additional step helps prevent moisture from getting into the tube and causing premature curing or hardening of the glue.
Remember, always keep Gorilla Super Glue Gel out of reach of children and pets. It is a strong adhesive and can cause harm if ingested or mishandled. If accidental contact occurs, seek medical advice immediately.
AcsYfpyLAzQ” >
Also Read: Is Gorilla Super Glue Waterproof?
Conclusion
Gorilla Super Glue gel is a powerful adhesive that can be used for a variety of projects. To use it effectively, follow these steps:
- Prepare the surfaces: Make sure the surfaces you are bonding are clean, dry, and free from any dirt or debris. This will ensure a strong and lasting bond.
- Apply a small amount: Squeeze out a small amount of Gorilla Super Glue gel onto one of the surfaces. Remember, a little goes a long way with this super-strong adhesive.
- Press the surfaces together: Carefully align the two surfaces and press them firmly together. Hold them in place for about 10-30 seconds to allow the glue to set.
- Avoid excessive glue: Be cautious not to apply too much glue as it can overflow and create a messy bond. A thin layer is usually sufficient for most applications.
- Keep it secure: After bonding, make sure to keep the glued surfaces secure and undisturbed for at least 24 hours to allow the glue to fully cure.
- Clean up any excess: If you accidentally get some glue on your skin or other unintended areas, quickly wipe it away with a cloth dampened with acetone or nail polish remover.
Remember, Gorilla Super Glue gel is extremely strong and bonds quickly, so be sure to work efficiently and carefully during application. It’s ideal for various materials like metal, plastic, wood, ceramics, and more.