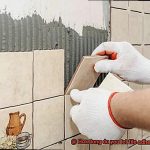
Imagine this: you’re knee-deep in a DIY project, or maybe your favorite mug just broke into a thousand pieces. In your moment of need, you turn to the legendary Gorilla Glue for salvation. But there’s one burning question on your mind: how long do you have to wait for it to set? Well, my friend, today we’re diving into the depths of this adhesive wonder to give you all the answers.
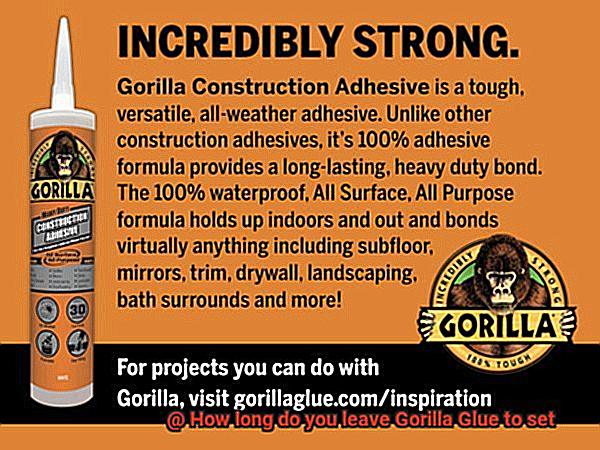
Gorilla Glue is the superhero of adhesives, loved by DIY enthusiasts, hobbyists, and even professionals. Its unmatched strength and ability to bond anything and everything make it a force to be reckoned with. But here’s the catch – if you want that bond to reach its full potential, you’ve got to give it some time.
So how long is “long enough”? It depends on a few things like temperature, humidity, and the materials you’re gluing together. According to Gorilla Glue themselves, for the strongest bond possible, you should let it cure for a full 24 hours. But here’s the good news – in less demanding situations, you might get away with waiting just 1-2 hours for decent strength.
Imagine this: you’re fixing that wobbly chair leg. You sit there nervously as time ticks away in the background, hoping that your glue job holds up when it matters most. Knowing exactly how long to wait not only saves you from endless boredom but also ensures your hard work doesn’t go down the drain with one wrong move.
Now I know what you’re thinking – 24 hours sounds like an eternity. Trust me, I feel your pain. But here’s why it’s worth every agonizing second: during those hours of waiting, something magical happens.
The glue undergoes a chemical reaction called cross-linking, transforming into a bond that’s as tough as nails. And let me tell you, impatience is not your friend in this situation.
Rushing the process could lead to a weak bond and a whole lot of disappointment.
Factors Affecting Setting Time
Contents
- 1 Factors Affecting Setting Time
- 2 Original Gorilla Glue Curing Time
- 3 Quick Cure Option for Faster Setting
- 4 Dampening Porous Surfaces Before Applying Glue
- 5 Safety Precautions When Working with Gorilla Glue
- 6 Stress on Bond After Initial Setting Time
- 7 Removing Excess Glue Squeeze-Out
- 8 Water-Resistant Properties of Gorilla Glue
- 9 Conclusion
When it comes to bonding materials together, Gorilla Glue is a top choice for many DIY enthusiasts and professionals alike. Its strong bond and versatility make it ideal for various projects. However, achieving the best results with Gorilla Glue requires an understanding of the factors that affect its setting time. Let’s take a closer look at these factors and how they can impact your glueing experience.
Temperature is a key player in the setting time of Gorilla Glue. Higher temperatures accelerate curing, while lower temperatures slow it down. But be cautious. Extreme temperatures, whether scorching or freezing, can harm the glue’s performance and overall bond strength. So, stick to a moderate temperature range for optimal results.
Humidity also has a say in the setting time. In humid environments, Gorilla Glue takes longer to set due to excess moisture interfering with the curing process. Conversely, dry conditions speed up the cure. To strike a balance, work in a well-ventilated area with moderate humidity levels.
The thickness of the glue application affects setting time too. Thick layers take longer to cure because they need more time for moisture to evaporate fully. Follow the manufacturer’s instructions regarding recommended thickness for optimal results.
The type of material being bonded also plays a role. Porous materials like wood or fabric absorb moisture from the glue, potentially prolonging setting time. Non-porous materials like metal or glass may cure faster due to less moisture absorption.
Applying pressure during curing influences how quickly Gorilla Glue sets. Firm and consistent pressure ensures proper contact between surfaces and better adhesion. Uneven or inadequate pressure can result in incomplete bonding and longer setting time. Use clamps, weights, or other methods to maintain pressure during curing.
Lastly, proper surface preparation is essential for optimal bonding and setting time. Surfaces should be clean, dry, and free from dust, grease, or contaminants that hinder adhesion. Some substrates may require sanding or roughening to improve the glue’s grip. Follow the manufacturer’s recommended surface preparation steps for a successful bond and appropriate setting time.
Original Gorilla Glue Curing Time
Original Gorilla Glue is renowned for its exceptional strength and durability, making it a popular adhesive choice for various applications. However, achieving the best bond requires understanding the factors that influence its curing time and taking certain precautions during the application process.
The curing time of Original Gorilla Glue can vary depending on several factors. Firstly, the type of materials being glued together plays a significant role. Each material has its own absorption rate, which can impact how quickly the glue cures. Whether you’re bonding wood, metal, plastic, or any other material, it’s essential to consider this aspect.
In addition to material type, the environment’s temperature and humidity also affect the curing process. Colder temperatures tend to slow down curing, while higher temperatures can expedite it. Likewise, higher humidity levels can prolong curing time, while lower humidity levels can hasten it. So, be mindful of these environmental conditions when working with Original Gorilla Glue.
To ensure optimal curing, it is crucial to apply a thin layer of glue on both surfaces being bonded. Excess glue should be wiped away before clamping the surfaces together. The clamping process is vital as it helps maintain consistent pressure and allows for proper bonding during the curing process.
While the glue may appear dry and feel tacky after a few hours, it is essential to resist the temptation to disturb or stress the bond until the full 24-hour curing period has elapsed. Premature handling or stressing of the bond can compromise its strength and durability. Patience is key in achieving a long-lasting bond with Original Gorilla Glue.
In certain cases, such as when bonding porous surfaces or in low humidity conditions, misting water lightly onto one of the surfaces before applying the glue can activate its curing process and improve adhesion. This technique enhances the glue’s ability to penetrate and create a strong bond.
It is important to note that Original Gorilla Glue expands as it cures. Therefore, it is crucial to exercise caution when using it in confined spaces or when working with delicate materials that could be damaged by expanding glue. By being mindful of these potential risks, you can avoid any unwanted mishaps.
Quick Cure Option for Faster Setting
When it comes to waiting for glue to dry, we all know the feeling of restlessness and impatience.
I’m here to reveal a quick cure option that will have your Gorilla Glue setting in no time, so you can finally finish that project and move on with your life.
One method to speed up the curing process is by harnessing the power of heat. Picture this: you grab your trusty heat gun or hairdryer, crank it up to the highest setting, and aim it directly at the glued surface. Just be sure to maintain a safe distance to prevent any scorching or burning mishaps. The intense heat will work its magic, accelerating the curing process and allowing your glue to set faster than ever before.
Now, let’s talk about moisture. Did you know that Gorilla Glue is activated by moisture? It’s true. And that means adding a little water can work wonders for speeding up the curing process. Imagine lightly misting the glued area with water or placing a damp cloth over the glue. The added moisture will kickstart the curing process, propelling your project towards completion in record time. But remember, don’t go overboard with the water – too much can weaken the bond and lead to less-than-desirable results.
But wait, there’s more. If you’re really in a hurry, consider using Gorilla Super Glue Gel. This special adhesive is specifically designed to cure in the presence of moisture, meaning it sets much quicker than other types of glue. It’s like a superhero in the world of adhesives, swooping in to save the day and bring your project together in a flash. Just make sure to carefully follow the instructions provided by the manufacturer for optimal results.
Now, here’s an important reminder: even with these quick cure options, it’s crucial to give your glue enough time to fully cure. I know it’s tempting to dive right into using your project, but patience is key. Wait at least 24 hours before subjecting it to any stress or load-bearing activities, and you’ll be rewarded with a strong and long-lasting bond.
Dampening Porous Surfaces Before Applying Glue
Today, we delve into the significance of dampening porous surfaces before applying glue. This seemingly simple step holds the power to transform your projects, ensuring a bond that is not only strong but also enduring.
Imagine working on a project involving wood, fabric, or foam. These materials possess a mischievous characteristic – they have an affinity for absorbing moisture from glue. And when this occurs, the curing time and bond strength suffer. We certainly don’t want that, do we? Fear not. Dampening comes to our rescue.
Now, how does one go about dampening a porous surface? It’s as easy as pie. Take hold of a clean cloth or sponge, moisten it with water (mind you, not too much), and gently glide it across the surface. The key lies in ensuring an even distribution of moisture without saturating the material. We mustn’t dilute our glue’s powers.
After giving your surface a soothing hydration session, allow it to air dry for a few minutes. This removes any excess moisture, guaranteeing that your glue will work its magic without any interference.
But why is this dampening process of such paramount importance? My friend, it all boils down to enhancing adhesion and bond strength. Dampening porous surfaces enables the glue to penetrate more effectively into the material, resulting in a bond that is both robust and enduring. It’s akin to endowing your adhesive with superpowers.
Dampening also grants you an extended working time for your glue. You now have extra moments to position and adjust those pieces before they set in place. It’s akin to having a personal assistant who gifts you precious minutes to ensure perfection.
However, remember this golden rule: balance is key. Excessive moisture can compromise the glue’s effectiveness and weaken the bond. On the other hand, insufficient dampening fails to provide enough moisture for proper bonding. Thus, it is always wise to conduct a small-scale test or experiment on a scrap piece before fully committing.
And there you have it, my glue-loving comrades. Dampening porous surfaces before applying Gorilla Glue constitutes the secret ingredient to a bond that is not only strong but also long-lasting. It enhances adhesion, extends working time, and ensures that your project endures the test of time. Yet, bear in mind that for optimal results, you must adhere to the specific instructions provided by the manufacturer.
Safety Precautions When Working with Gorilla Glue
Working with Gorilla Glue can be a powerful and effective way to bond materials together, but it’s important to prioritize safety while using this adhesive. Here are some safety precautions to consider:
- Wear protective gloves: Gorilla Glue is known for its strong adhesive properties, and you don’t want it sticking to your skin. Wearing gloves will protect your hands from potential irritation or accidental bonding.
- Ensure proper ventilation: Gorilla Glue emits fumes that can be strong and potentially harmful if inhaled in large quantities. Work in a well-ventilated area by opening windows or using fans to circulate the air.
- Protect your eyes: Accidental splashes or drips during the application process can cause severe eye irritation. Wear safety goggles or glasses to shield your eyes from any potential injuries.
- Avoid open flames and high heat sources: Gorilla Glue contains flammable ingredients, so keep it away from open flames or sources of high heat. Exposing the glue to heat can lead to ignition or combustion.
- Keep your workspace clean and organized: Spills and drips of Gorilla Glue can be difficult to clean once they set. To make cleanup easier, cover your work surfaces with plastic or old newspapers.
- Read and follow the instructions: Each type of Gorilla Glue may have specific safety precautions and instructions for use. Take a few minutes to familiarize yourself with them before starting your project.
Stress on Bond After Initial Setting Time
Today, we will unravel the secret behind achieving an unyielding bond with Gorilla Glue. While it may be tempting to rush through your project, exercising patience and allowing ample time for this mighty adhesive to fully cure before subjecting it to stress is of utmost importance. Let’s delve into why this step holds the key to a successful bond.
The Initial Setting Time:
As you apply Gorilla Glue, you will notice it starts to set within a short period. This initial setting time marks the point when the glue has dried enough to support light handling. However, don’t be deceived. Your bond is not yet ready for heavy-duty challenges.
Curing Time Matters:
To ensure a bond that can withstand the test of time, adhering to the recommended curing time of 24 hours is crucial. It’s important to note that various factors such as temperature, humidity, and the materials being bonded can impact this timeframe. Always consult the manufacturer’s instructions for precise guidance.
Stress Can Be a Bond Breaker:
Applying stress to a bond before it has fully cured can spell disaster. You risk weakening or even breaking the bond, resulting in a failed repair or project. So, resist the urge to test the strength of your bond prematurely.
Additional Strength Beyond 24 Hours:
Even after the recommended curing time, your bond may not have reached its pinnacle of strength just yet. Grant it some extra time to develop that superhero-like durability.
When in Doubt, Wait It Out:
If uncertainty arises about how long to let Gorilla Glue set, erring on the side of caution and allowing extra curing time is always wise. Remember, patience is key.
Consider Additional Support:
Depending on your project’s requirements, providing additional support or clamping during the curing process may be necessary. Refer to the manufacturer’s instructions for specific guidance on this matter.
Removing Excess Glue Squeeze-Out
Working with powerful adhesives like Gorilla Glue often results in some excess glue squeeze-out. But fear not. With the right techniques and a touch of patience, you can easily remove that excess glue and achieve a clean finish for your project. In this article, we will explore various methods and tips to help you tackle this common challenge.
Method 1: Partial Cure and Scrape
One effective method is to allow the glue to partially cure. As Gorilla Glue typically takes 1-2 hours to reach its initial cure stage, this gives you the perfect opportunity to scrape off the excess. With a putty knife or scraper tool, gently remove the tacky glue, ensuring not to damage the surface.
Method 2: Solvents for Stubborn Glue Residue
For stubborn or dried glue spots, solvents can be your best friend. Use a solvent specifically designed for polyurethane adhesives like Gorilla Glue. Before applying the solvent, test it on a hidden area to ensure it won’t damage or discolor the material. Apply a small amount of solvent on a cloth or sponge and gently rub the excess glue until it starts to dissolve. Wipe away the dissolved glue with a clean cloth and repeat if necessary.
Method 3: Sanding as a Last Resort
In rare cases where excess glue is particularly stubborn, sanding may be required. Use fine-grit sandpaper and gently sand the affected area until all traces of glue are removed. Be cautious not to sand too aggressively, as this may damage the surface or alter its appearance.
Water-Resistant Properties of Gorilla Glue
Prepare to be amazed as we dive into the secret behind this glue’s ability to withstand the power of water.
Gorilla Glue is renowned for its incredible bonding capabilities, but did you know it can also conquer the challenges of moisture? That’s right. This exceptional glue is specially formulated to keep things sticking together, even in wet or damp conditions.
So, how does it achieve this feat?
The answer lies in Gorilla Glue’s unique chemical composition and curing process. Within that tiny bottle lies the power of polyurethane, the secret ingredient responsible for its water-resistant superpowers. This remarkable compound creates a bond that can stand up to water like a true champion.
When Gorilla Glue encounters moisture, a magical chemical reaction occurs. The glue expands, transforming into a glue Hulk, if you will. This expansion allows it to fill in gaps and create an impenetrable seal, making it perfect for both porous and non-porous materials.
But wait, there’s more.
The versatility of this water-resistant wonder knows no bounds. Need to repair outdoor furniture? Gorilla Glue has got your back. Want to seal your aquarium without worrying about leaks? Gorilla Glue is your fish-friendly solution. It’s also ideal for fixing plumbing leaks, constructing boats (yes, boats.), and bonding materials like wood, metal, stone, ceramic, and plastic.
However, it’s important to note that while Gorilla Glue can handle a splash or two, continuous submersion or underwater use is not its forte. Extended exposure to water can gradually degrade its adhesive power over time. So unless you want your project to take an unexpected dive (pun intended), it’s best to keep it away from constant moisture.
In conclusion, Gorilla Glue reigns supreme not only in adhesive strength but also in water resistance. Its unique chemical composition and expansion properties make it a reliable choice for an array of indoor and outdoor applications.
So, next time you find yourself in a sticky situation that involves water, remember the mighty Gorilla Glue. It’s like having Aquaman in your toolbox, ready to save the day (or your project) from water-related disasters.
Also Read: Is Gorilla Super Glue Waterproof?
Conclusion
When it comes to using Gorilla Glue, one of the most common questions people have is how long they need to leave it to set. Well, my friend, I’m here to give you the lowdown on this sticky situation.
First things first, let’s talk about why setting time matters. Gorilla Glue is a powerful adhesive that bonds quickly and securely. But if you don’t give it enough time to set, you risk compromising the strength and durability of your bond. And nobody wants that.
So, how long should you wait? The answer depends on a few factors. In general, Gorilla Glue requires at least 24 hours to fully cure. That means giving it a full day to work its magic and create a solid bond that will stand the test of time.
But hold your horses. Don’t start celebrating just yet. It’s important to note that temperature and humidity can affect the setting time. In colder temperatures or high humidity conditions, you may need to allow for extra drying time.
Now, I know waiting can be tough when you’re eager to see your project come together. But trust me when I say that patience pays off in this case. Rushing the process could lead to disappointment down the road.
So take a deep breath, my friend, and let Gorilla Glue work its wonders at its own pace. Give it the time it needs to set properly and you’ll be rewarded with a bond that’s as strong as steel.
In conclusion, when using Gorilla Glue, be prepared for a minimum 24-hour waiting period for optimal results. Remember that temperature and humidity can play a role in setting time, so adjust accordingly.

