Ever been mesmerized by the rustic charm of pictures on wood? The timeless allure and artistic flair they bring to any space is simply captivating. But here’s the thing – you don’t need Mod Podge to achieve this artistic marvel.
In this blog post, we’ll unveil the secret to transferring pictures to wood without relying on Mod Podge. Get ready for a creative journey that will ignite your inner artist and breathe new life into your photographs.
Imagine this: You have a cherished photo that encapsulates a beautiful memory – a wedding, a breathtaking sunset, or a candid family moment. Now envision that image perfectly embodied on the textured surface of wood. Isn’t it absolutely captivating? That’s exactly what we’re aiming for.
Join us as we explore alternative methods for transferring pictures to wood, using unconventional materials that will open up a world of possibilities. Discover the magic behind ingredients you probably already have at home and feel empowered to express yourself in unique and inspiring ways.
So let’s dive into this captivating process together, leaving Mod Podge behind and embracing exciting alternatives. Get ready to unleash your creativity and transform your favorite images into stunning wooden masterpieces.
What is Mod Podge and Why is it Used for Transferring Pictures to Wood?
Contents
- 1 What is Mod Podge and Why is it Used for Transferring Pictures to Wood?
- 2 Alternative Methods to Transferring Pictures to Wood without Mod Podge
- 3 Gel Medium Method
- 4 Heat Transfer Method
- 5 Adhesive Spray or White Glue Method
- 6 Pros and Cons of Each Method
- 7 Tips for a Successful Picture Transfer
- 8 Conclusion
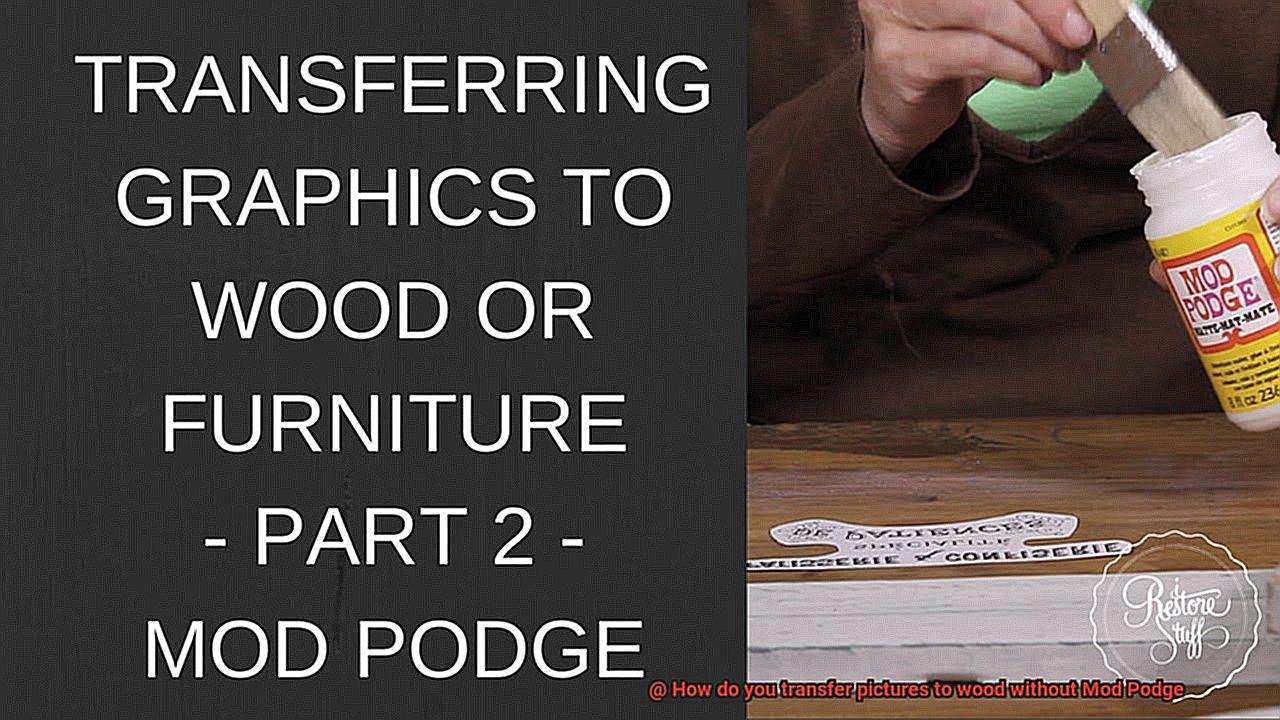
Enter the enchanting world of crafting and DIY wonders, where Mod Podge reigns supreme. This extraordinary adhesive has captured the hearts of creative souls, offering a seamless and transformative experience when it comes to transferring pictures onto wood. Join us as we delve deeper into the mesmerizing realm of Mod Podge, exploring its captivating features and uncovering the reasons why it is the ultimate choice for turning ordinary wood into extraordinary art.
Unveiling the Enigma: What is Mod Podge?
At its core, Mod Podge is a decoupage medium, a unique adhesive that unlocks the power to attach paper or fabric onto diverse surfaces. Crafted from a magical blend of water, polyvinyl acetate (PVA) glue, and other mysterious additives, this concoction works harmoniously to forge an unbreakable bond.
The Artistry of Smoothness: Creating a Flawless Finish
Embracing the art of perfection, Mod Podge effortlessly bestows a smooth and even surface when transferring pictures to wood. Its transparent nature, once dried, reveals a glossy sheen that magnifies colors and illuminates intricate details. Not only does this mesmerizing finish captivate the eye, but it also acts as a guardian, shielding images against moisture and potential damage.
From Fragility to Immortality: The Sealant and Finisher
Imbued with the power of preservation, Mod Podge serves as both a sealant and finisher for transferred images. Building an impenetrable fortress around cherished photographs or precious memories, it safeguards them from fading or peeling over time. When entrusted with beloved mementos or when crafting heirloom-worthy wooden creations, Mod Podge becomes an invaluable ally.
A Symphony of Simplicity: Ease of Use
Crafting should be an effortless symphony of joy, and Mod Podge ensures just that. With its ready-to-use form, there’s no need to navigate complex mixing or laborious preparation. Simply glide a thin layer onto the wooden canvas, gently place the picture, smoothing out any imperfections that dare to mar the masterpiece, and let it dry. Voila. The transformation is complete.
Alternative Methods to Transferring Pictures to Wood without Mod Podge
While Mod Podge is undeniably a remarkable adhesive for this purpose, there exists a plethora of alternative methods that can produce equally awe-inspiring results. So, let us embark on this captivating journey of creativity and explore the enchanting techniques that await us.
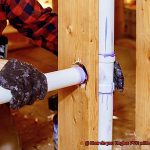
First on our list of alternative methods is the ever-popular gel medium. This versatile acrylic medium not only acts as a strong adhesive but also serves as a protective sealant for your transferred image. To work your magic with gel medium, simply apply a generous layer onto the wood surface, place your desired picture face down, and smooth out any imperfections. Once dry, carefully remove the paper to reveal the mesmerizing image that has been beautifully transferred onto the wood.
For those working with smaller images, packing tape holds the key to unlocking stunning results. Begin by printing your desired picture onto regular printer paper and covering it completely with clear packing tape. Immerse it in water until the paper becomes saturated, then delicately rub away the paper fibers, leaving only the ink adhered to the tape. Apply the tape onto the wood surface, ensuring a bubble-free and wrinkle-free application. Once dry, add a clear sealant to protect and preserve your transferred masterpiece.
To infuse your creations with an air of vintage charm, wax paper transfers are an excellent choice. Print your chosen image onto regular paper using a laser printer (inkjet printers may not yield satisfactory results). Place the printed picture face down on the wood surface and cover it with a sheet of wax paper. Gently press down with a hot iron, allowing the ink to transfer from the paper onto the wood. Carefully peel off the wax paper to reveal your exquisitely transferred image.
For those who prefer specialized products, image transfer mediums such as Liquitex or Golden’s Image Transfer Solution are a dream come true. These carefully formulated solutions are specifically designed to transfer images onto various surfaces, including wood. Begin by applying a layer of the transfer solution onto both the image and the wood surface, then place them together and allow them to dry overnight. Once dry, remove the paper backing to unveil your breathtaking transferred image.
Gel Medium Method
Bid farewell to Mod Podge and embrace the mesmerizing Gel Medium Method. This enchanting technique will turn ordinary wood into extraordinary art pieces. So grab your gel medium, brush, and laser-printed image, because we’re about to embark on a captivating journey of picture-perfect enchantment.
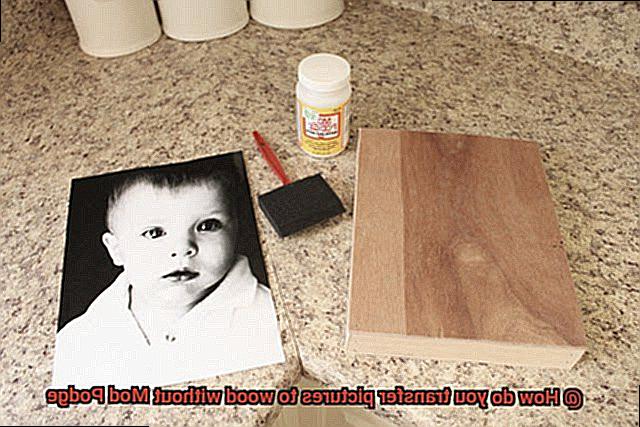
- First, let’s gather our supplies: gel medium (the star of the show), a trusty brush or foam applicator, a laser-printed image (because durability is key), and a piece of wood (the canvas for your masterpiece). Remember, laser-printed images work best due to their durability. Now that we’re fully equipped, let’s dive into the process.
- Step one: Spread a generous amount of gel medium onto the printed side of your image. It’s like spreading a magical adhesive potion onto your picture. Ensure even coverage, making sure every inch is coated with the gel medium goodness.
- Step two: Place your image face down onto the wood surface and firmly press it. This is where the real magic begins. Smooth out any wrinkles or pesky air bubbles with a brayer or your fingers. We want that image snug as a bug on the wood surface.
- Step three: Patience is key here, my friends. Let the transfer dry completely. It usually takes around 24 hours, but check your gel medium’s instructions for precise drying times. Resist the temptation to peek or disrupt the process. Remember, good things come to those who wait.
- Step four: Once dry, it’s time to unveil the hidden beauty beneath. Dampen a cloth or sponge with water and gently rub in circular motions over the paper. As you rub, the paper will peel away, revealing the transferred image underneath. It’s like unwrapping a precious gift, layer by layer.
- Step five: Keep rubbing until all the paper has been removed. Be gentle to avoid damaging the transferred image. This might require some patience and elbow grease, but trust me, the result will be worth it. You want that image to shine brilliantly, don’t you?
- Step six: Take a moment to marvel at your masterpiece. The Gel Medium Method offers a seamless and realistic transfer compared to other methods. The gel medium’s smooth, transparent surface blends naturally with the wood, giving your transferred image a professional look.
Heat Transfer Method
Bid farewell to Mod Podge and prepare yourself for an enchanting journey of artistry.
Before we embark on this wood art adventure, let’s explore the advantages and disadvantages of using heat transfer methods. It’s always wise to know what lies ahead before diving into the depths of creativity.
Advantage 1: Full-Color Magic
Prepare to be spellbound. Heat transfer methods offer the wondrous ability to transfer full-color images onto wood. Unlike other techniques that restrict you to black and white or a limited color palette, heat transfer methods can bring intricate details and vibrant hues to life. If you’re a lover of kaleidoscopic artistry, this method is tailor-made for you.
Advantage 2: Ease and Simplicity
Fret not, for the path to heat transfer mastery is paved with simplicity. Whether you opt for a heat press machine or the trusty household iron, the process remains delightfully straightforward. Print your image onto special heat transfer paper, lay it face down on the wood, and apply heat and pressure. Behold. Your image magically transfers onto the wooden surface. It’s akin to painting with the fiery touch of heat itself.
Disadvantage 1: Wood Woes
Now, let us address the potential challenges. Not all woods are created equal when it comes to heat transfer methods. Some may struggle to withstand the high temperatures required for this technique, leading to warping or even burning. A catastrophe we must avoid. Hence, it is crucial to test a small area of the wood before embarking on a full-fledged transfer. Let prudence guide your artistic endeavors.
Thus, we have uncovered both the merits and pitfalls of using heat transfer methods for picture-perfect wood transfers. While the advantages encompass vibrant, full-color creations and a relatively simple process, it is essential to choose your wood wisely to prevent any mishaps.
Armed with this knowledge, go forth and create your wood art masterpieces. Embrace the scorching heat and let your imagination soar. Whether you wield a heat press machine or brandish your trusty iron, prepare to be mesmerized by the bewitching results.
Adhesive Spray or White Glue Method
Embark on an artistic journey as we explore the mesmerizing world of transferring pictures onto wood without relying on traditional methods. In our previous section, we delved into the enchanting realm of heat transfer techniques. Now, let’s uncover the intriguing differences between adhesive spray and white glue methods to bring your wood art masterpieces to life. Discover the unique advantages of each technique and unleash your creativity with confidence.
Adhesive Spray Method:
Behold the magical potion that is the adhesive spray method, specially formulated for photo transfer projects. With this technique, prepare to witness a strong bond between your picture and the wood surface, ensuring a long-lasting and vibrant result. Here’s how it unfolds:
- Apply the mystical adhesive spray: Evenly coat both the back of the picture and the wood surface with this specialized spray for a secure attachment that defies gravity.
- Press with precision: Like a skilled artist, delicately press the picture onto the wood, smoothing out any wrinkles or air bubbles that dare to disrupt your masterpiece.
- Allow it to dry: Exercise patience and grant your artwork ample time to dry completely before daring to move or handle it. The reward? A picture-perfect finish that will leave you in awe.
Advantages of adhesive spray:
- Swift drying time: Watch in anticipation as the adhesive spray dries faster than its white glue counterpart, allowing you to revel in your artwork sooner.
- Unyielding bond: The secret lies within the specialized adhesive, forming an unbreakable connection that keeps your picture firmly in place, resisting peeling or fading over time.
- Flawlessly smooth finish: Adhesive sprays possess an otherworldly power to produce a seamless finish with minimal visible brush strokes or texture interruptions.
White Glue Method:
For those who crave a more traditional approach or embark on smaller projects, the white glue method beckons. This readily available and budget-friendly option has garnered a loyal following among artists seeking to infuse their wood art with a touch of nostalgia. Here’s how you can utilize white glue to transfer pictures onto wood:
Apply a whisper-thin layer: With the grace of a master artist, spread a delicate and even layer of white glue on both the back of the picture and the wood surface. Exercise caution, for excessive glue may mar your creation’s texture or lead to unwelcome warping.

Pros and Cons of Each Method
In our previous section, we explored the captivating differences between adhesive spray and white glue methods. Now, let’s delve into the pros and cons of each method when it comes to transferring pictures to wood without using Mod Podge.
Method 1: Wax Paper Method
One popular technique is using wax paper, an easy and affordable option that requires no special equipment. With this method, the image transfers smoothly onto the wood, resulting in a professional-looking outcome. However, there are a few drawbacks to consider. Complex or intricate designs may not transfer accurately, and the durability of the transferred image may be compromised over time. It’s crucial to handle the process with care to prevent any distortion during transfer.
Method 2: Gel Medium Method
Another widely embraced method involves applying a layer of gel medium onto the wood surface, providing greater control and precision during transfer. The result is a durable and long-lasting image on the wood. However, this method can be time-consuming as you have to wait for the gel medium to dry before removing the paper. Additionally, working with gel medium can get messy, and it may not adhere well to certain wood finishes or textures.
Method 3: Acetone Method
For a unique approach, consider the acetone method. This entails printing the image onto regular printer paper using a laser printer. Placing it face down onto the wood surface and rubbing acetone onto the back of the paper facilitates image transfer. This method allows for crisp details and vibrant colors. However, it’s important to note that acetone should be handled with caution due to its strong odor and potential skin irritation. Additionally, access to a laser printer is required.
Tips for a Successful Picture Transfer
Picture transfer without Mod Podge is an exciting technique that allows you to showcase your artistic skills and create unique pieces of art. In this article, we will delve into the world of successful picture transfers, unveiling tips and techniques that will help you achieve outstanding results. Get ready to amaze yourself and others with your newfound skills.
The Perfect Canvas: Choosing the Right Wood
The foundation of a successful picture transfer lies in selecting the right type of wood. Opt for hardwoods like birch or maple that offer a smooth and sturdy surface. Avoid woods with imperfections or rough areas, as they can compromise the quality of your transfer. Remember, a flawless canvas sets the stage for a flawless outcome.
Smooth and Ready: Preparing the Wood Surface
Before diving into the picture transfer process, it is crucial to prepare the wood surface properly. Sanding is your secret weapon here, as it creates a smooth and even texture that enhances the transfer’s clarity. Grab sandpaper with a grit of around 220, and gently sand the wood until it feels velvety to the touch. This step ensures optimal adhesion and a professional finish.
Inkjet Printers: Your Best Allies
When it comes to printing the image for the transfer, inkjet printers steal the spotlight. Unlike laser printers, they excel at capturing vibrant colors and intricate details, resulting in a more captivating transfer. Remember to use regular printer paper instead of photo paper as it allows for better absorption of the transfer medium.
Reverse Before Print: The Magic of Mirroring
To achieve the correct orientation when transferring the picture onto wood, don’t forget to reverse the image before printing. This step is crucial in ensuring that the final result matches your vision. Take advantage of photo editing software or the “mirror image” option in printer settings to effortlessly flip the image. It’s a small adjustment that yields big rewards.
Explore Alternative Transfer Mediums: Unleash Your Creativity
While Mod Podge is a popular choice for picture transfers, don’t be afraid to explore alternative transfer mediums that can yield equally stunning results. Gel mediums and acrylic mediums are fantastic alternatives that provide a clear and adhesive base for transferring images onto wood. Apply them evenly with a brush or sponge, ensuring complete coverage of the designated transfer area. Embrace experimentation and let your creativity soar.
Rt3EBRTJI1o” >
Conclusion
In conclusion, the world of transferring pictures to wood without Mod Podge is brimming with creative possibilities. While Mod Podge may be the go-to choice for many, there are alternative methods that can produce equally breathtaking results.
One such method is the gel medium technique. By applying a layer of gel medium onto the wooden surface and pressing your image onto it, you can achieve a flawlessly smooth and professional transfer. Alternatively, adhesive spray or white glue can securely attach your picture to the wood, ensuring it stays in place.
For those seeking vibrant full-color transfers, heat transfer methods are an excellent option. With the help of a heat press machine or an iron, you can effortlessly transfer vivid images onto wood.
If you’re looking for a touch of whimsy, wax paper transfers offer a charming alternative. Additionally, specialized image transfer mediums like Liquitex or Golden’s Image Transfer Solution provide unique effects that will truly make your pictures stand out.
To guarantee successful picture transfers, it’s crucial to select the right type of wood and properly prepare its surface by sanding. Printing your image in reverse using an inkjet printer is also essential for achieving accurate results. And don’t forget to explore various alternative transfer mediums for that extra touch of creativity.
By embracing these alternative methods and following these helpful tips, you’ll unlock your inner artist and transform your cherished images into captivating wooden masterpieces – all without relying on Mod Podge.