Well, hold onto your hats because we’ve got a game-changing technique for you. Picture this: your cherished memories, immortalized on beautiful wooden surfaces. And guess what? All you need is a trusty bottle of Elmer’s glue.
Yep, you heard that right. That childhood staple, Elmer’s glue, has now become the secret weapon in creating stunning photo transfers on wood. It’s like stepping into a time machine and landing in a vintage art gallery – except it’s all happening in your own home. Today, we’re going to take you on an adventure through this mesmerizing process that will have you channeling your inner Picasso.
First things first – let’s gather our supplies and get ready for this creative journey. From finding the perfect piece of wood to prepping your photograph, we’ll make sure you’re armed with all the knowledge you need to tackle this project head-on.
Now, let’s talk about why Elmer’s glue is the superhero adhesive for this technique. We’ll explore the science behind its magic powers and reveal how it temporarily binds your picture before permanently transferring it onto the wood. Prepare to be amazed by how this humble glue can create such awe-inspiring results.
But wait, there’s more. We’ve rounded up some incredible examples from seasoned crafters who have mastered the art of picture transfers on wood. They’ll share their top tips and tricks so that you can add your own personal touch and turn ordinary photographs into jaw-dropping masterpieces.
So grab your glue, unleash your imagination, and get ready to embark on an artistic adventure like no other. This groundbreaking technique will transform your home decor, impress friends and family with unforgettable gifts, or maybe even launch a whole new career path. The possibilities are endless – let’s dive in and discover them together.
Preparing the Wood Surface: Sanding and Cleaning
Contents
- 1 Preparing the Wood Surface: Sanding and Cleaning
- 2 Applying a Layer of Glue
- 3 Placing the Picture Face Down
- 4 Pressing and Securing the Picture to the Wood
- 5 Letting the Glue Dry Completely
- 6 Removing the Paper to Reveal the Transferred Image
- 7 Tips for Transferring Pictures with Elmer’s Glue
- 8 Alternatives to Elmer’s Glue for Transfers
- 9 Conclusion
Picture transfer onto wood is a captivating way to showcase cherished memories. To ensure a flawless transfer using Elmer’s glue, meticulous preparation of the wood surface is key. In this comprehensive guide, we will delve into the step-by-step process of sanding and cleaning, guaranteeing optimal adhesion and a stunning final outcome.
Step 1: Sanding – Smooth Canvas for Picture Perfection
To begin the wood surface preparation, embark on the sanding journey. Embrace medium-grit sandpaper (around 120-150 grit) and gently glide it across every inch of the wood. This technique eradicates rough spots, imperfections, and previous finishes, creating an ideal foundation for the picture transfer. Remember to sand evenly and align your strokes with the natural grain of the wood, resulting in a consistent and velvety finish.
Step 2: Cleaning – Banishing Dust and Debris
After the sanding dance is complete, it’s time to devote attention to a thorough cleaning session. Armed with a damp cloth or sponge, meticulously wipe down every nook and cranny of the wood surface. Leave no stone unturned as you eliminate dust, dirt, and any lingering debris that might disrupt the picture transfer process. For stubborn stains, a gentle soap solution can be employed, but be sure to rinse away any soapy residue diligently. Patience is paramount as you allow the wood surface to air dry fully before proceeding.
Step 3: Optional Bonus Step – Primer/Sealer for Resilience
For an extra layer of durability and longevity in your picture transfer endeavor, consider embracing a primer or sealer. Although optional, this step is highly recommended to elevate your creation.
Choose a primer or sealer specifically formulated for wood and glue applications, ensuring compatibility with Elmer’s glue. Adhere to the manufacturer’s instructions for application and drying time to achieve an even base. This additional measure fortifies the glue’s grip, safeguarding your transferred picture for years to come.
Applying a Layer of Glue
Prepare to be captivated as we delve into the mesmerizing world of transferring pictures onto wood. In our previous section, we explored the importance of prepping the wood surface, but now it’s time to take our artistry to new heights.
Join us as we unlock the enchanting process of applying a layer of glue – the mystical medium that will transform your cherished memories into stunning wood masterpieces. So, grab your trusty foam brush and let’s embark on this creative journey.
Step 1: Mastering the Wood Surface
Before we can embark on this artistic odyssey, we must ensure our wood surface is a flawless canvas. Take up your sandpaper and gently caress the wood, smoothing out imperfections and creating a velvety texture. This crucial step guarantees superior adhesion and banishes any rough textures that could mar your transferred image.
Once the wood surface is as smooth as satin, it’s time to banish any trace of dust or debris with meticulous precision. Seize a damp cloth or sponge and wipe away every speck of dirt or grime that dares to disrupt your masterpiece. By doing so, you’re providing an immaculate foundation for your picture transfer and ensuring maximum adhesion.
Step 2: Unleashing Elmer’s Glue
Now, let us unveil the star of our artistic extravaganza – Elmer’s glue. Take up your foam brush or paintbrush and wield it like a maestro conducting a symphony. With gentle strokes, apply an even layer of glue onto the wood surface. Remember, moderation is key in this delicate dance. We want enough glue to securely hold our picture in place, but too much can lead to unsightly wrinkling or bubbling.
As you glide the brush across the wood, embrace your inner artist and revel in the fluidity of your strokes. Cover every inch of the area where you wish to transfer your picture, leaving no corner untouched. This layer of glue acts as a medium, forging a bond between the wood and your cherished memories.
Placing the Picture Face Down
Unlock the secrets of transferring pictures onto wood with the captivating process of placing the picture face down. This vital step is crucial for achieving flawless and accurate image transfers, and we’re here to guide you through it.
Why is it so important to place the picture face down? Let’s delve into the reasons:
- Accurate Transfer: Placing the picture face down allows for direct contact between the photo paper and the wood surface. This direct contact ensures that the image transfers onto the wood accurately, without any distortions or misalignments.
- Seamless Bonding: The magic ingredient in this process is Elmer’s glue. By placing the picture face down, you create a perfect bonding surface for the glue to work its wonders. The glue bonds the photo paper and the wood together seamlessly, creating a strong and long-lasting transfer.

Now that we understand the importance of placing the picture face down, let’s dive into a step-by-step guide on how to do it effectively:
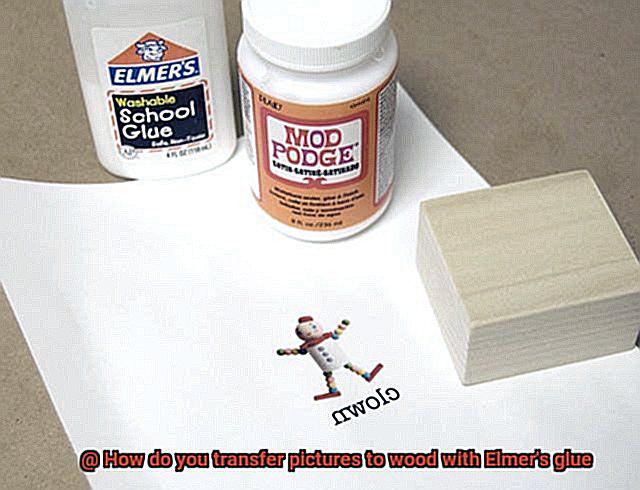
- Step 1: Gather your materials – wood surface, picture, Elmer’s glue, brush or roller, and a clean cloth. Ensure that both the wood surface and the picture are clean and free from any dust or debris.
- Step 2: Apply a thin and even layer of Elmer’s glue onto the wood surface using a brush or roller. Cover the entire area where you want the picture to be transferred.
- Step 3: Carefully position the picture face down onto the glued surface. Avoid moving or shifting the picture once it is placed to prevent smudging or misalignment.
- Step 4: Gently press down on the picture, starting from one side and working your way towards the other side. This eliminates any air bubbles that may have formed between the picture and the wood.
- Step 5: Use a clean cloth to gently smooth out any wrinkles or creases, ensuring a smooth and seamless transfer.
- Step 6: Leave the picture undisturbed on the wood surface for at least 24 hours to allow sufficient drying time. Resist the temptation to touch or move the picture during this period to prevent any damage to the transfer.
- Step 7: Once the drying time is complete, carefully peel off the photo paper from the wood surface, starting from one corner and slowly peeling back. Ensure that the picture adheres to the wood and does not come off with the paper.
Pressing and Securing the Picture to the Wood
In this section, we will explore the captivating process of pressing and securing the picture onto the wood. Prepare to unlock the secrets of creating flawless and precise transfers that will leave everyone in awe of your artistic prowess.
Now that you have applied a thin layer of Elmer’s glue onto the wood surface, it’s time to bring your picture to life on that stunning piece of wood. But how do you ensure a seamless transfer without any pesky air bubbles or unsightly wrinkles? Fear not, for I am here to guide you through this enchanting process.
Let’s begin with the pressing part. One method to achieve a perfect transfer is by utilizing a brayer or a smooth, flat object like a credit card. Think of it as smoothing out the creases on an ancient treasure map before embarking on a thrilling adventure. So grab your trusty brayer or credit card and prepare to work your magic.
Delicately place the picture face down onto the glued surface, ensuring that it is positioned with meticulous care. We must avoid any misalignments, as we are on a quest for perfection. With gentle pressure from your hands, bid farewell to any lingering air pockets. Imagine yourself sealing an ancient scroll with precision and grace.
Now comes the exhilarating part – using the brayer or credit card to glide across the picture. Begin at the center and gradually make your way towards the edges, just like a daring pirate unravels a map in search of buried treasure. This step guarantees that the picture adheres evenly without any unsightly creases or bothersome bubbles. Smooth sailing all the way.
Have you noticed excess glue seeping out from beneath the picture? Fear not, my friend, for even the most skilled artists encounter such mishaps. Simply reach for a damp cloth and gently wipe away those stray droplets before they have a chance to dry. We want our masterpiece to boast a clean and professional finish, after all.
Now that you have pressed the picture onto the wood, it is time to secure it in place while it dries. This step is absolutely crucial for a successful transfer. Lay a sheet of wax paper or parchment paper over the picture and employ weights to hold it down. Heavy books, sturdy bricks, or even cans of food can serve as your trusty allies. Just be careful not to mistake the cans for hidden treasure chests.
Letting the Glue Dry Completely
As you carefully glue your cherished picture onto a wooden canvas, excitement builds as you envision the masterpiece that will captivate all who lay eyes upon it. But hold your horses, my creative friend. Before you can take the next step in this enchanting process, there’s one crucial thing you must do: let the glue dry completely.
You may be wondering why it’s so important to exercise patience and let that glue work its magic. Let me enlighten you with some expert knowledge. The glue we’re using here is Elmer’s glue, a water-based adhesive that requires time to dry and form a strong bond with the wood.
The drying time of the glue can vary depending on several factors, including the thickness of the glue layer, humidity levels, and temperature. To ensure complete drying, it’s recommended to leave the glued picture untouched for at least 24 hours.
During this waiting period, it’s crucial to maintain a clean and dust-free environment for the wood and glued picture. Lay the wood flat or place it on a level surface to prevent warping or bending. We want your masterpiece to retain its intended shape.
Now, I understand that waiting for glue to dry can test your patience. If you’re feeling eager and want to speed up the process, here’s a helpful tip: use a fan or provide adequate ventilation. Just remember not to disturb the picture or introduce additional dust or debris. We don’t want any unwanted visitors ruining our artistic endeavor.
Once the glue is completely dry, it should be transparent and have a firm texture. If you notice any white or tacky areas, it indicates that the glue hasn’t fully dried yet. Rushing to the next steps before the glue is ready can result in smudging or even lifting of the picture during the transfer process. And we definitely don’t want that.
Removing the Paper to Reveal the Transferred Image
You’ve embarked on a creative journey, transferring your cherished photo onto wood using the magic of Elmer’s glue. Now, it’s time to unveil the hidden beauty beneath the paper and bring your masterpiece to life. In this comprehensive guide, we will delve into the intricate process of removing the paper with utmost care and precision, ensuring a flawless reveal of your transferred image.
Step 1: The Virtue of Patience
Before you embark on this exciting phase, exercise patience and allow the Elmer’s glue to dry completely. While it usually takes approximately 24 hours for the glue to set, it is wise to consult the manufacturer’s instructions for specific drying times. Remember, great things come to those who wait.
Step 2: Gently Rub and Loosen
Once the glue has dried, gently caress the surface with a damp cloth or sponge to begin the paper removal process. The moisture will delicately loosen the paper fibers, making it a breeze to peel off without causing any harm to the transferred image or wood surface.
Step 3: Embrace Gentle Precision
In this delicate endeavor, refrain from applying excessive pressure or engaging in vigorous scrubbing. Such forceful actions can lead to unintended consequences, like the transferred image coming off along with the paper. Instead, adopt gentle circular motions and gradually remove the paper. Allow patience to guide your every move.
Step 4: Triumph Over Stubborn Areas
Encountering areas where the paper tenaciously clings? Fear not. Reintroduce moisture by dampening those areas with water once again and patiently let them sit for a few minutes. This additional hydration will further soften the paper’s grip, making it easier to bid farewell. Remember, gentle persistence is key.
Step 5: Rinse and Repeat
As you continue the paper removal process, periodically rinse and wring out your cloth or sponge. This practice prevents excessive wetness on the wood surface, which could potentially cause the transferred image’s ink to bleed or smudge. Keep your tools pristine and your image untarnished.
Tips for Transferring Pictures with Elmer’s Glue
Are you ready to unleash your creativity and add a unique touch to your crafts? Transferring pictures onto wood using Elmer’s glue is a fantastic technique that allows you to transform ordinary wooden surfaces into personalized works of art. With just a few simple steps, you can create stunning wood transfers that showcase your favorite photographs or designs. Here are some expert tips to help you master this craft:
Prepare the canvas
Like any artist, you need to prepare your canvas before starting your masterpiece. Begin by ensuring that the wooden surface is clean, smooth, and free from any dust or debris. Give it a light sanding to create a perfect foundation for the glue to adhere to.
Choose the perfect image
The success of your wood transfer largely depends on the quality of the image you choose. Opt for high-resolution photographs or designs that will reproduce well on wood. Remember, laser printer prints or toner-based photocopies work best for this technique, as inkjet prints may smudge when exposed to the water-based glue.
Apply the magic glue
Now it’s time to work your magic with Elmer’s glue. Using a foam brush or sponge, apply a generous amount of glue onto the wooden surface. Be sure to spread it evenly and cover the entire area where you want the picture to be transferred. The glue acts as a bonding agent between the picture and the wood, ensuring a seamless transfer.
Place it with care
Carefully position your picture face down onto the glue-covered surface of the wood. Take a moment to smooth out any wrinkles or air bubbles using a clean cloth or your fingertips. Apply firm pressure to ensure proper contact between the picture and the glue, guaranteeing a flawless transfer.
Let it dry and work its magic
Patience is key when it comes to transferring pictures with Elmer’s glue. Allow the glue to dry completely, which can take several hours or even overnight. This crucial step ensures that the picture adheres firmly to the wood, preventing any mishaps during the removal of the paper backing.
Reveal the masterpiece
Once the glue has dried, it’s time for the big reveal. Dampen a sponge or cloth with water and gently rub it over the paper surface of the picture. As you do this, the water will dissolve the paper fibers, gradually revealing the transferred image beneath. Take your time and be gentle to avoid accidentally removing parts of the transfer.
Seal and protect your creation
To protect your beautiful wood transfer and give it a professional finish, apply a sealant over the surface. You have various options to choose from, such as Mod Podge or clear varnish. Brush or spray on the sealant evenly, following the instructions provided by the manufacturer. Multiple coats may be necessary for added durability and protection.
Alternatives to Elmer’s Glue for Transfers
Embarking on a creative journey to transform wood into personalized masterpieces is an exhilarating endeavor. While Elmer’s glue may be the go-to choice for transferring pictures to wood, there exists a treasure trove of alternative options that can generate equally breathtaking results. In this article, we will delve into the depths of these alternatives and guide you through the mesmerizing process of achieving captivating picture transfers. So, brace yourself and let’s dive into this enchanting world of artistic possibilities.
Mod Podge: The Versatile Wonder
Mod Podge, a versatile adhesive and sealer cherished by crafters and decoupage enthusiasts alike, is a remarkable substitute for Elmer’s glue. To transfer pictures onto wood using Mod Podge, simply apply a generous layer onto the wood surface, gently place the picture face-down onto the Mod Podge, and skillfully smooth out any pesky air bubbles or stubborn wrinkles. After allowing it to dry completely, delicately rub off the paper with a damp cloth, unveiling your transferred image in all its glory.
Gel Medium: A Stroke of Controlled Brilliance
With its luxuriously thick consistency, gel medium reigns as another remarkable alternative to Elmer’s glue for image transfers. This marvelous substance offers unparalleled control and prevents excessive absorption into the wood. Begin by applying a luscious layer of gel medium onto the wooden canvas, then carefully place the picture face-down onto the gel medium, ensuring a seamless connection devoid of any imperfections.
Once dried meticulously, moisten the paper with water and gently rub off the backing paper, revealing an awe-inspiring transferred image that will leave you spellbound.
Acrylic Medium: Unleashing Vibrancy and Elegance
For those seeking vibrant and elegant image transfers, acrylic medium, particularly matte or satin finish, beckons with open arms. By creating a thin concoction of equal parts acrylic medium and water, you can embark on a journey of artistic excellence.
Grace the wood surface with a layer of this magical mixture, place the picture face-down onto the wet medium, and gently smooth away any lingering air bubbles or creases.
After a patient wait for complete drying, sprinkle water onto the paper and tenderly rub off the backing paper, revealing a resplendent transferred image that captures the essence of your creativity.
81j70QRy7Ow” >
Conclusion
Transferring pictures to wood using Elmer’s glue is a creative and unique way to add a personal touch to your home decor or gifts.
With just a few simple steps, you can transform an ordinary piece of wood into a beautiful work of art. The process involves printing out your desired image on regular printer paper, applying a layer of Elmer’s glue to the wood surface, placing the image face down onto the glue, and allowing it to dry completely.
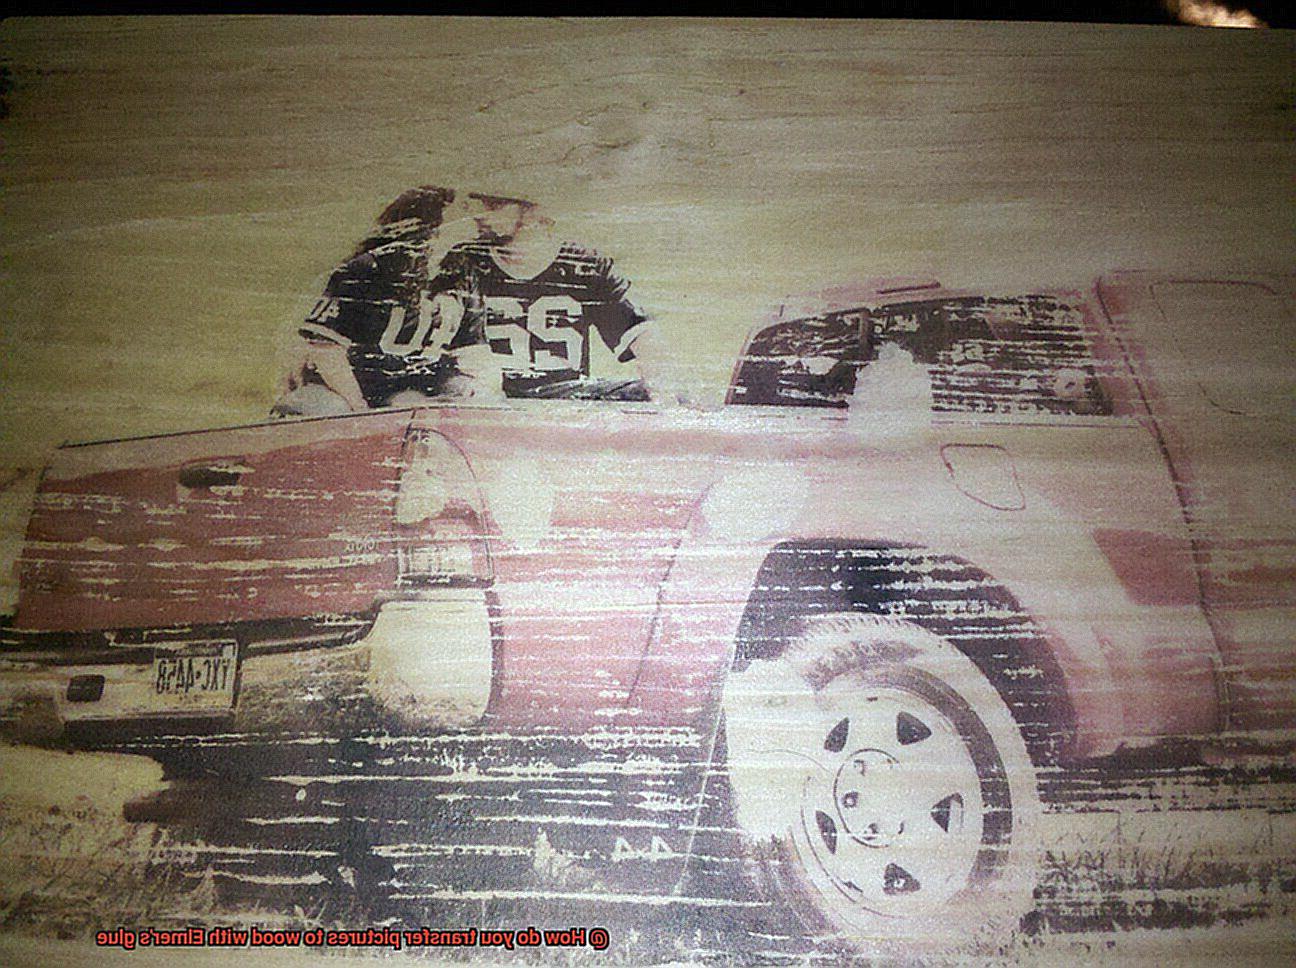
Once dry, you can gently rub away the paper fibers to reveal the transferred image on the wood. It’s like magic.
So go ahead and unleash your creativity by trying out this fun and easy method of transferring pictures to wood with Elmer’s glue.