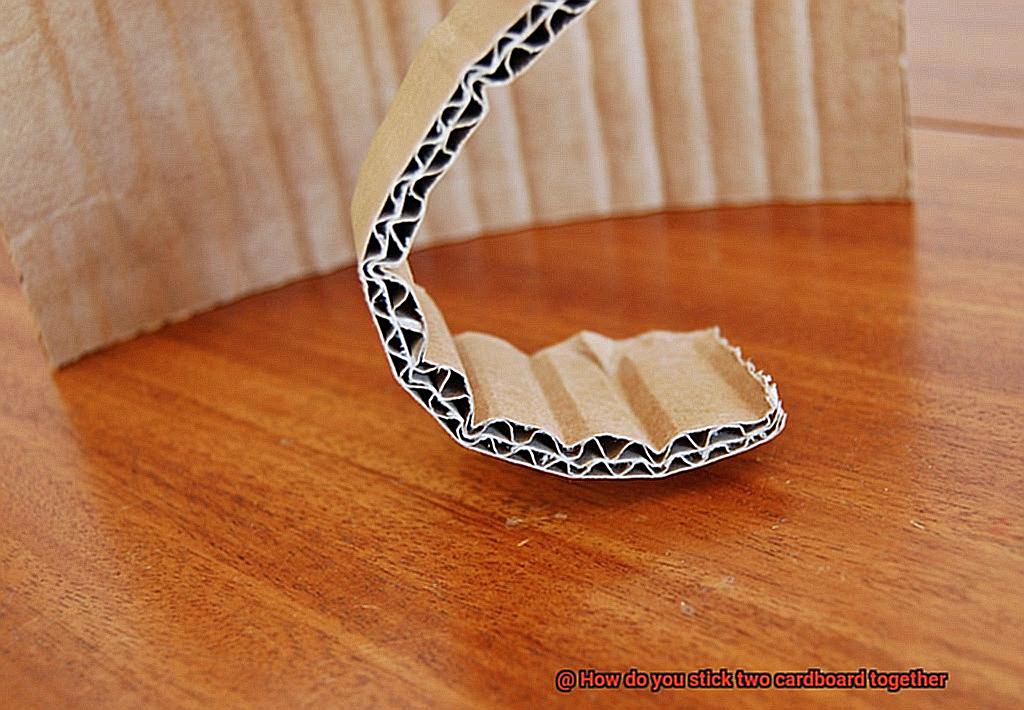
Today, we’re diving headfirst into the amazing world of sticking two pieces of cardboard together. Whether you’re building a spaceship for your cat or fixing that trusty old storage box, knowing how to bond cardboard is key to unlocking your creative genius. In this blog post, we’ll walk you through a range of tried-and-true methods, tips, and tricks to ensure a rock-solid bond that will stand the test of time.
Now, sticking two pieces of cardboard might sound like a piece of cake, but let me tell you, it’s all about the nitty-gritty details. Lucky for you, we’re here to break it down and make it super simple. Get ready to unleash your inner crafting pro as we embark on this exciting journey of cardboard bonding.
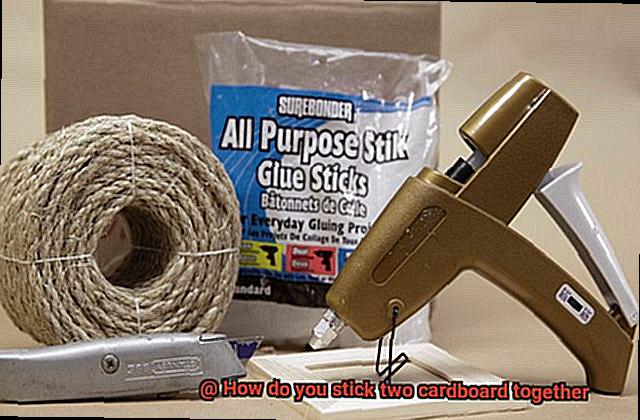
Choosing the Right Adhesive:
Contents
- 0.1 Choosing the Right Adhesive:
- 0.2 Preparation:
- 0.3 Application Techniques:
- 0.4 Ensuring a Sturdy Bond:
- 1 Adhesive Options for Sticking Cardboard Together
- 2 White Craft Glue
- 3 Hot Glue Gun
- 4 c. Specialized Adhesives
- 5 d. Double-sided Tape
- 6 Considerations When Choosing an Adhesive
- 7 Applying White Craft Glue
- 8 Applying Hot Glue Gun
- 9 Applying Spray Adhesive
- 10 Applying Double-sided Tape
- 11 Tips for Working with Cardboard and Adhesives
- 12 Conclusion
First things first – picking the right adhesive is crucial for a successful cardboard union. We’ve got options galore: glue sticks, good ol’ white glue (like Elmer’s), hot glue guns, double-sided tape – you name it. Plus, if you’re feeling fancy, there are even specialty adhesives like spray adhesives. Each option has its own superpowers and best uses. We’ll spill all the deets so you can confidently choose the perfect adhesive for your project.
Preparation:
Before we get our sticky fingers all over those cardboard pieces, we need to prep them properly. Think cleaning off any gunk or oils and making sure those edges fit snugly together. It’s all about creating that seamless connection for maximum bonding power. Trust us – taking a little extra time to prep will pay off big time in the end.
Application Techniques:
Alrighty then. Time to get down to business and learn some top-notch adhesive application techniques. We’ll walk you through it step by step, covering everything from brush-on application to dots, lines, zig-zags, and even bead application methods. You’ll become a pro at knowing which technique works best with your chosen adhesive and project needs.
Ensuring a Sturdy Bond:
But wait, there’s more. We’re not stopping at just applying the glue – we want that bond to be rock solid. So we’re sharing some expert tips and tricks to reinforce your cardboard connection. From clamping techniques to applying pressure evenly and giving it ample drying time, these little secrets
Adhesive Options for Sticking Cardboard Together
The choice of adhesive can make or break a cardboard project. With an array of options available, it is crucial to select the right adhesive that suits your project’s specific needs. In this comprehensive guide, we will delve into the various adhesive options for sticking cardboard together, considering their advantages and disadvantages.
White Craft Glue (PVA):
Advantages:
- Safe for all ages with non-toxic properties.
- Widely accessible and cost-effective.
- Dries transparently, ensuring a clean finish.
- Yields a robust bond when applied correctly.
Disadvantages:
- Longer drying time compared to other adhesives.
- Not suitable for use in humid environments due to its lack of water-resistance.
Hot Glue:
Advantages:
- Instant bonding for quick fixes and small projects.
- Convenient application with a hot glue gun.
- Versatile for a variety of crafting needs.
Disadvantages:
- Prone to brittleness over time, reducing durability.
- Unsuitable for projects requiring long-lasting strength.
Epoxy Adhesives:
Advantages:
- Provides a durable and permanent bond.
- Resistant to moisture and temperature fluctuations.
- Ideal for heavy-duty applications.
Disadvantages:
- Requires meticulous mixing of two components.
- Lengthy curing time compared to other adhesive options.
Double-Sided Tape:
Advantages:
- Hassle-free and easy to use.
- Offers instant bonding without any mess or residue.
Disadvantages:
Spray Adhesives:
Advantages:
- Offers uniform coverage over large areas.
- Creates a strong bond when appropriately applied.
Disadvantages:
- Potential messiness during application, requiring proper ventilation.
- Drying times may vary depending on the brand.
Liquid Nails/Construction Adhesive:
Advantages:
- Delivers a robust bond suitable for heavy-duty projects.
- Resistant to moisture and temperature fluctuations.
Disadvantages:
- Less readily available compared to other options.
- Difficult to remove if necessary.
White Craft Glue
White craft glue is a versatile and essential adhesive for various crafting projects. It is a water-based adhesive that dries clear, making it perfect for bonding two pieces of cardboard together. Whether you’re working on school projects, creating custom greeting cards, or constructing intricate cardboard structures, white craft glue will be your trusty companion.
To achieve the best results with white craft glue, there are a few key steps to follow. First and foremost, it is crucial to ensure that the surfaces you’re bonding are clean and free from any dirt, dust, or grease. Simply wipe them down with a damp cloth or use a mild detergent if necessary.
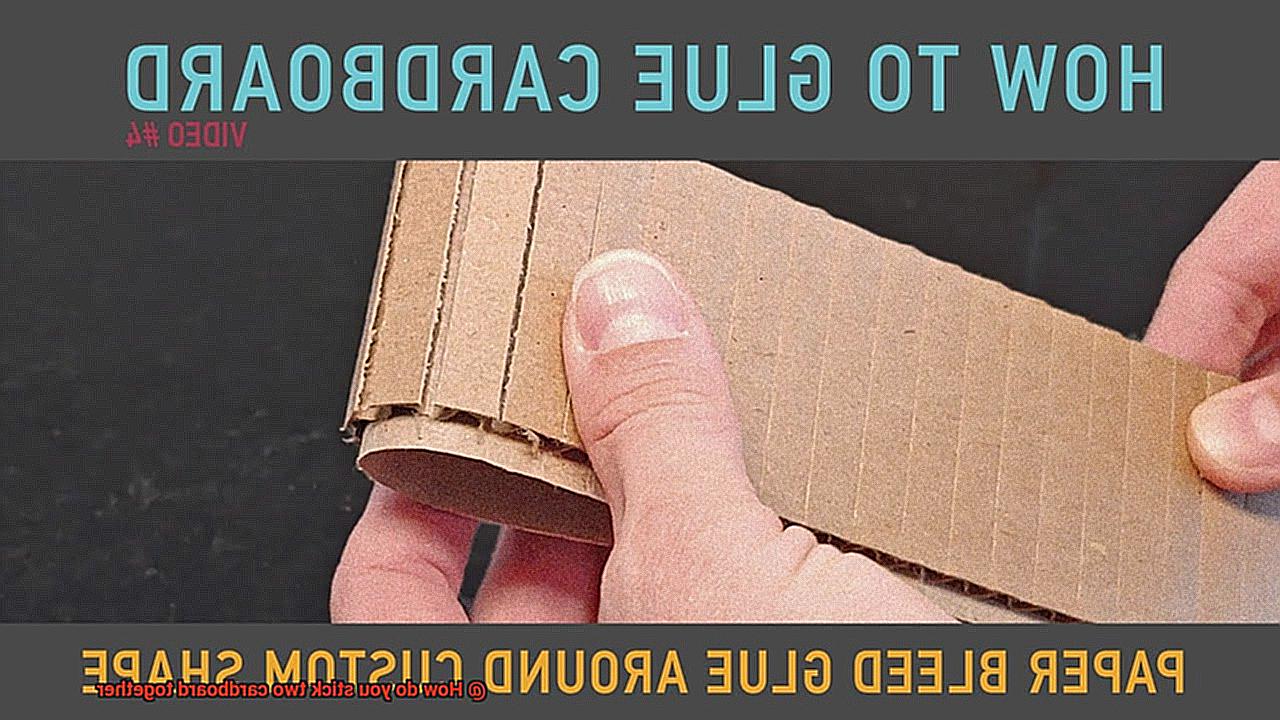
Next, when applying the glue, remember that less is more. A thin, even layer of glue should be applied to one piece of cardboard. Avoid using excessive amounts of glue, as it can result in messy seepage and longer drying times.
Once the glue is applied, align the second piece of cardboard with the glued surface, ensuring that everything lines up perfectly. Press it firmly onto the glue, creating good contact between the two pieces.
To create a strong bond, hold the glued pieces together firmly for a few minutes. You can use clamps or place heavy objects on top of the glued area. Just make sure that the pressure applied is even and does not damage your cardboard masterpiece.
Patience is key when using white craft glue. It needs time to work its magic. Leave your creation undisturbed for at least 24 hours to ensure proper drying and a strong bond. Think of it as waiting for the glue fairy to sprinkle her magic dust.
While white craft glue is fantastic for most cardboard projects, it may not be suitable for applications where moisture or heavy stress is involved. In such cases, consider using specialized adhesives like epoxy or hot glue.
When it comes to safety, white craft glue is non-toxic and safe for use, even with children. However, adult supervision is recommended, especially when handling sharp tools like scissors or utility knives.
If any excess glue spills out during the gluing process, don’t panic. Simply grab a damp cloth or sponge and wipe it away before it dries and becomes a sticky nightmare.
Once your glued cardboard has dried, give it a gentle tug to test the strength of the bond. If it holds up, congratulations. Your project is ready to conquer the world.
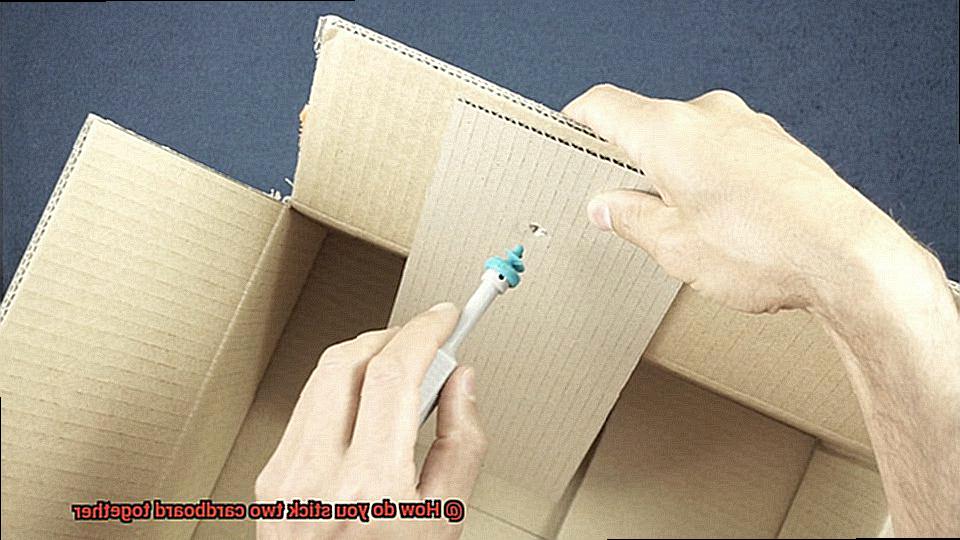
Hot Glue Gun
Look no further than the mighty hot glue gun. This versatile tool is a game-changer when it comes to bonding two pieces of cardboard together. In this article, we will guide you through the process of using a hot glue gun with confidence and finesse. Get ready to unleash your creativity and create projects that will withstand the test of time.
The Basics: Getting to Know Your Hot Glue Gun
A hot glue gun is more than just an ordinary tool; it’s a magical wand that transforms cardboard into sturdy creations. This handheld device uses hot adhesive to bond materials, such as cardboard, with ease. Hot glue guns come in different sizes and power levels, catering to various crafting needs. The glue sticks used in hot glue guns are made of thermoplastic materials that melt when heated, ensuring a strong bond between cardboard pieces.
Prepping for Success: Gather Your Materials
Before embarking on your cardboard bonding adventure, gather all the necessary materials. You’ll need two pieces of cardboard that you want to join together, a hot glue gun (choose one that suits your needs), and glue sticks compatible with your glue gun model. With these supplies at hand, you’re ready to bring your creative vision to life.
Safety First: Protecting Yourself and Your Workspace
As with any craft activity, safety should be a top priority. Ensure your work area is clean and well-ventilated, allowing for optimal focus and comfort during your project. To protect your working surface from heat damage, use a heat-resistant mat or working surface. Additionally, wearing protective gloves will shield your hands from potential burns caused by the hot adhesive.
Let the Bonding Begin: Step-by-Step Guide to Using a Hot Glue Gun
Now that you’re prepped and protected, it’s time to dive into the bonding process. Insert a glue stick into the glue gun and plug it in to heat up. As the glue gun warms up, you can feel the anticipation building. Once it reaches the desired temperature (usually indicated by an LED light), you’re ready to work your magic. Apply a thin line or dots of melted glue along one edge of the cardboard piece. With precision and purpose, quickly press the second piece of cardboard firmly against the glued area. Hold the pieces together for a few seconds, allowing the glue to solidify and form an unbreakable bond. Repeat this process along the remaining edges, reinforcing the connection between the two pieces.
c. Specialized Adhesives
Today, we embark on a thrilling journey into the realm of specialized adhesives. Get ready to unlock the secrets of bonding cardboard pieces together like a pro. Whether you’re a craft enthusiast, a packaging guru, or just a curious reader, this guide will equip you with the knowledge to conquer any adhesive challenge that comes your way.

The Hot Glue Gun: A Magical Wand for Cardboard Bonding
Ah, the hot glue gun – a staple in every creative arsenal. This versatile adhesive offers quick and robust bonding for cardboard. Its liquid form solidifies within seconds, creating an unbreakable bond. Perfect for arts and crafts projects, packaging, and even construction endeavors.
Double-Sided Tape: Convenience Meets Instant Bonding
When time is of the essence or you need a temporary solution, double-sided tape comes to the rescue. With adhesive coated on both sides of a thin strip, it instantly joins two cardboard pieces without any drying time. Ideal for lightweight applications or when flexibility is required.
Liquid Adhesives: The Powerhouses of Permanent Bonding
For a permanent and durable bond on cardboard, liquid adhesives are your best bet. White glue (PVA glue) and wood glue penetrate the cardboard fibers, creating a strong and resistant connection against moisture and temperature changes. While white glue is commonly used in paper-based projects, wood glue’s formidable adhesive properties make it an excellent choice for bonding cardboard too.
Specialized Cardboard Adhesives: The Spray of Speed and Security
Enter the superheroes of the adhesive world – specialized adhesives formulated exclusively for bonding cardboard. These spray adhesives offer lightning-fast drying times and exceptional coverage. Perfect for large-scale cardboard projects where efficiency is key.
Surface Preparation: The Key to a Strong Bond
Before diving into the adhesive wonderland, remember the importance of surface preparation. Cleanse the surfaces to be bonded, ensuring they are free from dust and debris. This simple step guarantees a clean and smooth surface for optimal adhesive adhesion.
d. Double-sided Tape
Today, we embark on a magical journey into the world of double-sided tape and its remarkable ability to effortlessly bond two pieces of cardboard together. Whether you’re a craft aficionado, a professional packager, or simply someone seeking adhesive wisdom, this guide will equip you with the knowledge to conquer any bonding challenge that comes your way. So, grab your tape dispenser and let’s dive in.
Quick and Mess-Free Bonding:
Bid farewell to messy glue spills and long drying times. Double-sided tape offers a swift and efficient solution for joining cardboard pieces. With its thin strip of adhesive material coated on both sides with protective backing, this versatile tape allows you to achieve an instant bond without the fuss.
No more waiting for glue to dry or dealing with sticky fingers. With double-sided tape, you can say goodbye to the mess and hello to hassle-free bonding. Simply peel off the protective backing from one side of the tape, apply it to the surface of your cardboard piece, and then peel off the other backing to reveal the second adhesive surface. Press the two pieces together firmly, and voila. You have an instant bond that is ready to withstand whatever task or project lies ahead.
Immediate Bonding for Time-Sensitive Projects:
Imagine having a project that requires an immediate bond – enter double-sided tape. This adhesive gem is perfect for situations where time is of the essence or when clamping or holding the items together during drying is not feasible.
Whether you’re creating custom packaging boxes, assembling displays, or working on quick-fix repairs, double-sided tape delivers instant bonding magic. Its strong adhesion properties ensure that your cardboard pieces stay firmly in place from the moment they are joined together. No need to wait for glue to dry or worry about items shifting or falling apart. With double-sided tape, you can confidently tackle time-sensitive projects with ease and efficiency.
Strength and Durability:
Not all tapes are created equal, so it’s essential to choose a double-sided tape suitable for your specific needs. Some tapes are designed for heavy-duty applications and can provide a robust and long-lasting bond. Ensure you select a tape appropriate for the weight and size of your cardboard pieces to achieve optimal results.
When it comes to bonding cardboard, strength and durability are key. Double-sided tape offers a range of options to suit various projects, from lightweight crafts to heavy-duty applications. If you’re working with large or bulky cardboard pieces, opt for a tape with extra holding power. These tapes are specifically designed to withstand the weight and strain that may be placed on the bond. For smaller or more delicate projects, choose a tape that provides enough adhesion to keep your pieces securely together without causing damage.
Considerations When Choosing an Adhesive
Today, we will explore the key considerations when selecting an adhesive to stick two pieces of cardboard together. So grab a cup of coffee and let’s dive into this sticky situation.
Types of Adhesives:
First things first, let’s talk about the different types of adhesives available. Liquid glues provide versatility and precision, allowing you to control the amount and placement of adhesive. Glue sticks offer convenience and mess-free application, making them ideal for quick and easy projects. Tape is perfect for instant fixes and offers a strong bond with minimal effort. Spray adhesives ensure even coverage, making them suitable for large and irregular surfaces. Consider your project needs and choose the adhesive type that suits you best.
Bonding Strength:
Next up is bonding strength. Are you looking for a temporary bond that allows for repositioning or an adhesive that creates a permanent bond that can withstand heavy use? Some adhesives offer temporary bonding while others provide a strong permanent bond. Make sure to select an adhesive that matches the level of durability you require.
Surface Characteristics:
Cardboard comes in various textures and porosities, so it’s essential to consider these surface characteristics when choosing an adhesive. Some adhesives work better on porous surfaces, while others excel on smooth surfaces. Ensure proper adhesion by selecting an adhesive that matches the texture and porosity of your cardboard.
Environmental Factors:
Will your bonded cardboard be exposed to moisture or extreme temperatures? If so, it’s crucial to choose an adhesive that can withstand these conditions. Certain adhesives may lose their strength when faced with moisture or heat. So don’t forget to factor in the environment when making your adhesive selection.
Safety First:
Your health should always be a priority. Some adhesives contain harmful chemicals or emit strong fumes, which can pose risks. Read the safety instructions provided by the manufacturer and choose an adhesive that is safe for your intended use. Your crafting experience should be enjoyable, not hazardous.
Cost and Availability:
Lastly, consider your budget and accessibility. Adhesives come in various price ranges, and some may be more readily available than others. Choose an adhesive that fits your budget and is easily accessible to make your crafting journey stress-free.
Applying White Craft Glue
Today, we embark on a sticky adventure as we explore the wonders of white craft glue and its application on cardboard. So grab your glue guns, put on your crafting hats, and let’s dive into the art of sticking things together.
Preparing the Surface:
Before we begin, let’s ensure our cardboard is squeaky clean. Dust off those cobwebs, wipe away any debris, and create a pristine surface ready for bonding. Remember, a clean canvas is essential for a successful adhesive journey.
Applying the Glue:
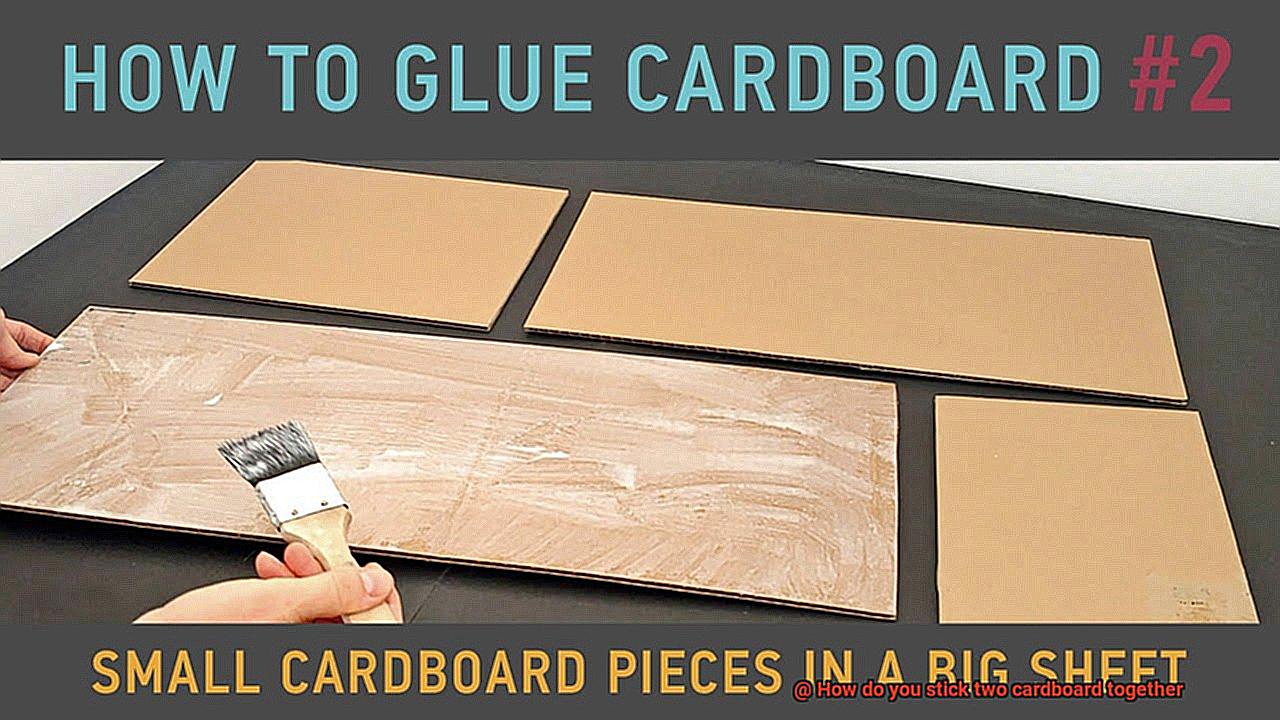
Now that our cardboard is prepped and primed, it’s time to get gluing. Squeeze a small dollop of white craft glue onto one piece of cardboard. Whether you choose to use a brush or get your hands dirty with your fingers, spread the glue evenly across the surface. But be cautious not to go overboard with the glue – we’re aiming for a smooth and tidy bond, not a sticky mess.
The Perfect Alignment:
Alright, now that our glue is applied, it’s time to bring our cardboard pieces together in perfect harmony. Ensure that both pieces are aligned properly before pressing them together. We wouldn’t want any wonky edges or misaligned masterpieces.
Apply Some Pressure:
To secure that solid bond, it’s time to apply a little pressure. Grab those heavy books you’ve been meaning to read (or maybe use some trusty clamps if you’re feeling fancy) and gently press the glued cardboard pieces together. This will help ensure a strong and steadfast connection.
The Waiting Game:
Patience is a virtue in the world of crafting. Leave your glued masterpiece undisturbed for at least 24 hours to allow the white craft glue to dry and set completely. Trust me, good things come to those who wait.
When White Craft Glue Isn’t Enough:
While white craft glue is a versatile adhesive, there are times when you need a bit more oomph. If you’re working on a project that requires extra strength or durability, consider exploring other options like hot glue or epoxy. These bad boys will provide the muscle your project needs.
Clean-up Tips and Tricks:
Oops. Made a little mistake or got carried away with the glue? Don’t fret. While white craft glue is still wet, it can be easily cleaned up with a damp cloth or sponge. If it’s already dry, try using a scraper or some sandpaper to remove any excess adhesive. Crisis averted.
Applying Hot Glue Gun
Hot glue guns are a versatile and essential tool for various crafts and DIY projects. When it comes to sticking two pieces of cardboard together, hot glue guns offer numerous benefits that make them an ideal choice. In this article, we will explore the advantages of using a hot glue gun for applying hot glue to cardboard, providing you with step-by-step instructions to achieve professional-looking results.
Strong Adhesive Properties:
Hot glue guns provide a strong bond between cardboard pieces. The melted glue quickly solidifies, creating a secure and durable connection that can withstand regular handling and wear. Whether you’re working on a school project or constructing a cardboard model, the strength of the hot glue ensures your creations stay intact.
Quick Drying Time:
One of the greatest advantages of using a hot glue gun is its rapid drying time. Unlike other adhesives that require hours or even days to fully set, hot glue dries within minutes. This allows you to continue working on your project without having to wait for the glue to dry, saving you valuable time.
Versatility:
Hot glue guns can be used for various applications beyond sticking cardboard together. They are suitable for bonding different materials such as fabric, wood, plastic, and even metals. This versatility makes hot glue guns a must-have tool for any DIY enthusiast or crafter.
Easy Application:
Applying hot glue is a straightforward process that requires minimal effort. With the help of a hot glue gun, you can dispense the glue precisely onto the desired area, ensuring even coverage and preventing messy results. The control offered by hot glue guns allows for intricate detailing and precise bonding.
Cost-Effective:
Hot glue guns are an affordable tool that offers excellent value for money. They are readily available in various price ranges, making them accessible to a wide range of budgets. Additionally, hot glue sticks are also inexpensive and come in packs, providing you with an ample supply for your projects.
Reusability and Removability:
One of the advantages of using hot glue is its reusability and removability. If you make a mistake or need to readjust your project, hot glue can be reheated and peeled off without damaging the materials. This flexibility allows for experimentation and correction, making it an ideal adhesive for creative endeavors.
Applying Spray Adhesive
Intro:
Welcome, crafters and DIY enthusiasts. Today, we embark on a journey into the world of spray adhesive, a powerful glue that can create a strong bond between two pieces of cardboard. Whether you’re working on school projects, art installations, or home decorations, understanding the proper application of spray adhesive is essential for achieving professional results. In this article, we will guide you step-by-step through the process, ensuring a strong and lasting bond between your cardboard pieces.
Prepare the Surface:
To ensure a flawless bond, start by cleaning the surfaces to be bonded. Wipe away any dust or debris with a clean cloth. A pristine surface guarantees optimal adhesion.
Choose the Right Environment:
Safety first. Work in a well-ventilated area or outdoors when using spray adhesives. This prevents inhaling fumes and ensures a safe working environment.
Shake It Up:
Give your spray adhesive can a good shake to awaken its adhesive powers. This vigorous shaking ensures an even distribution of the adhesive for maximum bonding effectiveness.
Apply Thin Coats:
Hold the can about 6-8 inches away from the surface and apply thin coats of adhesive in a sweeping motion. Multiple thin layers provide better coverage and superior adhesion compared to one thick layer.
Allow Tacky Time:
After applying the adhesive, exercise patience and allow it to become tacky. Tacky adhesive has a slightly sticky feel but won’t leave residue on your fingers when touched.
Align and Press Firmly:
Once the adhesive is tacky, align your cardboard pieces with precision and press them together firmly. Applying even pressure across the entire surface ensures an unbreakable bond.
Weight it Down:
To solidify the bond, add some weight or use clamps to keep the cardboard pieces pressed together for a few hours. This allows the adhesive to cure fully and create a bond that can withstand the test of time.
Safety First:
Remember to handle spray adhesives with care and follow the safety precautions mentioned on the can. Protect your skin and eyes, and keep the can away from open flames or heat sources.
Applying Double-sided Tape
Today, we’re delving into the marvelous world of double-sided tape and its magical ability to bond two pieces of cardboard seamlessly. Whether you’re working on a school project or creating something extraordinary from scratch, this versatile adhesive solution will be your trusty sidekick. So let’s dive in and learn the expert techniques for applying double-sided tape to cardboard like a pro.
Step 1: Clean and Dry Surfaces:
Prepare for success by ensuring that your cardboard surfaces are clean and dry. Dust, dirt, or moisture can disrupt the adhesive’s effectiveness. Give those cardboard pieces a quick wipe-down with a cloth before you begin.
Step 2: Peel and Stick:
It’s time to work your magic. Start by removing the protective liner from one side of the double-sided tape. With confidence, firmly press the exposed adhesive side onto one piece of cardboard. Feel the instant bond forming – love at first stick.
Step 3: Align and Press:
Now, remove the protective liner from the other side of the tape, revealing the second adhesive surface. Align the second piece of cardboard with the first and press them together firmly. Imagine a superhero landing – that’s the level of force we’re talking about here.
Consider Reinforcement:
For lightweight to medium-weight applications, double-sided tape is perfect. However, if you’re working on heavier or more permanent bonds, consider additional reinforcement options like glue or staples. Secure those cardboard pieces with extra strength.
Choosing the Right Tape:
Not all double-sided tapes are created equal. Optimize your results by choosing a high-quality tape specifically designed for bonding cardboard. Don’t settle for cheap or low-quality tapes that may lack adhesion or durability.
Removal and Cleanup:
When it’s time to part ways with your double-sided tape and cardboard, no worries. Removing the tape is a breeze. Gently peel it off to avoid damaging the surface. For any stubborn residue, use an adhesive remover or rubbing alcohol to clean up the mess.
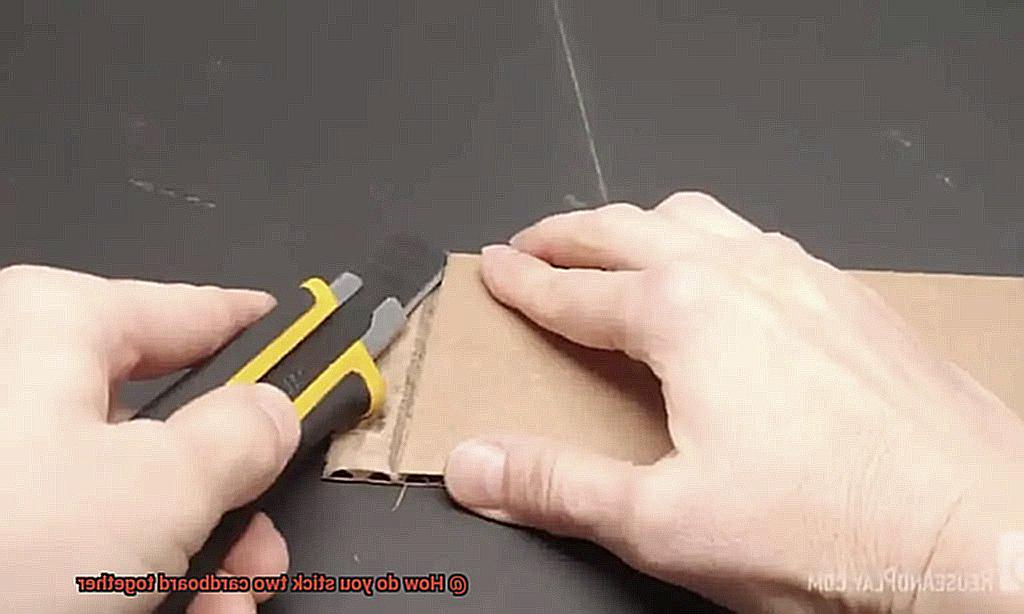
Tips for Working with Cardboard and Adhesives
Working with cardboard and adhesives can be a fun and creative experience. Whether you’re into crafting, packaging, or building prototypes, knowing how to stick cardboard together effectively is essential. In this article, we will explore various tips and techniques to help you create strong bonds using different adhesives. Let’s get started on your next cardboard masterpiece.
Choose the right adhesive
Just like superheroes have unique powers, different adhesives have their specialties too. Consider the specific requirements of your project when selecting an adhesive. Glue sticks, white glue, and school glue are great options for most cardboard projects due to their non-toxic nature and ease of use. If you need a quick bond, hot glue is your go-to hero. Spray adhesive is perfect for larger areas, while double-sided tape offers a clean and instant bond.
Prepare the surfaces
Before the glue party begins, it’s important to prepare the surfaces that will be bonded. Clean the cardboard pieces to remove any dust or grease that could affect adhesion. A gentle wipe with a damp cloth will do the trick. If there are any rough edges or uneven parts on the cardboard, sand them down to create a smooth bonding surface.
Apply adhesive like a pro
Now it’s time to become a glue master. For liquid adhesives like white glue or craft glue, spread a thin and even layer on one piece of cardboard using a brush or roller. Avoid using excessive amounts of glue as it can cause warping or weaken the joint. With hot glue, squeeze it out in lines or dots and press the pieces together quickly before it cools down. Spray adhesive requires an even coat on one piece of cardboard, while double-sided tape is as simple as sticking and pressing.
Allow proper drying time
Patience is key when it comes to glue magic. Different adhesives have different drying times, so it’s important to follow the instructions on the packaging. Rushing the process can result in weak adhesion and potential failure of the bond. Allow the glue to dry completely before moving or playing with your creation.
Reinforce for extra strength
Sometimes, even superheroes need backup. If you want your cardboard creation to withstand extra challenges, consider reinforcing the bond. You can use reinforcement tapes along the seams or even stitch with a needle and thread for added superhero strength. These techniques are particularly useful for projects that require durability or long-term stability.
h5vHheaR_HY” >
Conclusion
When it comes to joining two cardboard pieces together, there are several effective methods you can employ.
One simple yet reliable technique involves using glue specifically designed for paper and cardboard applications.
Apply a thin layer of the adhesive onto one of the cardboard surfaces, ensuring even coverage.
Gently press the second piece of cardboard onto the glued surface, aligning them accurately for a seamless bond.
For an extra secure hold, consider using clamps or heavy objects to apply pressure while the glue dries.
Another option is utilizing double-sided tape, which offers convenience and immediate adhesion without any drying time.
Ensure both cardboard surfaces are clean and dry before applying the tape for optimal stickiness.
Peel off one side of the tape’s protective backing and carefully position it along one edge of the first piece of cardboard.
Press firmly to secure it in place, then remove the remaining protective backing from the other side of the tape.
Align the second piece of cardboard with precision and press down firmly to create a strong bond.
If you require a more temporary solution or want to avoid using adhesives altogether, consider using Velcro strips or dots specifically designed for adhering lightweight materials like cardboard.
Attach one side of the Velcro strip or dot onto each piece of cardboard, making sure they align perfectly when brought together.
The hook-and-loop mechanism will provide a secure attachment while allowing easy detachment when needed.
Whichever method you choose, always ensure proper ventilation when working with adhesives to maintain safety precautions.
Experiment with these techniques to find the one that best suits your project’s requirements and enjoy the satisfaction of creating a sturdy bond between two cardboard pieces.