Welcome to our blog post all about securing a mirror to a wood frame.
So, you’ve got yourself a gorgeous mirror or maybe you’re feeling crafty and want to create a unique frame for an existing one. Either way, you need to know how to attach it securely.
Lucky for you, it’s not as complicated as it sounds. With just a few tools like a drill, mirror clips, adhesive, and screws, you’ll be able to achieve a professional-looking result that will hold up over time.
In this article, we’ll walk you through the steps, share some handy tips, and make sure your mirror stays put while adding style and functionality to any room.
What is Mirror Clips and How to Use Them
Contents
- 1 What is Mirror Clips and How to Use Them
- 2 Adhesive Options for Securing a Mirror to a Wood Frame
- 3 Using Mirror Mastic
- 4 Using Double-Sided Tape or Foam Mounting Strips
- 5 Preparing the Wood Frame for Adhesive Application
- 6 Pros and Cons of Using Mirror Clips Versus Adhesive
- 7 Tips for Applying Adhesive Properly
- 7.1 Choose the Right Adhesive:
- 7.2 When it comes to adhesives, one size doesn’t fit all. Each type of adhesive has unique qualities that make it ideal for specific applications. Ensure you choose an adhesive specifically designed for bonding mirrors to wood frames to achieve the best results.
- 7.3 Clean the Surfaces:
- 7.4 Before applying adhesive, thoroughly clean both the mirror and wood frame. Dirt, dust, or grease can prevent the adhesive from properly sticking, compromising the bond. Use a mild detergent or glass cleaner to clean the mirror surface and a damp cloth for the wood frame. Allow both surfaces to dry completely before proceeding.
- 7.5 Apply Adhesive Evenly:
- 7.6 To achieve a secure bond between the mirror and wood frame, it is important to apply the adhesive evenly. Start by spreading a thin layer of adhesive on the back of the mirror and along the edges that will come into contact with the wood frame. Use a putty knife or trowel to ensure even coverage, creating maximum contact between the mirror and adhesive.
- 7.7 Use Adequate Amount of Adhesive:
- 7.8 Using an adequate amount of adhesive is essential for a strong bond without unsightly drips or oozing out from the sides. Follow the manufacturer’s instructions for the recommended amount of adhesive to use. Applying too little may result in an unstable bond, while applying too much can create a messy appearance. Strike the right balance to achieve an effective and neat application.
- 7.9 Press Firmly:
- 8 Conclusion
Mounting a mirror onto a wood frame can be a daunting task, but with the right tools and technique, it can be a breeze. One popular method is using mirror clips, small metal or plastic brackets specifically designed to hold mirrors in place securely. In this article, we will explore what mirror clips are, how they work, and provide step-by-step instructions on how to use them effectively.
What are Mirror Clips?
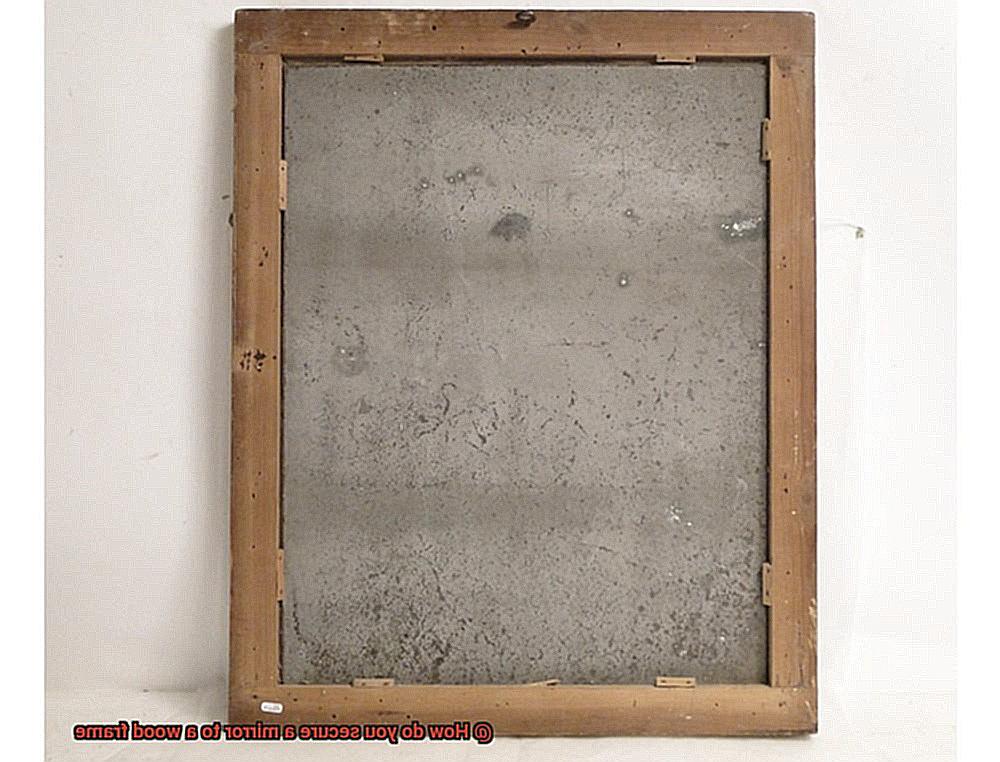
Mirror clips are small brackets that secure a mirror to a wood frame, preventing it from shifting or falling off. They come in various sizes and styles to accommodate different mirror thicknesses and frame designs. Made from durable materials like metal or plastic, mirror clips are built to provide stability and ensure the mirror remains securely attached.
Using Mirror Clips: Step-by-Step Guide
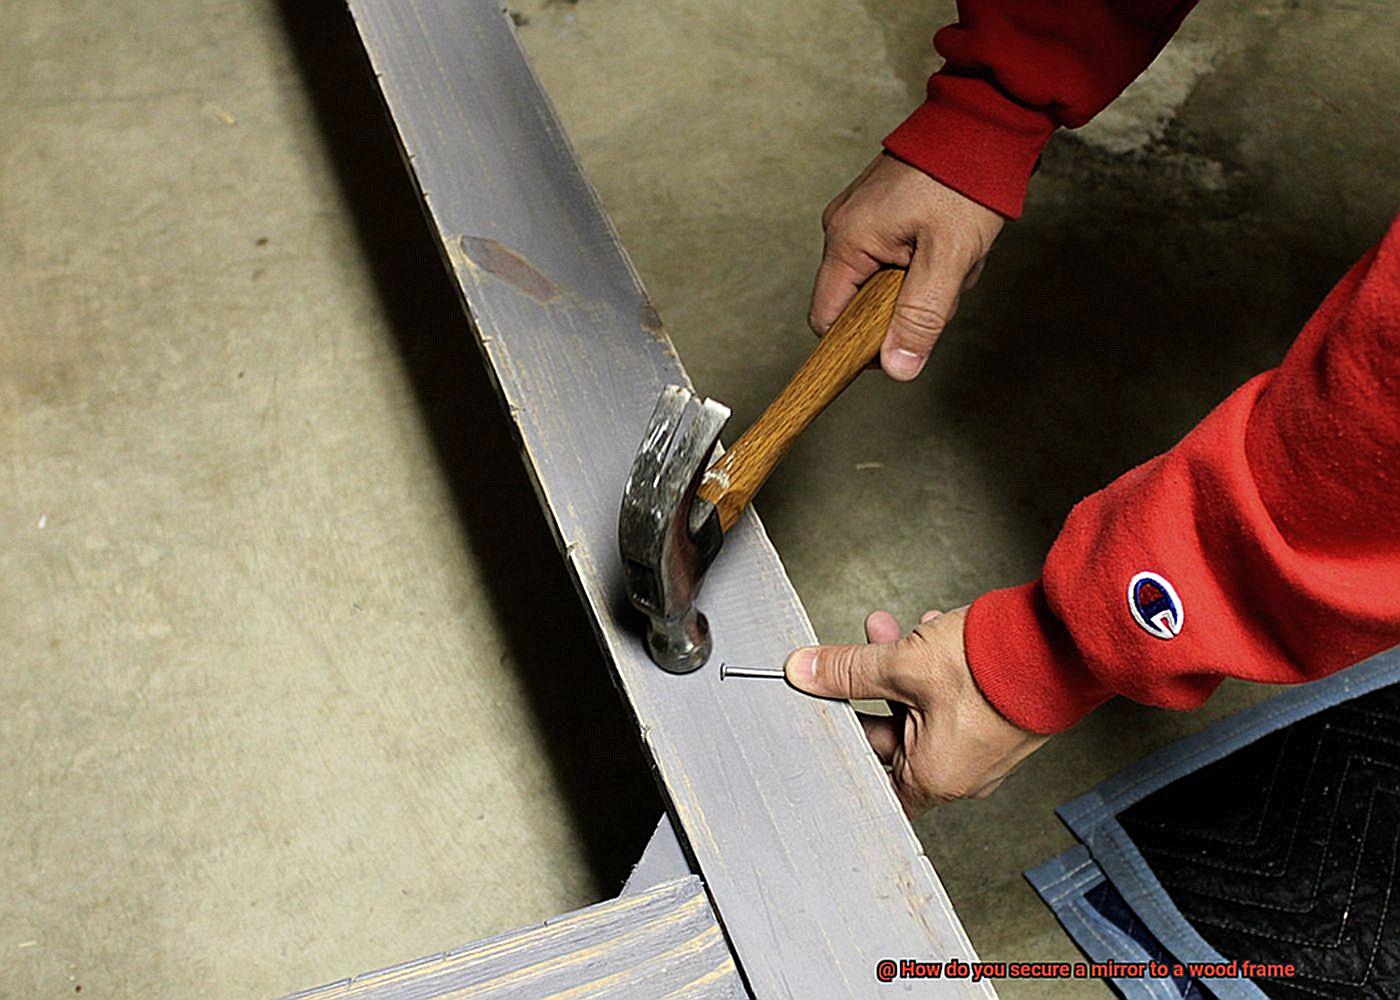
- Determine Placement: Begin by deciding where you want to mount the mirror on the wood frame. Mark the spots where the mirror clips will be attached. Typically, four clips are used – one for each corner of the mirror.
- Create Pilot Holes: Use a drill to create pilot holes at the marked spots on the wood frame. The size of the pilot holes should match the screws that will be used to secure the clips. Ensure the holes are deep enough to accommodate the screws without protruding from the back of the frame.
- Attach Mirror Clips: Align each mirror clip with its corresponding hole on the frame. Hold the clip in place and insert a screw through the hole in the clip and into the pilot hole in the frame. Use a screwdriver to tighten the screw until the clip is firmly secured to the frame. Repeat for each clip.
- Place the Mirror: Carefully place the mirror onto the wood frame, aligning it with the clips. Gently press down on the mirror to ensure it is snugly held by the clips. Check that all corners are securely held in place.
- Additional Support: For added stability, consider using rubber bumpers or adhesive pads between the back of the mirror and the wood frame. These help cushion and stabilize the mirror, reducing the chance of shifting or cracking.
Adhesive Options for Securing a Mirror to a Wood Frame
Securing a mirror to a wood frame is a task that requires careful consideration of adhesive options. With a plethora of choices available, selecting the right adhesive for your project can be overwhelming. Let’s explore the world of mirror adhesives and discover the best options for securing mirrors to wood frames.
Mirror adhesive, specifically designed for bonding mirrors to various surfaces, including wood, offers a sturdy and long-lasting bond. Ideal for smaller or lightweight mirrors, this adhesive ensures that your mirror stays securely in place. However, if you’re working with a larger or heavier mirror, construction adhesive might be a better choice. Construction adhesive is specially formulated to support heavy objects and provides the necessary strength for larger mirrors. Look for a construction adhesive suitable for both wood and glass surfaces, with a high initial grab to prevent slipping during installation.
For those seeking simplicity, double-sided mounting tape provides an easy and convenient option. Designed to create a strong bond between the mirror and wood frame, this tape is quick to apply. However, it may not be as durable as other adhesive options and may not be suitable for larger or heavier mirrors.
Silicone adhesive is another popular choice renowned for its flexibility and adhesion properties. Perfect for bonding mirrors to different surfaces, silicone adhesives also offer resistance against moisture and temperature changes, making them ideal for bathroom or outdoor installations.
When using any adhesive, it is crucial to follow the manufacturer’s instructions meticulously. Prepare the wood surface by thoroughly cleaning it and eliminating any dust, grease, or contaminants that could affect the bond. Apply the adhesive evenly along the back of the mirror using spaced dots or lines to distribute weight evenly and minimize the risk of cracking or breaking.
Remember to test a small area before applying the adhesive to ensure compatibility with both the mirror and wood frame. Patience is key – allow the adhesive to cure fully before hanging or moving the mirror, guaranteeing a secure and long-lasting bond.
Using Mirror Mastic
Securing a mirror to a wood frame requires the right adhesive, just like finding the perfect dance partner. Mirror mastic, a specially designed adhesive, offers a strong and lasting bond that ensures your mirror stays securely in place. In this article, we’ll explore the benefits of mirror mastic and guide you through the process of using it to secure your mirror to a wood frame.
Mirror Mastic: The Ideal Adhesive for Wood Frames:
Mirror mastic is a thick, white paste-like adhesive that forms a strong bond between the mirror and wood frame. It offers several advantages over other adhesives, making it the top choice for securing mirrors to wood frames.
Strong Adhesion:
Mirror mastic is like a superhero cape for your mirror—it adheres well to both the mirror and wood frame, creating a bond that can withstand the weight and movement of the mirror. No more worrying about your mirror slipping or falling off the frame—mirror mastic has got you covered.
Moisture Resistance:
Mirror mastic is an all-weather warrior, especially when it comes to moisture. It laughs in the face of humidity and humidity-related mishaps in places like bathrooms. With mirror mastic, your mirror will stay securely in place, no matter how steamy things get.
Using Mirror Mastic: A Step-by-Step Guide:
Now that we’ve covered the benefits of mirror mastic let’s dive into how to use it effectively to secure your mirror to a wood frame.
Step 1: Prepare the Surfaces:
Before applying mirror mastic, it’s time to clean up. Ensure that both the mirror and wood frame are sparkling clean and free from any dust, grease, or debris. Think of it as preparing a canvas for a masterpiece—you want those surfaces pristine for optimal adhesion.
Step 2: Apply Mirror Mastic:
Grab your caulk gun and get ready for some artistic zigzagging. Apply a small amount of mirror mastic onto the back of the mirror in a zigzag pattern. Spread it evenly across the surface to ensure a strong and reliable bond.
Step 3: Secure the Mirror:
It’s showtime. Carefully position the mirror onto the wood frame, pressing firmly to create a perfect union between the adhesive and both surfaces. Take a step back and admire your handiwork—your mirror is now securely attached to its wood frame.
Step 4: Allow Drying and Curing Time:
Now, patience is the name of the game. After securing the mirror to the wood frame, resist the urge to touch or move it for at least 24 hours. This waiting period allows the mirror mastic to dry and cure, creating an unbreakable bond that will stand the test of time.
Using Double-Sided Tape or Foam Mounting Strips
These adhesive options are versatile, easy to use, and offer a strong hold that will keep your mirrors securely in place.
Let’s start with double-sided tape. This nifty adhesive is as versatile as it gets. With adhesive on both sides and a protective backing, it’s perfect for securing mirrors. Just cut the tape into strips, peel off the backing, and stick it onto the back of your mirror. Then, position it onto the wood frame and press down firmly. Easy peasy.
Now, let’s give a warm welcome to foam mounting strips. These little heroes are made of foam material with adhesive on both sides. They often come pre-cut for your convenience. Attach the strips evenly on the back of your mirror, position it onto the wood frame, and press down firmly. Voila. Your mirror is now securely attached.
The benefits of using these adhesive options are plentiful. Firstly, they eliminate the need for drilling or other hardware installation methods that may damage your precious wood frame. Plus, they’re ideal for lightweight or smaller-sized mirrors, allowing you to make temporary installations or easily change up your mirror’s position in the future.
But before you go sticking everything together like a mad scientist, remember that effectiveness can vary depending on factors like mirror weight and size, as well as the texture of your wood frame. Choose high-quality adhesive products specifically designed for mirror mounting to ensure a reliable hold.
Preparing the Wood Frame for Adhesive Application
Preparing the Wood Frame for Adhesive Application
To ensure a strong and durable bond between a mirror and a wood frame, it is essential to properly prepare the frame before applying adhesive. Follow these steps to achieve a secure hold and create a harmonious connection between your mirror and wood frame:
- Clean the frame: Use a soft cloth or brush to remove any dust, dirt, or debris from the surface of the wood frame. This step ensures that no particles interfere with the adhesive bond.
- Repair any imperfections: Check for cracks, chips, or rough edges on the wood frame. Smooth out these imperfections using sandpaper or wood filler to create an even surface for the adhesive to adhere to.
- Ensure dryness: Moisture can weaken the adhesive’s hold, so it is crucial to ensure that the wood frame is completely dry before proceeding with the application.
- Prime the frame: Applying a primer suitable for wood surfaces enhances the adhesive’s bonding capabilities. Follow the manufacturer’s instructions for proper application techniques to create an optimal surface for the adhesive to adhere to.
- Choose the right adhesive: Select an adhesive specifically designed for mirror mounting, such as mirror mastic or construction adhesive. Read and follow the instructions on the product carefully to achieve the best results.
- Apply the adhesive: Use a notched trowel or putty knife to evenly spread a consistent layer of adhesive on the backside of the mirror frame. Aim for a smooth and even application, akin to spreading peanut butter on toast.
- Position the mirror: Carefully align and press down on the mirror onto the wood frame, ensuring it is straight and correctly positioned. Use a level to guarantee picture-perfect alignment.
- Allow drying time: Let the adhesive dry completely before moving or handling the mirror. The drying time may vary depending on the type of adhesive used, so be patient and follow the manufacturer’s instructions.
- Inspect and reinforce: After the adhesive has dried, inspect the mirror and frame for any gaps or areas that need additional adhesive. Apply a small amount of adhesive to fill in these gaps and ensure a secure hold.
- 10. Clean excess adhesive: Use a damp cloth or paper towel to gently wipe away any excess adhesive that may have squeezed out from between the mirror and the frame. Be careful not to disturb the bond while cleaning.
Pros and Cons of Using Mirror Clips Versus Adhesive
Deciding between mirror clips and adhesive for attaching a mirror to a wood frame can be a perplexing task. Both options come with their own set of advantages and disadvantages, requiring careful consideration before making a choice. In this comprehensive guide, we will delve into the pros and cons of using mirror clips versus adhesive, equipping you with all the necessary information to make an informed decision.
The Pros of Using Mirror Clips:
- Effortless Installation: DIY enthusiasts will rejoice in the simplicity that mirror clips bring to the table. With screws or other fasteners, attaching the clips to the wood frame becomes a breeze. Bid farewell to the need for professional assistance.
- Flexibility at its Finest: Mirror clips often boast adjustable features, allowing you to align and level the mirror flawlessly. This remarkable flexibility ensures that your mirror is positioned with utmost precision and perfection.
- Minimal Risk of Damage: Unlike adhesive, mirror clips eliminate the need for glue or sticky substances. Consequently, the risk of damaging both the mirror and wood frame during installation or removal is significantly reduced. Furthermore, if you ever need to replace the mirror, it can be done without leaving behind any unsightly marks or stubborn residue.
The Cons of Using Mirror Clips:
- Unavoidable Hardware Visibility: One drawback of opting for mirror clips is their visibility once installed. This may not sit well with homeowners who prefer a seamless appearance for their mirrors and wood frames.
- Limited Aesthetic Options: Typically available in basic metal finishes like chrome or brass, mirror clips might not be suitable if you have a specific aesthetic in mind for your mirror. The lack of variety restricts your choices in terms of style and design.
- Potential Security Concerns: While mirror clips can securely hold mirrors in place, they might not match up to the strength and reliability of adhesive options. Due to their mechanical fastening nature, there is a slight risk of the mirror shifting or becoming loose over time.
Tips for Applying Adhesive Properly
Securing a mirror to a wood frame requires the proper application of adhesive to ensure a strong and secure bond. By following these tips, you’ll be able to confidently attach your mirror and create a beautiful addition to your home.
Choose the Right Adhesive:
Selecting the right adhesive is crucial when securing a mirror to a wood frame. Consider using mirror mastic, double-sided adhesive tape, or construction adhesive, depending on the weight and size of your mirror. Mirror mastic is highly recommended for its flexibility and strong bonding properties.
When it comes to adhesives, one size doesn’t fit all. Each type of adhesive has unique qualities that make it ideal for specific applications. Ensure you choose an adhesive specifically designed for bonding mirrors to wood frames to achieve the best results.
Clean the Surfaces:
Before applying adhesive, thoroughly clean both the mirror and wood frame. Dirt, dust, or grease can prevent the adhesive from properly sticking, compromising the bond. Use a mild detergent or glass cleaner to clean the mirror surface and a damp cloth for the wood frame. Allow both surfaces to dry completely before proceeding.
Apply Adhesive Evenly:
To achieve a secure bond between the mirror and wood frame, it is important to apply the adhesive evenly. Start by spreading a thin layer of adhesive on the back of the mirror and along the edges that will come into contact with the wood frame. Use a putty knife or trowel to ensure even coverage, creating maximum contact between the mirror and adhesive.
Use Adequate Amount of Adhesive:
Using an adequate amount of adhesive is essential for a strong bond without unsightly drips or oozing out from the sides. Follow the manufacturer’s instructions for the recommended amount of adhesive to use. Applying too little may result in an unstable bond, while applying too much can create a messy appearance. Strike the right balance to achieve an effective and neat application.
Press Firmly:
After applying the adhesive, carefully position the mirror onto the wood frame, ensuring proper alignment. Starting from the center, press firmly on the mirror surface and work your way towards the edges. This step helps eliminate air bubbles and ensures maximum contact between the mirror and adhesive, enhancing the strength of the bond.
snFmWCTFHIk” >
Conclusion
In conclusion, there are several methods available to securely attach a mirror to a wood frame. You can choose from options such as mirror clips, adhesive choices like mirror mastic or double-sided tape, or foam mounting strips. Each method has its own pros and cons, so it’s essential to consider factors like the mirror’s size and weight, desired aesthetic, and level of security needed.
Mirror clips are a convenient choice that allows for easy installation and flexibility in positioning the mirror. They also minimize the risk of damage to both the mirror and wood frame. However, they may be visible and have limited aesthetic options.
Alternatively, adhesive options like mirror mastic, construction adhesive, double-sided tape, or foam mounting strips provide a strong bond without the need for drilling or other hardware installation methods. These options work well for lightweight or smaller-sized mirrors but may not be as durable for larger or heavier mirrors.
When applying adhesive, it’s crucial to select the right type for your specific needs and ensure that both surfaces are clean and dry. Applying the adhesive evenly and using an adequate amount is vital for a secure bond without any messiness. Additionally, pressing firmly on the mirror surface after positioning it onto the wood frame helps eliminate air bubbles and ensures maximum contact between the two surfaces.