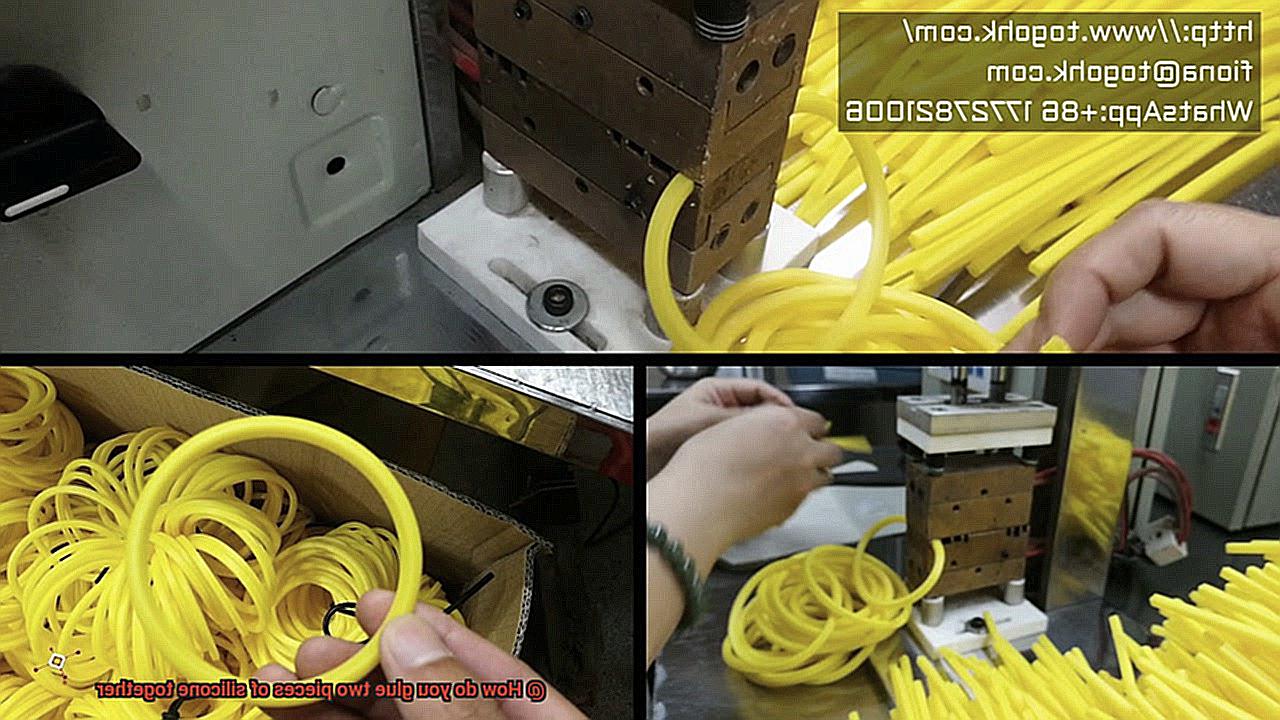
Silicone, the superhero of flexibility and durability, has become a staple in countless industries. But when it comes to joining two silicone pieces together, you may wonder if it’s an impossible feat due to its non-porous nature. Fear not. Whether you’re tackling a DIY project or seeking a professional solution, this guide will walk you through the process of seamlessly gluing two pieces of silicone together.
The key lies in selecting the right adhesive and following a few crucial steps. This blog post aims to arm you with the knowledge and techniques necessary to achieve a robust, long-lasting bond between silicone pieces.
From artsy craft projects to nifty household repairs and even intricate industrial applications, understanding how to fuse silicone is an invaluable skill. So grab your safety goggles and let’s dive headfirst into the captivating world of silicone gluing.
In this comprehensive guide, we’ll explore various adhesive options suitable for silicone, delve into surface preparation techniques, and provide step-by-step instructions for a successful bonding process. Additionally, we’ll shed light on essential considerations that ensure your silicone bond stands the test of time.
Ready to unlock the secrets of perfect silicone glueing? Let’s embark on this exciting journey together.
What is Silicone?
Contents
Silicone, an extraordinary synthetic polymer composed of a magical blend of silicon, oxygen, hydrogen, and carbon atoms, is a material that transcends boundaries and finds its place in countless industries. Its exceptional properties make it the ultimate choice for a wide array of applications. In this captivating blog post, we will delve into the captivating world of silicone, explore its remarkable characteristics, and unravel why it has become the go-to material for countless professionals.
Heat Resistance: Defying the Flames
Silicone’s standout feature lies in its ability to defy scorching temperatures without flinching. From the blistering heat of industrial settings to bubbling hot liquids in the kitchen, silicone remains unyielding, refusing to melt or deform. This incredible quality makes it the perfect companion for products such as resilient oven mitts, reliable baking mats, and steadfast automotive gaskets.
Flexibility and Elasticity: A Dance of Endurance
Silicone boasts an unrivaled dance of flexibility and elasticity. It gracefully stretches and seamlessly returns to its original shape without leaving a trace of damage, making it an indispensable material for applications that involve movement or bending. This remarkable attribute ensures a formidable bond when gluing two silicone pieces together while preserving the material’s integrity.
Chemical and Moisture Resistance: The Unyielding Barrier
Silicone stands as an unwavering barrier against the relentless assault of chemicals and moisture. Its highly inert nature shields it from reacting with most substances, rendering it suitable for environments teeming with harsh chemicals or drenched in liquids. This vital property becomes paramount when selecting an adhesive to bond silicone, guaranteeing unparalleled durability and stability.
Electrical Insulation: A Guardian against Surges
Silicone possesses a unique talent for electrical insulation, making it the guardian against surges in electronic applications. It gallantly withstands high voltages and staunchly prevents electrical currents from passing through, ensuring safety and reliability in electrical systems. This remarkable quality crowns silicone as the favored choice for products like indomitable electrical connectors, resolute insulators, and steadfast cables.
Biocompatibility: The Safeguard of Life
Silicone’s crown jewel lies in its biocompatibility—its gift of being non-toxic and hypoallergenic. This exceptional property renders it safe for use in medical devices and implants.
Silicone-based adhesives take center stage in the realm of medicine due to their ability to bond harmoniously with the human body, evading any adverse reactions. Healthcare professionals bestow their trust upon silicone as a safe and reliable option.
What Type of Adhesive Should be Used?
When it comes to gluing two pieces of silicone together, the type of adhesive you choose is critical. Silicone is a tricky material to bond due to its flexibility and non-porous nature.
There are adhesives specially designed for this challenge. Let’s explore the adhesive options and surface preparation techniques you need to know for a successful bond.
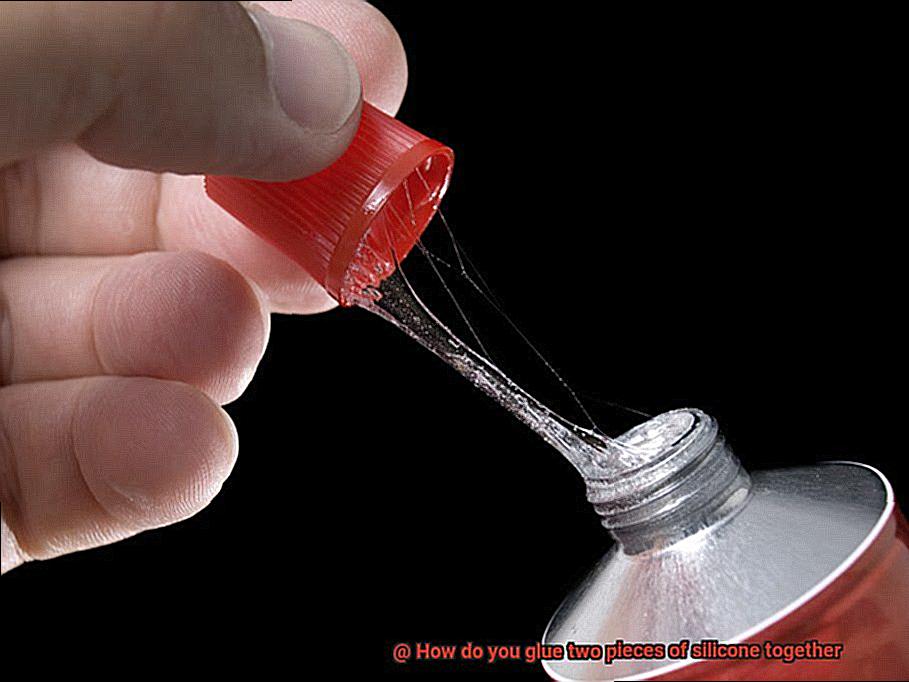
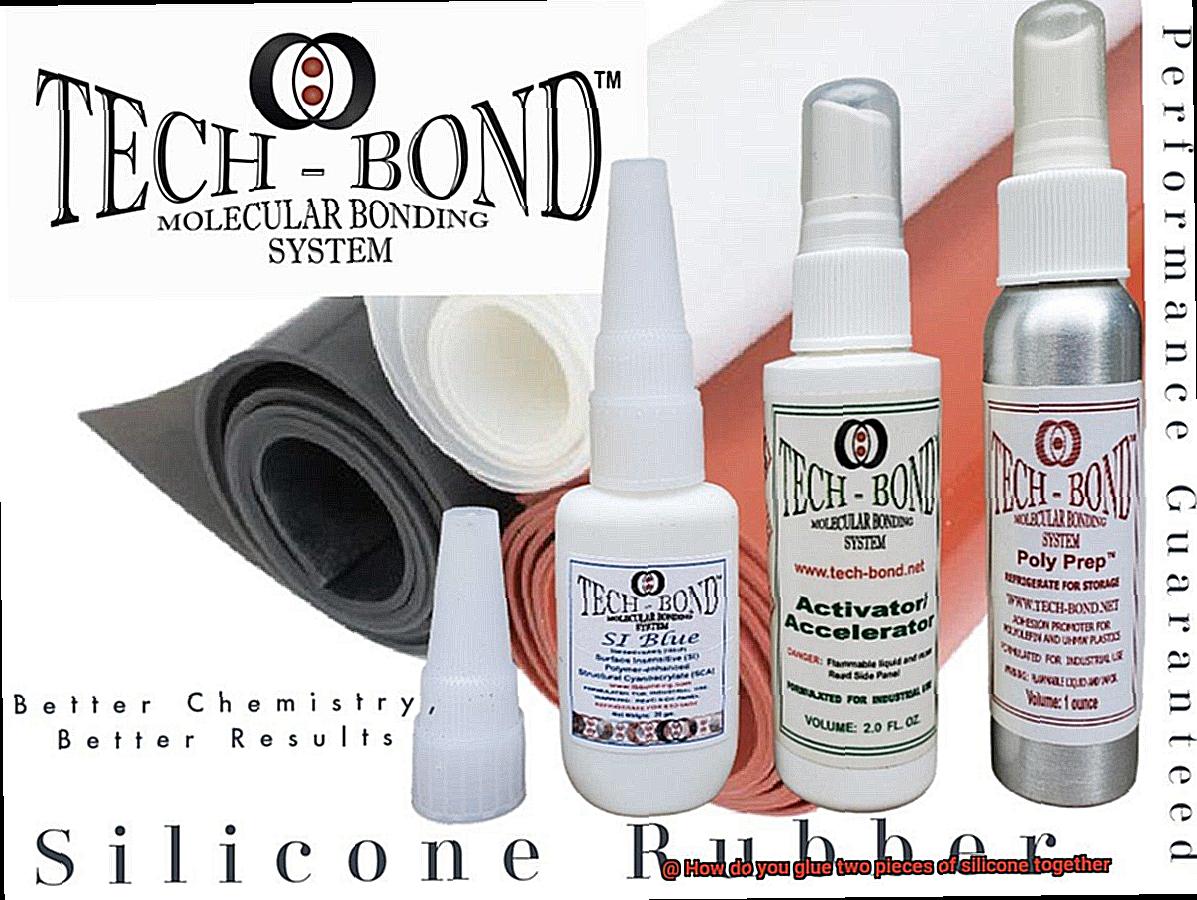
- Silicone-based adhesives: These bad boys are the superheroes of silicone bonding. They are formulated specifically for silicone materials and offer excellent adhesion and flexibility. They can withstand high temperatures, water, and even UV rays. Talk about versatility.
- Cyanoacrylate adhesives (super glue): This fast-acting adhesive forms a strong bond between silicone surfaces in a jiffy. Just make sure to choose one that explicitly states compatibility with silicone or plastics on the label. We don’t want any sticky situations here.
- Epoxy adhesives: If you’re bonding silicone with other materials like metal or glass, it’s time to bring out the big guns. Epoxy adhesives provide high strength and durability, perfect for permanent bonds. Just make sure to pick an epoxy adhesive that plays well with both your silicone and the material you’re bonding it to.
Surface preparation is crucial for a strong bond:
- Cleanliness is key: Wipe those silicone surfaces squeaky clean with isopropyl alcohol or a mild detergent. Get rid of any dirt or grease that could weaken the bond.
- Roughen up: For some extra oomph, lightly roughen the surfaces with sandpaper or a file. This step enhances adhesion and ensures a stronger bond.
Now that you’ve chosen the right adhesive and prepared the surfaces like a pro, it’s time for application:
- Follow the manufacturer’s instructions: Be a glue guru and carefully read and follow the instructions provided by the adhesive manufacturer. Each adhesive may have specific application guidelines that you need to follow for optimal results.
- Apply with care: Apply a thin, even layer of adhesive to one surface. Then, press the pieces together firmly. This ensures maximum contact and a stronger bond.
- Patience is a virtue: Give the adhesive sufficient curing time before subjecting your bond to any stress or load. Rushing the process can compromise the strength and durability of the bond.
Preparing the Surfaces for Bonding
Are you ready to become a glue guru? Get ready to learn the secrets of preparing surfaces for bonding two pieces of silicone together. It’s like finding the perfect superhero team-up – with the right adhesive and surface preparation techniques, you can conquer this tricky task. So, grab your cape and let’s dive in.
First things first, let’s talk about the adhesives that are specially designed for silicone materials. These superheroes offer excellent adhesion and flexibility, making them the perfect choice for bonding silicone. They can withstand high temperatures, water, and even UV rays. Talk about versatility. Make sure you choose an adhesive that is specifically formulated for silicone bonding.
Next up, we have cyanoacrylate adhesive, also known as super glue. This fast-acting adhesive forms a strong bond between silicone surfaces in a jiffy. Just make sure you choose one that explicitly states compatibility with silicone or plastics on the label. We don’t want any sticky situations here.
If you’re looking to bond silicone with other materials like metal or glass, it’s time to bring out the big guns – epoxy adhesives. These provide high strength and durability, perfect for permanent bonds. But remember, you’ll need an epoxy adhesive that plays well with both your silicone and the material you’re bonding it to.
Now that we’ve covered our adhesive options, let’s move on to surface preparation. Cleanliness is key. Wipe those silicone surfaces squeaky clean with isopropyl alcohol or a mild detergent. Say goodbye to dirt and grease that could weaken the bond.
For some extra oomph, lightly roughen up the surfaces with sandpaper or a file. This step enhances adhesion and ensures a stronger bond. Be gentle though, too much pressure can weaken the silicone.

Once your surfaces are clean and prepped, it’s time to apply the adhesive. Read and follow the instructions provided by the adhesive manufacturer carefully. Each adhesive may have specific application guidelines that you need to follow for optimal results. Apply a thin, even layer of adhesive onto one surface and then press the pieces together firmly.
Patience is a virtue. Give the adhesive sufficient curing time before subjecting your bond to any stress or load. Rushing the process can compromise the strength and durability of the bond.
Applying the Adhesive
Gluing two pieces of silicone together may seem like a daunting task, but with the right adhesive and proper technique, you can create a bond that is as strong as any superhero team-up. Let’s delve into the process of applying adhesive to bond silicone surfaces.
First and foremost, it is essential to choose the right adhesive for gluing silicone. Look for a silicone-based adhesive that is specifically formulated to bond with silicone surfaces. Not all silicone adhesives are created equal, so ensure that you select one that suits your specific application.
Once you have your adhesive superhero ready, it’s time to prepare the surfaces. Cleaning is crucial to remove any dirt, dust, or grease that could compromise the bonding process. Use a mild soap or detergent and water solution to gently scrub the surfaces with a soft cloth or sponge. Rinse thoroughly with clean water and allow them to dry completely.
With your surfaces clean and dry, it’s time to apply the adhesive. Before diving in, read the manufacturer’s instructions carefully. They are your trusty sidekick, guiding you through the process. In most cases, it is recommended to apply a thin layer of adhesive on both surfaces.
Start by squeezing a small amount of adhesive onto one of the silicone surfaces. Use a brush or applicator to spread it evenly over the surface, ensuring complete coverage of the area that will be bonded. Repeat this process for the second surface.
Once the adhesive is applied, it’s go time. Immediately join the two silicone pieces together. Take your time to align them carefully, and once aligned, press them together firmly. Applying even pressure across the entire bonded area will help ensure a strong and secure bond.
But we’re not done just yet. To give your bond some extra strength, consider clamping or taping the pieces together while the adhesive cures. This will help maintain pressure and keep everything in place. Make sure to follow the manufacturer’s instructions regarding curing time and any additional steps that may be required.
Here’s a little secret: some silicone adhesives require the use of a primer or activator to enhance bonding. These additional products help prepare the silicone surface and promote better adhesion. If your adhesive requires a primer or activator, be sure to follow the instructions provided.
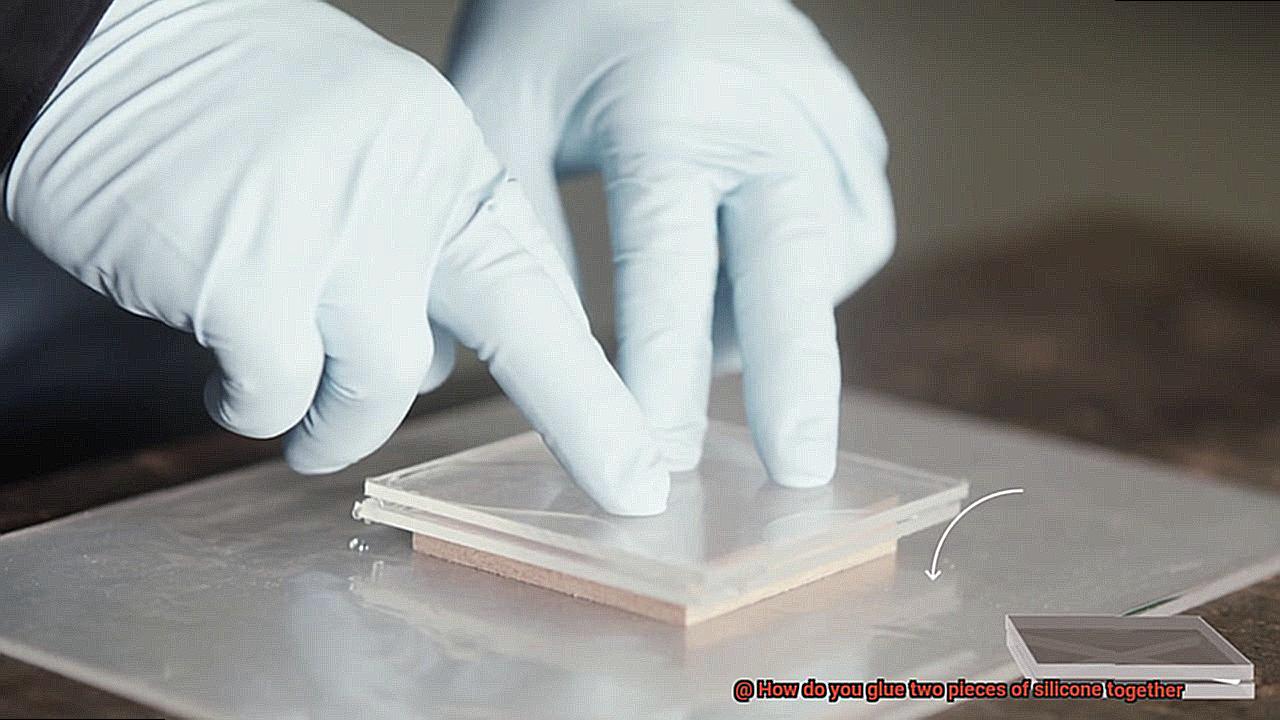
Pressing the Surfaces Together
If you’re seeking to forge an unbreakable alliance between two pieces of silicone, look no further. In this guide, we will unlock the secrets of pressing surfaces together, allowing you to achieve a bond that is strong and durable. Prepare to unleash your adhesive powers and reach superhero-level results.
Step 1: Cleanse and Prepare
Before assembling your superhero team, ensure they are ready for action. Thoroughly cleanse the surfaces of both silicone pieces using a mild soap or detergent and water, eliminating any dirt, dust, or oils that could sabotage the bonding process. Once cleansed, meticulously dry the surfaces to guarantee maximum adhesion.
Step 2: Choose Your Adhesive Arsenal
Every superhero requires the right tools for the job. Select a silicone-based adhesive or specialized silicone glue designed specifically for bonding silicone materials. These adhesives possess the power to create a formidable bond between your silicone pieces.
Step 3: Apply Adhesive
Arm yourself with a thin layer of adhesive, generously applying it to both pieces of silicone. Remember, less is more when it comes to adhesive application. This crucial step ensures proper coverage and promotes a robust bond between the surfaces.
Step 4: Precision Alignment
In superhero missions, precision is paramount. Carefully align the two silicone pieces, ensuring they are in the desired position before bringing them together. Be cautious not to apply excessive pressure at this stage, as you don’t want the adhesive to escape from the joint.
Step 5: Unleash Your Strength
Now it’s time for the ultimate test of strength. Apply firm and even pressure to press the silicone pieces together. This action helps distribute the adhesive evenly and creates maximum contact between the surfaces for an unbreakable bond. Depending on the size and shape of the silicone pieces, you can use your hands or employ clamps or weights.
Step 6: The Curing Period
Patience is a virtue in the world of bonding. Allow the adhesive to cure for the recommended time specified by the manufacturer. This period is crucial for the adhesive to set and solidify its hold. Safeguard the bond’s integrity by avoiding any disturbances or movement of the glued pieces during this time.
Step 7: Test the Bond
Just like a superhero gauging their strength, assess the bond’s resilience once the curing time has elapsed. Gently check for any signs of weakness, such as movement or separation between the glued pieces. If necessary, grant the adhesive more curing time until an unyielding bond is achieved.
Curing the Adhesive
In our previous section, we delved into the thrilling world of gluing silicone together. Now, let’s unlock the secrets of curing adhesive and discover how to create connections that can withstand the test of time. Get ready to embark on a journey of mastering the art of curing and witness the magic of unbreakable bonds.
The Two-Part Symphony:
First things first – let’s get acquainted with the star of the show: the two-part silicone adhesive. This dynamic duo consists of a base component and a curing agent. When these components join forces, a chemical reaction takes place, propelling us into the curing process and setting the stage for an unshakeable bond.
Timing is Everything:
Just like in superhero movies, timing is crucial when it comes to curing adhesives. The duration required for complete curing can vary depending on the specific product and its intended application. Some adhesives work their magic in just a few minutes, while others require several hours. To ensure success, always heed the manufacturer’s instructions regarding curing time and conditions.
Temperature and Humidity: The Dynamic Duo’s Sidekicks:
Let’s not forget about temperature and humidity – our trusty sidekicks in the curing process. Higher temperatures tend to speed up curing, while lower temperatures slow it down. Similarly, high humidity can give a boost, while low humidity may drag things out. To stay on track, ensure your curing environment meets the recommended temperature and humidity conditions for your adhesive.
Ventilation: Fresh Air for Success:
While we’re on the subject of curing, let’s talk about ventilation. Proper airflow is essential during the curing process to allow any volatile compounds released by the adhesive to dissipate safely. Good ventilation also helps prevent harmful fumes from accumulating, ensuring a safe working environment. So, crack open those windows and let the fresh air in.
Unleashing UV Light:
Some silicone adhesives demand an additional ingredient to work their magic: UV light. If your adhesive requires a dose of UV love, make sure you expose it to the right light source as instructed by the manufacturer. This “lightning strike” will initiate and complete the curing process, bringing your bond to its full strength potential.
Additional Steps and Precautions
Gluing two pieces of silicone together may seem like a simple task, but achieving a strong and durable bond requires additional steps and precautions. Let’s explore these measures in detail to ensure your adhesive prowess conquers the world of gluing.
- Surface Preparation: Properly preparing the surfaces is key to successful silicone bonding. Silicone’s non-stick properties pose a challenge for adhesives, so cleaning the surfaces thoroughly with a mild detergent or solvent is essential. This removes dirt, oils, and contaminants that can hinder the bonding process. For even better adhesion, lightly roughen the surfaces with sandpaper or a fine grit abrasive pad to create more gripping surface area.
- Primer Application: Enhance adhesive effectiveness by using a primer specifically designed for silicone bonding. Primers contain chemicals that react with the silicone surface, creating a stronger bond. Follow the primer instructions carefully and ensure it is fully dry before proceeding.
- Adhesive Selection: Choose an adhesive formulated for silicone bonding. Silicone-based adhesives or specialized two-part epoxy adhesives are suitable options. Ensure compatibility with silicone and consider your specific application to make the right choice.
- Application Technique: Apply a thin and even layer of adhesive on both surfaces being bonded together. Excessive amounts can lead to poor bonding or messy results. After applying the adhesive, immediately align and join the silicone pieces to prevent premature drying or curing.
- Curing Time: Allow sufficient time for the adhesive to fully cure after joining the silicone pieces. The curing time varies depending on the adhesive type, so consult the manufacturer’s instructions for specific guidelines. Avoid subjecting the bonded silicone to stress or load during curing, as it may compromise strength.
- Temperature and Environmental Factors: Ensure the adhesive and silicone pieces are at the recommended temperature range during application and curing. Extreme temperatures can weaken the bond’s integrity. Consider humidity levels, exposure to chemicals, and UV light, as they can influence the bond’s long-term durability.
Bonding Challenging Types of Silicone
When it comes to bonding silicone, it’s not as simple as gluing two pieces together with regular adhesive. Silicone poses unique challenges due to its low surface energy and smooth texture. However, fear not. In this blog post, we’ll explore the obstacles of bonding different types of silicone and provide you with tips and tricks to conquer this sticky situation with vivid language and varied sentence structure.
The Slippery Surface:
Silicone’s smooth surface and low surface energy make it a challenging material for adhesion. Regular glue just slips right off. To overcome this slippery situation, opt for silicone-based adhesives specifically formulated to bond silicone materials.
These specialized adhesives possess the magic ingredients needed to conquer the slick surface and create a strong bond that defies gravity.
Cleaning is Key:
Before diving into gluing, ensure your silicone surfaces are squeaky clean. Any dirt, grease, or residue present can hinder adhesive performance. Think of it as preparing a canvas for a masterpiece.
Wipe away contaminants using a mild detergent or an alcohol-based cleaner with gentle strokes. Rinse the surfaces thoroughly with water, letting them dry completely before applying the adhesive.
Applying the Adhesive:
Remember, less is more when applying adhesive to silicone. A thin and even layer is all you need to make the magic happen. Avoid going overboard, as excess adhesive can result in messy outcomes and unwanted squeeze-out.
Follow the manufacturer’s instructions diligently, as different adhesives may have specific application requirements that must be adhered to.
Pressing for Success:
To achieve a bond that stands the test of time, apply pressure after joining the silicone surfaces together.
Embrace your inner strength by using clamps or weights to hold the pieces in place during curing. This ensures that the adhesive forms full contact with both surfaces, creating a bond so strong it could withstand a hurricane.
Patience is a Virtue:
In the world of bonding silicone, patience reigns supreme. Give the adhesive ample time to cure and solidify its grip. Curing times can vary depending on the adhesive used, so consult the manufacturer’s instructions for guidance. Resist the urge to rush the process and avoid pulling or stressing the glued parts prematurely. Rome wasn’t built in a day, and neither is a perfectly bonded silicone masterpiece.
vQ_nXbUdAcA” >
Also Read: How To Glue Silicone To Silicone?