Ever been faced with the heart-wrenching sight of a shattered ceramic piece, taunting your desire to restore its former glory? Fear not, my friend, for we are about to embark on an extraordinary journey into the realm of ceramic repair. In this captivating blog post, we will unveil the secrets to seamlessly gluing ceramic pieces back together, transforming them into breathtaking works of art.
Imagine this: a beloved family heirloom, a cherished teacup, or a whimsical figurine tragically fractured into fragments. Restoration may seem like an impossible feat, but fear not – it’s within your grasp. Armed with the right techniques and materials, you can resurrect these ceramic treasures, ensuring their stories continue for generations to come.
Here, we’ll dive deep into the essential elements of successful ceramic repair. We’ll explore the crucial role of choosing the perfect adhesive that suits your specific type of ceramic – one that creates an invisible bond capable of standing the test of time. Moreover, we’ll delve into meticulous preparation techniques that guarantee seamless connections between broken edges.
But hold on tight because there’s more. We’ll also uncover the importance of clamping and curing during the repair process. Get ready for insider tips on maximizing adhesion while minimizing any visible signs of restoration – because true craftsmanship lies in leaving no trace behind.
So grab your trusty apron and roll up those sleeves as we embark on an enchanting journey into the art of ceramic repair. Together, we will unlock the secrets to breathing life back into shattered ceramics and witness these once-broken masterpieces rise from their ashes in a display of true artistry.
Choosing the Right Adhesive
Contents
When it comes to repairing ceramic pieces, selecting the right adhesive is essential for achieving a strong and durable bond. In this article, we will explore the factors that should be considered when choosing an adhesive for gluing ceramic pieces back together. From the type of ceramic to the intended use of the repaired piece, we will provide you with valuable insights to ensure a successful repair.
Type of Ceramic Matters:
The type of ceramic you are working with plays a crucial role in determining the adhesive you should use. Porous ceramics, such as terracotta or earthenware, require an adhesive that can penetrate their pores and create a secure bond. Epoxy adhesives are highly recommended for porous ceramics due to their exceptional bonding properties and ability to fill in gaps effectively.
On the other hand, non-porous ceramics like porcelain or glazed ceramics demand adhesives that can adhere well to smooth surfaces. This is where cyanoacrylate adhesives, commonly known as super glues, come into play.
They are widely used for non-porous ceramics because of their quick-drying nature and formidable bonding capabilities.
Intended Use: A Crucial Consideration:
Another important factor to consider is the intended use of the repaired ceramic piece. If the ceramic will be exposed to heat or moisture, it is imperative to select an adhesive that can withstand these conditions.
Heat-resistant epoxies or silicone-based adhesives prove suitable for ceramics that will be subjected to high temperatures, such as ovenware or ceramic cookware. For ceramic pieces that will come into contact with water, waterproof adhesives like polyurethane or marine-grade epoxy are highly recommended.
The Art of Invisibility: Visibility of the Adhesive:
If you desire a seamless repair, where the adhesive remains inconspicuous after drying, opt for clear or color-matching adhesives that blend seamlessly with the ceramic’s color. However, bear in mind that achieving a flawless finish may require additional steps like sanding or painting. Therefore, consider the aesthetic aspect carefully while selecting an adhesive for your ceramic repair project.
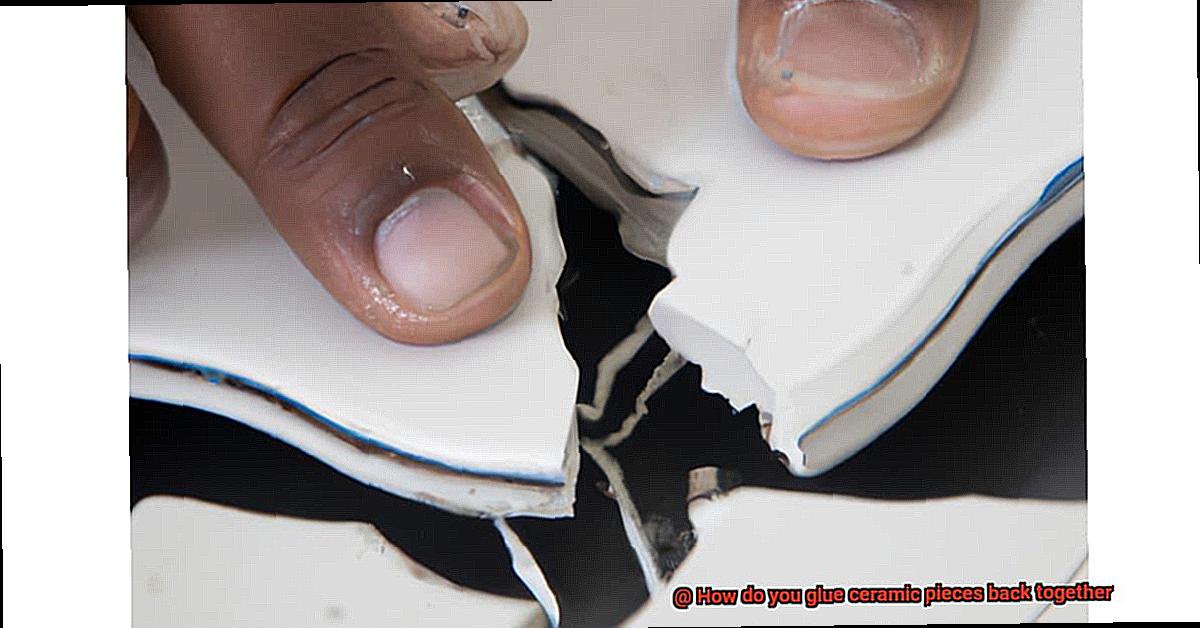
Cleaning the Ceramic Pieces
Embarking on the journey of restoring ceramic pieces is like breathing life back into a forgotten masterpiece. These delicate treasures deserve our utmost care and attention. Before we delve into the realm of adhesive bonding, let us uncover the enchanting process of cleaning ceramic pieces. By following these steps, we will not only achieve a flawless repair but also honor the beauty that lies within.
Step 1: Banishing Dirt with Grace:
Just as a gentle breeze sweeps away the dust of time, a soft cloth can whisk away the debris clinging to the fractured edges of our ceramic treasures. Begin by delicately brushing or wiping away any loose dirt or particles. Allow the soft touch of a cloth to caress the surface, preparing it for its glorious revival.
Step 2: The Elixir of Restoration:
Prepare a cleansing solution that will breathe new life into our ceramic companions. Mix warm water with a mild dish soap or, for optimal results, utilize a ceramic-specific cleaner. Beware, however, of harsh chemicals and abrasive cleaners. These villains can mar the delicate beauty of our ceramics, shattering our dreams of seamless repair.
Step 3: Embracing Gentle Cleansing:
Dip a soft sponge or cloth into our magical elixir and tenderly cleanse the broken edges of our ceramic pieces. Watch as stains, grease, and stubborn residue surrender to the power of the mild soap. For those defiant blemishes, enlist the aid of a soft-bristled toothbrush or a cotton swab dipped in the cleansing solution. But tread carefully, for too much pressure can unleash havoc upon our fragile ceramics. We aim to restore, not ravage.
Step 4: A Blissful Rinse:
As we bid farewell to dirt and grime, we must ensure their complete departure from our beloved ceramics. Bathe them in the purity of clean water, rinsing away every trace of our cleansing solution. Remember, even the tiniest residue can cast a shadow on the adhesive’s effectiveness. Rinse away, my friend, and watch your ceramics gleam with newfound brilliance.
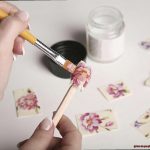
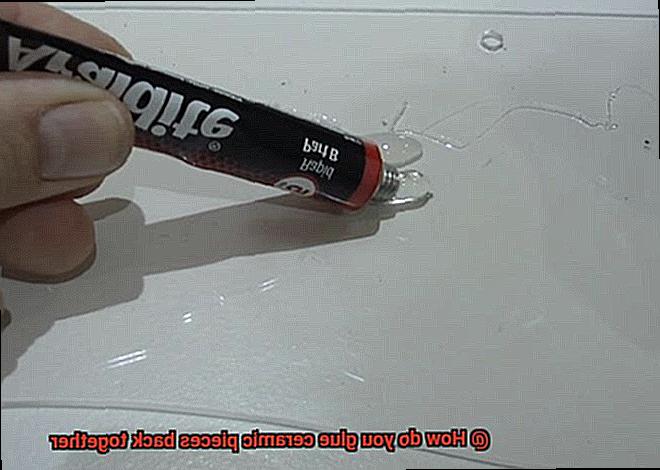
Applying the Adhesive
Embarking on a journey to restore ceramic pieces is like delving into a world of forgotten beauty, where broken fragments find new life. In this enchanting process lies the secret of applying adhesive, the final touch that brings these masterpieces back to their former glory.
Join me as I unveil the magic of using epoxy adhesive to glue ceramic pieces together. Together, let’s enter the realm of ceramic restoration and witness the transformation unfold.
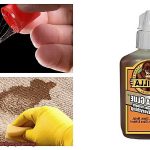
Choosing the Perfect Adhesive:
The foundation for a successful restoration rests upon selecting the right adhesive. Among the many options available, epoxy resin reigns supreme in the world of ceramic gluing. Composed of a resin and a hardener, this two-part adhesive combines to create a bond that is both unyielding and enduring. Known for its exceptional adhesion properties, epoxy is the trusted choice for bonding ceramics.
Preparing the Ceramic Surfaces:
Before we can embark on this magical journey, it is imperative to prepare the ceramic surfaces properly. Begin by tenderly cleansing the broken edges using a mild detergent or soap and warm water. Rinse them meticulously, ensuring no remnants of dirt or debris remain. This cleansing ritual paves the way for seamless bonding.
Enhancing Adhesion:
To unlock the full potential of adhesion, we must delicately roughen the cleaned surfaces. Employ fine-grit sandpaper or a diamond file with gentle strokes, allowing them to lightly caress the edges. Caution is our guiding principle here; we seek to augment adhesion, not exacerbate existing fissures in these delicate works of art.
Mixing the Epoxy:
Now, let’s unveil the essence of this magical elixir – epoxy adhesive. Follow the instructions bestowed upon us by its creator, for they hold the key to a harmonious amalgamation. On a pristine disposable surface, squeeze equal amounts of epoxy resin and hardener from their syringe-like compartments. With a small stick or toothpick as our wand, stir the components together until they dance in perfect unison. Remember, precision in measurement and thorough mixing are the secret ingredients for an unbreakable bond.
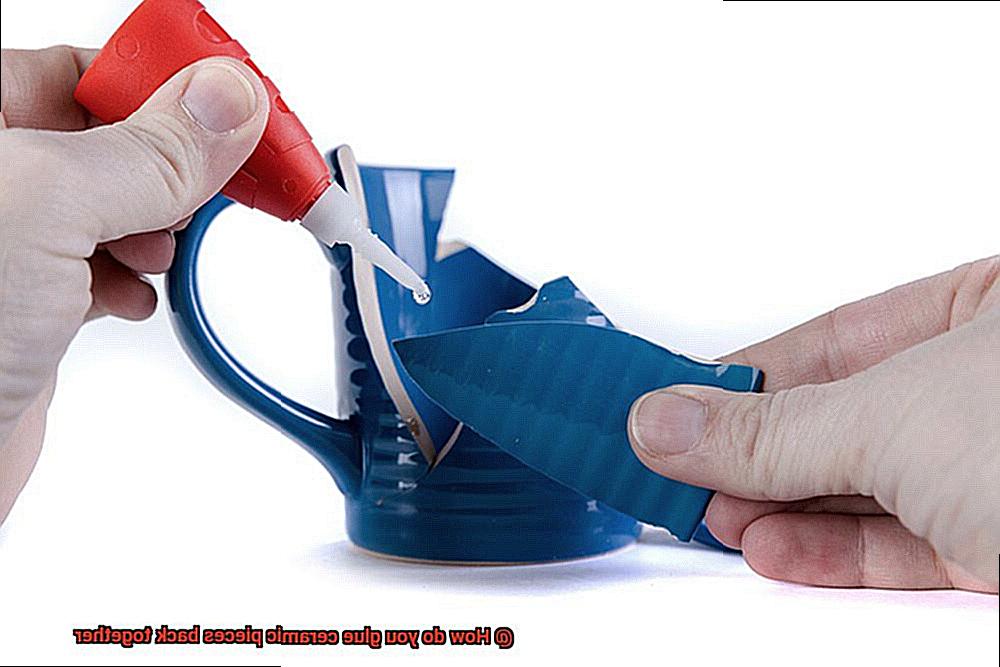
Aligning and Pressing the Pieces Together
In our previous discussion, we explored the captivating process of restoring ceramic masterpieces. Today, we delve deeper into the heart of the restoration process and uncover the secrets behind aligning and pressing those broken ceramic pieces together. So, grab your favorite cup of tea and let’s embark on this enchanting journey.
The Perfect Fit:
In the realm of ceramic restoration, achieving a perfect fit is paramount. Begin by carefully examining the broken edges, searching for any irregularities or gaps that may hinder seamless alignment. To ensure flawless reassembly, consider numbering or marking corresponding edges before applying any adhesive. It’s like solving a puzzle of broken beauty.
Dry-Fit for Success:
Before reaching for that trusty adhesive, take a moment to dry-fit the pieces together without any glue. This step allows you to fine-tune the alignment, making necessary adjustments along the way. Like a conductor orchestrating a symphony, you want every piece to harmonize perfectly.
Tools to Hold it All Together:
When it comes to larger or heavier ceramic pieces, a helping hand is often needed to maintain proper alignment during the drying process. Clamps and securing devices become your loyal assistants, ensuring a steadfast bond while preventing any shifting or misalignment. Patience becomes your virtue as you let time work its magic.
Choosing the Right Glue:
The adhesive you choose holds the key to a successful restoration. Enter epoxy adhesives – the superheroes of ceramic bonding. Renowned for their exceptional strength and durability, they are the go-to choice for experts in the field. However, remember to follow the manufacturer’s instructions diligently for optimal results.
The Art of Adhesive Application:
Like an artist skillfully applying brushstrokes on canvas, apply a thin layer of adhesive to both surfaces being joined. It’s essential to cover the entire contact area, ensuring a seamless connection. Beware the temptation to overdo it, as excess glue can mar the final appearance of your restored piece.
Pressing Matters:
Now comes the moment of truth – bringing the broken pieces together and pressing them firmly. With hands guided by expert precision, align them meticulously and apply gentle pressure for a few minutes. The adhesive begins its transformative work, reuniting fragments into a cohesive whole. You are the catalyst for resurrection.
Securing with Clamps or Tape (if necessary)
In our journey through the magical world of ceramic restoration, we’ve explored the art of aligning, gluing, and applying adhesive like seasoned artists. Now, it’s time to delve into the next chapter: securing with clamps or tape. Get ready to discover how these humble tools can transform your broken pieces into masterpieces.
The Mighty Clamps: Unleashing their Power
When it comes to securing ceramic pieces during the gluing process, clamps are like armor-clad knights, ensuring a tight and robust bond. Let’s explore their different types and learn how to employ their power effectively:
- C-Clamps: These trusty companions are ideal for larger or irregularly shaped ceramic pieces. Apply adhesive, align the broken sections, and gently press them together. Then, position the C-clamps over the glued area and tighten them securely. Remember, though, not to overtighten and risk damaging your delicate ceramic treasure.
- Bar Clamps: Sleek and versatile, bar clamps are perfect for longer or flatter ceramic pieces. Follow the same adhesive application and alignment process as with C-clamps, but this time, position the bar clamps across the glued area and tighten them until snug.
- Spring Clamps: These nimble helpers excel at securing smaller ceramic pieces with their spring-loaded jaws. Apply adhesive, align the broken sections, and gently press them together. Then, let the tension of the spring clamps work its magic as you position them over the glued area.
Taming with Tape: Unleashing its Versatility
Sometimes, clamps just don’t fit the bill or might be unavailable in your ceramic restoration arsenal. Fear not. Tape can come to the rescue as a temporary alternative for securing your precious pieces:
Curing Time
Journey with me once again into the fascinating realm of ceramic restoration, where shattered fragments find solace in the embrace of adhesive. In our previous adventure, we witnessed the tools transforming into valiant allies, joining broken pieces and birthing unbreakable bonds. Today, let us embark on a quest to unravel the enigma of curing time – the secret ingredient that breathes life into these fractured masterpieces. Join me as we delve into the depths of this enchanting journey.
The Alchemy of Curing Time:
Curing time, my dear companions, holds the key to unlocking the true potential of adhesive in ceramic restoration. It is the period required for the glue to set and reach its pinnacle of strength. Picture it as a delicate dance between time and adhesive, a symphony of molecular connections solidifying into an unyielding bond.
Factors That Shape Curing Time:
Now, let us delve into the factors that shape this mystical phenomenon. The type of adhesive employed, temperature and humidity levels, and the dimensions and weight of the ceramic pieces all wield their influence upon the ideal curing time.
Adhesives, like potions brewed by wise sorcerers, each possess their own unique set of curing requirements. Adhere closely to the instructions bestowed upon us by these revered creators of magic elixirs.
Patience: The Virtue That Unleashes True Power:
While some adhesives may claim a mere 24-hour curing time, it is often wise to exercise even greater patience for optimal results. Rushing this sacred process risks sacrificing the strength and endurance of your restoration. Thus, let us recline upon our thrones, embracing tranquility as time works its wondrous alchemy.
Handle With Tender Reverence:
During this sacred period of curing, treat your repaired ceramic piece as a precious relic from a bygone era. Avoid any unnecessary disturbances or stresses that may disturb the delicate union of broken fragments. Place it in a sanctuary of security and stillness, allowing the enchantment to unfold undisturbed.
Testing the Bonded Repair
Today, we embark on a captivating journey through the realm of testing the bonded repair of ceramic pieces. Prepare to be amazed as we explore the intricate tests that unveil the strength, durability, and aesthetic charm of these repairs. So, let’s dive into this scientific odyssey together and unlock the mysteries that lie within.
Mechanical Tests: Unleashing the Power of Strength
In the world of testing bonded repairs, mechanical tests emerge as the mighty heroes that ensure reliability and resilience. Let us introduce you to our three formidable champions: tensile, shear, and flexural strength tests.
Tensile Strength Tests:
Ever wondered how well an adhesive can withstand a pulling force perpendicular to the repaired surface? Tensile strength tests reveal just that. They measure the adhesive’s ability to bond ceramic pieces together and determine the maximum force it can handle before relinquishing its grip.
Shear Strength Tests:
Imagine forces that slide or shear parallel to the repair joint – these are the challenges shear strength tests conquer. By evaluating an adhesive’s resistance to such forces, we can rest assured that our cherished ceramic pieces will remain securely intact.
Flexural Strength Tests:
Can a restored ceramic masterpiece withstand the test of time against bending or flexing forces? Flexural strength tests hold the answer. By applying a load to the center of a repaired ceramic piece while supported at both ends, we can gauge the amount of force required to break its adhesive bond.
Environmental Testing: The Acid Test for Durability
To truly ascertain a bonded repair’s capabilities, we subject it to a series of environmental challenges. These tests mimic real-world conditions, subjecting repaired ceramic pieces to temperature variations, humidity changes, and exposure to chemicals. Through these trials, we unravel how well an adhesive endures over time, ensuring its lasting durability.
Aesthetics Testing: Beauty in the Eye of the Beholder
While strength and durability are paramount, we mustn’t overlook the aesthetic allure of a bonded repair. Aesthetics testing scrutinizes how seamlessly an adhesive blends with the color and texture of the ceramic material. It also examines whether any visible lines or gaps mar the grace of the glued joint. After all, a restored ceramic piece should captivate the beholder’s gaze and exude timeless beauty.
Field Testing: Real-Life Challenges, Real-Life Solutions
The Result of Glue Repairs on Ceramics
In this captivating journey, we explore the factors that transform a shattered piece into a flawless masterpiece. Grab your aprons and prepare to unlock the secrets behind the mesmerizing outcome of glue repairs on ceramics.
The Power of Choice:
Not all glues are cut from the same cloth. The type of adhesive selected holds the key to a successful repair. Let’s delve into the contenders:
- Epoxy Glue: Renowned for its ironclad bond and resistance to moisture, heat, and chemicals, epoxy glue reigns supreme in ceramic repairs. Yet, its strength comes at a cost – a visible line or residue may mar the surface, diminishing the allure of certain decorative pieces.
- Super Glue: Speedy and steadfast, super glue forms an unyielding bond that dries clear, making it less conspicuous on repaired ceramics. However, its endurance may not match that of epoxy glue, so consider your repair’s demands judiciously.
- Ceramic-Specific Adhesives: Enter the realm of specialized adhesives tailored explicitly for ceramic repairs. These magical concoctions ensure impeccable bonding while drying clear and boasting resilience against water and heat. With these gems in hand, a seamless finish is within reach.
The Nature’s Challenge:
The size of the damage determines the path to restoration. Let us face this trial head-on:
- Small Chips or Cracks: These minor blemishes succumb effortlessly to glue repairs, leaving no trace behind. Skillfully executed techniques coupled with premium adhesives render imperfections invisible, resulting in a breathtaking revival.
- Complex Breaks and Larger Damage: Alas, grander fractures demand reinforcement beyond the realm of glue alone. Fear not. Metal pins and wire mesh come to the rescue, bestowing the much-needed structural support for a solid repair that withstands the test of time.
The Symphony of Skill:
In this world of restoration, the hands of a master artist hold the power to transform a repair into a masterpiece. The skill level of the individual undertaking the repair plays an instrumental role in the final result. A seasoned repairer possesses the magic touch necessary to erase the visibility of the repair line, crafting a seamless finish that astounds.
Y5BuzNYZOCQ” >
Conclusion
When it comes to gluing ceramic pieces back together, there are a few key steps to keep in mind. First and foremost, you’ll need the right adhesive for the job. Look for a glue specifically designed for ceramics, as this will ensure a strong and durable bond.
Before applying the adhesive, it’s crucial to clean and prepare the surfaces of the broken ceramic pieces. Use a gentle cleanser or rubbing alcohol to remove any dirt, grease, or residue that may hinder the bonding process.
Once the surfaces are clean and dry, carefully apply a thin layer of glue to one of the broken edges. Be sure to spread it evenly and avoid using too much glue, as excess can seep out and create unsightly messes.
Next, align the broken edges together with precision. Take your time and make any necessary adjustments before pressing them firmly together. It’s essential to hold the pieces in place for several minutes to allow the glue to set properly.
After giving it ample time to dry, check for any gaps or unevenness in the repaired area. If needed, you can use fine-grit sandpaper or a file to smooth out imperfections.
Finally, be patient with your repaired ceramic piece. Allow it at least 24 hours (or follow the manufacturer’s instructions) for complete curing before subjecting it to any stress or pressure.
Remember that gluing ceramics back together requires attention to detail and patience. With proper preparation and careful application of adhesive, you can restore your broken ceramic items with confidence.