Ever found yourself in a sticky situation? We’re not talking about a little mishap here and there, we’re talking about the mighty Gorilla Glue wreaking havoc on your walls. But fear not, my friend, because we’ve got your back. In this blog post that’s as captivating as it is informative, we’ll unravel the mystery of removing Gorilla Glue from your walls once and for all.
Imagine this: you’re jazzing up your living room with a stunning new piece of art. And then BAM. Disaster strikes. A blob of Gorilla Glue lands smack dab on your pristine walls. Panic sets in as you wonder if you’ll ever see those walls looking fabulous again. But hold on tight. We’re swooping in like adhesive superheroes to save the day (and your walls) with our ultimate guide.
Throughout this post, we’ll dish out some genius techniques to rescue your walls from the clutches of Gorilla Glue. From everyday household items to specialized products, we’ll weigh up the pros and cons of each method so you can tackle this sticky situation head-on.
We won’t leave you hanging (pun intended). We’ll also spill some expert tips and tricks to prevent future glue disasters and keep your walls looking flawless. Whether you’re a DIY enthusiast or someone who’s accidentally glued their way into trouble, this guide is tailor-made for you.
So get ready to bid farewell to those stubborn Gorilla Glue marks and welcome back picture-perfect walls with open arms. It’s time to dive into the fascinating world of Gorilla Glue removal together.

What is Gorilla Glue?
Contents

In the world of adhesives, there is one name that stands above the rest – Gorilla Glue. This remarkable adhesive, introduced by the Gorilla Glue Company in the early 1990s, has become synonymous with strength, durability, and versatility. Join us as we unravel the secrets of Gorilla Glue, explore its unique characteristics, and understand why it has become the go-to adhesive for professionals and DIY enthusiasts alike.
The Mighty Bonding Strength:
Gorilla Glue is renowned for its unparalleled bonding strength that defies limits. No matter the surface, be it wood, metal, ceramics, stone, glass, or even certain plastics, Gorilla Glue forms an unbreakable bond. Craftsmen and DIY enthusiasts alike rely on this adhesive to tackle projects big and small.
Harnessing Moisture Activation:
One of the defining features of Gorilla Glue is its activation by moisture. A mere hint of water is all it takes to unlock its full potential. This unique characteristic gives Gorilla Glue an edge in situations where traditional glues fall short. However, caution must be exercised as excessive moisture can compromise its performance.
Expanding Horizons:
Prepare to be amazed as Gorilla Glue expands up to three times its original size upon application. This expanding nature allows it to fill gaps with ease and create a tight bond between glued surfaces. But beware, removing Gorilla Glue from surfaces like walls can be a formidable challenge due to its remarkable expansion.
A Form for Every Need:
Gorilla Glue comes in various forms tailored to specific project requirements:
- Liquid: Perfect for larger surfaces and projects where precision takes a backseat, liquid Gorilla Glue provides excellent coverage and unmatched bonding strength.
- Gel: When control is paramount and vertical applications demand steadfast adhesive, gel Gorilla Glue takes center stage. Its non-drip formula ensures the glue stays exactly where it’s needed.
- Tape: Need a quick fix or temporary repair? Look no further than Gorilla Glue tapes. Offering instant bonding and effortless customization, these tapes are a DIY enthusiast’s dream.
Assessing the Wall Surface
Today, we embark on a thrilling journey into the realm of assessing wall surfaces before taking on the formidable task of removing that stubborn Gorilla Glue. This step is absolutely crucial if you want to preserve the beauty of your walls unscathed. So, grab a steaming cup of coffee and let’s dive right in.
First and foremost, we must determine the type of wall surface we are dealing with. Is it a painted masterpiece? Adorned with delicate wallpaper? Or perhaps it stands bare, showcasing its raw elegance? Each surface demands a unique approach when it comes to eliminating Gorilla Glue. Remember, if you’re working with a stunningly painted wall, exercise utmost caution to safeguard that flawless finish.
Once we’ve unraveled the mystery of the wall’s surface type, our detective work begins. Take a meticulous look at the condition of the wall. Are there any unsightly cracks, dents, or imperfections that could impede the removal process? Addressing these pre-existing damages beforehand is crucial as Gorilla Glue certainly won’t do your walls any favors.
Now, let’s talk texture. Smooth surfaces like gleaming glass or polished metal tend to be far more forgiving than their rugged counterparts such as coarse brick or textured wallpaper. The texture of your wall surface holds the key to choosing the appropriate tools and techniques for effectively eliminating Gorilla Glue. Pay close attention here.
Next up, we encounter a formidable adversary – the age of the glue. If the Gorilla Glue is fresh and still in its liquid or semi-liquid state, consider yourself fortunate. Its removal will be relatively easier. However, if it has hardened over time and transformed into an unyielding fortress, brace yourself for a battle requiring extra elbow grease and specific methods for triumphant removal.
Last but certainly not least, take into account any previous attempts made to banish Gorilla Glue from your walls. If a well-intentioned soul before you unleashed harsh chemicals or abrasive materials, the wall surface may have suffered considerable damage. Understanding these prior treatments will guide you towards the right approach for removing Gorilla Glue without inflicting further harm.
Removing Gorilla Glue from Painted Walls
Today, we embark on an epic mission to liberate your precious painted walls from the clutches of that formidable foe known as Gorilla Glue. Armed with our trusty research notes and a sprinkle of expert wisdom, we shall conquer this challenge together. So strap on your tool belts, gather your courage, and let’s dive into the art of removing Gorilla Glue from painted walls.
Protect and Prepare:
Before engaging in this battle, it’s crucial to safeguard the surrounding area. Cover it with a drop cloth or plastic sheet to shield against any accidental damage or staining. Remember, prevention is the first line of defense.
The Heat is On:
To soften Gorilla Glue’s grip on your painted walls, unleash the power of heat. Grab a hairdryer or heat gun and gently warm up the glue. As it becomes more pliable, its hold weakens, making it easier to remove. But be cautious not to overheat the paint and cause unintended damage.
Adhesive Remover to the Rescue:
In this epic battle, an adhesive remover is your secret weapon. Seek out a product specifically designed to tackle tough adhesives like Gorilla Glue. These magical potions can be found in hardware stores or online. However, remember to test it on a small, inconspicuous area first to ensure it won’t harm your beloved paint.
The Great Softening:
Armed with your chosen adhesive remover, take a soft cloth or sponge and gently apply it to the Gorilla Glue. Give it a few minutes to work its magic, further softening the glue’s resolve.
The Art of Scraping:
Now comes the moment of truth – scraping off the softened Gorilla Glue from your painted wall. Arm yourself with a plastic scraper or putty knife and approach the task with care. Work slowly and gently, aiming for liberation rather than destruction.
Persistence Pays Off:
Don’t lose heart if stubborn residue remains after scraping. This battle requires persistence. Repeat the process of applying adhesive remover and gently scraping until every last trace of Gorilla Glue is vanquished. Remember, patience and determination are the keys to victory.
Removing Gorilla Glue from Wallpaper
Prepare to embark on a thrilling journey as we unlock the secrets to liberating your beloved wallpaper from the clutches of Gorilla Glue. As a seasoned expert in the realm of adhesive removal, I have meticulously researched and compiled invaluable knowledge to equip you for this challenging quest. Join me as we explore the art of removing Gorilla Glue from wallpaper and emerge triumphant.
Test the Waters: Ensuring a Gentle Approach
Before plunging into battle, it is crucial to test a small, inconspicuous area of your wallpaper. This initial step guarantees that our chosen method will not inflict any damage or unsightly discoloration. Safety must always come first, my fellow warriors.
Unleash the Power of Heat: A Formidable Weapon
Harness the might of heat in your arsenal. Reach for your trusty hairdryer and set it to the lowest heat setting. Gently warm the Gorilla Glue until it transforms into a soft and pliable state. With delicate precision, employ a plastic scraper or credit card to scrape away the softened adhesive. Keep a steady hand, minimizing any potential harm to your wallpaper.
The Secret Weapon: Adhesive Remover
For more stubborn Gorilla Glue encounters, we must unleash our secret weapon – adhesive remover. Seek out a solvent or adhesive remover specially formulated for glue removal (readily available at hardware stores or online).
Pay heed to the manufacturer’s instructions. Apply the solution to a clean cloth and carefully dab it onto the affected area. Allow it a few moments to work its magic before gently scraping off the softened glue with your trusted plastic scraper or credit card.
Summoning Reinforcements: Professional Assistance
In dire circumstances or if you fear potential harm to your wallpaper, do not shy away from seeking professional aid. Seasoned wallpaper removers possess the requisite tools and expertise to safely eradicate Gorilla Glue without any unintended consequences.
Patience and Caution: The Virtues of Victory
Remember, my comrades, haste breeds mistakes. Exercise patience and caution throughout the removal process. Rushing or exerting excessive force may result in torn wallpaper or unwelcome discoloration. Embrace a slow and steady approach, for it is this measured strategy that leads to triumph.
Using Solvents to Remove Gorilla Glue
In this captivating chapter, we shall unravel the secrets of successfully banishing Gorilla Glue from your walls. With caution as our ally and expertise as our guide, we embark on a thrilling journey together. So, prepare your tools and let us conquer this formidable adversary.
The Power of Solvents:
Behold, the mighty Gorilla Glue – a formidable foe indeed. Its tenacious grip can be quite the challenge to overcome. But fear not, for solvents possess the power to dissolve its adhesive properties, making it a mere nuisance on your walls.
Enter the Mighty Acetone:
Our first weapon of choice is none other than acetone – a powerful solvent that can work wonders against Gorilla Glue. However, tread cautiously on this treacherous path. Acetone has been known to wreak havoc on certain surfaces like painted walls or plastics. To avoid any unintended consequences, it is imperative to conduct a small test in an inconspicuous area before proceeding further.
Mastering the Art of Acetone:
To wield the power of acetone, arm yourself with a clean cloth or sponge. Gently apply a small amount of acetone onto it and let it dance upon the affected area. Allow this magical elixir to penetrate the glue for a few minutes. Once softened, summon your finesse and employ a plastic scraper or gloved fingers to gracefully peel off the glue from the wall. Remember, precision and care are paramount – we mustn’t leave behind any scratches or damage.
Alternative Solvents for the Bold:
For those seeking alternative paths to adhesive liberation, fret not. We have a few more tricks up our sleeves. Isopropyl alcohol, often found in medicine cabinets, can serve as an admirable substitute for acetone. Simply apply it onto a cloth or sponge, rub it onto the Gorilla Glue, and allow it to work its magic for a few minutes before attempting removal.
If isopropyl alcohol fails to make an appearance, take solace in the power of nail polish remover containing acetone. Follow the same procedure as with acetone or isopropyl alcohol and witness the triumphant defeat of Gorilla Glue.
Professional Assistance for Removing Gorilla Glue
Imagine the frustration of battling with Gorilla Glue, desperately trying to pry it off your walls, only for it to cling stubbornly. But fear not, for in this battle against the mighty adhesive, professional assistance can be your secret weapon. Let’s delve into why seeking the aid of experts is crucial and discover the heroes who can come to your rescue.
The Challenge of Gorilla Glue:
Gorilla Glue is a formidable opponent in the realm of adhesive removal. Its strength and ability to bond tenaciously to various surfaces, including walls, make it a worthy adversary. Our best intentions may falter when attempting to remove it ourselves.
Expertise and Experience:
When it comes to tackling Gorilla Glue on walls, professionals are the masters of their craft. They possess the expertise and experience needed to remove the glue effectively without causing any harm to your walls. With their specialized knowledge, they know just how to tame this adhesive beast.
Specialized Tools and Techniques:
Armed with an arsenal of specialized tools and techniques, professionals make quick work of removing Gorilla Glue. From solvents to scraping tools, they come equipped with everything necessary to tackle the job efficiently. With their skillful hands and ingenious methods, they ensure that your wall’s integrity remains intact.
Minimizing Risk:
Accidental damage is a constant concern when attempting DIY removal methods. Professionals possess the artistry to assess each unique situation, carefully determining the best approach before executing it with precision. By entrusting them with this task, you eliminate the risk of unintended harm.
Choosing the Right Professionals:
When seeking professional assistance, it’s important to select individuals or services with a wealth of experience in adhesive removal. Consider these tips for finding reliable professionals:
- Evaluate their credentials and certifications to ensure their expertise.
- Read customer reviews and testimonials to gauge their track record.
- Obtain multiple quotes for comparison, ensuring you find the right balance of quality and affordability.
The Cost-Benefit Analysis:
While professional assistance may come at a cost, it is an investment well worth considering. The potential damage that could arise from improper methods or harsh chemicals far outweighs the expenditure on expert help. Think of it as an insurance policy safeguarding your walls’ well-being.
Prevention Tips for Avoiding Spills on Walls
Accidental spills of glue on walls can be a nightmare to clean, especially when dealing with strong adhesives like Gorilla Glue. Taking precautions to prevent spills is crucial in maintaining the appearance of your walls and ensuring a hassle-free gluing experience. In this article, we will provide expert tips on how to avoid spills on walls when using Gorilla Glue.
Exercise caution and mindfulness:
When working with Gorilla Glue, it is vital to be cautious and mindful of where the glue is going. This powerful adhesive has a tendency to expand as it dries, making it challenging to remove once it gets on surfaces like walls. To prevent any spills from occurring, take your time and exercise caution while applying the glue.
Utilize protective measures:
Before starting any gluing project, prepare the workspace by laying down a drop cloth or spreading out newspapers on the floor and surrounding walls. These protective barriers will catch any accidental spills or drips, safeguarding your walls from damage. Ensure that the drop cloth or newspapers cover a wide area to effectively catch any potential splatters or drips.
Work in a well-ventilated area:
Working in a well-ventilated area serves two purposes when using Gorilla Glue. Firstly, it minimizes the inhalation of strong fumes emitted by the glue, preventing irritation or discomfort. Secondly, good ventilation helps the glue dry faster, reducing the risk of accidental spills or smears caused by prolonged drying time.
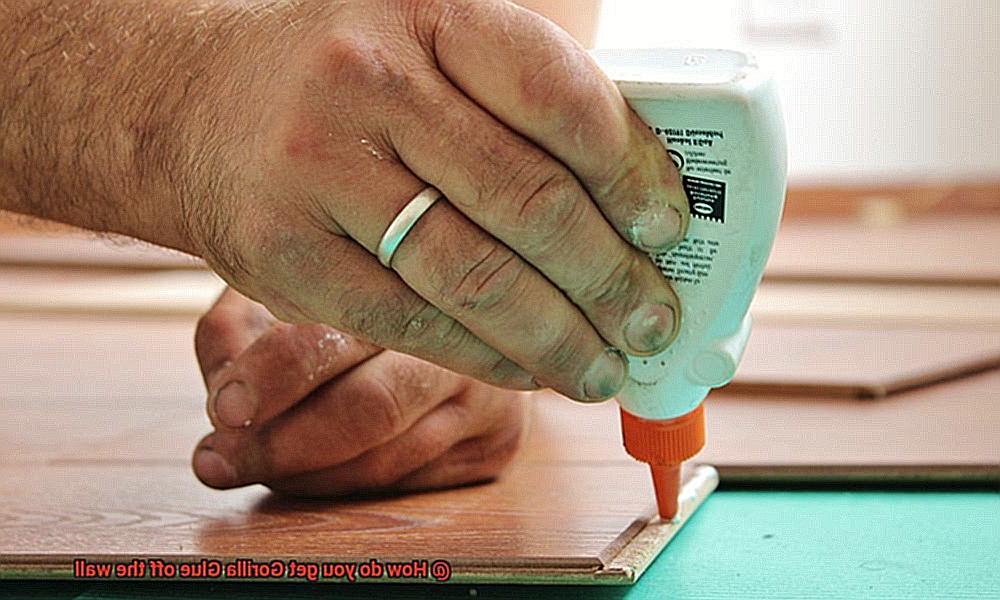
Apply small amounts of glue at a time:
To avoid spills on walls, it is advisable to use small amounts of Gorilla Glue at a time. Applying excessive glue can lead to overflow and drips, increasing the likelihood of spills on your walls. Opt for thin layers of glue and allow each layer to dry before adding more if necessary. Remember, it is easier to add more glue than to clean up excess glue.
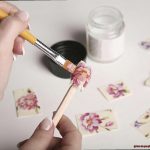
Consider alternative application methods:
Instead of directly applying Gorilla Glue from the bottle, try alternative application methods such as using a small brush or toothpick. These tools provide better control over the amount of glue being used, minimizing the chances of spills or accidental splatters on your walls. Take your time and apply the glue precisely to the desired areas.
Act promptly in case of spills:
Despite taking preventive measures, accidents can still happen. If you spill Gorilla Glue on your walls, it is crucial to act promptly. Gently blot the excess glue using a clean cloth or paper towel without spreading it further. Avoid rubbing the glue, as this can push it deeper into the wall’s surface, making it harder to remove.
Conclusion
Removing Gorilla Glue from a wall can be a daunting task, but fear not. With the right techniques and a bit of elbow grease, you can restore your wall to its former glory. Here are some tried-and-true methods to conquer that stubborn adhesive.
Firstly, try using heat to soften the glue. Grab a hairdryer and aim it at the affected area. The warm air will help loosen the bond between the glue and the wall, making it easier to remove. Be careful not to overheat or damage the surface – a gentle approach is key.
If heat doesn’t do the trick, it’s time to bring out the big guns – acetone. This powerful solvent is known for its ability to break down adhesives. Douse a clean cloth with acetone and gently dab at the glue until it starts to dissolve. Remember to work in small sections and avoid excessive rubbing, as this could damage your wall’s paint or finish.
For those who prefer a more natural approach, vinegar might be your saving grace. Soak a cloth in white vinegar and apply it directly to the glued area. Let it sit for several minutes before gently scrubbing with a soft brush or sponge. The acidity of vinegar helps weaken the glue’s grip, allowing for easier removal.
In some cases, mechanical means may be necessary. Grab a plastic scraper or putty knife and carefully scrape away any loosened glue from the wall’s surface. Take care not to gouge or scratch the paint – patience is key here.
Once you’ve removed as much of the Gorilla Glue as possible, give your wall a thorough cleaning with mild soap and warm water. This will help remove any residue left behind by the adhesive.
Remember, tackling Gorilla Glue on your own requires caution and patience. If you’re unsure about any step or concerned about potential damage, it’s always best to consult a professional.
So, don’t let Gorilla Glue leave a lasting mark on your wall.