Imagine this: a basement transformed into a cozy haven, complete with plush carpeting that invites you to sink your toes into its softness. But before you can revel in this oasis of comfort, there’s the daunting task of adhering carpet to that cold, unforgiving concrete floor.
This blog post is here to unveil the mystery of how to glue carpet to concrete, transforming your space into a haven of warmth and charm.
Hook:
Concrete may seem like an inhospitable surface for carpeting, but fret not. By arming yourself with the right techniques and tools, you’ll find that gluing carpet to concrete is surprisingly straightforward. Whether you’re a seasoned DIY enthusiast or embarking on your first home improvement adventure, this guide will equip you with essential knowledge and tips for achieving an impeccable finish that will withstand the test of time.
Main Points:
- Preparation: Get ready to conquer the concrete by learning critical steps such as cleaning, leveling, and sealing the surface. These preparations ensure a secure bond between the carpet and the floor, setting the stage for success.
- Carpet Glue Options: Explore an array of adhesive choices available on today’s market. From pressure-sensitive adhesives that offer flexibility to traditional spreadable adhesives known for their reliability, discover which one best suits your needs.
- Application Techniques: Unlock insider secrets on applying carpet glue like a pro. Learn about essential tools and achieve proper coverage while avoiding common mistakes that could trip up even the most experienced DIY-er.
- Securing the Carpet: Dive into techniques for securely attaching your carpet to the concrete floor. From stretching and trimming it just right to ensure a precise fit throughout, these methods guarantee a snug embrace between your new carpet and its sturdy foundation.
What Tools and Materials are Needed to Glue Carpet to Concrete?
Contents
- 1 What Tools and Materials are Needed to Glue Carpet to Concrete?
- 2 Preparing the Concrete Surface for Installation
- 3 Measuring and Cutting the Carpet
- 4 Applying Adhesive on the Concrete Surface
- 5 Pressing the Carpet onto the Concrete Surface
- 6 Allowing Adequate Time for Drying
- 7 Avoiding Damage After Installation
- 8 Conclusion
Transforming your concrete floor into a cozy and stylish space requires the right tools and materials. Glueing carpet to concrete is a popular choice, offering warmth and comfort to any room. In this comprehensive guide, we will explore the essential items you need for a successful carpet installation on concrete. From high-quality adhesive to safety equipment, we’ve got you covered.
High-quality Carpet Adhesive:
The foundation of a successful carpet installation on concrete starts with high-quality carpet adhesive. Look for an adhesive specifically designed for bonding carpet to concrete surfaces. This ensures a strong and durable bond that will keep your carpet securely in place for years to come.
It’s important to choose an adhesive suitable for both indoor and outdoor use, particularly if you’re installing carpet in areas like basements or patios that may be exposed to moisture.
Trowel or Glue Spreader:
To evenly apply the adhesive onto the concrete surface, you’ll need a trowel or glue spreader. The trowel, with its flat, rectangular shape and notched edges, allows for precise application of the adhesive.
On the other hand, a glue spreader with its serrated edge allows for smooth and even distribution of the adhesive in a sweeping motion.
Whichever tool you choose, ensure it is comfortable to hold and easy to maneuver, enabling you to achieve an even layer of adhesive.
Knee Kicker:
Achieving a tight and secure fit is crucial for a professional-looking carpet installation. A knee kicker is an indispensable tool for this purpose. With its padded end and lever, you can use your knee to kick the carpet into place along the edges and corners of the room. This tool eliminates wrinkles and bubbles, ensuring a smooth and flawless appearance.
Carpet Cutter or Utility Knife:
Precision is key when cutting the carpet to size. A carpet cutter or utility knife is essential for making accurate cuts along walls and obstacles. Look for a carpet cutter with a retractable blade, providing convenience and safety as you switch between cutting and storing the tool. With the right cutting tool, you can achieve clean and seamless edges, giving your carpet installation a professional finish.
Measuring Tape:
Accurate measurements are the foundation of a successful carpet installation. A measuring tape is your trusted companion in determining the dimensions of the room and calculating the amount of carpet needed. Measure twice to avoid any surprises or miscalculations, ensuring a smooth and efficient installation process.
Safety Equipment:
Prioritizing safety is paramount when working with adhesive. Protect yourself by wearing safety goggles and gloves to prevent any potential harm from adhesive contact with your skin or eyes. Adhesive can be messy, so taking necessary precautions ensures a worry-free installation process and peace of mind.
Conclusion:
By equipping yourself with the right tools and materials, you can achieve a successful and professional-looking carpet installation on concrete.
Preparing the Concrete Surface for Installation
Transforming your cold and bare concrete floor into a cozy oasis with a beautiful carpet installation requires proper preparation of the concrete surface. By following these essential steps, you can ensure a successful installation that will stand the test of time.
Step 1: Cleanliness is Key
Before you even think about gluing the carpet down, make sure your concrete surface is spotless. Sweep or vacuum the area to remove any dirt, dust, grease, or debris that could interfere with the adhesive. For stubborn stains, a mild detergent or concrete cleaner will do the trick.
Step 2: Repair Imperfections
Inspect the concrete surface for cracks, holes, or uneven areas. It’s crucial to address these imperfections before proceeding with the installation to prevent future problems. Small cracks can be easily filled with a concrete patching compound, while larger cracks may require professional assistance.
Step 3: Apply the Superhero Primer
Now that your repairs are complete and your concrete surface is looking pristine, it’s time to apply the primer. This superhero-like substance binds the concrete and adhesive together, improving adhesion and preventing your carpet from lifting or coming loose over time. Choose a primer suitable for your project’s requirements and the type of adhesive you’ll be using.
Step 4: Follow Instructions Carefully
When applying the primer, follow the manufacturer’s instructions meticulously. Mix and dilute the primer as directed, apply it evenly with a roller or brush, and allow it to dry for the recommended time before moving on to carpet installation. Patience is key during this step.
Step 5: Check for Moisture Issues
Moisture can be sneaky and cause problems with your adhesive or lead to mold and mildew growth under your carpet. Use a moisture meter to test for excessive moisture in the concrete. If high levels are detected, additional steps such as installing a moisture barrier or using a specific adhesive for moist conditions may be necessary.
Step 6: Ensure Complete Dryness
Before proceeding with carpet installation, it is essential to confirm that the concrete surface is completely dry. Moisture trapped under the carpet can lead to unpleasant odors, mold and mildew growth, and even damage to the carpet itself.
Measuring and Cutting the Carpet
In this section, we will delve into the crucial steps of measuring and cutting carpet to ensure a successful and visually appealing installation. So, grab your tools and let’s embark on this journey.
Step 1: Gather Your Tools – Be Prepared for Success
Before diving into the task at hand, ensure you have all the necessary tools readily available. Here’s what you’ll need:
- Measuring tape: Your trusty companion for accurate measurements.
- Chalk or marker: The guide that will mark your measurements on the carpet.
- Straightedge or carpenter’s square: Essential for drawing precise lines.
- Sharp utility knife or carpet cutter: The key to clean and precise cuts.
Step 2: Measure Like a Pro – Lay the Foundation
To begin, measure the dimensions of the room where you’ll be installing the carpet. Start at one corner and meticulously measure along each wall, noting down the length and width. Take into account any irregularities or protrusions that may affect the carpet’s dimensions. Accuracy is paramount.
Step 3: Transfer Measurements onto the Carpet – Marking Your Territory
Once you’ve obtained accurate measurements, it’s time to transfer them onto the backside of the carpet. Place the carpet on a clean, flat surface with its backside facing up. Align one edge with a straightedge or carpenter’s square to ensure a perfectly straight line when marking your measurements.
Using your measuring tape, carefully mark the desired length and width on the backside of the carpet. Double-check your measurements before proceeding further. Connect the corresponding points using a straightedge or carpenter’s square to create crisp cutting lines.
Step 4: Mind the Patterns – Aligning Beauty with Precision
If your carpet boasts intricate patterns or designs that require alignment during installation, this step is crucial. Pay extra attention to ensure that each piece is cut in harmony with the adjacent ones. This meticulousness will result in a visually pleasing and cohesive final appearance.
Applying Adhesive on the Concrete Surface
In our pursuit of carpet installation perfection, we now face a critical step: applying adhesive on a concrete surface. Prepare to delve into the world of adhesives as we uncover the secrets to achieving an impeccable bond between your carpet and the unyielding concrete beneath. So gather your tools and embark on this journey towards carpet installation mastery.
Step 1: Preparing the Concrete Canvas
Before we can create our masterpiece, we must ensure that our canvas – the concrete surface – is pristine. Sweep away debris and eliminate loose particles with the sweeping motion of your trusty broom or the suction power of your vacuum cleaner. Don’t forget to mend any cracks or uneven patches, laying the foundation for a smooth and solid surface.
Step 2: Choosing the Perfect Adhesive
Just as an artist chooses their paintbrush, selecting the right adhesive is crucial. Explore the vast array of carpet adhesives and opt for a high-quality adhesive specially formulated for bonding carpet to concrete. This ensures an unyielding and long-lasting union.
Step 3: Following Manufacturer’s Instructions
With adhesive in hand, it’s imperative to heed the wisdom of the manufacturer’s instructions. These guidelines hold the key to applying the adhesive correctly, guaranteeing a successful installation. Take note of application methods, drying time, and any other specific requirements specified.
Step 4: Precise Application of Adhesive

Now it’s time to get hands-on. Pour a small amount of adhesive onto the concrete surface and equip yourself with a notched trowel. This trusty tool allows you to spread the adhesive evenly over the area designated for carpet installation. Remember, choose the size of your notched trowel according to the manufacturer’s recommendations, tailored to your specific carpet type.
Step 5: Working Smart, Not Hard
To achieve flawlessness, tackle the installation in small sections. Apply the adhesive while it’s still wet, ensuring optimal bonding. Begin at one corner of the room and methodically work your way towards the opposite corner. This systematic approach guarantees complete coverage and minimizes the risk of adhesive drying out prematurely.
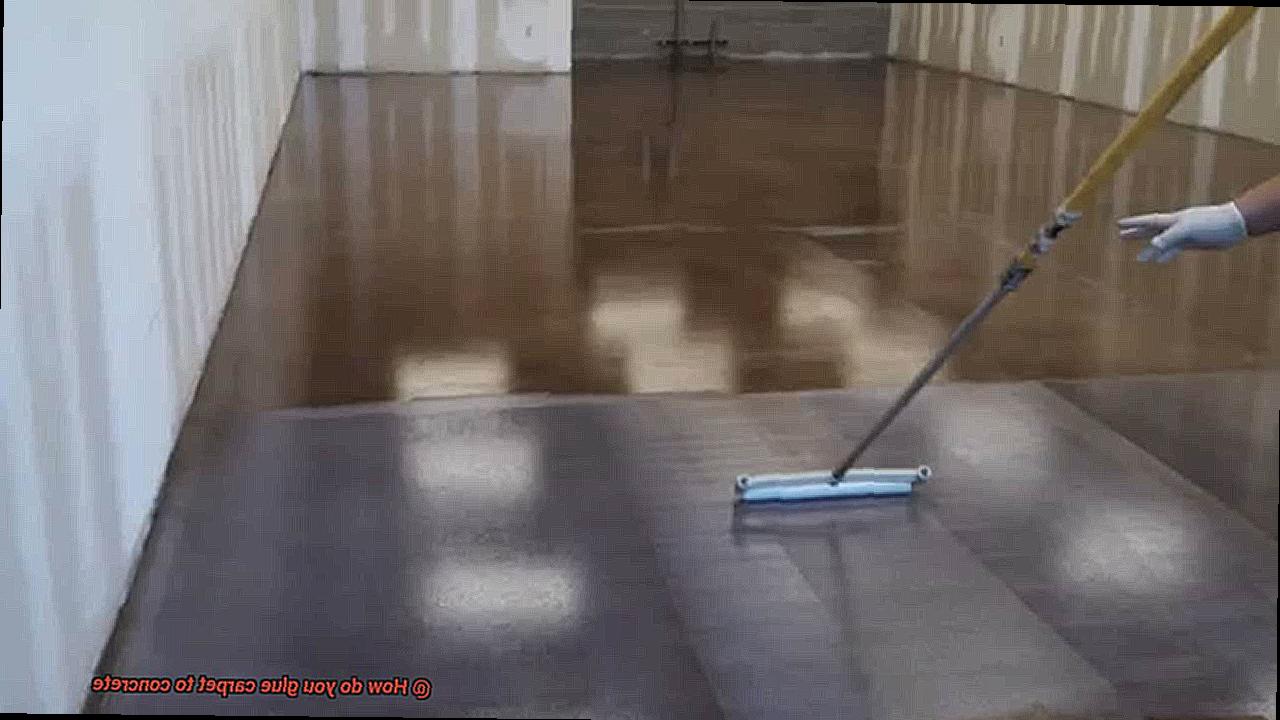
Pressing the Carpet onto the Concrete Surface
In today’s installment of our carpet installation mastery series, we delve into the critical step of pressing the carpet onto the concrete surface. This seemingly simple task plays a vital role in achieving a secure bond between your carpet and the unyielding concrete beneath. So, grab your tools and get ready to learn why this step is essential for a flawless finish.
Why Pressing Matters:
Pressing the carpet onto the concrete surface goes beyond aesthetics – it ensures a secure bond that prevents any loose or wrinkled areas from forming over time. This step is crucial for maximizing the lifespan and functionality of your carpeted floor.
Preparing for Success:
Before pressing the carpet, it’s crucial to ensure that you’ve applied the adhesive evenly and allowed it to dry to a tacky consistency. This sets the stage for proper adhesion and minimizes the risk of the carpet lifting or shifting down the road.
The Technique: Press with Precision
To press the carpet onto the concrete, position one end firmly in place and gradually work your way across the room or area. Utilize a trusty carpet roller or a flat, smooth object such as wood or a laminate flooring installation tool to exert even pressure as you go.
Firm and Even Pressure: Banishing Air Pockets
Applying firm and even pressure while pressing the carpet onto the concrete is key. This technique banishes any air pockets or bubbles that may have formed during installation, ensuring a seamless and flawless result.
Corner and Edge Mastery: Fortify Vulnerable Areas
Don’t overlook corners and edges. These areas are prone to lifting or peeling if not properly pressed. Take extra care in these spots by using a dedicated carpet seam roller or a hand roller to exert firm pressure, fortifying their bond with the concrete.
Tackling Stubborn Areas: The Heat is On
Encountering stubborn areas where the carpet doesn’t adhere properly? Fear not. Unleash the power of heat by using a heat gun or a hairdryer set on low heat. Gently warming up the adhesive softens it, allowing for better adhesion when pressed onto the concrete.
Allowing Adequate Time for Drying
Today, we delve into a crucial step that can make or break your installation: allowing adequate time for drying. Get ready to uncover the secrets to a flawless finish as we explore the importance of this step and provide you with expert tips. So, grab a steaming cup of coffee, sit back, and prepare to be enlightened.
Why is Drying Time Important?
Imagine a beautifully glued carpet, meticulously bonded to the concrete surface, with not a wrinkle in sight. Now picture this masterpiece falling apart because you rushed through the drying process. That’s why allowing adequate time for drying is absolutely vital. Let’s dig deeper into why:
Proper Curing:
Drying time is the magic ingredient that allows the adhesive to fully cure. This curing process ensures that the adhesive reaches its maximum strength, creating a bond that will stand the test of time. So, resist the urge to cut corners – give that adhesive the time it needs to work its wonders.
Warding Off Delamination:
Have you ever witnessed a carpet peeling away from the floor like a sad banana? That disastrous sight is called delamination, and it’s every installer’s worst nightmare. Adequate drying time helps prevent this catastrophe by ensuring that the adhesive sets properly and forms a secure bond between the carpet and concrete surface.
Tips for Successful Drying:
Now that we understand the importance of drying time, let’s uncover some invaluable tips to ensure your carpet installation project goes off without a hitch:
Heed Manufacturer’s Instructions:
Every adhesive has its own unique characteristics and requirements when it comes to drying time. Take the time to read and follow the manufacturer’s instructions meticulously. They have done extensive research and testing, so trust in their expertise.
Embrace the Power of Ventilation:
Think of your drying carpet as a living being in need of fresh air. Proper ventilation aids in evaporation, expediting the drying process. Open windows, introduce fans, or utilize dehumidifiers to promote airflow, especially in areas with high humidity levels. Let the wind carry away the moisture and bring forth a perfectly dried carpet.
Avoiding Damage After Installation
Now, let’s ensure that your installation remains damage-free for years to come. As an expert in the field, I have some valuable tips to share on how to protect and maintain your beautiful new carpet.
First and foremost, it is crucial to properly stretch and secure your carpet. This step prevents buckling or wrinkling, which can cause premature wear and tear. Follow the manufacturer’s instructions diligently to ensure your carpet is taut and securely in place. Trust me, this simple step will work wonders in preserving your carpet’s longevity.
Next, let’s address cleanliness. Regular cleaning and maintenance are key to avoiding stains and dirt from seeping into the fibers. Make vacuuming a habit and schedule periodic deep cleaning sessions. By doing so, not only will you keep your carpet looking fresh, but you’ll also extend its lifespan.
Now, let’s talk about high traffic areas. We all have spots in our homes that experience more foot traffic than others. To prevent excessive wear and tear in these areas, consider placing protective mats or rugs. These accessories distribute weight and minimize the impact on your carpet. It’s a small investment that can make a big difference.
Accidents happen, but when they occur on your newly installed carpet, time is of the essence. Promptly address spills or accidents to prevent permanent staining or damage. Grab a clean cloth and blot up any spills immediately. Avoid rubbing or scrubbing as this can push the stain further into the fibers. Remember, quick action can preserve your carpet’s pristine appearance.
Let’s not forget about furniture. Dragging heavy items across your carpeted area is a big no-no. Invest in furniture sliders or lift and carry these items to avoid tears or rips in your carpet. Your carpet will thank you.
Lastly, maintaining a consistent indoor climate is crucial. Extreme temperature fluctuations or high humidity levels can affect the adhesive used to glue your carpet to the concrete floor. This could lead to deterioration over time. Do your best to maintain a stable climate to preserve your carpet’s integrity.
8slJkb3VXHU” >
Conclusion
When it comes to gluing carpet to concrete, there are a few key steps you need to follow for success.
First, make sure the concrete surface is clean and free of any debris or dust. This will ensure that the adhesive sticks properly.
Next, choose a high-quality carpet adhesive that is specifically designed for concrete surfaces. Apply the adhesive evenly across the entire surface using a trowel or notched spreader.
Press the carpet firmly into place, making sure to smooth out any wrinkles or bubbles. Allow the adhesive to dry completely before walking on the carpet.