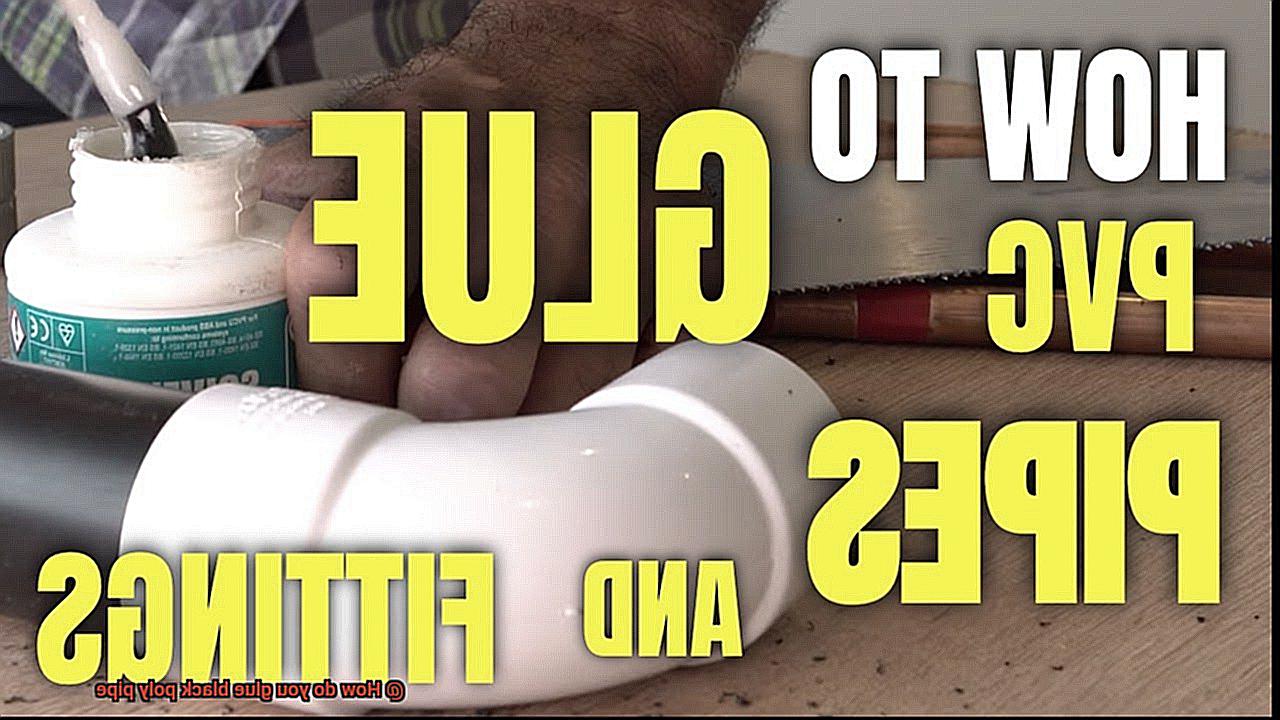
When it comes to plumbing projects involving black poly pipe, one crucial step can make or break your success – the art of gluing.
Whether you’re fixing a pesky leak or installing a brand-new irrigation system, knowing how to glue black poly pipe is essential. In this blog post, I’ll guide you through the process step by step, ensuring you achieve long-lasting and watertight connections.
So grab your tools and get ready to master this vital skill.
How do you glue black poly pipe?
Contents
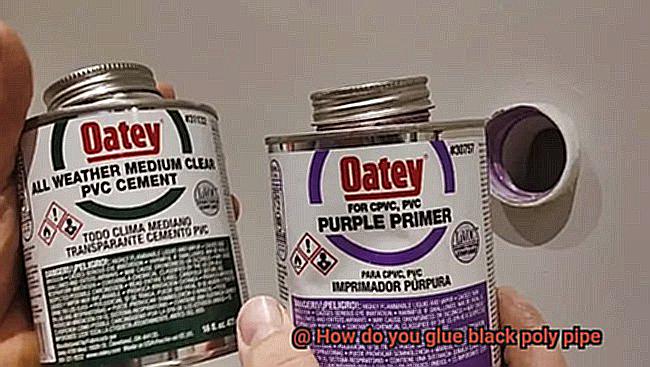
Step 1: Gather Your Tools
Before diving into the gluing process, make sure you have everything you need. You’ll want a can of solvent cement made specifically for poly pipe, an applicator brush, a clean cotton cloth, pipe cutters, and pipe fittings.
Step 2: Prep Your Pipe and Fittings
To ensure a rock-solid bond, proper preparation is key. Start by cutting both the pipe and fittings to your desired lengths using trusty pipe cutters. Smooth out any rough edges or burrs so they’re nice and even. Then give them a good wipe down with a clean cotton cloth to remove any dirt or dust particles.
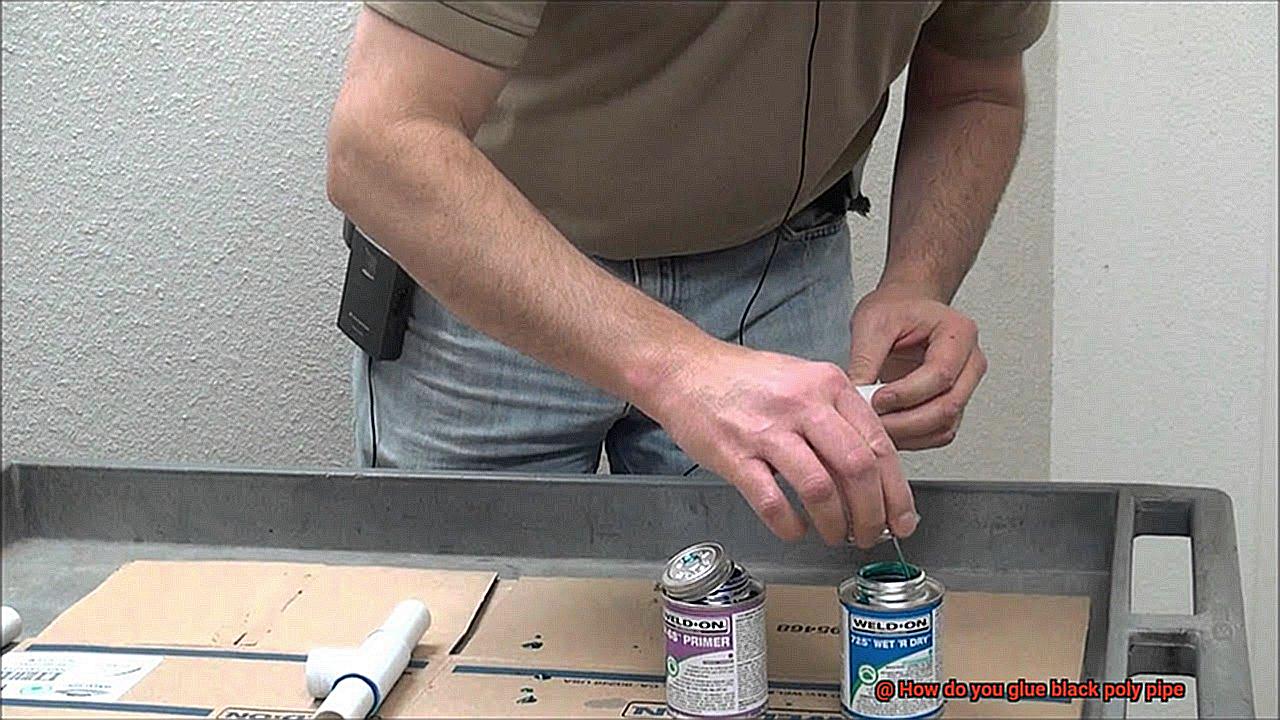
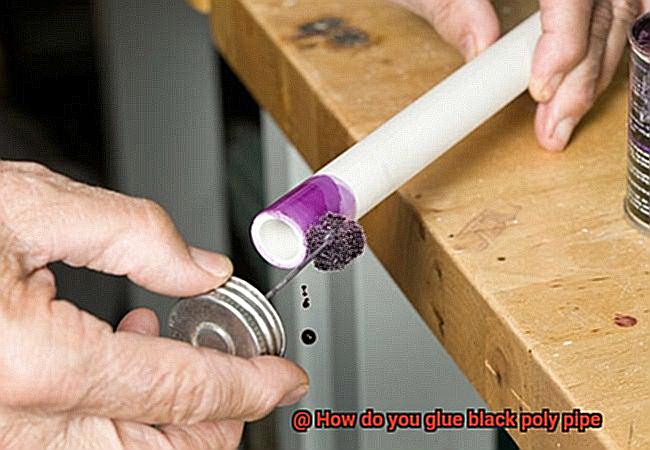
Step 3: Apply the Solvent Cement
Now it’s time to get down to business. Grab that applicator brush and generously apply the solvent cement on both the outside of the pipe and inside of the fitting. Make sure every inch is coated evenly for maximum strength.
Step 4: Join ‘Em Together
No time to waste. As soon as you’ve applied the solvent cement, join that pipe and fitting together like two peas in a pod. Push that pipe into the fitting with a slight twist for good measure. Hold it firmly in place for a few seconds so that cement can set just right.
Step 5: Let It Cure
Patience is key here – let that glue work its magic. Follow the manufacturer’s instructions on curing time, usually around 15 to 30 minutes. During this period, avoid putting any pressure or stress on the joint. Give it space to become a strong bond.
Step 6: Test It Out
Once the recommended curing time has passed, it’s time for the moment of truth – testing your connection. Turn on that water supply and inspect the joint closely for any sneaky leaks. If you spot one, no worries. Just repeat steps 2 through 5 until you’ve got a watertight seal.
What is Poly Pipe Glue?
In the world of plumbing and irrigation systems, leak-free connections are paramount. That’s where poly pipe glue comes into play. In this blog post, we will explore the concept of poly pipe glue, its functionality, and its importance in joining polyethylene pipes together.
What is Poly Pipe Glue?
Poly pipe glue, also known as PVC pipe glue or plastic pipe adhesive, is a specially formulated adhesive designed to bond polyethylene pipes together. These pipes, commonly referred to as poly pipes, are highly favored in plumbing and irrigation systems due to their exceptional durability and flexibility.
How Does it Work?
Poly pipe glue works by chemically softening the surface of the polyethylene pipes, allowing them to seamlessly fuse together when firmly pressed. This creates a robust and secure bond that guarantees leak-free connections.
The Application Process:
- Clean Surfaces: To ensure proper adhesion, it is imperative to thoroughly clean the surfaces that will be glued, removing any dirt, oil, or moisture.
- Apply the Glue: Generously coat both the outside surface of one pipe and the inside surface of the fitting or coupling that it will be joined to with poly pipe glue. Ensure all areas that will come into contact are adequately coated.
- Insert and Twist: Swiftly insert the pipe into the fitting while giving it a slight twist. This twisting motion evenly distributes the adhesive across the surfaces, resulting in a stronger bond.
- Firmly Hold: After inserting the pipe, firmly hold the joint together for a few seconds to allow the adhesive to set. During this time, avoid disturbing or moving the joint to maintain its strength.
- Check for Leaks: Once the adhesive has fully cured, pressurize the system with water or air to check for any signs of leaks or weak joints. If any leaks are detected, additional glue may be required or the joint may need to be reassembled.
Safety Precautions:
- Follow the manufacturer’s instructions for specific guidance on curing times and safety precautions.
- Wear protective gloves when handling the glue.
- Work in a well-ventilated area to avoid inhaling fumes.
Preparing the Surfaces for Gluing
In the world of plumbing and irrigation systems, the secret to leak-free success lies in the power of poly pipe glue. But before you can unleash this adhesive superhero, you must first prepare the surfaces of your black poly pipe. In this ultimate guide, we will take you through the essential steps to ensure a bond as strong as a steel fortress.
Step 1: Cleanliness Is Key
To achieve a successful glue joint, cleanliness is paramount. Grab a clean cloth or rag and meticulously wipe down the surfaces that will be bonded. Remove any dirt, dust, grease, or other contaminants that could interfere with the bonding process and weaken your joint. For stubborn residues or marks, employ a mild detergent or solvent specifically designed for cleaning poly pipe surfaces.
Step 2: Sanding for Success
In some cases, particularly with older or weathered pipes, sanding may be necessary to create a rougher surface that enhances adhesion. Gently sand the areas to be bonded using fine-grit sandpaper or an abrasive pad. Remember, gentle is key here – applying too much pressure or sanding too aggressively could harm the pipe.
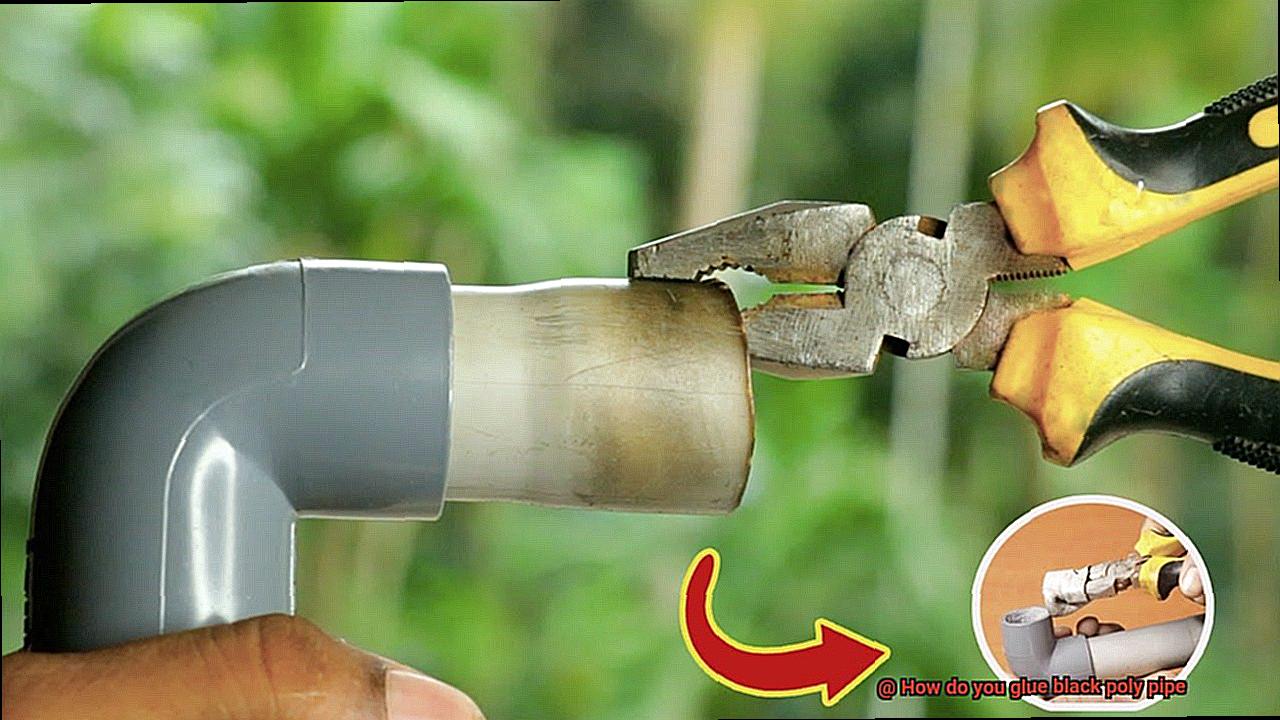
Step 3: Bye-Bye Burrs
Sharp edges and burrs on black poly pipes can compromise joint integrity and proper sealing. Eliminate these obstacles with a deburring tool or a trusty utility knife. Carefully remove any burrs or rough edges, ensuring a smooth area around the pipe’s circumference for a snug fit.
Step 4: Priming for Perfection
When it comes to preparing black poly pipe surfaces for gluing, priming is critical – especially when using solvent-based adhesives. Primers soften and ready the pipe’s surface, enhancing adhesion. Follow the manufacturer’s instructions and apply primer using a brush or applicator. Allow sufficient drying time before proceeding.
Step 5: Tolerance Check
Before diving into gluing, ensure your pipes and fittings fit together seamlessly. Inspect for obstructions, misshapen ends, or irregularities that could hinder a tight and secure connection. If necessary, trim or adjust the pipe ends to guarantee a proper fit.
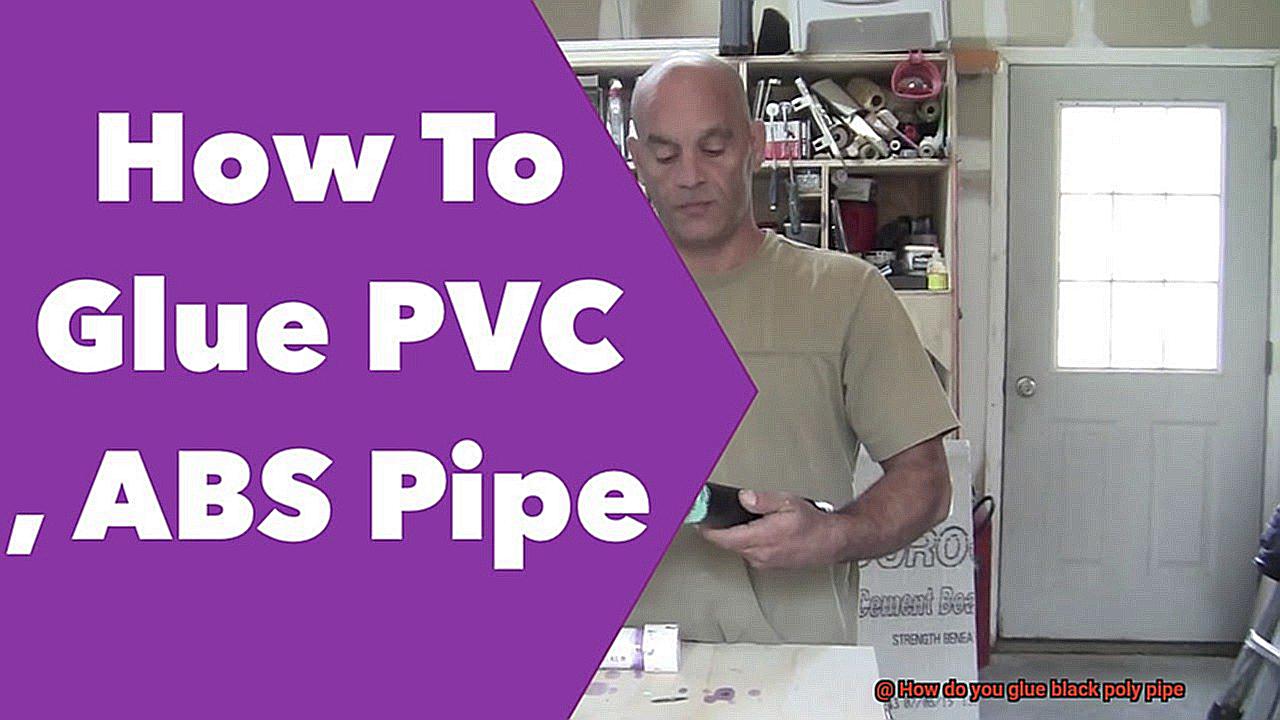
Applying the Adhesive
Today, we embark on a journey into the intricate world of applying adhesive to black poly pipe. Whether you’re a seasoned DIYer or a plumbing aficionado, we’ve got you covered with a comprehensive guide that will ensure your black poly pipe installation stands the test of time. So grab your favorite adhesive and let’s dive in.
Step 1: Surface Preparation – A Solid Foundation
Before diving into the adhesive application process, it’s crucial to prepare the surface of the black poly pipe. Armed with a clean cloth or rag and mild detergent, give the pipe a thorough scrub to remove any dirt, grease, or debris that might hinder the adhesive’s grip. Rinse it diligently and allow it to dry completely before proceeding.
Step 2: Roughening the Surface – Creating a Reliable Grip
To guarantee an unwavering bond, it’s vital to roughen the surface of the black poly pipe. With sandpaper or a trusty wire brush in hand, gently create texture on the surface. Exercise caution here – a delicate roughening is all that’s required. Our goal is to provide enough grip for the adhesive without compromising the structural integrity of the pipe itself.
Step 3: Applying the Adhesive – Unleashing the Magic
Now comes the exhilarating part – applying the adhesive. When it comes to gluing black poly pipe, solvent-based adhesives are commonly employed. Shake or stir the adhesive thoroughly to achieve optimal consistency. Using a brush or applicator, ensure a thin and even layer of adhesive is applied to both the pipe and fitting surfaces that will be joined together. Leave no crevice untouched – every point of contact matters.
Step 4: Joining the Pipe and Fitting – A Seamless Connection
With the adhesive skillfully applied, the time has come to join the pipe and fitting. Align them meticulously and exert firm pressure to ensure a tight connection. Beware of any twisting or turning once they are joined, as this could jeopardize the bond we’re striving to create.
Step 5: Setting and Curing – Patience is Key
Hold your horses. We’re almost there, but it’s crucial to give the adhesive time to work its magic. Check the manufacturer’s instructions for the specific setting time required by your chosen adhesive. Once set, maintain pressure on the pipe and fitting for a brief period, allowing the adhesive to cure. Generally, it’s advisable to wait at least 24 hours before subjecting the pipe to any pressure or stress.
Inserting the Pipe into the Fitting
Today, we embark on an exhilarating journey into the world of inserting a black poly pipe into a fitting. This seemingly simple task requires precision and care to ensure a tight and leak-free connection. So, fasten your tool belts and brace yourself as we conquer this essential plumbing skill.
Step-by-Step Guide:
Prepare the Pipe and Fitting:
Before diving headfirst into the installation process, take a moment to meticulously clean both the pipe and fitting. Rid them of any dirt, debris, or lingering moisture using a clean cloth or specialized poly pipe cleaning solution.
Align the Pipe and Fitting:
Proper alignment is key to achieving a successful connection. Slide the pipe fully into the fitting, ensuring it reaches the stopper or shoulder with no room for gaps or spaces. Embrace that snug fit.
Apply Lubricant or Adhesive (if required):
Some fittings demand the assistance of lubricants or adhesives during insertion. Respectfully follow the manufacturer’s instructions, allowing ample time for drying or setting before proceeding.
Twist and Insert:
With everything primed and ready, it’s time to perform the grand insertion. Employ a gentle twisting motion as you push the pipe into the fitting. This elegant twist ensures an even distribution of adhesive or lubricant, resulting in an unyielding seal.
Avoid Excessive Force:
Remember, patience is a virtue. If you encounter resistance during insertion, halt and assess the alignment of the pipe and fitting. Forcing it will only lead to ruin.
Inspect and Secure:
Once you’ve gracefully inserted the pipe into the fitting, pause to visually inspect your handiwork. Seek out any gaps, leaks, or misalignment with eagle-eyed precision. If any issues arise, address them promptly and efficiently before proceeding.
Holding the Joint in Place
In this blog post, we will explore the various methods and considerations involved in securing the joint during the gluing process. So, grab your clamps, straps, and ropes as we embark on a journey towards a sturdy and leak-free connection.
The Power of Clamps:
Clamps are our trusty companions when it comes to holding joints together during the gluing process. These specialized tools apply even pressure to prevent any movement that could compromise the bond. Position the clamp just above the joint, covering both the pipe and fitting for optimal pressure distribution.
Versatility and Adjustability:
Clamps with adjustable jaws are versatile tools that can accommodate different pipe sizes. Their adaptability makes them practical for various projects involving black poly pipe. Avoid overtightening, as this can cause distortion or cracking.
Alternative Methods:
If clamps are not readily available, straps or ropes can be used to secure the joint tightly until the adhesive sets. Care should be taken not to damage or deform the pipe or fittings during this process.
Minimizing Stress on the Connection:
Avoid unnecessary stress on the joint by minimizing movement or bending of the pipe during the curing process. Consider temporarily supporting or bracing the pipe in a stable position until the adhesive has fully set.
Time Matters:
Follow the adhesive manufacturer’s recommendations for curing time and leave clamps or straps in place for at least this duration. This ensures sufficient time for the adhesive to cure and bond effectively.
Post-Gluing Inspection:
After removing the clamps or straps, inspect the joint carefully for any signs of leakage or weakness. Promptly address any defects to prevent further issues down the line.
Curing Time
Curing time is a critical aspect to consider when working with black poly pipe and adhesive. It refers to the duration required for the adhesive to fully dry and reach its maximum strength. By allowing sufficient time for the glue to cure, you can ensure a secure and long-lasting connection between the black poly pipe pieces.
The recommended curing time can vary depending on the type of adhesive used and the environmental conditions. It is important to carefully follow the manufacturer’s instructions provided with the adhesive product, as they will specify the optimal curing time.
Typically, curing time can range from a few minutes to several hours. Some fast-setting adhesives may allow for handling or manipulation of the joint after just a few minutes, but it is crucial to note that the adhesive may not have reached its maximum strength at this point. To guarantee a strong and durable bond, it is advisable to wait for the full curing time before subjecting the joint to any stress or pressure.
Several factors, including temperature, humidity, and ventilation, can influence the curing time of the adhesive. Higher temperatures generally speed up the process, while lower temperatures can slow it down. Adequate ventilation helps facilitate faster drying, while poor ventilation can prolong the curing time.
To ensure a successful glue joint, exercise patience and allow ample time for the adhesive to cure properly. Rushing the process or applying stress too soon can result in a weak bond or failure of the connection. By following the manufacturer’s instructions regarding curing time and considering environmental factors, you can have confidence in the durability and longevity of your black poly pipe joints.
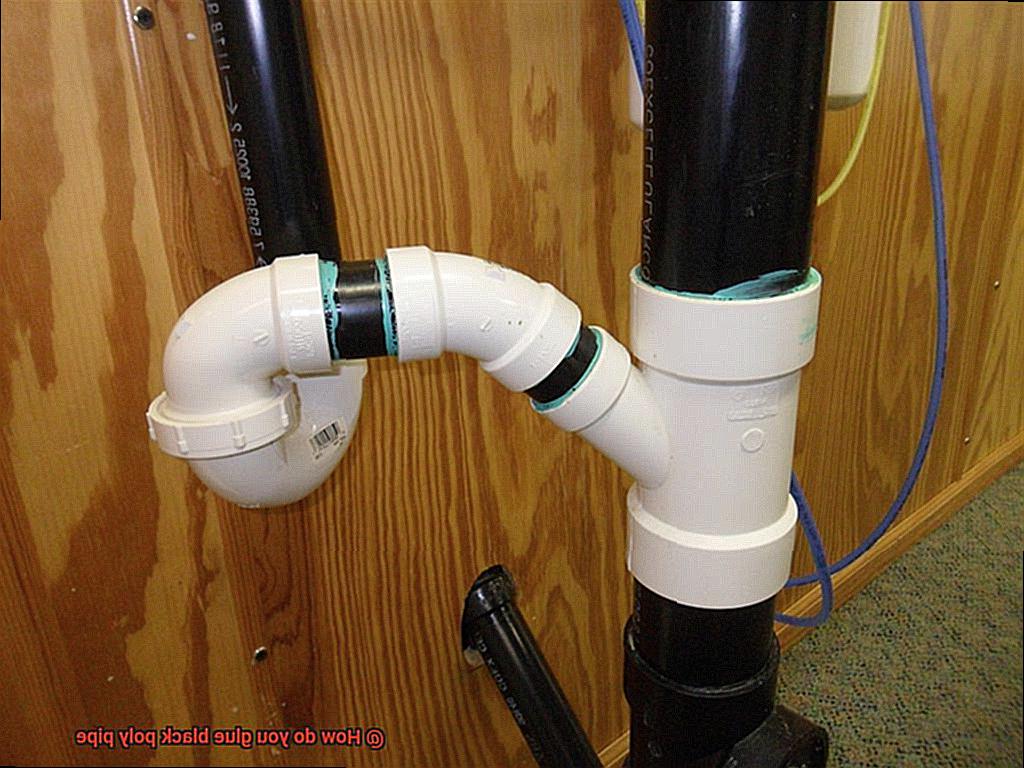
Checking for Leaks and Weak Joints
Black poly pipe is a popular choice for plumbing systems due to its durability and flexibility. However, like any plumbing material, it is not immune to leaks and weak joints. In this comprehensive guide, we will explore the essential steps to detect and repair these issues, ensuring a robust and reliable black poly pipe system.
Step 1: Conducting a Pressure Test
To begin checking for leaks and weak joints in black poly pipe, a pressure test is crucial. This involves pressurizing the pipe system with water or air to identify any leaks. Gather the necessary tools: a pressure gauge, a test pump, and plugs or caps to seal off the ends of the pipe. Close all valves and faucets connected to the black poly pipe. Attach the test pump to one end of the pipe and start pumping air or water into the system. Monitor the pressure gauge for any drop in pressure, which indicates a leak. Inspect all joints, fittings, and connections to identify the source of the leak.
Step 2: Visual Inspection
A visual inspection is another effective method for checking for leaks and weak joints. Look for signs of water seepage, dampness, or discoloration around joints and fittings. Unusual noises during operation, such as hissing or gurgling sounds, may also indicate leaks in the system.
Step 3: Addressing Leaks and Weak Joints
If a leak is detected during the inspection, it is crucial to address it promptly. Tighten loose joints or replace faulty fittings as necessary. For more severe issues, cut out and replace damaged sections of the black poly pipe.
Step 4: Proper Curing Time
After repairing any leaks or weak joints, it is important to allow sufficient curing time for adhesive or sealant to dry properly. Follow the manufacturer’s instructions for recommended curing time before subjecting the joint to stress or pressure.
Different Types of Poly Pipe Glue
If so, it’s essential to understand the different types of poly pipe glue and their applications. Whether you’re a DIY enthusiast or a professional plumber, choosing the right glue is crucial for creating strong and dependable connections. In this comprehensive guide, we’ll explore the various types of poly pipe glue available, giving you the knowledge to make informed decisions for your project.
Solvent Cement:
Solvent cement is a commonly used adhesive for joining black poly pipes with a diameter of 2 inches or less. This glue works by chemically softening the surface of the pipe and fitting, ensuring a secure fusion when pressed together firmly. It is ideal for water supply and irrigation systems where reliable connections are essential.
Adhesive Tape:
Adhesive tape is a convenient option for small repairs or temporary fixes in black poly piping systems. Made of sticky material, it adheres to the surface of the pipe and creates a tight seal. While adhesive tape may not offer the same strength as solvent cement, it can be handy in certain situations that require quick solutions.
Mechanical Fittings:
For larger diameter pipes or heavy-duty applications, mechanical fittings provide an excellent alternative to glue. These fittings utilize clamps or screws to tighten onto the pipe, creating a secure connection without adhesive. They are particularly useful in situations where pipes need to be easily disassembled or repositioned.
Ffq66Mn3-6k” >
Conclusion
When it comes to gluing black poly pipe, there are a few key steps you need to follow.
First, make sure the pipe is clean and free of any dirt or debris. Next, apply a primer to the pipe and fittings to ensure proper adhesion.
Then, generously apply the glue to both the pipe and fitting surfaces. Finally, quickly join the pieces together and hold them firmly in place for a few seconds to allow the glue to set.
So be sure to choose the right adhesive for the job.