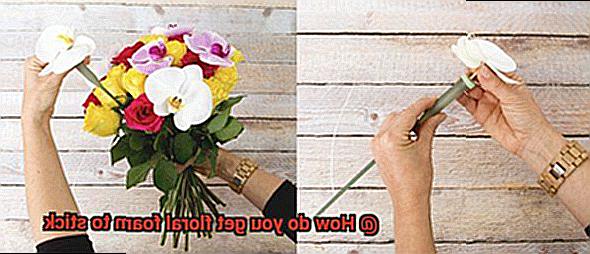
Crafting jaw-dropping floral arrangements is like conjuring up pure magic. It’s all about precision, creativity, and that special touch that turns ordinary blooms into extraordinary masterpieces. And at the core of this artistry lies floral foam, the unsung hero that brings our floral dreams to life. But how do you make this enchanting material stick securely in place? Well, my friend, you’ve come to the right place.
In this comprehensive guide, we’re diving headfirst into the secrets of achieving flawless adhesion with floral foam. Whether you’re a seasoned florist or a DIY enthusiast with a fiery passion for petals, our expert tips and tricks will arm you with the knowledge to firmly secure your foam in place.
From building a rock-solid foundation for intricate designs to ensuring longevity and preventing any mishaps along the way, we’ll explore various methods and tools that let you harness the power of floral foam like a pro. So, get ready to unleash your creativity as we embark on this quest to master the art of making floral foam stick. Let’s dive in.
What is Floral Foam?
Contents
- 1 What is Floral Foam?
- 2 Advantages of Using Floral Foam
- 3 Methods for Securing Floral Foam
- 4 Using Floral Adhesive to Stick Floral Foam
- 5 Using Hot Glue to Secure Floral Foam
- 6 Temporary Attachment with Floral Tape and Wire
- 7 Waterproof Adhesives for Stronger Bonds
- 8 Important Safety Precautions When Working with Floral Foam
- 9 Conclusion
The secret lies in a humble material called floral foam, also known as oasis foam. In this article, we will delve into the world of floral foam, exploring its uses, properties, and some tips on how to make it stick securely.
The Power of Hydration:
At its core, floral foam acts as a water source for cut flowers. Made from a specialized open-cell phenolic plastic foam, it works like a sponge, absorbing water and retaining moisture. This unique quality ensures that flowers stay fresh and hydrated for an extended period, allowing them to maintain their beauty and vibrancy.
Types of Floral Foam:
Floral foam comes in two main types: wet and dry. Wet floral foam is pre-soaked in water before use and is best suited for fresh flower arrangements. Dry floral foam requires soaking prior to use and is ideal for artificial or dried flower displays. Both types effectively hold and hydrate flowers, providing a stable foundation for creative designs.
Shaping Possibilities:
One of the most remarkable features of floral foam is its versatility in shaping and molding. Easily cut into different sizes or customized into specific shapes to fit various containers or design requirements, this flexible material empowers florists to unleash their creativity and construct unique arrangements that captivate the eye.
Support System:
Floral foam not only hydrates flowers but also acts as a support system. By inserting stems securely into the foam, florists can evenly distribute the weight throughout the arrangement, preventing flowers from drooping or falling out. This structural support ensures that the overall design remains intact, enhancing visual appeal.
Sustainability Matters:
While traditional floral foam may lack environmental friendliness due to its non-biodegradable nature, the floral industry is embracing eco-friendly alternatives. These alternatives are crafted from biodegradable materials such as plant-based foams or compostable plastics, offering a more sustainable option for floral arrangements without compromising functionality.
Making Floral Foam Stick Securely:
To ensure a secure bond, florists have several options at their disposal:
- Floral Adhesive: Designed specifically for floral applications, this adhesive provides a strong and long-lasting bond when applied to the surface of floral foam.
- Hot Glue: Ideal for attaching foam pieces together or securing them onto surfaces, hot glue creates a sturdy bond quickly and reliably.
- Floral Tape and Wire: Floral tape can be wrapped tightly around the foam to hold it in place temporarily, while floral wire can be inserted and bent around objects or structures.
- Waterproof Adhesives: When arrangements will come into contact with water, waterproof adhesives like epoxy or silicone sealants offer a stronger bond and prevent any potential damage.
Advantages of Using Floral Foam
Look no further than floral foam. This versatile material is like glue that holds your flowers securely in place, while also providing them with the hydration they need to stay fresh and vibrant. In this blog post, we will explore the advantages of using floral foam and why it is a must-have for any floral arrangement.
Advantage 1: Excellent Water Retention
Floral foam’s unparalleled ability to retain water ensures that your flowers stay hydrated for longer periods. Its porous structure allows it to hold a significant amount of water, eliminating worries about wilting blooms. Whether you’re planning a stunning centerpiece for a wedding or creating a beautiful home decoration, floral foam will keep your flowers looking fresh and fabulous.
Advantage 2: Easy Shaping and Manipulation
Floral foam comes in various shapes and sizes, making it incredibly versatile for different floral arrangements. Need a perfect fit for your bouquet or wreath? No problem. Floral foam can be easily cut or shaped to suit your design needs. It provides a stable base for arranging flowers, allowing you to let your creativity bloom.
Advantage 3: Support and Stability
Say goodbye to drooping flowers. Floral foam acts as a secure anchor, providing excellent support and stability to your floral arrangement. Delicate stems or heavy blooms? Not a problem. With floral foam, your flowers will stay in place throughout the arrangement, creating a visually stunning display that will impress anyone who lays eyes on it.
Advantage 4: Enhanced Longevity
Floral foam helps extend the life of your flowers by efficiently retaining water. It provides a continuous source of hydration, preventing wilting and dehydration. This is especially beneficial in warm climates or when displaying arrangements in areas without direct access to water. With floral foam, your flowers will stay fresh and vibrant for longer.
Advantage 5: Versatile Placement Options
Floral foam offers endless possibilities when it comes to placement options. It can be easily inserted into various containers, from vases to unconventional objects like pumpkins or even shoes. With its ability to mold into different shapes and sizes, floral foam adapts to any vessel, allowing you to create unique and visually appealing displays that will leave everyone in awe.
Advantage 6: Time-Saving Solution
Floral foam’s secure hold on stems eliminates the need for painstakingly arranging each individual stem manually. This time-saving solution allows florists and DIY enthusiasts to create stunning arrangements more efficiently, giving you more time to focus on other aspects of your project. With floral foam, you can achieve beautiful arrangements in less time.
Methods for Securing Floral Foam
Securing floral foam is a crucial step in creating beautiful and long-lasting floral arrangements. There are various methods that can be used to ensure that the foam stays in place and provides the necessary support for your flowers. Let’s explore these methods in detail.
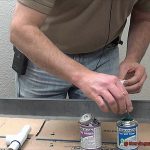
One of the most popular and effective methods is using floral adhesive or glue. Specially formulated for floral foam, this adhesive provides a strong hold. It can be easily applied using a glue gun or a brush, allowing you to secure the foam to your container or base effortlessly. Remember to choose an adhesive specifically made for floral foam, as regular glue may not provide the desired results.
Another method for securing floral foam is using floral pins or greening pins. These small U-shaped metal pins are perfect for adding extra stability to your arrangements. Simply insert them into the foam and then into your container or base to keep everything securely in place. Floral pins are particularly useful when working with heavier flowers or larger arrangements that require additional support.
To ensure double security, consider using floral tape. This sticky tape can be wrapped around the foam and container, providing a firm hold. Floral tape works great in combination with other methods such as adhesive or pins, giving your arrangement that added peace of mind.
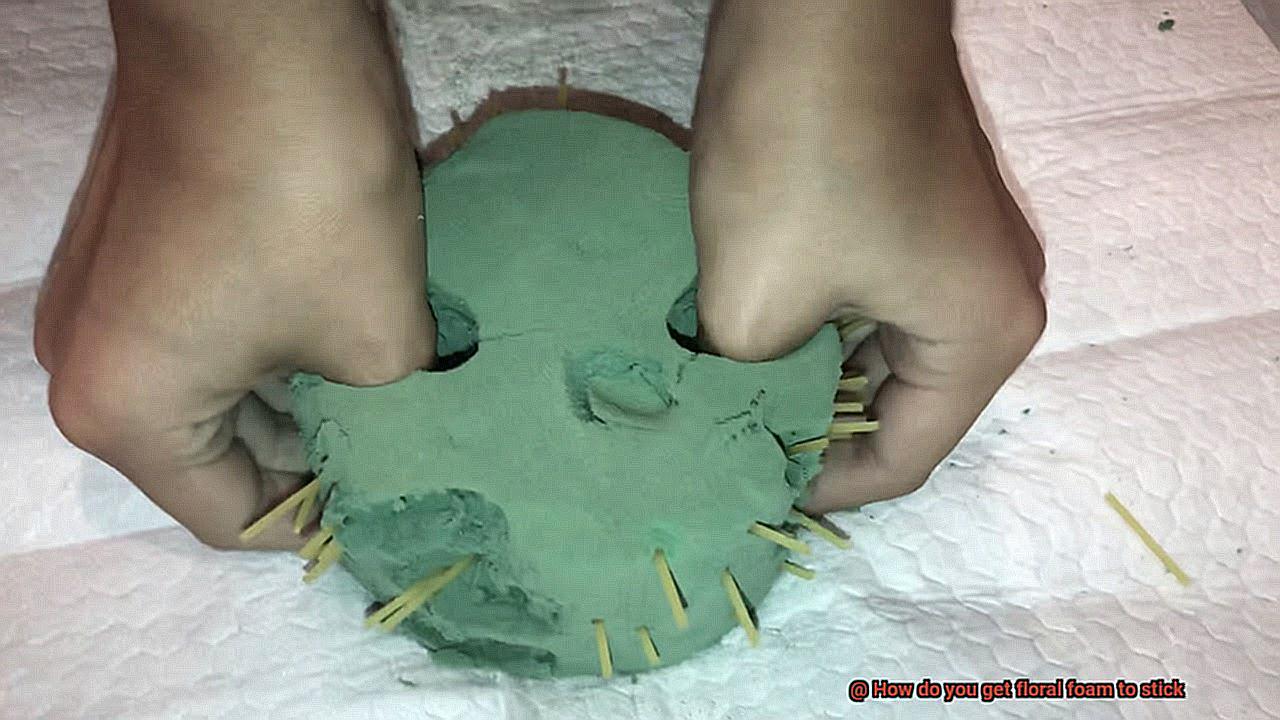
If you’re looking for a more unconventional approach, wire can also be used to secure floral foam. By inserting wire pieces into the foam and twisting them around the container or base, you can achieve a sturdy hold. This method is especially helpful when working with unique containers or when you need some extra stability for your arrangement.
Remember, it’s important to choose the right method based on the size and weight of your arrangement. Larger or heavier arrangements may require a combination of methods for added stability. Additionally, always handle the foam with care to avoid any damage that could compromise its structural integrity.
Using Floral Adhesive to Stick Floral Foam
Creating stunning floral arrangements requires more than just arranging beautiful blooms. It’s crucial to have a strong foundation that keeps everything in place, and that’s where floral adhesive comes in. In this article, we’ll dive into the world of floral glue and explore the proper steps for using it to stick floral foam to any surface. So grab your glue gun and let’s get sticking.
Clean the Surface:
Before applying floral adhesive, make sure the surface where you’ll be attaching the foam is clean and free from dust or debris. A quick wipe with a damp cloth should do the trick, ensuring a better bond between the foam and the surface.
Choose Your Floral Adhesive:
Floral adhesive comes in various forms, including liquid, glue dots, and sprays. Choose the type that suits your preferences and needs. Liquid adhesive provides an even distribution, while glue dots offer convenience, and sprays are great for large-scale projects.
Apply a Thin Layer:
When using liquid floral adhesive, it’s best to apply a thin layer onto both the foam and the surface. This ensures an even distribution of the adhesive and prevents excessive dripping or pooling. Remember, a little goes a long way.
Press Firmly:
After applying the adhesive, gently press the foam onto the surface, ensuring that it sticks firmly. Applying light pressure for a few seconds will help establish a strong bond between the foam and the surface.
Allow Drying Time:
Patience is key when working with floral adhesive. Let it dry completely before handling or moving the arrangement. Drying times can vary depending on the type of adhesive used, so refer to the manufacturer’s instructions for guidance.
Secure Additional Materials:
Floral adhesive isn’t just for sticking foam. It works wonders for securing other materials like ribbons, fabric, or decorative elements to the foam. Follow the same application process for these items, ensuring they are firmly attached.
Know Its Limits:
Floral adhesive is perfect for temporary arrangements. If you’re looking to create a more permanent display, consider using other methods such as wire or floral picks for securing the foam.
Conclusion:
Floral adhesive is a versatile and essential tool in any floral artist’s arsenal. By following these simple steps, you can ensure your floral foam stays securely attached to any surface, providing a strong foundation for your beautiful creations. So go ahead, get creative, and let your arrangements stick around with the help of floral adhesive.
Using floral adhesive to stick floral foam is a common practice among florists and DIY crafters. Floral adhesive is a strong glue specifically designed for securing floral foam to various surfaces, ensuring that arrangements stay intact. Here is a step-by-step guide on how to use floral adhesive effectively:
Using Hot Glue to Secure Floral Foam
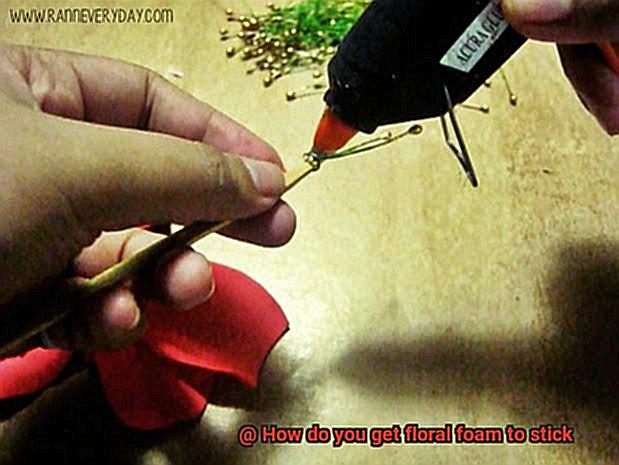
Creating stunning floral arrangements is an art form that requires precision and attention to detail. One crucial aspect of this process is securing the floral foam in place to ensure that your creation stays intact and doesn’t shift or fall out of the container. Many florists and DIY enthusiasts turn to a trusty ally for this task: hot glue. In this article, we will explore the world of hot glue and how it can be used effectively to secure floral foam, providing you with the knowledge you need to elevate your flower arranging skills.
Step 1: Gather Your Materials
Before embarking on your floral adventure, gather the necessary tools: a hot glue gun and hot glue sticks. Ensure that your glue gun is fully heated before starting the process. Safety first.
Step 2: Positioning the Floral Foam
Select your desired container or vase and place the floral foam snugly inside. A secure fit is essential for the stability of your arrangement.
Step 3: Apply Hot Glue
With your floral foam in position, it’s time to grab that hot glue gun. Apply a thin line or dot of hot glue to the bottom of the foam. Remember, less is more in this case. Excessive amounts of glue can create a mess and be challenging to hide later on.
Step 4: Press Firmly and Hold
Immediately press the foam onto the bottom of the container, applying gentle pressure to ensure a firm bond. Hold it in place for a few seconds until the glue dries and sets. This will prevent any unwanted shifting or movement of the foam.
Step 5: Reinforcing Your Bond
For larger arrangements or intricate designs, it may be necessary to secure multiple areas of the foam with hot glue. Apply small dots or lines of glue around the edges and corners of the foam to ensure it stays securely in place.
Step 6: Hiding Imperfections
Sometimes hot glue can leave visible residue on the foam, which may not be aesthetically pleasing. To hide any imperfections, consider covering the glued areas with moss, foliage, or other decorative elements. This will add an extra touch of beauty while concealing any glue marks.
Step 7: Attaching Additional Elements
Hot glue is not only useful for securing floral foam but also for attaching additional elements to your arrangement. Whether it’s flowers, foliage, or decorative accents, a small amount of hot glue applied to the stem or base of the element will provide a reliable bond when pressed firmly into the foam.
Temporary Attachment with Floral Tape and Wire
Look no further than the combination of floral tape and wire. These two tools are perfect for providing temporary attachment that is just as effective as hot glue, but with added flexibility. In this article, we will guide you through the steps and techniques for using floral tape and wire to secure your floral foam.
First and foremost, let’s delve into the different types of floral tape and wire available. Floral tape comes in various colors and thicknesses, but the most common type is a stretchy, adhesive tape that adheres well to both itself and other surfaces. It is specifically designed for use in floral arrangements, making it an ideal choice for attaching floral foam.
When it comes to wire options, there are several to choose from. Green floral wire is a popular choice as it seamlessly blends with foliage. It is available in different gauges, with thicker wire providing more stability. For temporary attachments, a lighter gauge wire is recommended.
Now, let’s discuss the step-by-step process for attaching floral foam using floral tape and wire:
Cut a piece of foam that fits snugly into your container or base. Trim the edges if needed to achieve the desired shape.
Take your floral tape and begin wrapping it tightly around the foam. Start at one end and work your way around in a spiral motion, slightly overlapping the tape with each pass. Press the tape firmly against the surface to ensure proper adhesion.
For added stability when attaching the foam to a vertical surface like a wall or vase, incorporate wire along with the tape. Cut a piece of wire long enough to reach from the bottom of the foam to the top of the container or surface. Insert one end of the wire into the foam at an angle, ensuring a secure fit. Then, wrap the floral tape around both the wire and foam, starting at the point where the wire is inserted. Continue wrapping until you reach the top of the foam. This will provide extra support and prevent the foam from slipping or falling off.
It’s important to note that this method is temporary and may not be as secure as other attachment methods, especially for heavier arrangements. However, it is highly suitable for lightweight designs or situations where you need the flexibility to easily remove or reposition the foam.
Waterproof Adhesives for Stronger Bonds
In the world of floral design, the right adhesive can make all the difference in creating stunning and long-lasting arrangements. When it comes to securing floral foam, waterproof adhesives are the key to achieving stronger bonds. In this article, we will delve into the significance of using waterproof adhesives in floral design and explore different types of adhesives that provide exceptional durability and resistance to water exposure.
The Role of Waterproof Adhesives:
Floral foam is commonly used in arrangements involving water, such as vase displays and submerged flower designs. Traditional adhesives fail to maintain their grip when faced with moisture, jeopardizing the stability of the arrangement. Waterproof adhesives, however, are specifically formulated to withstand water exposure without compromising their adhesive properties. They are indispensable for securely fastening floral foam and ensuring your creations endure.
Types of Waterproof Adhesives:
Several types of waterproof adhesives are widely employed in floral design. Floral adhesive, available in liquid or gel form, is a favored choice due to its ability to bond foam and flowers effectively. It dries transparently, creating an invisible yet resilient bond. Waterproof glue is another option renowned for its capacity to endure water exposure while maintaining adhesive strength. Epoxy resin, a blend of resin and hardener, forms an exceptionally robust and waterproof bond once fully cured.
Choosing the Right Adhesive:
Not all adhesives labeled as “waterproof” are suitable for use with floral foam. It is paramount to select adhesives explicitly designed for floral applications to attain optimal results. These specialized adhesives adhere flawlessly to the foam’s surface, guaranteeing a robust bond. Always adhere to the manufacturer’s instructions for proper usage, including applying the adhesive evenly over the foam’s surface and allowing it to partially dry before attaching additional elements.
Enhancing Adhesion:
Besides utilizing waterproof adhesives, there are techniques that can further augment the bond between floral foam and other materials. Roughening the foam’s surface using sandpaper or a hot knife creates a superior grip for the adhesive. Mechanical means, such as floral pins or wire, provide additional support and stability to the arrangement.
Important Safety Precautions When Working with Floral Foam
Floral enthusiasts, let’s talk about an often overlooked topic in the world of floral design – safety precautions when working with floral foam. While it’s exciting to create beautiful arrangements, it’s crucial to prioritize your safety. Here are some important precautions to keep in mind:
Wear protective gear:
- Gloves: Always wear gloves when handling floral foam to protect your skin from potential irritation or allergic reactions caused by the chemicals in the foam.
- Safety goggles: Protect your eyes from dust particles by wearing safety goggles.
- Face mask: Prevent respiratory issues by wearing a face mask to avoid inhaling the particles released from the foam.
Work in a well-ventilated area:
- Floral foam releases fine particles into the air when cut or manipulated. To minimize inhalation, work in a well-ventilated area.
- Open windows or use a fan to ensure proper air circulation and reduce exposure to these particles.
Avoid direct contact with skin:
- Floral foam contains chemicals that can cause skin irritation or allergic reactions. Always wear gloves to avoid direct contact.
- If you accidentally touch the foam, wash the area thoroughly with soap and water.
Use sharp tools with caution:
- When cutting floral foam, use sharp tools like knives or floral cutters. Be cautious to prevent accidents or injuries.
- Keep your fingers away from the cutting edge and always cut on a stable surface.
Dispose of floral foam properly:
- Floral foam is not biodegradable, so don’t throw it in regular trash bins. Improper disposal can release harmful chemicals when incinerated.
- Check with local waste management facilities for guidelines on how to dispose of floral foam safely.
Store floral foam in a dry place:
- Moisture can degrade floral foam over time, reducing its effectiveness. Store it in a dry place away from water sources or high humidity areas.
- This will help maintain its quality and ensure optimal performance when working with it.
LZxydhzz_bI” >
Conclusion
Floral foam is a fantastic tool for creating beautiful and long-lasting flower arrangements. However, getting it to stick securely can sometimes be a challenge. But fear not. I’m here to share some expert tips on how to make floral foam stick like glue.
One method that works wonders is using floral adhesive. This specialized adhesive is designed specifically for securing floral foam to various surfaces. Simply apply a thin layer of the adhesive onto the bottom of the foam and press it firmly onto your desired surface. In no time, you’ll have a sturdy bond that will hold your flowers in place.
Another trick is to use waterproof tape or wire to secure the foam. Wrap the tape tightly around the base of the foam, making sure it’s snug and secure. Alternatively, you can insert wire into the foam and then twist it around a support structure, such as a wire grid or a container handle. This technique provides extra stability and ensures your arrangement stays intact.
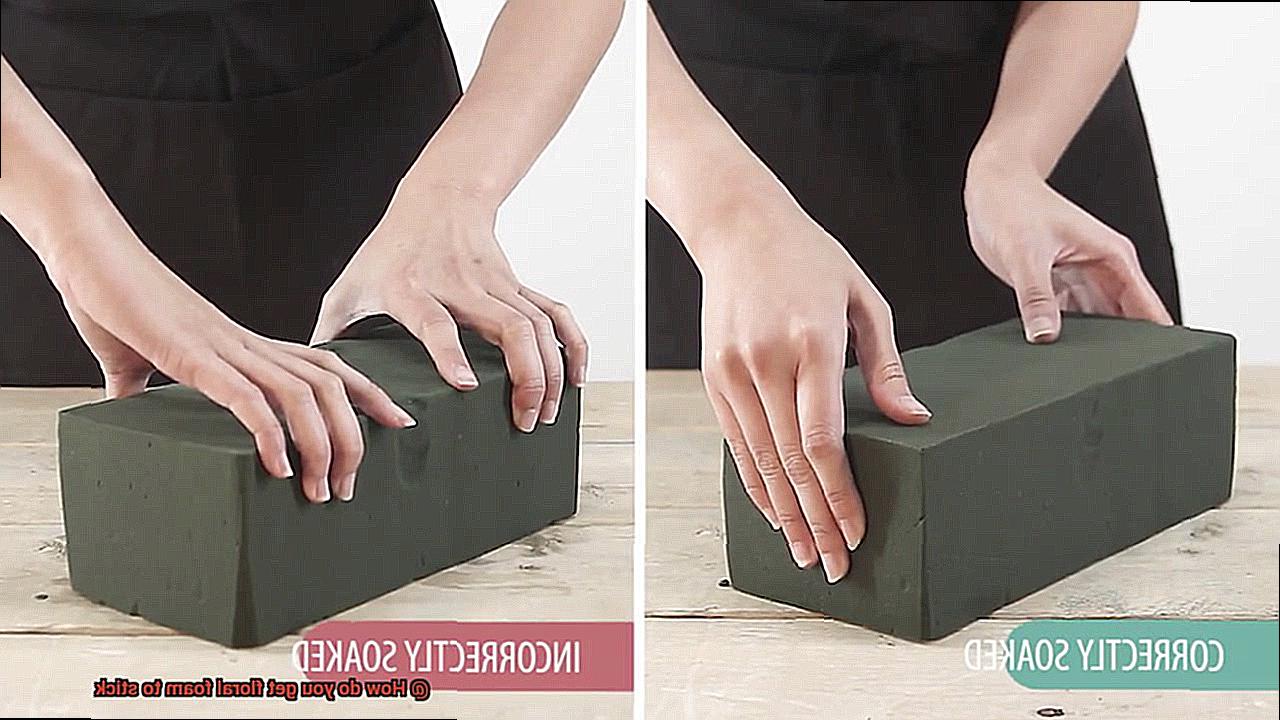
If you’re working with wet floral foam, soaking it in water before securing it can help improve its sticking power. Wet foam tends to adhere better than dry foam, so give it a good soak for about 30 minutes before getting started. Once it’s thoroughly saturated, gently squeeze out any excess water and proceed with attaching it using one of the methods mentioned earlier.
To add an extra layer of security, consider using floral pins or picks. These handy tools are perfect for anchoring your foam in place, especially if you’re working with heavier flowers or foliage. Simply insert them through the bottom of the foam and into your chosen surface, ensuring they’re firmly in place.
In conclusion, getting floral foam to stick doesn’t have to be a struggle. With the right techniques and materials, you can ensure your arrangements stay put and look stunning every time.