Ever found yourself captivated by the crystal-clear allure of acrylic displays, the flawless design of acrylic furniture, or the shimmering perfection of acrylic trophies? It’s no secret that acrylic has become a staple in the world of design. But what happens when you need to join two pieces together? How do you maintain that transparency while ensuring a bond that’s as sturdy as it is invisible? Well, my friend, welcome to the fascinating art of gluing acrylic to acrylic.
When it comes to joining acrylic, regular adhesives just won’t make the cut. Creating an invisible bond requires a delicate dance between technique, understanding, and the right materials. Are you ready to dive into this captivating process and master the art of joining acrylic? Then buckle up because we’re about to unlock secrets that will revolutionize your acrylic projects.
From unraveling the science behind bonding acrylic to providing step-by-step instructions, this article spills all the beans on ensuring a connection so flawless it’ll leave you speechless. We’ll explore why proper surface preparation is vital, which types of adhesives are best suited for this task, and what key factors you must consider during the gluing process.
Prepare yourself for a deep dive into the remarkable properties of acrylic solvent cement, awe-inspiring wonders of acrylic epoxy, and even mind-blowing UV-curing adhesive systems. But wait – there’s more. We’ll also uncover essential precautions, insider tips, and crafty tricks to help you achieve professional-grade results every single time.
Get ready to unleash your inner artist, engineer, or designer as we embark on a journey through creating invisible bonds between acrylic. Your craftsmanship is about to soar to new heights with our guidance. Acrylic-to-acrylic gluing has never been so intriguing and accessible – so let’s get this show on the road.
What is Acrylic?
Contents
- 1 What is Acrylic?
- 2 What Adhesive Should You Use?
- 3 Preparing the Acrylic Surfaces for Glue
- 4 Applying the Solvent Cement
- 5 Aligning and Pressing the Acrylic Pieces Together
- 6 Curing Times for Different Adhesives
- 7 Alternatives to Solvent Cement for Bonding Acrylic
- 8 Choosing the Right Adhesive for Your Project
- 9 Conclusion
Step into the captivating world of acrylic, a synthetic material that has revolutionized industries and captivated artists and designers alike. With its unparalleled clarity, durability, and versatility, acrylic has become a cherished medium in a multitude of applications. In this article, we will explore the enchanting properties and myriad uses of acrylic, uncovering its secrets and unlocking its potential.
Origins and Development:
In the early 20th century, a group of visionary scientists sought to create a material that would transcend the limitations of glass. Their quest led to the birth of polymethyl methacrylate (PMMA), affectionately known as acrylic or plexiglass. This innovative material quickly soared to prominence, captivating the world with its exceptional optical properties and effortless malleability.
Key Properties of Acrylic:
- Transparency: Like a crystal-clear window to another world, acrylic boasts unrivaled transparency. Its ability to allow light to pass through with minimal distortion makes it an ideal choice for applications where absolute clarity is essential.
- Durability: Time stands still for acrylic as it defies the ravages of weathering and aging. Resistant to yellowing and brittleness, this resilient material triumphs over the test of time, making it suitable for both indoor and outdoor use.
- Impact Resistance: Fragility is a foreign concept to acrylic as it fearlessly withstands impact. Unlike its delicate counterpart, glass, acrylic is shatter-resistant, ensuring safety in a wide range of applications.
- Chemical Resistance: As though encased in an impenetrable fortress, acrylic showcases remarkable resistance to chemicals. This quality reinforces its durability, safeguarding against the corrosive forces that seek to diminish its brilliance.
- Ease of Fabrication: With the grace of a sculptor’s hand, acrylic submits to the will of artisans and craftsmen. It can be effortlessly cut, drilled, shaped, and polished using common tools and techniques, allowing for boundless creativity and versatility.
What Adhesive Should You Use?
When it comes to bonding acrylic to acrylic, you need an adhesive that will provide a strong and durable bond. Fortunately, there are several options available on the market, each with its own unique qualities. Let’s explore these options and find the perfect adhesive for your project.
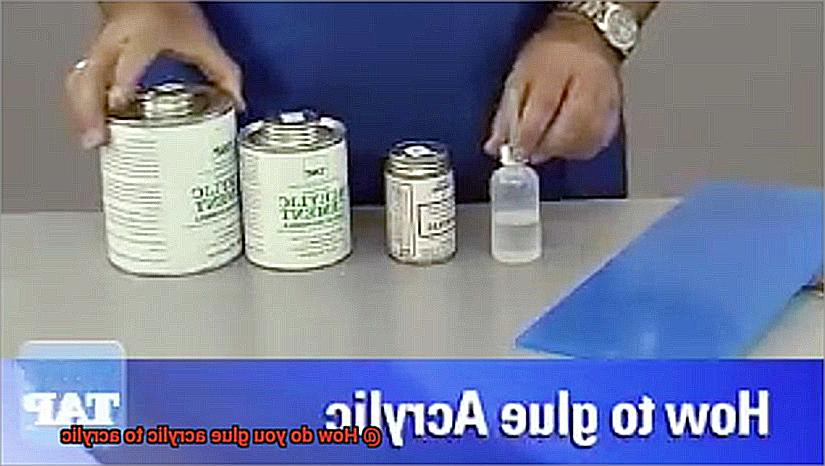
- Solvent-based cement: This adhesive works like magic by chemically melting the surfaces of the acrylic, allowing them to fuse together. It comes in liquid form and can be applied using a brush or syringe. Solvent-based cements are particularly effective for joining large surface areas, providing a strong bond that will stand the test of time.
- Epoxy adhesive: If strength and longevity are essential for your project, epoxy is the way to go. It consists of two components – a resin and a hardener – that need to be mixed together before application. Once mixed, epoxy forms a super-strong bond that is resistant to moisture and temperature changes.
- Acrylic adhesives: These adhesives are specifically formulated for bonding acrylic materials. They come in tube or cartridge form and can be applied directly onto the surfaces to be bonded. Acrylic adhesives bond quickly and provide excellent clarity, making them suitable for applications where aesthetics are important.
- Multipurpose adhesives: If none of the specific options mentioned above suit your needs, you can consider multipurpose adhesives like cyanoacrylate (super glue) or polyurethane adhesives. Cyanoacrylate adhesives bond quickly and provide a strong hold, but they may not be suitable for all types of acrylics. Polyurethane adhesives offer good flexibility and resistance to impact but may not have as strong of a bond as other options.
When choosing an adhesive, it’s important to consider the specific requirements of your project. Factors such as the size and shape of the acrylic pieces, the level of strength needed, and any environmental factors should be taken into account. Following the manufacturer’s instructions for proper application and curing times is crucial to ensure the best results.
Preparing the Acrylic Surfaces for Glue
Unlocking the secret to a flawless bond between acrylic surfaces requires an artful approach. Just as a painter prepares their canvas before creating a masterpiece, we must meticulously prepare our acrylic surfaces to achieve a strong and enduring bond. Let us embark on a journey of preparation, where each step is a brushstroke leading us closer to adhesive perfection.
Step 1: Cleanliness – Banishing Dust and Grime:
In the realm of acrylic bonding, cleanliness reigns supreme. Like purifying the air before a meditation session, we must cleanse both acrylic surfaces thoroughly. Enlist the aid of warm water and a gentle soap or detergent to wash away any remnants of dust, dirt, or grease. Our goal is to create an immaculate foundation for our adhesive enchantment.
Step 2: Texture – The Art of Sanding:
Now that cleanliness has been achieved, it is time to add texture to our acrylic canvas. Imagine an artist gently etching lines onto their painting, creating depth and dimension. Armed with fine-grit sandpaper, delicately sand both acrylic surfaces in circular motions.
This creates a rough texture, allowing the adhesive to embrace the acrylic with greater tenacity. Caution must be exercised, for excessive pressure may mar the surface with unwanted scratches.
Step 3: Drying Time – Bid Farewell to Moisture:
After the artistic act of sanding, we must ensure that moisture has no place in our masterpiece. Much like waiting for paint to dry before layering another stroke, we must eliminate any residual moisture.
Employ a clean cloth as your trusty brush, sweeping away any lingering dampness from both surfaces. Moisture is the nemesis of our adhesive prowess; thus, we desire surfaces that are utterly dry and prepared for bonding.
Step 4: Acrylic Solvent – Unleashing the Power Within:
Now, let us introduce the secret ingredient that elevates our bonding magic – acrylic solvent. Picture a sculptor applying a finishing touch to their creation, accentuating its beauty. With a clean cloth or brush, apply a small amount of acrylic solvent to both surfaces.
This enchanting elixir softens the acrylic, paving the way for an even stronger bond. Allow ample time for the solvent to dry completely before proceeding to our final act.
Applying the Solvent Cement
Prepare to be enchanted as we unravel the secrets of creating a bond that withstands the test of time. With brushes in hand, let us embark on this artistic endeavor together.
Step 1: Preparing for Perfection

Before we dive into our adhesive masterpiece, we must ensure our canvases are pristine. Just like an artist wouldn’t paint on a dirty canvas, we must cleanse both acrylic surfaces of dirt, dust, and grease.
A gentle bath with a mild soap and water solution will do the trick. Remember, let’s keep it gentle and avoid harsh chemicals that could harm our precious acrylic.
Step 2: The Dance of Dryness
Moisture, the nemesis of perfection. Once our surfaces are squeaky clean, they must be thoroughly dried. Moisture can sabotage our artistic endeavor, so we need those surfaces as dry as a desert before proceeding.
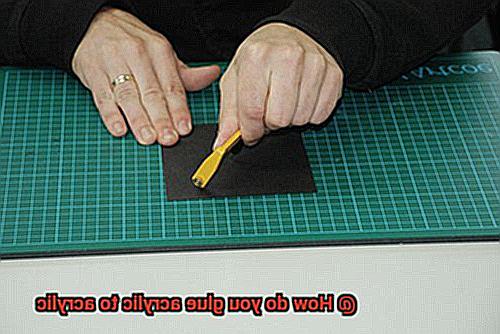
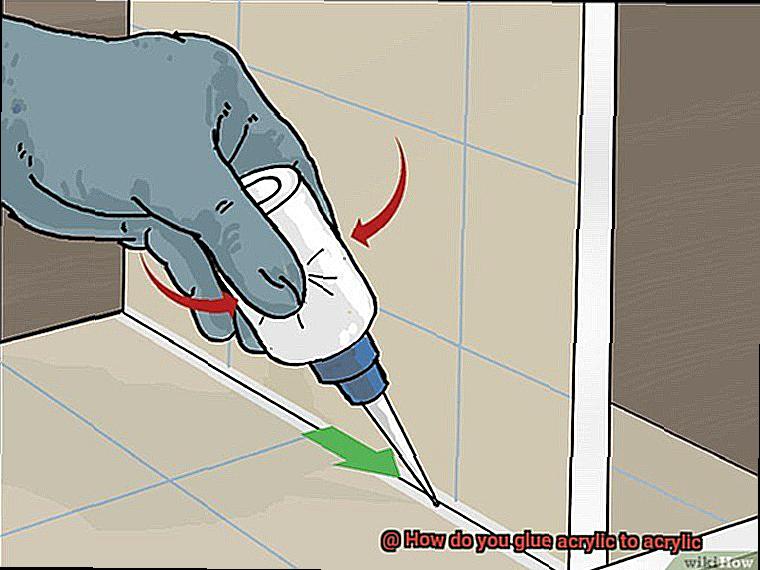
Step 3: The Artful Application
Now, the moment we’ve all been waiting for – applying the solvent cement. With brush or syringe in hand, let us delicately apply the adhesive sparingly on one surface. We must approach this like a master painter – too much adhesive can warp or distort our beautiful acrylic masterpiece. Precision is key.
Step 4: The Swift Symphony
Time is fleeting in this delicate dance. Once the adhesive is applied, swiftly bring the two surfaces together with finesse and grace. Remember, dear artists, solvent cement dries faster than a shooting star. We must move swiftly to create that impeccable bond.
Step 5: Patience, My Dear
Now that our surfaces are united, it’s time to apply a gentle pressure to ensure a secure bond. Clamps or weights can be used to hold them in place while the adhesive sets. Ah, the anticipation. Let’s give it a few minutes to work its magic.
Step 6: The Waiting Game
Patience, my dear adhesive enthusiasts. We must allow sufficient curing time for our bond to fully develop its strength. Depending on the type of solvent cement used, this might take anywhere from a few hours to a full day. During this time, avoid subjecting the bonded acrylic to stress or strain. Treat it delicately, like a fragile work of art.
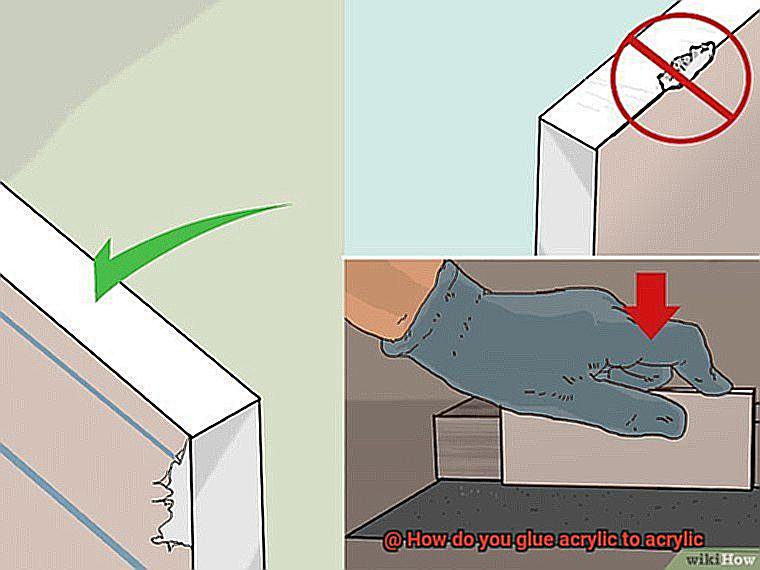
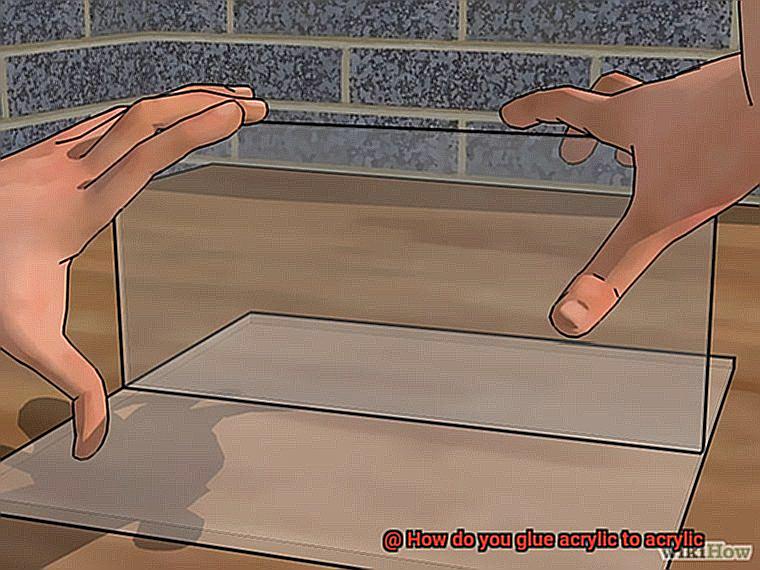
Aligning and Pressing the Acrylic Pieces Together
We have already learnt how to cleanse and prepare our acrylic canvases for the ultimate bonding experience. Now, let us delve into the captivating process of aligning and pressing the acrylic pieces together. Grab your wands (or brushes) and let’s unveil the secrets to creating an unbreakable connection.
Step 1: Cleanliness is Next to Perfect Bonding
Before we begin our magical adventure of alignment and pressing, we must ensure that our acrylic surfaces are squeaky clean. Banish all dirt, dust, and debris from our acrylic pieces. Wipe them gently with a mild soap solution and a soft cloth, rinse with clean water, and dry them thoroughly. Ah, now we’re ready for the true bonding experience.
Step 2: The Right Adhesive is Key
Choosing the right adhesive is crucial for a strong and durable bond between acrylic pieces. We have a variety of options available – solvent-based adhesives, epoxy adhesives, or acrylic cement. Let us select an adhesive specifically designed for bonding acrylic materials – this will ensure that our masterpiece stands the test of time.
Step 3: A Test Fit for Perfect Harmony
Before we apply any adhesive, let’s perform a test fit of our acrylic pieces. This step allows us to ensure that they fit together flawlessly without any gaps or misalignments. Place the pieces in their intended position without adhesive and check for any adjustments needed. If necessary, carefully trim or sand the edges until they fit like a puzzle.
Step 4: Applying Adhesive with Grace
Now comes the moment we’ve all been waiting for – applying the adhesive. Follow the manufacturer’s instructions diligently. Apply the adhesive evenly to both surfaces of the acrylic pieces using a brush or applicator. Remember, a little goes a long way, so avoid overdoing it to prevent warping or distortion.
Step 5: The Art of Alignment
With our adhesive in place, it’s time to align and press the acrylic pieces together. Gently push the pieces together, ensuring that they are properly aligned along all edges. For extra support, use clamps or other holding devices to keep the pieces in place while the adhesive sets. Remember, even pressure is key to a strong and uniform bond.
Curing Times for Different Adhesives
Brace yourselves for an enlightening journey into the science behind adhesive bonding, where every second counts and every choice matters.
Let’s delve into the mesmerizing world of curing times for different adhesives when it comes to bonding acrylic surfaces. Ah, acrylic, that marvelous plastic that demands a delicate touch when it comes to gluing. We shall explore the mystical powers of adhesives that can conquer this challenge.
First on our list is the legendary cyanoacrylate, also known as super glue. This remarkable adhesive possesses the ability to bond acrylic surfaces with lightning speed. Imagine this, my friends: you apply the adhesive, and within seconds to a few minutes, behold.
Your acrylic pieces are united in perfect harmony. Of course, the curing time may vary depending on factors such as temperature, humidity, and even the thickness of the adhesive layer.
Now, let us turn our attention to epoxy, a true marvel among adhesives. With its two components – a resin and a hardener – it creates a chemical symphony that results in an unbreakable bond. However, be prepared to exercise patience when using epoxy on your acrylic project. It may take several hours to several days for this adhesive to fully cure and unleash its maximum strength. So plan accordingly and allow it ample time to weave its magic.
And then we have polyurethane adhesive, a beloved companion in the realm of bonding acrylic surfaces. These adhesives possess unparalleled strength and flexibility, making them a favorite among craftsmen. Yet again, curing times are subject to variables such as temperature and humidity. To unravel the mysteries of this adhesive’s curing time, consult the wisdom contained within the manufacturer’s instructions.
But let us not forget about those mighty external forces that can influence curing times – temperature and humidity. Just as a scorching summer day hastens the melting of ice cream, higher temperatures accelerate the curing process of adhesives. Conversely, lower temperatures may slow it down. And behold, the power of humidity. High levels can expedite the curing time, while low levels may prolong it. So, whether you find yourself toiling under the blazing sun or within the confines of a climate-controlled sanctuary, heed these factors and adjust your expectations accordingly.
Alternatives to Solvent Cement for Bonding Acrylic
Today, we embark on a thrilling journey to explore the captivating alternatives to solvent cement for bonding acrylic surfaces. Prepare to be enthralled as we uncover the mystical powers of UV-curable adhesives, the mighty strength of epoxy, the hidden charms of super glue, and the practicality of mechanical fasteners. Join us as we navigate through this enchanting world to find the perfect bonding solution for your acrylic masterpieces.
UV-Curable Adhesive – Illuminating Bonds
Behold, the radiant UV-curable adhesive, a marvel designed specifically for bonding acrylic. These magical adhesives awaken under the spell of ultraviolet light, weaving a robust and everlasting bond between acrylic surfaces. With their strength and resilience, UV-curable adhesives illuminate your projects with reliability and durability.
Epoxy Adhesive – The Titan of Strength
In our quest for formidable bonds, we encounter the legendary two-part epoxy adhesive. Known for its Herculean strength and unwavering endurance, epoxy stands tall as a reliable choice for bonding acrylic surfaces. However, tread with caution and choose an epoxy adhesive crafted specifically for plastics to ensure optimal results with your acrylic masterpieces.
Super Glue – The Unsung Hero
The unsung hero in our adhesive saga. While not all super glues are suited for bonding acrylic, certain types crafted exclusively for plastics can work miracles. When wielded with precision, these specialized super glues reveal their true power, forging unbreakable bonds between acrylic surfaces. Witness their prowess as they step forward as a worthy alternative to solvent cement.
Mechanical Fasteners – Practicality Unleashed
For those seeking a pragmatic approach, we unveil the realm of mechanical fasteners. Picture screws, bolts, or clips, valiantly joining acrylic pieces together with steadfast determination. Though these bonds may lack the invisibility of adhesives, they offer the convenience of easy disassembly when needed. So, if your project demands flexibility and practicality, embrace the power of mechanical fasteners.
Choosing the Right Adhesive for Your Project
The right adhesive can make all the difference between a masterpiece and a mishap. So grab your favorite beverage, settle in, and let’s uncover the secrets to bonding acrylic to acrylic.
First, let’s consider the factors at play when selecting an adhesive. What type of acrylic are you working with? Do you need a seamless finish or a strong bond? And what is the specific application of your creation? These questions will guide you towards adhesive enlightenment.
One popular choice for bonding acrylic is the trusty solvent-based adhesive. These remarkable adhesives chemically melt the surfaces of the acrylic to create a bond that solidifies into near-invisibility. Perfect for projects demanding transparency and seamlessness, they are like invisible threads holding your creation together.
But wait, there’s more. Enter cyanoacrylate adhesives, better known as super glue. Quick-drying and strong, they are ideal for small-scale projects or repairs. However, not all super glues are created equal for acrylic bonding. Choose one specifically formulated for this material to ensure a secure connection.
Now, let us explore the realm of epoxy adhesives – mighty warriors consisting of two components that must be mixed together before application. Once combined, they cure and create an unbreakable bond between acrylic surfaces. Strong and durable, epoxy adhesives are heroes for large or complex projects that demand stability and resistance to stress.
Hold on tight because we’re not done yet. Let us shed light upon UV-curing adhesives – the speedsters of the adhesive world. These powerful adhesives require exposure to ultraviolet light to cure and form a bond. Perfect for time-sensitive industries like electronics or medical device manufacturing, UV-curing adhesives offer fast curing times and strong bonds.
Now, as you embark on your adhesive journey, remember to consider the specific requirements and limitations of each adhesive. Some may have temperature or humidity restrictions, while others demand special handling or application techniques. Always consult the manufacturer’s instructions and perform a small test before diving into your project.
And above all, prioritize safety in your adhesive endeavors. Some adhesives emit fumes or can cause skin irritation, so work in a well-ventilated area and use appropriate personal protective equipment.
3KzZDi-aXD4″ >
Conclusion
Gluing acrylic to acrylic requires a careful and precise process.
To ensure a strong bond, it is important to follow the right steps and use the correct adhesive. One popular option is using a solvent-based cement specifically designed for acrylics.
This type of adhesive works by chemically melting the surfaces of the acrylic, allowing them to fuse together when they dry. Before applying the adhesive, it is crucial to clean the surfaces thoroughly to remove any dirt or oils that could interfere with the bonding process.
Once cleaned, apply a thin layer of the adhesive to both surfaces and press them firmly together. It is important to hold them in place for a few minutes until the adhesive starts to set.
Remember, proper ventilation is essential when working with solvent-based adhesives, so make sure you are in a well-ventilated area or wear appropriate protective equipment.