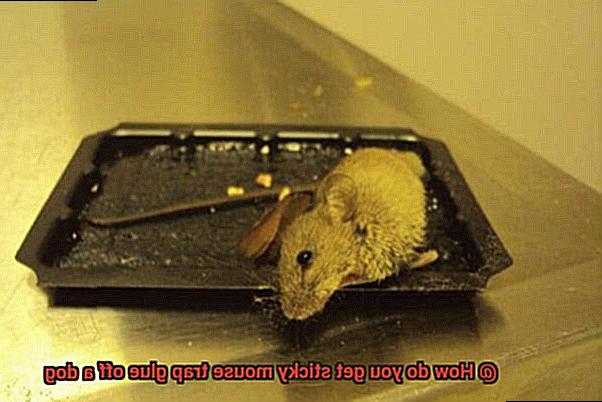
We adore our furry pals, but sometimes they find themselves in sticky situations. Picture this: your doggo with mouse trap glue stuck to their precious fur. As a responsible pet owner, it’s crucial to know how to safely and effectively remove that stubborn adhesive without causing harm.
In this article, we’ll give you the lowdown on getting that pesky mouse trap glue off your beloved pooch. We’ve got step-by-step instructions to make it a breeze. So let’s dive right into how to handle this sticky mess and keep your pup wagging happily.
Step 1: Stay Cool, Stay Calm
Contents
- 0.1 Step 1: Stay Cool, Stay Calm
- 0.2 Step 2: Gather the Goods
- 0.3 Step 3: Cornstarch Sorcery
- 0.4 Step 4: Comb It Out
- 0.5 Step 5: Spot Cleaning
- 0.6 Step 6: Rinse and Repeat
- 1 Assess the Extent of Glue on the Dog’s Fur
- 2 Wear Gloves for Protection
- 3 Home Remedies to Remove Glue
- 4 Applying Oil to Dissolve the Glue
- 5 Be Patient and Gentle When Removing Glue
- 6 Rinse and Wash with Pet Shampoo After Removal
- 7 Seek Professional Help If Necessary
- 8 Prevent Future Incidents with Alternative Pest Control Methods
- 9 Conclusion
First things first, take a deep breath and keep calm. Your pup can sense your vibes, so stay cool and reassure them with a soothing voice. Remember, you’ve got this.
Step 2: Gather the Goods
Before you start the rescue mission, gather these supplies: cornstarch (the superhero of this story), rubbing alcohol (the magic potion), a comb or brush (your trusty sidekick), mild pet-friendly shampoo (to give your pup some pampering), and lukewarm water (for rinsing away the mess). Armed with these tools, you’re ready for action.
Step 3: Cornstarch Sorcery
Sprinkle a generous amount of cornstarch on the glue-covered areas of your dog’s fur. This absorbent powder works its magic by making the glue less sticky. It’s like giving your pup a sprinkle of fairy dust.
Step 4: Comb It Out
Now it’s time for some gentle brushing action. Grab that comb or brush and carefully work through the cornstarch-coated areas. The goal here is to break up the glue and loosen its grip on your furry friend’s fur. Remember to be extra gentle – we want happy tails, not ouchies.
Step 5: Spot Cleaning
If some sticky spots remain, don’t fret. Grab a cotton ball and moisten it with rubbing alcohol. Gently dab the cotton ball on those pesky areas. The rubbing alcohol dissolves the glue, making it easier to remove without causing any harm to your pup’s skin or fur.
Step 6: Rinse and Repeat
Once the glue is history, rinse your dog’s fur thoroughly with lukewarm water. Grab that pet-friendly shampoo and give them a good scrub to wash away any residue from the
Assess the Extent of Glue on the Dog’s Fur
We all want the best for our furry friends, but accidents happen. If your dog gets stuck in sticky mouse trap glue, it’s crucial to act quickly and safely to remove it. This article will guide you through assessing the extent of the glue on your dog’s fur and provide effective methods for removal. Patience and care are key when dealing with this sticky situation.
Assessing the Extent of Glue on Your Dog’s Fur:
Visual Examination:
Part your dog’s fur gently and look for visible signs of glue—sticky residue or clumps. Note the size and location of these areas.
Tactile Examination:
Feel the affected areas with your fingers, searching for unusual textures or stickiness caused by the glue. Glue can be difficult to spot visually if it has dried and blended with the fur.
Observe Your Dog:
Pay attention to any signs of discomfort or pain when touching or inspecting certain areas. This may indicate skin irritation or injury caused by the glue. Seek veterinary assistance if necessary.
Removing the Glue Safely:
Consult a Professional:
If unsure about removal techniques or if the glue extent is large, consult a veterinarian or professional groomer for guidance.
Protect Yourself and Your Dog:
Wear gloves during removal to protect against chemicals present in the glue.
Use an Oil-Based Solution:
Apply vegetable oil, coconut oil, or even peanut butter generously on the affected area to break down the adhesive properties of the glue.
Allow Time for Dissolution:
Let the oil sit for a few minutes to penetrate and loosen the glue. Be patient; complete dissolution may take time.
Gently Comb and Separate:
Using a fine-toothed comb or gloved fingers, carefully work through the fur, separating any strands stuck together due to the glue. Repeat and apply more oil as needed until all traces of glue are removed.
Rinse and Wash:
Thoroughly rinse and wash your dog’s fur with a mild pet shampoo to remove any remaining oil and prevent ingestion.
Wear Gloves for Protection
Accidents happen, and sometimes our furry friends find themselves in sticky situations – quite literally. If your dog has gotten caught in sticky mouse trap glue, don’t panic. With a little patience and the right tools, you can safely free your pup from this adhesive mess. One essential tool? Gloves. Let’s explore why wearing gloves is crucial when it comes to removing sticky mouse trap glue from your dog’s fur.
Protection against Stickiness:
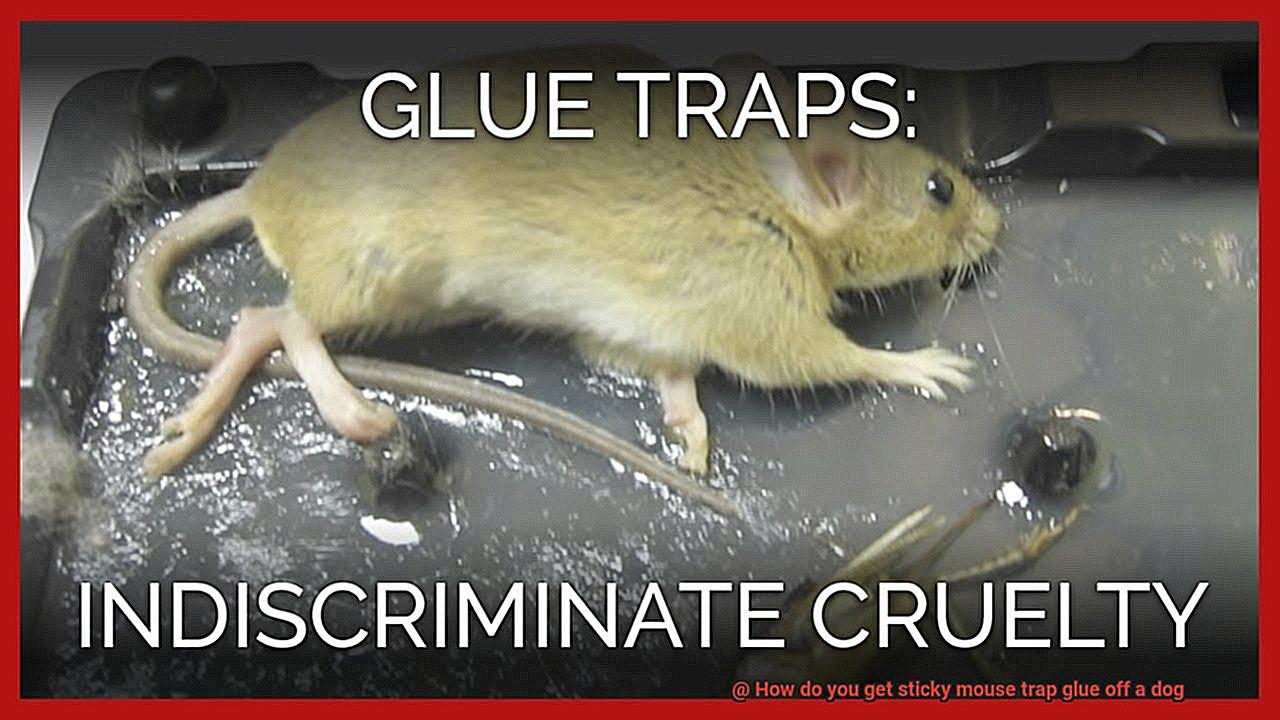
Sticky mouse trap glue possesses incredible adhesive properties. You definitely don’t want that stuff clinging to your bare hands. By wearing gloves, you shield yourself from direct contact with the glue, reducing the risk of it sticking to your skin. Opt for sturdy materials like rubber or latex gloves to provide better protection against stickiness.
Comfort and Safety for Your Dog:
Gloves not only protect you but also safeguard your furry friend during the removal process. Dogs can be touch-sensitive, and causing them discomfort or pain while trying to free them from the glue is the last thing you want. Gloves act as a barrier between your hands and their delicate fur, minimizing potential irritation or harm.
Preventing Cross-Contamination:
Imagine accidentally transferring that sticky glue from your hands onto other surfaces or objects around your home – yikes. Wearing gloves prevents any unintentional spread of the glue and keeps it contained within the removal process. This reduces the risk of further contamination and saves you from additional cleanup hassle.
Choosing the Right Gloves:
When selecting gloves for this task, prioritize durability and ease of cleaning. Rubber or latex gloves are ideal choices as they offer better protection against the adhesive nature of the glue. Ensure a proper fit so that you have a firm grip while handling your dog, preventing any accidental slips or mishaps.
Home Remedies to Remove Glue
Discovering glue on surfaces can be frustrating, but when it ends up on your dog’s fur, it becomes a whole new sticky situation. However, fear not. There are effective home remedies that can come to your rescue and restore your dog’s fur to its fluffy glory. In this article, we will explore tried and tested methods that can help you safely remove glue from your dog’s fur.
Vegetable Oil: The Natural Adhesive Buster
Vegetable oil is an excellent adhesive remover due to its natural properties. Start by applying a generous amount of vegetable oil to the affected area and let it sit for a few minutes. The oil will break down the adhesive properties of the glue, making it easier to remove. Gently comb through your dog’s fur or use a soft cloth to wipe away the softened glue. Rinse thoroughly with warm water and mild soap to ensure all remnants are gone.
Peanut Butter: Sticky Glue Meets Tasty Treat
Peanut butter is not just a delicious spread; it can also help remove glue from your dog’s fur. Apply a thick layer of peanut butter onto the glued area and let it sit for 10-15 minutes. The oils in peanut butter work their magic, breaking down the glue and making it easier to remove. Use a comb or soft cloth to gently wipe away the softened glue, then rinse with warm water and mild soap for a clean finish.
Warm Soapy Water: Soak Away the Sticky Situation
Sometimes, a good old-fashioned soak is all you need. Fill a bathtub or basin with warm water and add pet-friendly shampoo or dish soap. Submerge only the affected area of your dog in the water and let them soak for a few minutes while gently massaging the glued area with your hands. The warm soapy water will help loosen the glue, making it easier to remove. Rinse your dog thoroughly afterward to ensure no soap residue remains.
Ice Cube: Freeze and Release
If the glue has hardened and seems impossible to remove, an ice cube can come to the rescue. Gently rub the ice cube over the glued area to freeze the adhesive. Once it hardens, it becomes less sticky and easier to remove. Use a comb or your fingers to gently break off the frozen glue from your dog’s fur, taking care not to pull on their hair.
Commercial Adhesive Removers: When All Else Fails
If the home remedies don’t do the trick, there are commercial adhesive removers available. Choose a product specifically designed for removing sticky substances from pet fur. Follow the instructions carefully and ensure that the product is safe for use on animals and does not contain any toxic ingredients.
Applying Oil to Dissolve the Glue
Our furry friends have a knack for getting into sticky situations, quite literally. Whether it’s a mishap with crafts or an unfortunate encounter with a mouse trap, removing sticky glue from your dog’s fur can be a real challenge. But fear not. In this article, we will explore the incredible power of oil and how it can effectively dissolve stubborn glue, leaving your beloved pet looking fabulous once again.
Step 1: Assess the Situation
Before taking any action, it is crucial to ensure that your dog is calm and cooperative. If they are distressed or aggressive, seeking professional help from a veterinarian or a professional dog groomer may be the best course of action.
Step 2: Choose the Right Oil
When it comes to dissolving glue, the right oil can make all the difference. Vegetable oil, olive oil, or coconut oil are excellent choices due to their properties that break down the adhesive nature of the glue, making it easier to remove.
Step 3: Apply the Oil
With a gentle touch, massage a small amount of oil onto the affected area of your dog’s fur. Use circular motions to evenly distribute the oil and allow it to penetrate the glue.
Step 4: Let It Work Its Magic
Give the oil some time to work its magic and dissolve the glue. Depending on the extent of the glue and how long it has been stuck on the fur, this process may take a few minutes to an hour. Patience is key here.
Step 5: Remove the Glue
Using a comb or your fingers, carefully separate the strands of glued fur. Take your time and be gentle to avoid causing any discomfort or pain for your furry friend. If necessary, reapply more oil to sticky areas until all traces of glue are gone.
Step 6: Wash Thoroughly
After successfully removing the glue, it is essential to thoroughly wash your dog’s fur with a mild pet shampoo and warm water. Rinse well to ensure that no residue remains that could potentially irritate their sensitive skin.
Be Patient and Gentle When Removing Glue
Be Patient and Gentle When Removing Glue: Safely Restoring Your Dog’s Fabulous Coat
Introduction:
Accidents happen, even to our furry friends. If your dog finds themselves in a sticky situation with glue stuck in their fur, it is crucial to approach the removal process with patience and gentleness. By following these steps and tips, you can safely and effectively remove the glue without causing harm or distress to your beloved pet.
Assessing the Situation
Before diving into the removal process, take a moment to assess the extent of the glue’s presence on your dog’s fur. This will help you determine the best approach for removal. If the glue is confined to a small area, removing it without causing too much distress is possible. However, if it has spread or become matted into the fur, be prepared to invest more time and patience.
Gathering Supplies
To ensure a smooth and stress-free process, gather all the necessary supplies beforehand. You will need scissors, vegetable oil, warm water, mild shampoo, and a soft towel. Having these items readily available will minimize any stress for your dog.
Handling Your Dog with Care
Keep in mind that your dog may already be stressed or anxious due to the sticky situation. Handle them with care, using gentle strokes and comforting words. Consider having an assistant who can offer treats or distractions to keep your dog calm throughout the process.
Removing the Glue
Begin by gently restraining your dog and carefully trimming away any excess glue that is not stuck to the fur. Use sharp scissors, taking caution not to cut or nick their delicate skin. Once loose glue has been removed, it’s time to tackle the remaining sticky residue.
Apply a small amount of vegetable oil onto a cloth or cotton ball and gently massage it into the affected area. Allow the oil to sit for a few minutes, loosening the glue. Using your fingers or a soft brush, carefully work through the fur to break up the adhesive.
Finishing Touches
After the glue has been loosened, wash your dog with warm water and a mild shampoo to remove any remaining residue. Be gentle and avoid any vigorous scrubbing that could irritate their skin. Finally, dry your dog with a soft towel and give them some extra love and attention for being such a patient and good-natured companion.
Rinse and Wash with Pet Shampoo After Removal
Now, it’s crucial to rinse and wash your furry friend to ensure complete elimination of any residual adhesive. In this comprehensive guide, we will walk you through the steps to safely cleanse your dog’s fur using pet shampoo. By following these instructions, you will prioritize your dog’s comfort and well-being throughout the process.
Step 1: Wet the Affected Area
Begin by gently wetting the area where the glue was stuck. Use lukewarm water to avoid any discomfort for your dog.
Step 2: Apply Pet Shampoo
Next, apply a generous amount of pet shampoo specifically formulated for dogs. Using a pet shampoo is vital because human products may contain harmful ingredients for dogs. Work the shampoo into a lather, focusing on the area where the glue was present. Gently massage the fur, ensuring every affected area is covered.
Step 3: Allow the Shampoo to Sit
Let the shampoo sit on the fur for a few minutes. This step helps break down any remaining adhesive residue and allows the shampoo to penetrate deep into the fur for a thorough cleanse.
Step 4: Rinse Thoroughly
Thoroughly rinse your dog’s fur with lukewarm water until all traces of shampoo are gone. It is essential to rinse thoroughly as any leftover shampoo may cause skin irritation or discomfort for your dog.
Step 5: Pat Dry with a Towel
After rinsing, carefully pat your dog dry with a clean towel. Avoid vigorous rubbing, as it can irritate the skin or tangle the fur.
Step 6: Optional: Use a Pet-Safe Conditioner
If needed, use a pet-safe conditioner to restore moisture and softness to your dog’s fur. Follow the instructions on the conditioner’s packaging and rinse thoroughly after application.
Step 7: Air Dry or Use a Low Heat Setting
Finally, allow your dog’s fur to air dry or use a blow dryer on a low heat setting. Be cautious with the blow dryer, as high temperatures can burn your dog’s skin. Maintain a safe distance and continuously monitor the heat level.
Seek Professional Help If Necessary
While we may be capable of handling many situations ourselves, there are times when seeking professional help is essential. In this article, we will explore why it is important to seek professional help if necessary and how it can make a significant difference in ensuring the best outcome for your pet.
Assessing the Situation:
The first step in determining whether professional help is necessary is to assess the severity of the situation. If your pet’s condition or behavior is concerning or unfamiliar, it is crucial not to dismiss it. By seeking professional advice, you can obtain a proper diagnosis and appropriate treatment plan tailored specifically to your pet’s needs.
Expert Knowledge and Experience:
One of the key benefits of seeking professional help is the access to expert knowledge and experience. Veterinarians, animal behaviorists, and trainers have undergone extensive education and training to understand animal health, behavior, and training techniques. Their expertise allows them to accurately diagnose and address issues that may be beyond our understanding or capabilities.
Specialized Care and Techniques:
Professionals have access to specialized care and techniques that can significantly improve outcomes for your pet. From advanced medical procedures to behavior modification therapies, they possess the tools and skills required to provide effective treatment or training. This specialized care can make a substantial difference in your pet’s overall well-being.
Preventing Further Complications:
In some instances, attempting to handle a situation without professional guidance can lead to further complications. Incorrectly administering medication, using inappropriate training methods, or misinterpreting symptoms can exacerbate the problem or even pose risks to your pet’s health. Seeking professional help ensures that your pet receives proper care from the start, minimizing the potential for complications.
Peace of Mind:
Seeking professional help when necessary provides peace of mind for pet owners. It is reassuring to know that you are doing everything possible to ensure your pet’s health and happiness. Professionals can offer guidance, support, and reassurance throughout the process, alleviating any uncertainties or anxieties.
Prevent Future Incidents with Alternative Pest Control Methods
Our furry companions bring joy to our lives, and their safety is paramount. However, when mice invade our homes and we resort to using sticky mouse traps, accidents can occur, putting our beloved pets at risk. In this article, we will explore alternative pest control methods that can prevent future incidents involving sticky mouse trap glue and ensure the safety of our four-legged friends.
Natural Repellents:
Harness the power of nature by using essential oils like peppermint, eucalyptus, and lavender, which are known to repel mice and other pests. Dilute these oils with water and create a spray to be used around the house or in areas frequented by mice. Carefully research pet-safe options to avoid any potential harm to your furry friend.
Humane Traps:
Embrace compassion by opting for humane traps that capture mice without causing harm. These traps employ a one-way entry system that prevents mice from escaping once captured. To prevent future incidents, release the mice far away from your home, ensuring they have no way of returning.
Sanitation and Cleanliness:
Maintaining a clean environment is crucial in deterring mice. Take these steps to minimize their attraction:
- Store food properly in sealed containers to eliminate easy access for rodents.
- Regularly clean up crumbs and spills that can serve as enticing food sources.
- Keep your house tidy and free of clutter, making it less appealing for mice to nest.
- Seal potential entry points such as gaps in walls, floors, and windows to prevent easy access.
Sealing Cracks and Holes:
Thoroughly inspect your home for cracks or holes where mice can infiltrate, even through seemingly minuscule openings. Employ caulk or other appropriate materials to seal off these entry points, effectively barring mice from entering your living space.
Consult with Pest Control Professionals:
When in doubt, seek guidance from pest control professionals well-versed in humane methods. These experts can provide tailored advice for your specific situation, offering safe and effective solutions that prioritize the well-being of both you and your pets.
fqu8gdU78E4″ >
Conclusion
Removing sticky mouse trap glue from a dog can be a challenging and delicate task. However, there are effective methods that can help you safely free your furry friend from this sticky situation.
Firstly, it is important to remain calm and reassure your dog throughout the process. Dogs are sensitive creatures, and they can pick up on our emotions. By staying composed and speaking in a soothing tone, you can help alleviate any anxiety or discomfort your dog may be experiencing.
Next, assess the extent of the glue’s adhesion to your dog’s fur. If it is a small area, you may be able to gently peel off the glue using your fingers or a pair of tweezers. Be extremely careful not to tug or pull on your dog’s fur, as this can cause pain and potential injury.
For larger areas of glue, consider using an oil-based solution such as vegetable oil or olive oil. These oils have properties that can break down the adhesive bond without harming your dog’s skin. Apply a generous amount of oil to the affected area and gently work it into the fur with your fingers. Allow the oil to sit for a few minutes before attempting to remove the glue.
Once the adhesive has loosened, use a comb or brush specifically designed for dogs’ sensitive skin to carefully comb out the remaining residue. Take your time and be patient during this step, as rushing could lead to further entanglement or discomfort for your furry companion.
After successfully removing all traces of glue from your dog’s fur, give them a warm bath using mild pet shampoo. This will not only cleanse their coat but also soothe any potential irritation caused by the adhesive.
Remember, prevention is always better than cure. To avoid future mishaps with mouse traps or other sticky substances, ensure that such items are securely placed out of reach of your pets.
In conclusion, getting sticky mouse trap glue off a dog requires patience, gentle handling, and appropriate solutions.

