Ever been captivated by the sheer elegance and sophistication of a marble-topped table? That smooth, shimmering surface adds a touch of luxury to any room. But have you ever wondered how these beautiful marble tops are securely fastened to their wooden bases?
In this blog post, we’ll dive deep into the art of fixing marble tops to wooden bases. We’ll unravel the secrets that guarantee a secure and long-lasting bond, so you can admire your prized possession without any worries.
Hook:
Imagine the sheer satisfaction of owning a breathtaking marble table – not just as functional furniture but also as a conversation starter. Join us on this journey as we reveal the steps to turn your dream into reality.
Main Points to Discuss:
- Preparation is Everything: Let’s explore the essential preparation steps that lay the foundation for a flawless assembly. From precise measurements and expertly cutting the marble to treating the wooden base, these initial steps are crucial for success.
- Adhesive Options Galore: Different adhesives offer varying levels of strength and flexibility when it comes to attaching marble to wood. Discover which adhesive suits your specific needs – whether it’s epoxy, construction adhesive, or a two-component resin.
- Layering Technique for Stability: Achieving optimum stability and preventing future damage requires mastering the layering technique. We’ll outline the steps needed to create an unbreakable bond between your marble top and wooden base.
- Perfecting the Finishing Touches: No project is complete without meticulous attention to detail. From smoothing those edges to sealing the marble surface, we’ll guide you through those finishing touches that enhance both durability and appearance.
Ready to embark on this exciting journey? Let’s dive into the world of fixing marble tops to wooden bases and transform your living space with style.
What Materials Are Needed?
Contents
Creating a secure and visually stunning bond between a marble top and a wooden base requires careful selection of materials. In this guide, we will explore the essential materials needed and provide you with step-by-step instructions for a successful project.
Materials Needed:
- Adhesive: Selecting the right adhesive is paramount to ensure a long-lasting bond. Opt for an epoxy adhesive, renowned for its exceptional bonding properties and durability.
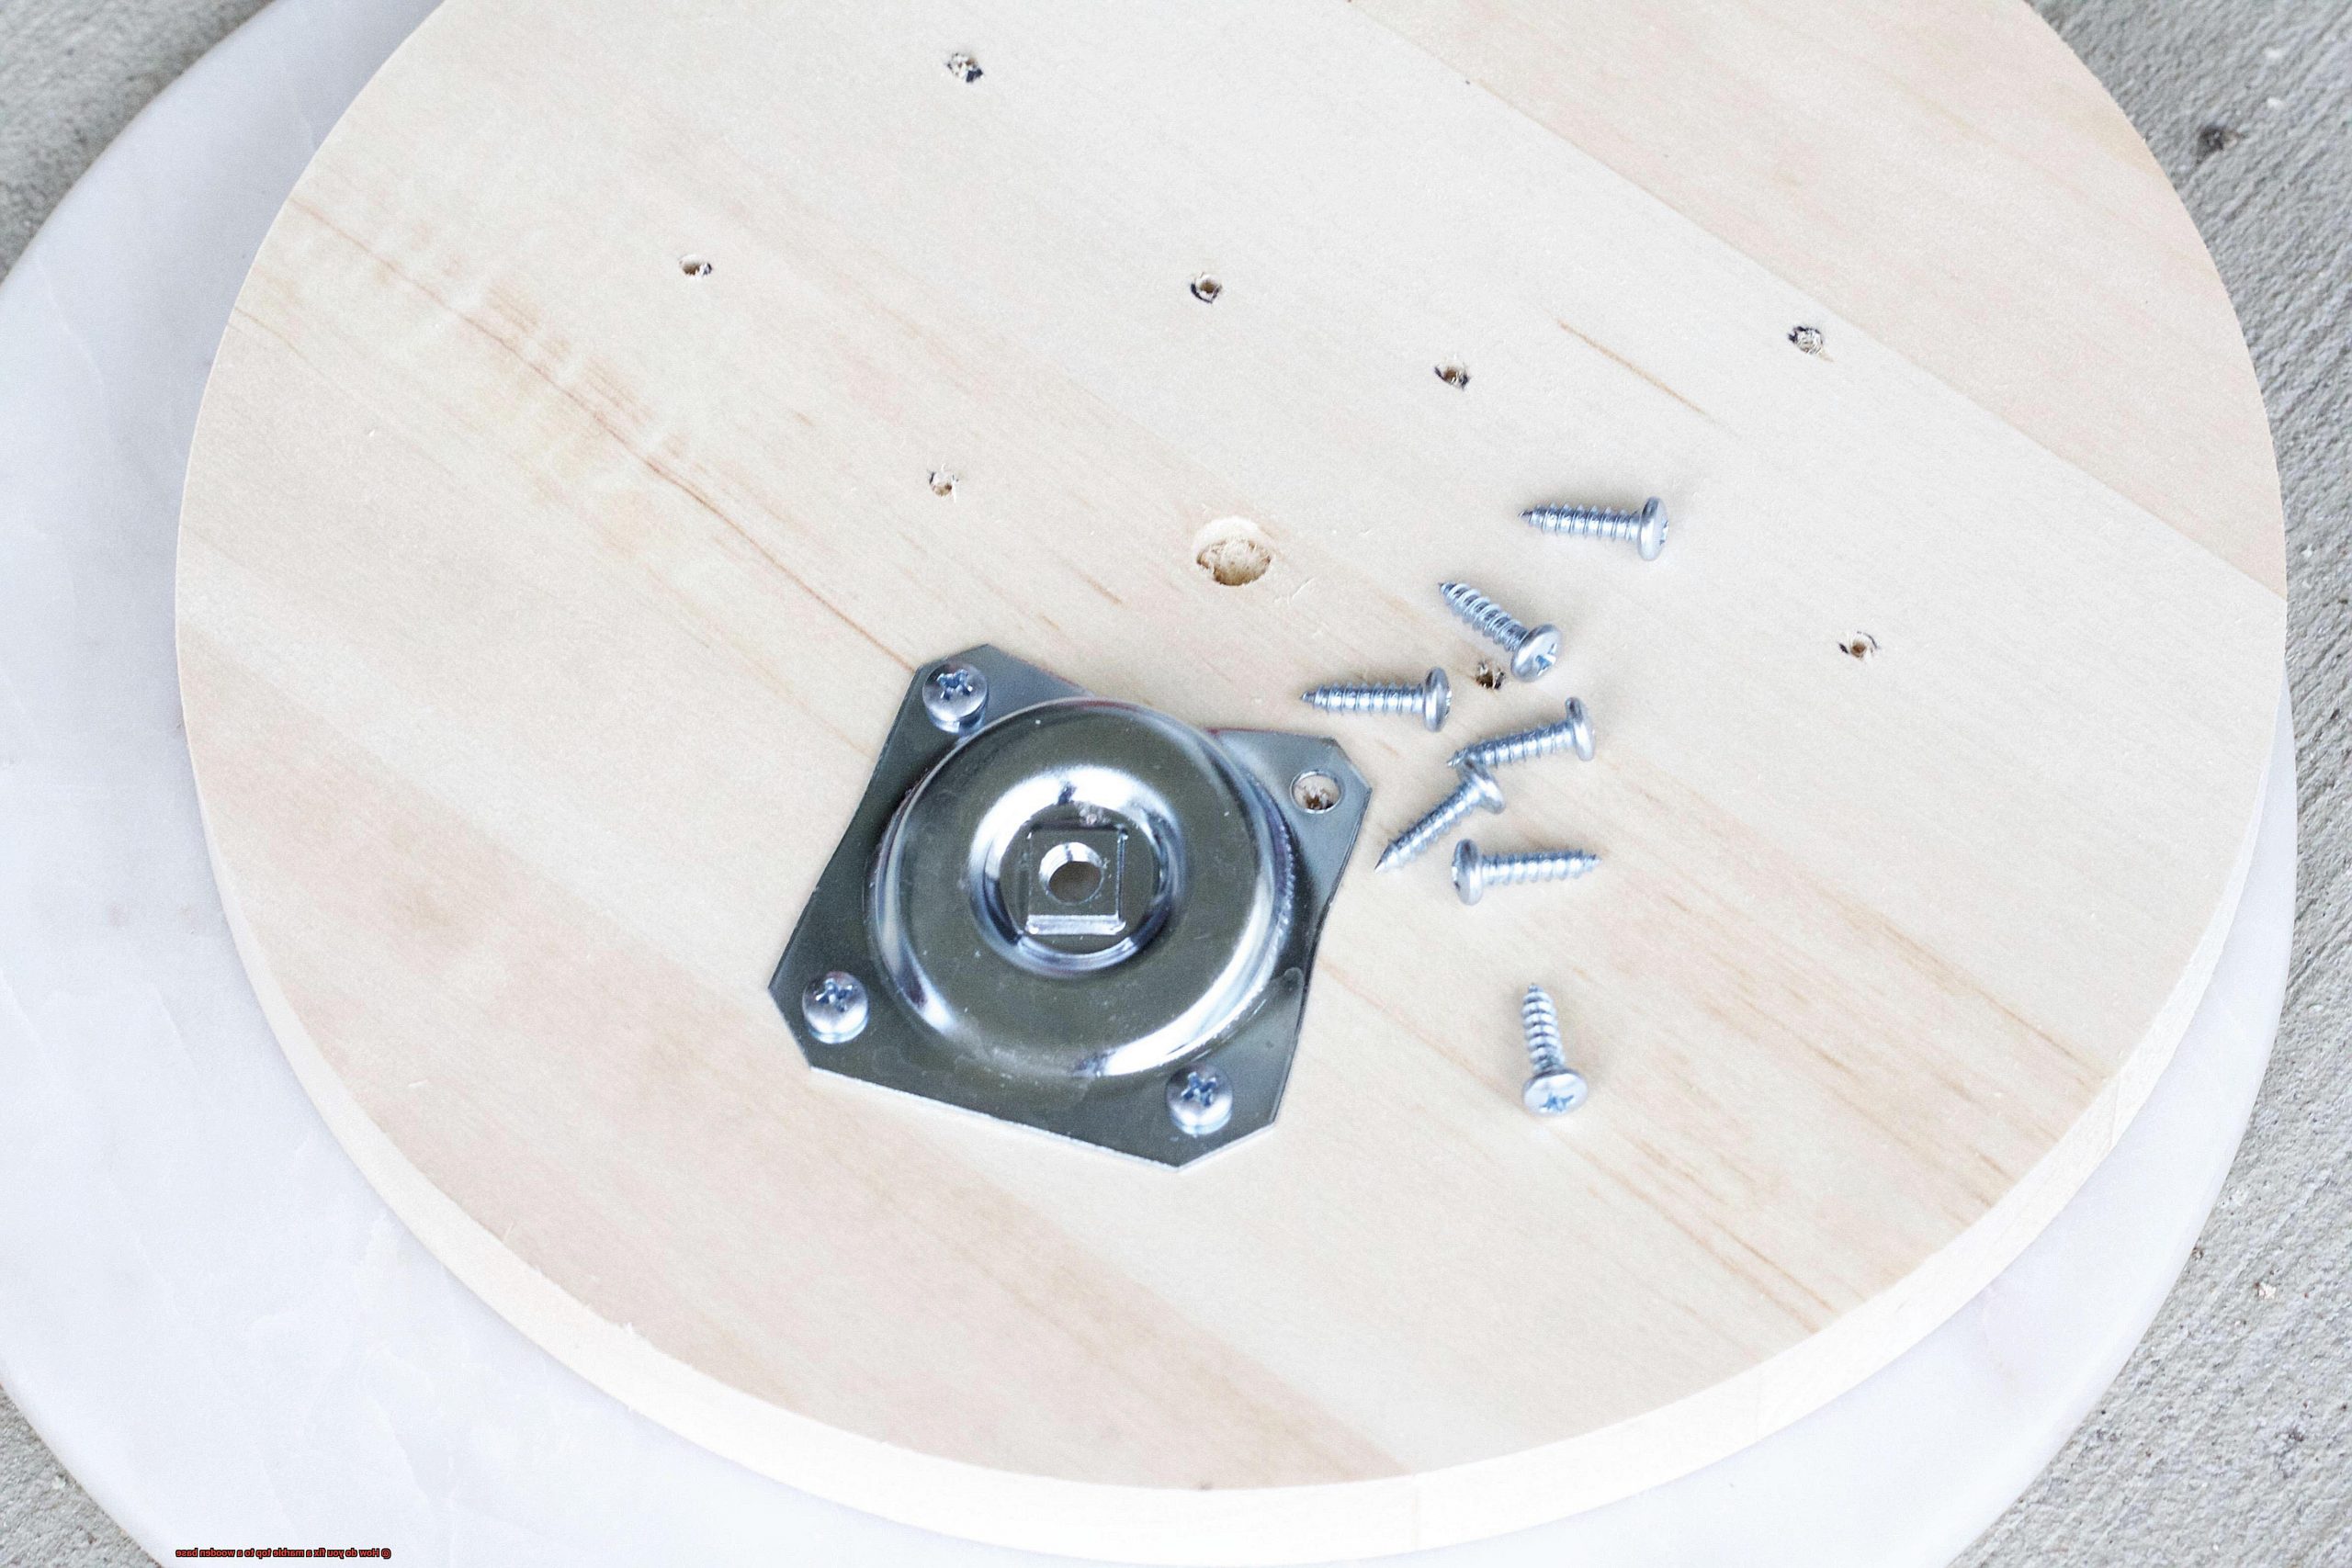
- Screws: To reinforce the structure, you’ll need screws to attach wooden blocks to the base. These blocks act as support structures, distributing the weight evenly. The size and quantity of screws depend on the dimensions of your marble top and wooden base.
- Wooden Blocks: Choose sturdy wood material for the blocks, carefully cut to size and secured to the base using screws. These blocks provide stability and longevity to the entire structure.
- Sealant: Preserve the beauty and integrity of both marble and wood with a high-quality sealant designed for stone surfaces. Apply the sealant to the edges of the marble top and any gaps between the marble and wooden base, protecting against moisture damage, staining, and deterioration.
Step-by-Step Process:
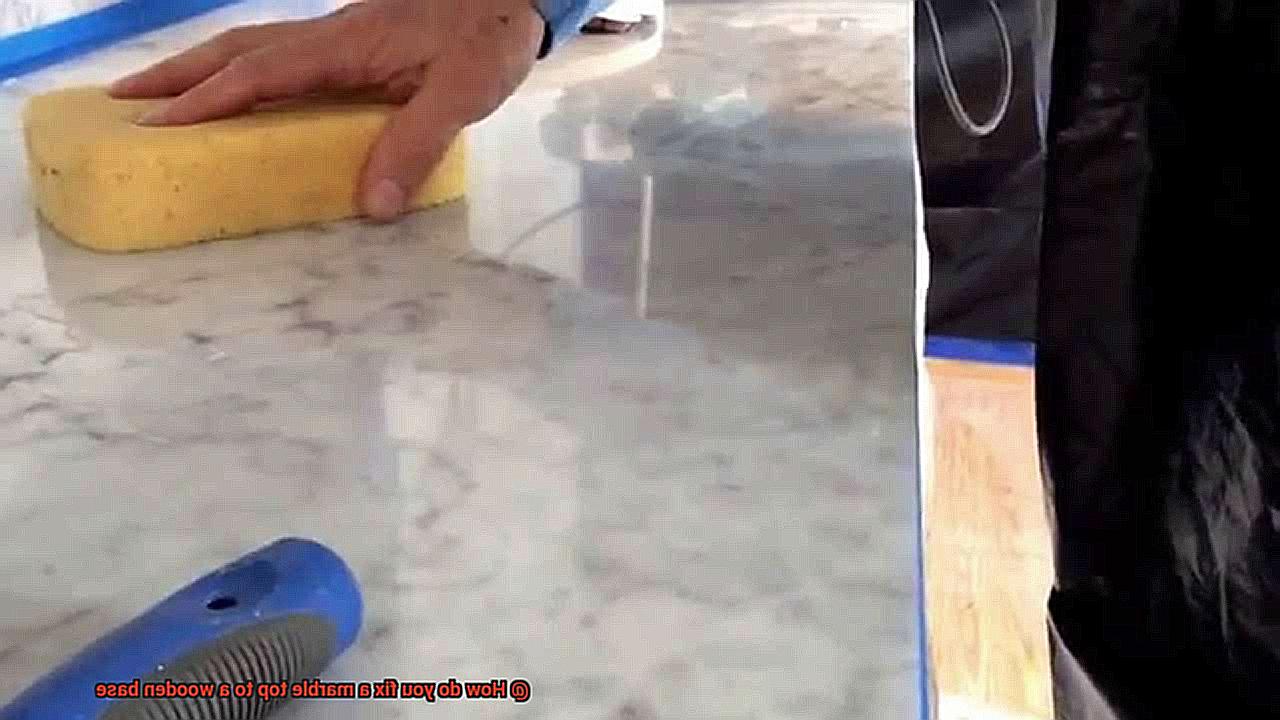
- Cleanse and Prepare: Begin by thoroughly cleansing both the marble top and wooden base using a mild cleaner or soap and water. Remove any dirt, dust, or debris, ensuring both surfaces are completely dry before proceeding.
- Apply Adhesive: Follow the manufacturer’s instructions to apply an even layer of epoxy adhesive onto the wooden base. This remarkable adhesive guarantees a strong bond between marble and wood.
- Position Marble Top: With precision, place the marble top onto the adhesive-covered wooden base, taking care to align it perfectly and ensure an even placement. Firmly press down on the marble top, creating an unyielding connection between the two surfaces.
- Utilize Clamps or Weights: Enhance stability and support by utilizing clamps or weights to hold the marble top in place while the adhesive cures. This prevents any movement or shifting during the drying process, ensuring a flawless result.
- Allow for Curing Time: Exercise patience and allow the adhesive to cure completely, following the manufacturer’s instructions. This typically takes several hours or even overnight. Avoid disturbing the bond during this crucial time to achieve optimal results.
Preparing the Marble Top and Wooden Base
Marble and wood, a match made in design heaven. But before you can create that stunning combination, it’s essential to prepare the marble top and wooden base. In this post, we’ll guide you through the essential steps to ensure a secure and visually pleasing bond. So grab your tools and let’s get started.
Step 1: Cleanliness is Key
To achieve a strong bond, both surfaces must be clean and free from dust, dirt, and debris. Begin by gently wiping down the marble top with a damp cloth and mild detergent. Avoid abrasive cleaners as they can harm the delicate marble surface. Rinse off any soap residue and dry thoroughly.
Next, turn your attention to the wooden base. Use a soft brush or cloth to remove any dirt or dust. If there are stubborn stains or marks, consider sanding them down to create a smooth surface. Remember to clear away any loose particles before proceeding.
Step 2: Level the Playing Field
An uneven surface can compromise the strength of your bond. Grab a trusty level tool and check both the marble top and wooden base for flatness. Address any uneven spots before moving forward.
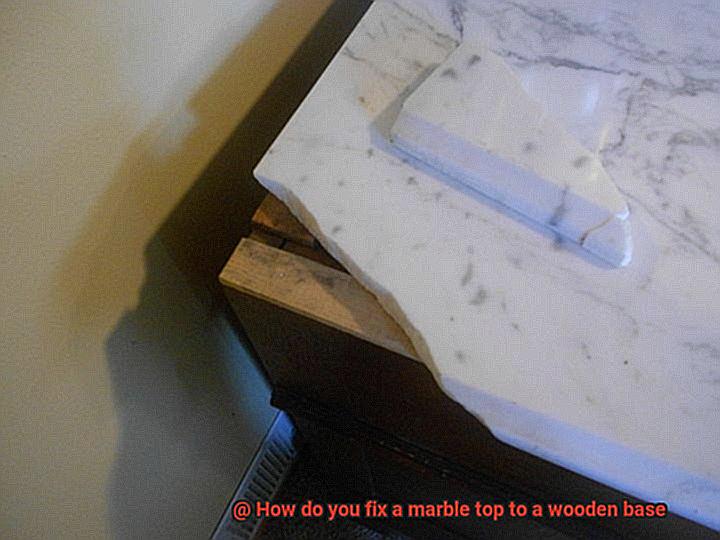
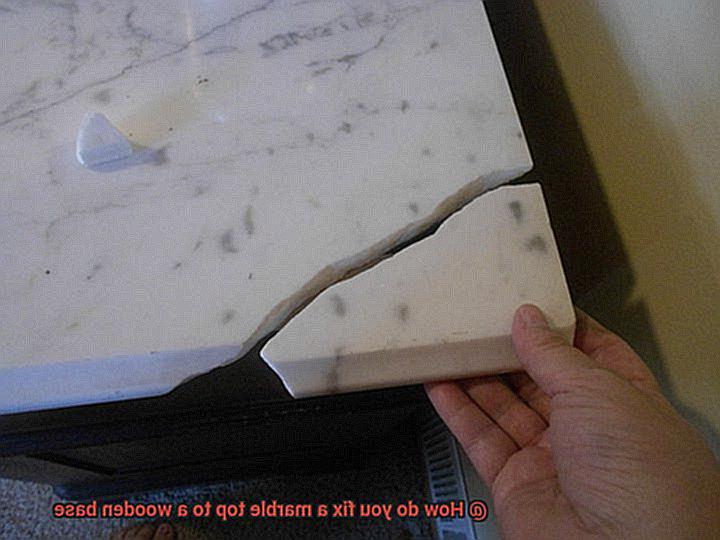
Step 3: Repairing Imperfections
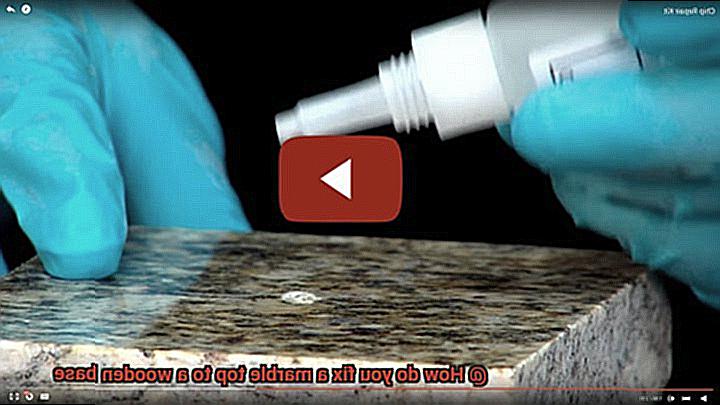
Inspect your marble top for chips or cracks. If you find any, it’s best to repair them before fixing it to the wooden base. You can easily mend these imperfections with a marble repair kit available in the market. Follow the instructions carefully for a seamless finish.
Step 4: Measure Twice, Adhere Once
Before applying adhesive, measure and mark the desired placement of the marble top on the wooden base. This step ensures proper alignment with other elements like cabinets or walls. Use a measuring tape and pencil for accurate markings.
Step 5: Choosing the Right Adhesive
The choice of adhesive is crucial for a strong and durable bond between marble and wood. Opt for a high-quality epoxy adhesive specifically designed for bonding marble and wood. This will provide the necessary strength and durability for your project.
Applying the Adhesive
Today, we’re diving into the intricate process of achieving a flawless bond between a marble top and a wooden base. In our previous section, we covered the essential steps to prepare both surfaces for this majestic union. Now, let’s explore the star of the show – applying the adhesive.

Step 1: Selecting the Perfect Adhesive
Just like finding your soulmate, choosing the right adhesive is crucial for a strong and long-lasting connection. Epoxy adhesives are the superheroes of bonding, offering exceptional strength and durability against temperature changes and moisture.
Step 2: A Clean Slate
Before delving into adhesive application, ensure both the marble top and wooden base are squeaky clean and bone-dry. Remember, cleanliness is the key to successful bonding. Use a mild detergent and water to scrub away any pesky dust, dirt, or grease that could hinder your adhesive’s effectiveness. Once cleaned, allow both surfaces to air dry completely.
Step 3: Precision Application
With pristine surfaces ready, it’s time to apply a thin layer of adhesive onto both the marble top and wooden base. Grab your trusty trowel or putty knife and become a smoothing maestro as you spread the adhesive evenly. Every crevice and corner should be coated for an equal bond.
Step 4: The Perfect Fit
Now comes the moment of truth – delicately place the marble top onto the wooden base with finesse. Take your time to align those edges perfectly; after all, beauty lies in symmetry. Apply gentle pressure to forge an unbreakable bond between these two materials.
Step 5: Stability Matters
To avoid any unexpected waltzing between your marble top and wooden base while the adhesive cures, it’s time to bring in reinforcements. Utilize clamps or heavy objects to hold the marble top firmly in place, guaranteeing its stability during the curing process. Follow the manufacturer’s instructions for the specific curing time of your adhesive – patience is the ultimate virtue.
Placing the Marble Top onto the Wooden Base
In our previous discussion, we explored the intricacies of bonding and its parallel to finding a kindred spirit. Today, let’s delve into the captivating process of securely attaching a marble top to a wooden base. Prepare yourself for an enlightening journey as we uncover the secrets behind achieving a flawless and enduring union that will forge an unbreakable connection between your marble top and wooden base.
Step 1: The Dance of Purity
Before embarking on this harmonious fusion, purity reigns supreme. Employ a mild detergent, warm water, and your trusted cleaning cloth to meticulously cleanse both the wooden base and marble top. Banish any traces of dirt, dust, or grease from their surfaces. Remember, cleanliness lays the foundation for an immaculate bond.
Step 2: The Bonding Alchemist
To fortify this union with unwavering strength and stability, selecting the perfect adhesive is paramount. Seek out adhesives specifically crafted to meld marble and wood. Settle for nothing less than excellence. The quality of your choice will determine the longevity of this sacred alliance.
Step 3: Spreading the Essence
With putty knife or brush in hand, spread a thin layer of adhesive upon the pinnacle of the wooden base. Like an artist delicately imbuing their creation with life, distribute it evenly across every inch. This step guarantees a tenacious bond that defies the ravages of time.
Step 4: A Serendipitous Encounter
Now comes the enthralling moment – bringing together the marble top and wooden base. With measured precision, align them flawlessly, akin to finding that elusive missing puzzle piece. Patiently adjust until elation washes over you at their perfect fit. This is a dance of destiny.
Step 5: The Tender Embrace
Once satisfaction dawns upon you, tenderly press down on the marble top, melding it with the adhesive. Distribute gentle pressure across its entire expanse, ensuring not a single area is neglected. It’s akin to sealing the bond of love with a heartfelt touch.
Securing the Bond with Clamps or Weights
In our previous exploration, we unraveled the secrets of uniting marble and wood, creating a bond that defies time. Now, as your trusted guide, let’s embark on a practical journey to secure this bond using the mighty clamps or the unassuming weights. Prepare to witness the artistry of fusion.
Clamps: The Powerhouse of Precision
When it comes to securing the harmonious marriage between marble and wood, clamps emerge as the true powerhouses in your arsenal. With their ability to distribute pressure evenly, they ensure a steadfast and secure connection. Let’s dissect the process into manageable steps:
Setting the Stage for Success:
Cleanliness reigns supreme. Begin by meticulously cleaning and drying both surfaces, leaving no room for debris or dust. This pristine canvas provides the ideal backdrop for the adhesive or epoxy to work its magic.
Embrace the Adhesive Affair:
Generously apply your chosen adhesive or epoxy to both the marble top and wooden base surfaces, ensuring an even coat that covers every nook and cranny.
Align and Position:
With finesse and precision, place the marble top onto the wooden base, ensuring perfect alignment. This is where your discerning eye for detail takes center stage.
Clamps to Captivate:
Introduce your clamps to this enchanting rendezvous. Select clamps that match the magnitude of your project and possess ample pressure capacity.
The Symphony of Pressure:
Position the clamps strategically around the edges of the furniture piece, orchestrating a symphony of pressure that encompasses all directions. This virtuoso performance results in a resilient bond without compromising the integrity of our cherished materials.
Gradual Tightening:
Like a maestro conducting his masterpiece, gradually tighten the clamps, delicately applying the necessary pressure to forge a bond that withstands the test of time. Keep a watchful eye for any signs of strain, ensuring the harmony remains intact.
Patience, the Virtuous Virtuoso:
Allow the clamps to weave their spell for the recommended curing time stipulated by the adhesive or epoxy manufacturer. Remember, true artistry requires patience, and in this waiting lies the culmination of perfection.
Allowing the Adhesive to Cure
In our previous chapter, we explored the enchanting dance of pressure needed to unite marble and wood. Today, we unveil a vital ingredient in this artistry – the proper curing of adhesive. So, sit back, savor your favorite beverage, and embark on a journey into the significance of this often-underestimated step.
The Science Behind Curing:
Imagine a symphony of strength where a marble top flawlessly merges with a wooden base, defying both time and gravity. To achieve such an indomitable bond, we must first grasp the science behind curing.

Curing is the transformative process that hardens the adhesive, unleashing its full bonding potential. It’s akin to allowing a masterpiece to dry before unveiling it to the world.
The Waiting Game:
Curing times vary depending on the adhesive employed. Some adhesives attain readiness within a few short hours, while others demand days to reach their zenith. Patience is not just a virtue; it’s an essential ingredient. Always consult the manufacturer’s instructions for precise curing times. Just like Rome, your marble-wood bond deserves time and care to flourish.
Optimal Conditions:
Just as a masterpiece thrives in an ideal environment, so does your adhesive crave suitable conditions. Temperature and humidity wield immense influence over the curing process. Aim for a temperature range between 50-77°F (10-25°C), creating an atmosphere conducive to proper setting. While humidity may tempt us with its tropical allure, high levels can prolong the curing time – so keep it low.
Weight and Pressure:
Let’s now delve into the art of distributing weight and pressure. Placing a gentle yet firm weight or clamp atop the marble surface ensures even pressure distribution. This technique eradicates any gaps or unwelcome air bubbles that may arise between the marble and wooden base. Remember, we aspire to a bond that defies time, not one that crumbles under the slightest touch.
Handle with Care:
During the curing period, treat your marble top as the delicate masterpiece it truly is. Refrain from placing heavy objects or exerting excessive force upon its surface. Any unnecessary movement or stress during this crucial stage risks compromising the bond’s integrity. Let us keep the dance floor clear, allowing our adhesive to work its magic undisturbed.
Inspecting the Bond
In our previous section, we delved into the captivating art of curing adhesive and achieving an indomitable bond between marble and wood. Now, let’s embark on a journey of inspecting the bond itself, uncovering the secrets that ensure stability, durability, and visual perfection.
Just like a master artist examines every inch of their creation before revealing it to the world, we must inspect this bond meticulously to create a masterpiece that defies time and gravity. So, grab your magnifying glass (or just your keen eyes) as we explore the importance of inspecting the bond between a marble top and wooden base.
The Foundation of Stability:
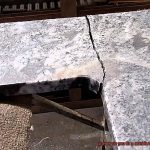
The wooden base forms the foundation for the bond’s stability. Carefully scrutinize it for cracks, splits, or any unevenness that threatens its strength. If flaws are found, promptly address them through repairs or reinforcements. Remember, a solid foundation is key to a resilient bond.
Marble’s Marvels:
Now, let’s turn our attention to the mesmerizing marble top. Diligently examine it for chips, cracks, or any uneven edges that could mar its beauty. These imperfections must be addressed before proceeding further to ensure a seamless union between marble and wood. Take your time; after all, even Michelangelo didn’t rush his masterpieces.
The Cleanliness Factor:
Cleanliness is not just next to godliness; it’s also crucial for a successful bond. Ensure both surfaces are pristine – free from dust, debris, or any pesky contaminants that could hinder the adhesive’s effectiveness. Give them a good wipe or gentle scrub if necessary – it’s all part of achieving that flawless connection.
Compatible Companions:
Remember chemistry class? Well, now it’s time to consider the chemistry between your chosen wood and marble. Different materials can have varying expansion and contraction rates, which may impact the bond’s stability over time. Ensure they are compatible to avoid any future surprises.
Supporting the Weight:
Marble is not known for its lightness, so it’s essential to ensure the wooden base can bear its weight. Take a moment to assess its strength and consider reinforcing it if needed. If uncertain, seek advice from professionals who specialize in marble installation – they are the superheroes of this craft.
Finishing Touches
In this section, we will dive into the enchanting world of finishing touches, where we add the final strokes to create a bond that not only withstands the tests of time and gravity but also mesmerizes all who behold it. So, grab your tools, put on your expert hat, and let’s explore the steps for creating a secure and aesthetically pleasing bond between a marble top and wooden base.
Step 1: Cleaning the Surfaces
Prepare the canvas for our masterpiece by meticulously cleaning both the marble top and wooden base. Banish dirt, dust, and pesky grease with a thorough washing using a mild soap and water solution. Let nothing interfere with the magic of our adhesive.
Step 2: Sanding for Superior Adhesion
Create texture on our wooden canvas to enhance adhesion. With sandpaper in hand, gently roughen the wooden surface until it becomes an artist’s dream. Remember to remove any loose particles, leaving behind only the foundation for greatness.
Step 3: Choosing the Perfect Adhesive
Like selecting the perfect brush for painting, choosing the right adhesive is crucial. Our guide to perfection recommends epoxy – the trusted ally known for its strong bond and unwavering durability. To ensure optimal results, select an epoxy specifically designed for bonding stone and wood.
Step 4: Applying the Adhesive with Artistry
With tools in hand and an artist’s precision, it’s time to apply our adhesive masterpiece. Use a notched trowel or spatula to create an even layer of epoxy on both the marble top and wooden base. Meticulously cover every inch, allowing these two materials to merge into an artistic harmony.
Step 5: The Perfect Union
Delicately, like a master painter placing the final brushstroke, position the marble top onto the wooden base. Ensure impeccable alignment, as if the universe itself has ordained this union. Gently apply pressure, forging a connection that defies time and space.
Tp3803XHSms” >
Conclusion
To securely attach a marble top to a wooden base, there are several steps you can follow.
First, ensure that the wooden base is sturdy and level. Then, apply a layer of adhesive specifically designed for bonding marble to wood.
Carefully place the marble top onto the adhesive, making sure it aligns perfectly with the base. Apply pressure evenly across the surface to ensure a strong bond.
Regularly inspect and maintain the attachment to ensure its longevity and stability.