Do you find yourself constantly frustrated with your nails lifting or falling off just hours after applying nail glue? It’s a common problem, but luckily, we have the solution. We’re here to share our expert tips on how to get nail glue to stick better and keep your manicure looking flawless for longer.
Nail glue is a crucial component in achieving those stunning and intricate nail designs. But if you’re not using it correctly, its effectiveness can be compromised. That’s why we’ve done the research and compiled a fool-proof list of hacks that will help maximize the adhesive properties of your nail glue.
Our guide covers everything from prepping your nails for glue application to choosing the right type of glue for your needs. We’ll also show you why it’s essential to allow your nails to dry and cure properly after applying the glue. Plus, we have some tricks up our sleeves on how to prevent pesky nail lift and avoid losing those acrylics altogether.
With our tried-and-tested methods, you can finally say goodbye to embarrassing nail lift in public or spending hours at the salon getting your nails fixed. Trust us; following these simple steps will give you confidence knowing that your manicure will last for at least two weeks.
So stick around, grab a cup of coffee, and let’s dive into our ultimate guide on how to get nail glue to stick better.
Step 1: Thoroughly Clean the Nails
Contents
- 1 Step 1: Thoroughly Clean the Nails
- 2 Step 2: Apply a Base Coat of Clear Nail Polish
- 3 Step 3: Apply a Small Amount of Glue Directly to the Nail
- 4 Step 4: Press the Nail Down Firmly and Hold in Place for 10-15 Seconds
- 5 Extra Tip 1: Rough Up the Surface of Your Natural Nail with a Buffer
- 6 Extra Tip 2: Warm Up the Glue Before Applying It
- 7 Conclusion
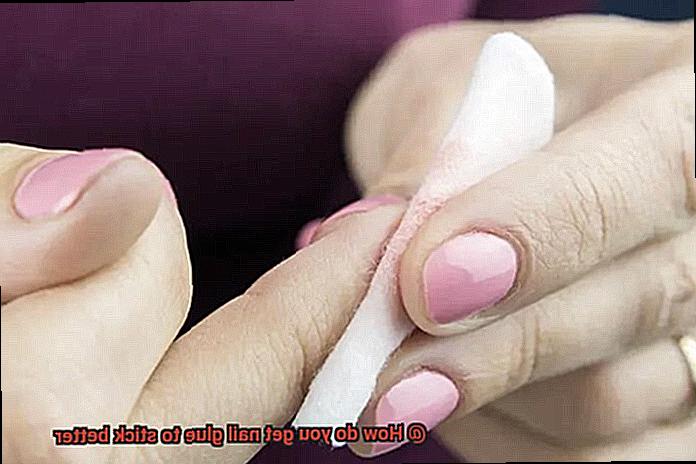
If you’re looking for a way to make your nail glue last longer and stick better, it’s essential to start with step one – thoroughly cleaning your nails. Before you reach for your favorite falsies or nail extensions, take the time to gather some basic tools: nail polish remover, cotton balls or pads, and a nail buffer.
First, remove any old nail polish with a cotton ball or pad soaked in nail polish remover. Then, wash your hands and nails with soap and water and dry them completely. This step is crucial because any dirt, oil or residue on your nails can interfere with the adhesive properties of the glue.
Next, use a nail buffer to gently remove any ridges or bumps on the surface of your nails. This creates a smooth surface for the glue to adhere to. Avoid using lotions or oils before applying the glue as they can interfere with its adhesive properties.
It’s also important to note that if you have any cuts or wounds on your fingers or around your nails, wait until they have healed before applying nail glue. This prevents irritation or infection.
To further enhance the adhesive properties of the glue, apply a base coat of clear nail polish after cleaning your nails thoroughly. This helps create an even smoother surface for the glue to adhere to. Wait for the base coat to dry completely before moving on to the next step.
When applying the glue, remember not to use too much as this can cause it to take longer to dry. After applying the glue, press the false nail down firmly onto your natural nail and hold it in place for 10-15 seconds.
If you’re still having trouble getting the glue to stick, try roughing up the surface of your natural nail using a fine-grit buffer. This creates tiny grooves in the surface of your nail, giving the glue something extra to hold onto. You can also warm up the glue slightly by placing the bottle in warm water for a few minutes before applying it.
Step 2: Apply a Base Coat of Clear Nail Polish
If so, you know that having a strong foundation for your nail products is crucial. That’s where step 2 comes in: applying a base coat of clear nail polish.
But why is this step so important? Well, let me break it down for you. A base coat of clear nail polish creates a smooth and even surface for the nail glue to adhere to. It also protects your nails from damage caused by the glue. Plus, it helps your manicure last longer.
So, how do you apply this magical layer of polish? Follow these easy steps:
Step 1: Clean your nails
Clean your nails with a nail polish remover and cotton ball to remove any oils or dirt that could prevent the polish from sticking properly.
Step 2: Apply the first coat
Apply a thin layer of clear nail polish to each nail, starting at the base and working your way upwards towards the tip. Look for a product specifically designed as a base coat or nail primer for the best results.
Step 3: Wait for it to dry
Wait for the first coat to dry completely before applying a second coat. This ensures that your base coat is strong enough to provide a foundation for your other nail products.
By taking these simple steps, you can ensure that your nails are protected and your manicure lasts longer. So go ahead and experiment with different nail designs without worrying about damage caused by the glue.
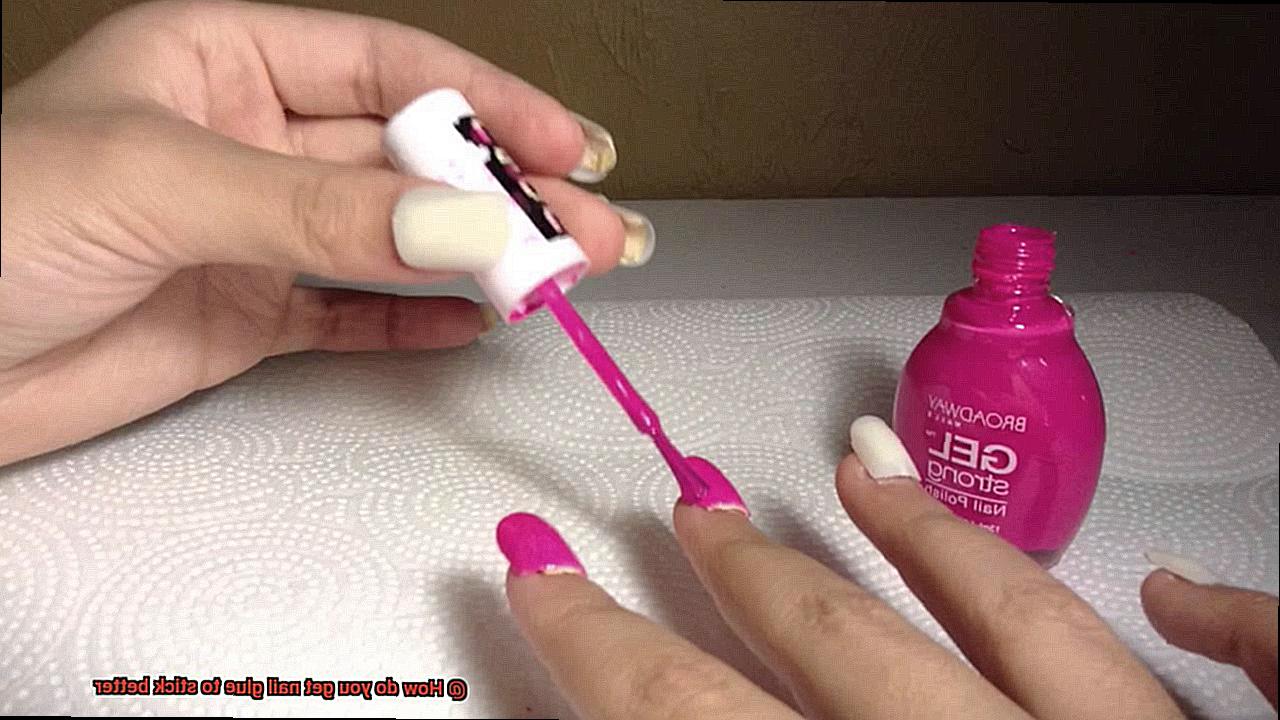
Step 3: Apply a Small Amount of Glue Directly to the Nail
We hope you’re ready to take your nail game to the next level because we’re about to dive into an essential step that can make or break your nail look – applying a small amount of glue directly to the nail.
First things first, let’s make sure our nails are prepped and ready for glue. Clean and dry nails are key, as any oils or moisture can interfere with the bonding process. Now that we have a clean slate, it’s time to get gluing.
But wait, how much glue should we use? Remember, less is more in this case. Using too much glue can lead to a messy application and excess glue seeping out from the sides of the nail – not exactly what we’re going for. Aim for a drop about the size of a pinhead for each nail, and you’ll be good to go.
When applying the glue, start at the base of the nail and work your way towards the tip, ensuring that you cover every inch of the nail surface, including those tricky edges. And here’s a pro-tip: try your best not to get any glue on your skin or cuticles. Not only can this cause irritation and discomfort, but it can also compromise the overall look of your nails.
After you’ve applied the glue, hold your nails in place for a few seconds. This will give the glue time to set and dry evenly, ensuring a strong bond that will last longer. Once you’re done, you’re ready to show off your stunning new nails.
Step 4: Press the Nail Down Firmly and Hold in Place for 10-15 Seconds
Fear not, because the key to getting your nails to stay put is in step Pressing your nail down firmly and holding it in place for 10-15 seconds might seem like a small detail, but it plays a vital role in ensuring your nails stay in place.
To start off, even pressure is crucial. You want the glue to spread evenly across all parts of the nail to create a strong bond. Applying uneven pressure can lead to a weak bond and ultimately cause your nails to fall off.
Timing is also everything. Holding your nail in place for the full 10-15 seconds gives the glue enough time to dry and bond with your nail. This can save you from the frustration of having your nails fall off midway through the day.
If you’re struggling to hold your nails in place while waiting for the glue to dry, try using a clamp or clothespin. Just be careful not to apply too much pressure, as this could damage your nail or cause the glue to spread unevenly.
In addition, keeping your nails clean and dry before applying the glue is essential. Any oils or moisture on your nails can prevent the glue from bonding properly. To ensure maximum adhesion, use some nail polish remover or rubbing alcohol to prep your nails before applying the glue.
To summarize, here are some tips for getting your nail glue to stick better:
- Apply even pressure when pressing down on your nail
- Hold your nail in place for the full 10-15 seconds
- Use a clamp or clothespin if needed, but be careful not to apply too much pressure
- Clean and dry your nails before applying the glue
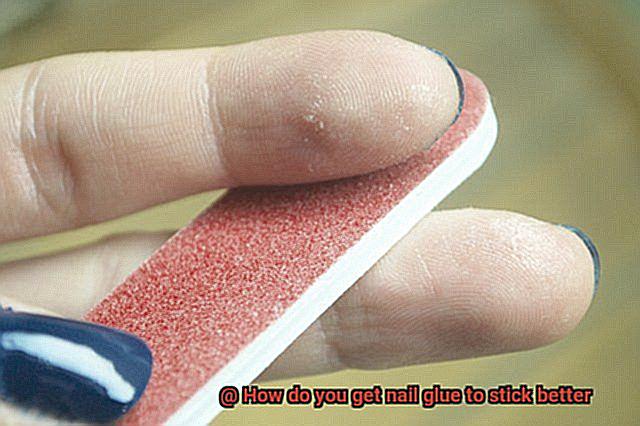
Extra Tip 1: Rough Up the Surface of Your Natural Nail with a Buffer
Look no further than this extra tip: rough up the surface of your natural nail with a buffer.
Buffers are a handy tool for smoothing out and shaping your nails, but did you know they can also create tiny grooves and imperfections that help the glue adhere better? By gently buffing the surface of your nails with a buffer, you are essentially creating a better surface for the glue to grip onto.
To use this technique, start by using the roughest side of your buffer (usually labeled with a number like “100” or “180”) and gently run it over the surface of your nails. Pay special attention to the areas where you will be applying glue, such as the tips and edges of your nails. Don’t apply too much pressure or buff too hard – just enough to create a slightly rougher surface.
After you’ve finished buffing, use a soft-bristled brush or cloth to remove any dust or debris from your nails. This step is crucial because it ensures that the glue adheres only to your natural nail and not any leftover particles.
In summary, roughing up the surface of your natural nail with a buffer before applying nail glue is an easy and effective way to improve its adhesion. But remember: be gentle and don’t overdo it. Excessive buffing can weaken and damage your nails over time.
Extra Tip 2: Warm Up the Glue Before Applying It
Then remember this extra tip: warm up the glue before applying it.
There are few things more frustrating than spending time and effort on a beautiful manicure, only to have it ruined by weak and lifting nails. But fear not. By warming up your nail glue, you can ensure that it sticks better and lasts longer.
Here are some tips on how to do it:
- Hold the bottle between your hands: One of the easiest ways to warm up nail glue is to hold the bottle between your palms for a few minutes before using it. This simple trick will warm up the glue and make it more liquid, making it easier to apply.
- Use warm water: Another way to warm up nail glue is to place the bottle in a container of warm water for a few minutes. Be careful not to let the water get too hot, as this can damage the glue and make it less effective.
Shake well: Once the glue is warm, shake the bottle well to mix the glue thoroughly.
- Apply evenly: Apply a small amount of glue to your nail, being careful not to apply too much. Too much glue can cause air bubbles and weaken the bond.
- Press firmly: After applying the glue, press your nail firmly onto the surface you want it to stick to and hold it there for at least 30 seconds. This will help to ensure that the glue forms a strong bond.
kXo2ympE9lg” >
Conclusion
In conclusion, achieving a flawless manicure that lasts for at least two weeks is possible by following the simple steps outlined in our expert guide. Don’t let the common problem of nail glue not sticking ruin your perfect polish. Start by thoroughly cleaning your nails and creating a smooth surface for the glue to adhere to. Applying a base coat of clear nail polish also helps protect your nails from damage caused by the glue.
When applying the glue, remember that less is more. Use just enough and cover every inch of your nail surface while avoiding getting any on your skin or cuticles. Pressing your nail down firmly and holding it in place for 10-15 seconds is crucial in ensuring a strong bond.
Our extra tips include roughing up the surface of your natural nail with a buffer to create tiny grooves that help the glue adhere better and warming up the glue before applying it to make it more liquid and easier to apply.
Say goodbye to embarrassing nail lift by following these tried-and-tested methods. Enjoy long-lasting, stunning manicures without spending hours at the salon.