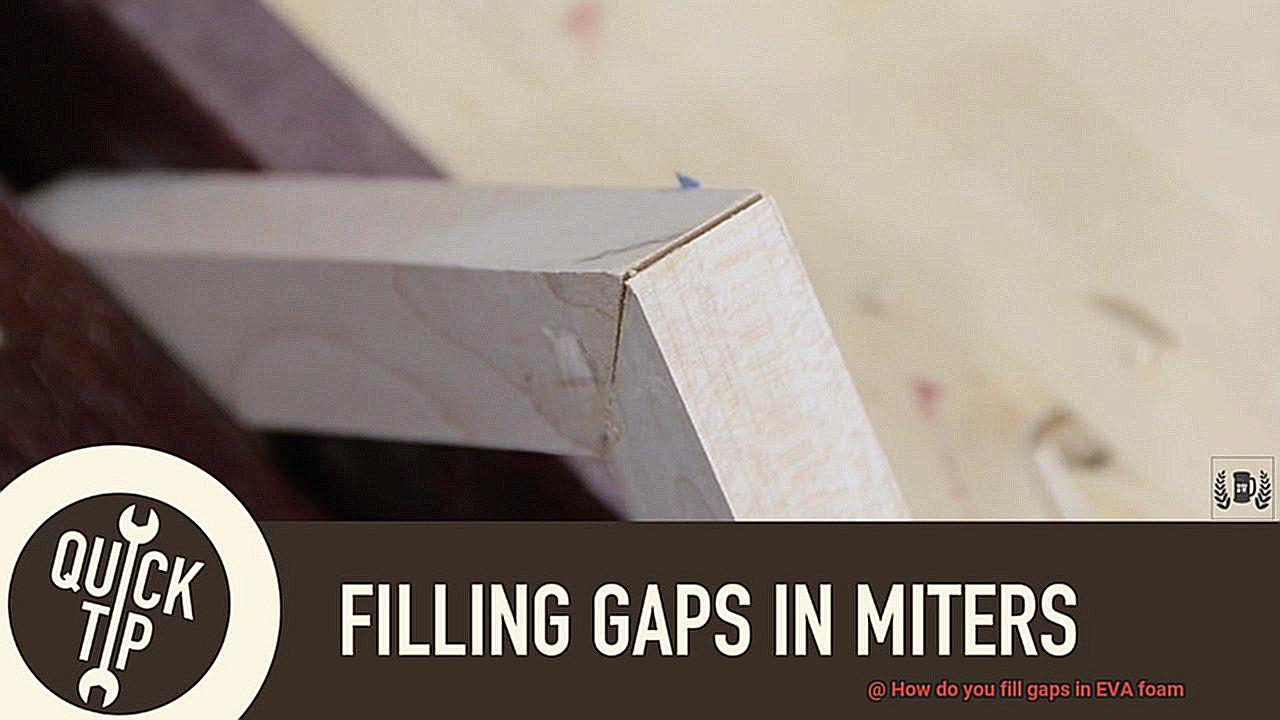
Whether you’re a seasoned crafter or just dipping your toes into the world of EVA foam, those pesky gaps in your projects can be a real buzzkill. But fear not.
We’ve got some killer tricks up our sleeves to help you fill those gaps like a pro. Not only will this make your creations look top-notch, but it’ll also ensure they stand the test of time.
So, if you’re ready to take your cosplay armor, props, and craft projects from meh to marvelous, keep reading. We’re about to spill all the secrets to achieving that flawless finish on your EVA foam masterpieces.
Let’s dive in and banish those gaps for good.
What is EVA Foam?
Contents
- 1 What is EVA Foam?
- 2 Types of Fillers for Gaps in EVA Foam
- 3 Hot Glue Method for Filling Small Gaps in EVA Foam
- 4 Two-Part Epoxy Adhesive Method for Filling Larger Gaps in EVA Foam
- 5 Flexible Filler Compound Method for Filling Gaps in EVA Foam
- 6 Specialized Foam Adhesives Method for Filling Gaps in EVA Foam
- 7 Considerations When Filling Gaps in EVA Foam
- 8 Conclusion
EVA foam, or ethylene-vinyl acetate foam, is a remarkably versatile material that finds its place in numerous industries. From safeguarding gear and footwear to insulating structures and inspiring creativity, EVA foam combines cushioning, durability, and user-friendliness. This ultimate guide will delve deep into the world of EVA foam, unveiling its properties, applications, and techniques for gap filling.
Properties of EVA Foam:
- Softness and Flexibility: With a gentle touch and remarkable flexibility, EVA foam molds to the body, making it perfect for protective gear like helmets and knee pads. Its softness ensures excellent shock absorption.
- Heat Insulation: Boasting low thermal conductivity, EVA foam acts as an exceptional insulator in construction and HVAC industries.
- Resistance to Water and Chemicals: EVA foam stands strong against water, oils, and chemicals, making it ideal for industrial applications where exposure to such substances is common.
Applications of EVA Foam:
- Protective Gear: The cushioning properties of EVA foam make it a go-to material for protective gear like helmets, knee pads, and yoga mats.
- Footwear: Widely used in shoe midsoles, EVA foam provides unparalleled comfort, support, and shock absorption to the wearer.
- Insulation: Thanks to its heat insulation capabilities, EVA foam is a popular choice for insulating construction projects or HVAC systems.
- Creative Projects: Crafters and DIY enthusiasts favor EVA foam due to its versatility and ease of use. It can be effortlessly cut into various shapes using basic tools like scissors or craft knives.
Effective Gap Filling Techniques for EVA Foam:
- Hot Glue: Perfect for small gaps, apply hot glue directly into the gap and smooth it out before it cools and hardens.
- Epoxy Adhesive: When dealing with larger gaps, opt for a two-part epoxy adhesive for a durable and professional finish.
- Flexible Filler Compound: Tailored to flexible materials like foam, these compounds offer a finish that moves with the foam.
- Foam Adhesives: Specialized foam adhesives not only bond EVA foam but also fill any gaps or voids effectively.
Types of Fillers for Gaps in EVA Foam
If you’ve ever found yourself grappling with those stubborn gaps in your EVA foam projects, fear not. In this comprehensive guide, we will delve into the world of filler options that are perfectly suited for filling gaps in EVA foam. So gear up and let’s embark on this foam-filling journey together.
EVA Foam Filler: Form-Fitting and Reliable
When it comes to a seamless finish, nothing beats using a filler specifically designed for EVA foam. These fillers, available in sheets, blocks, or beads, are made from the same material as the foam itself, ensuring compatibility and a flawless outcome. With the ability to be easily shaped or cut to fit into gaps, these EVA foam fillers provide a sturdy bond when heated or glued in place.
Epoxy Resin: Unyielding Strength and Durability
For larger gaps or areas requiring exceptional strength, turn to epoxy resin. Renowned for its potent adhesive properties and compatibility with various materials, including foam, epoxy resin comprises two parts—a resin and a hardener—that are mixed before application. Spread it over the gap using a spatula or employ a syringe for precise filling. Once cured, epoxy resin creates a firm and long-lasting finish suitable for both indoor and outdoor use.
Bonding Adhesives: Powerful Connections
An array of bonding adhesives is available on the market to effectively fill gaps in EVA foam. These adhesives are specially formulated to provide robust and flexible bonds between different materials, including foam. Liquid, gel, or tape forms cater to different project needs. Their application is simple—spread them over the gap and allow them to cure according to the manufacturer’s instructions. Some bonding adhesives offer additional benefits like moisture, heat, or chemical resistance.
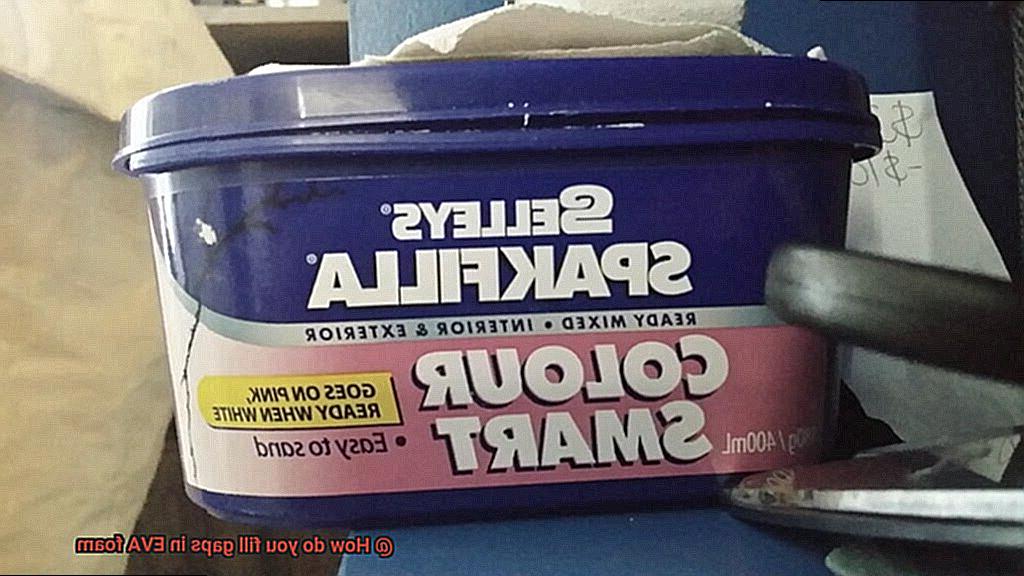
Silicone Sealant: Flexibility Meets Waterproofing
Silicone sealant is a sought-after option for filling gaps in EVA foam. Its flexible and waterproof nature allows it to withstand varying temperatures and environmental conditions. Coming in tube form, it can be conveniently applied using a caulking gun or by hand. Opt for a silicone sealant specifically compatible with EVA foam, ensuring proper adhesion. Spread it evenly over the gap and use a putty knife or finger to achieve a tidy finish. Keep in mind that silicone sealant requires adequate curing time, so adhering to the manufacturer’s instructions is crucial.
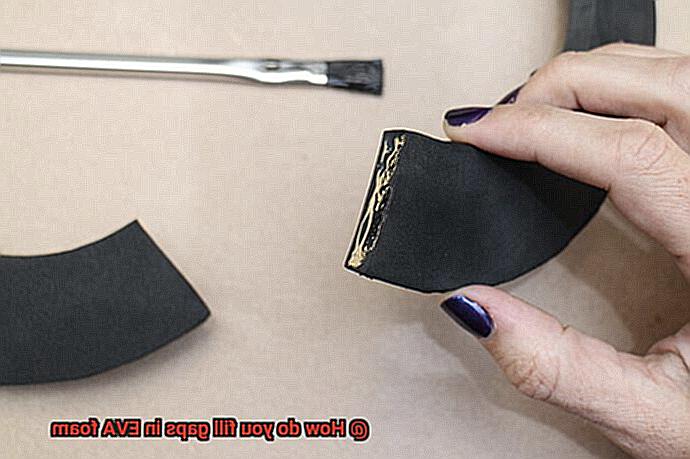
Hot Glue Method for Filling Small Gaps in EVA Foam
Well, fret no more because I have the perfect solution for you – the hot glue method. This quick and easy technique will have your foam looking flawless in no time.
To get started, gather your trusty hot glue gun and some glue sticks. Set your glue gun to a low temperature to prevent any damage to the foam. Safety first, my friends.
Now, let’s dive into the process. Follow these steps to fill those gaps and achieve a smooth finish:
- Heat up your glue gun: Make sure the glue is melted and ready to use. A low-temperature setting will protect the foam.
- Apply the hot glue: Directly fill the gap or crevice that needs filling. Start with a small amount and add more if necessary – we don’t want any excess glue oozing out and causing more problems.
- Smooth it out: Grab a spatula or any other flat tool and gently smooth out the surface of the hot glue. This will blend it seamlessly into the surrounding foam, creating a smooth finish. Just be careful not to apply too much pressure and deform or tear the foam. We want to fix gaps, not create new ones.
- Shape it (optional): For intricate designs, use a heat gun on a low setting to heat up the hot glue and mold it into your desired shape. But remember, take it easy and don’t overheat the foam – we don’t want any melted messes.
- Sand it down: After the hot glue has cooled and hardened, grab some fine-grit sandpaper or a sanding block and gently sand away any excess glue or rough edges. This will give you that perfectly smooth finish you’ve been dreaming of.
- Test before painting or sealing: If you plan on painting or sealing your foam project, do a little test spot first. Hot glue may not adhere well to certain types of paint or sealants, so it’s always better to be safe than sorry. Nobody wants their hard work ruined by a paint mishap.
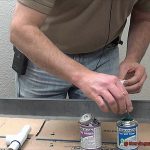
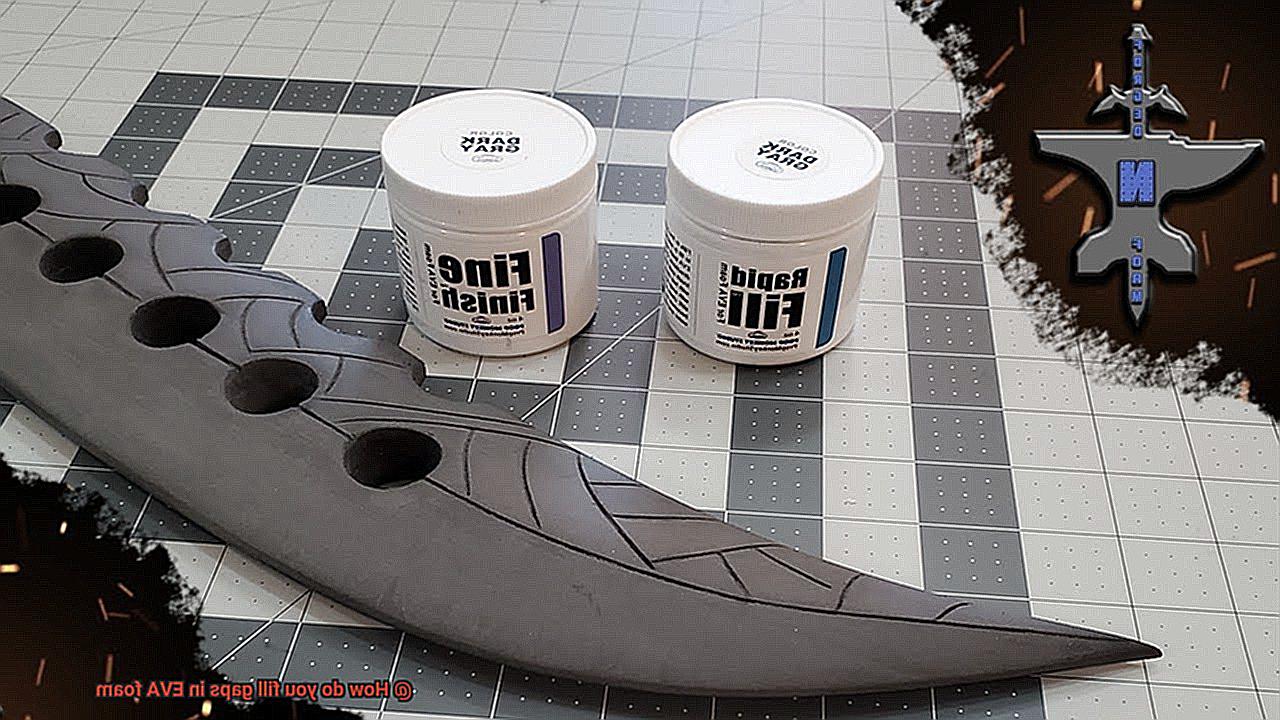
Two-Part Epoxy Adhesive Method for Filling Larger Gaps in EVA Foam
The two-part epoxy adhesive method is a tried and true technique for filling larger gaps in EVA foam. This method involves mixing two components, usually a resin and a hardener, to create a strong adhesive that can effectively fill gaps and create a seamless surface. Let’s break down the steps to ensure success:
- Surface Preparation: Before applying any adhesive, it’s crucial to prepare the EVA foam surface. Clean it thoroughly with a mild detergent and water solution, removing any dust or debris. Dry it completely to ensure proper adhesion.
- Mixing the Epoxy: Follow the manufacturer’s instructions to mix the two parts of the epoxy adhesive. Accuracy is key here – make sure to get the perfect ratio for a strong bond. Take your time and mix it thoroughly.
- Applying the Adhesive: With the epoxy mixed, it’s time to start filling those gaps. Use a putty knife or similar tool to evenly distribute the adhesive across the gap in your foam. Work quickly but carefully to avoid air bubbles or lumps.
- Applying Pressure: To ensure a strong bond and prevent shifting during curing, use a clamp or apply pressure to hold the gap closed. This step is crucial for long-lasting results.
- Curing Time: The curing time will vary depending on the product, so check the instructions provided. Be patient and allow sufficient time for the epoxy to fully cure before subjecting it to any stress or load.
- Finishing Touches: Once cured, trim or sand down any excess adhesive for a seamless finish. If desired, apply a layer of paint or sealant over the repaired area for added protection and a polished look.
It’s important to note that while this method works well for EVA foam, it may not be suitable for all foam types or applications. Consider the specific requirements of your foam material and consult with experts or manufacturers if needed.
Flexible Filler Compound Method for Filling Gaps in EVA Foam
Well, worry no more. We have just the solution for you – the flexible filler compound method. In this blog post, we will dive into the world of glue and explore how a specially formulated compound can seamlessly fill in those gaps, leaving your EVA foam looking flawless. So, let’s embark on this journey and unlock the secrets to achieving perfection in your foam creations.
Benefits of using a flexible filler compound:
- Achieve a seamless finish: The flexible filler compound is more than just an ordinary glue. It is specifically designed to blend harmoniously with EVA foam, resulting in a smooth and seamless surface that will make your projects stand out.
- Flexibility is key: Unlike traditional glues, this remarkable compound possesses a unique flexibility that allows it to endure the movement and stretching of the foam without cracking or peeling. Say goodbye to worries about gaps reappearing after a short period.
- Compatibility galore: The beauty of the flexible filler compound lies in its compatibility with different types of EVA foam. No matter what kind of foam you’re working with, this compound ensures reliable adhesion, guaranteeing a strong bond that will last.
Selecting the right filler compound:
Before diving headfirst into filling gaps, it’s essential to choose the right filler compound. Consider factors such as the type of foam, gap size and depth, flexibility requirements, and durability expectations. By carefully selecting the perfect filler compound for your specific needs, you’ll set yourself on the path to achieving flawlessness.
Application process:
Now that you have selected the perfect filler compound, it’s time to bring your vision to life. Follow these steps for a flawless finish:
- Prepare the surface: Begin by meticulously cleaning the foam to remove any dirt or debris. A clean canvas is essential for a perfect result.
- Mix and apply: Follow the detailed instructions provided with your chosen filler compound to ensure proper mixing. Apply an even layer of the compound to fill in the gaps or voids, making sure to cover every inch flawlessly.
- Smooth and shape: Use a putty knife or spatula to expertly smooth out the compound, ensuring a seamless transition between the filled areas and the surrounding foam. Pay attention to every detail, and let your creativity shine through.
- Let it cure: Give the compound sufficient time to cure according to the manufacturer’s instructions. Patience is key. This waiting period is crucial for achieving optimal results.
Specialized Foam Adhesives Method for Filling Gaps in EVA Foam
Well, get ready to be amazed because I have some fantastic news for you – specialized foam adhesives are here to save the day. These magical adhesives are specifically designed to fill gaps in EVA foam, creating a seamless finish that is not only strong but also incredibly durable. Let’s dive into the advantages and methods of using these game-changing adhesives.
First and foremost, one of the biggest advantages of specialized foam adhesives is their ability to expand and conform to the shape of any gap. It doesn’t matter if the gap is big or small; these adhesives will fill every nook and cranny, leaving no weak points behind. And let me tell you, achieving a solid bond with regular adhesives can be quite challenging when working with EVA foam, which has a porous structure.
Now, let’s talk about how to use these amazing adhesives. First things first, make sure to prep your surface by cleaning the foam and removing any dust, dirt, or oils that could interfere with the adhesive’s bonding capabilities. A light sanding of the surface can also create a rough texture that allows the adhesive to grip better.
Next up, it’s always a good idea to do a small test on a hidden area of your foam before committing to filling the entire gap. This way, you can ensure that the adhesive is compatible with your specific foam and assess its performance.
When it comes to application methods, you’ve got options. For small or narrow gaps, using a foam adhesive spray is an efficient choice. The spray allows for precise application, ensuring that the adhesive reaches deep into the gap. Just remember to apply multiple thin layers, allowing each layer to dry before adding the next one.
For larger or irregularly shaped gaps, liquid foam adhesives are your best bet. These adhesives come in squeeze bottles or tubes, allowing for controlled and precise application. Simply apply the adhesive directly into the gap and use a putty knife or spatula to spread it evenly and fill the void completely.
And let’s not forget about foam adhesive tapes. These double-sided tapes with a foam core are perfect for gaps that are difficult to access or require a temporary fix. Just cut them to the desired length, apply them directly to the gap, and voila – an instant bond without any drying time.
Remember, no matter which method you choose, be patient and allow the adhesive to fully cure before putting any stress or pressure on your foam creation. This will ensure a strong and long-lasting bond that will stand the test of time.
Considerations When Filling Gaps in EVA Foam
When filling gaps in EVA foam, there are several important considerations to keep in mind. First and foremost, the type of glue or adhesive used is crucial. Not all glues are suitable for EVA foam, as some may not bond well or could cause damage to the material. It is highly recommended to use a glue specifically designed for EVA foam, such as EVA foam adhesive or contact cement. These types of glue are formulated to provide a strong bond without compromising the integrity of the foam.
Size is another factor to consider when filling gaps in EVA foam. For small gaps or cracks, a thin layer of glue can be applied directly to the gap using a brush or applicator. However, for larger gaps or holes, it may be necessary to use a filler material along with the glue to provide additional support and fill in the voids.
Proper surface preparation is essential for successful gap filling. The surface of the EVA foam should be thoroughly cleaned and free from any debris or contaminants before applying glue. Any dirt, dust, or oils can hinder the bonding process and result in a weak bond. Cleaning the surface with mild soap and water, followed by rinsing and drying, is recommended. Additionally, lightly sanding the surface with fine-grit sandpaper can improve the bond between the glue and foam.
Weather conditions also play a role in the effectiveness of gap filling in EVA foam. It is ideal to work in a well-ventilated area with moderate temperature and humidity levels. Extreme heat or cold can affect the drying time of the glue, while high humidity can lead to trapped moisture that weakens the bond. Following the manufacturer’s instructions regarding temperature and humidity conditions will ensure optimal bonding.
Flexibility is an important characteristic of EVA foam, so it is crucial to choose a glue that can withstand movement without cracking or breaking. Some glues may become brittle over time or in extreme temperatures, which can compromise the bond. It is advisable to select a glue that remains flexible even after drying, ensuring the foam can flex and move without compromising the strength of the bond.
Lastly, patience is key when filling gaps in EVA foam. It is important to allow sufficient time for the glue to fully dry and cure. Rushing this process can result in a weak bond and ultimately jeopardize the integrity of your foam creation. Following the manufacturer’s instructions regarding drying and curing times will ensure a strong and durable bond.
tgGnfPMzTqo” >
Conclusion
There are a few simple and effective methods to tackle this issue.
One option is using a filler specifically designed for EVA foam. This type of filler is easy to apply and dries quickly, ensuring a seamless finish.
Another alternative is using hot glue, which can be melted and applied directly into the gaps. Once cooled, it provides a sturdy and durable solution.
Additionally, you can also consider using silicone caulk or epoxy putty to fill in the gaps. These materials offer excellent adhesion and flexibility, making them ideal for filling larger or irregularly shaped gaps in EVA foam.
So, whether you’re working on a cosplay project or crafting props, these techniques will help you achieve a flawless result.