Ever wondered how you can bring together two materials that seem to have nothing in common, like ceramic and stainless steel? It’s all about the magic of bonding. Get ready to be spellbound as we unravel the secrets and techniques behind this captivating fusion.
Bonding ceramic to stainless steel is a delicate dance of precision and expertise. Despite their differences, these materials can be joined in a way that defies logic. In this article, we’ll embark on an enchanting journey, uncovering the mesmerizing processes involved in uniting ceramic and stainless steel step by step.
Whether you’re an adventurous DIY enthusiast or a seasoned pro looking to expand your repertoire, let’s plunge into the world of ceramic and stainless steel bonding together. Get ready to unlock the hidden secrets that lie within this extraordinary art form.
Adhesive Bonding
Contents
Adhesive bonding is a powerful technique that creates strong and durable bonds between different materials. One popular application of adhesive bonding is bonding ceramic to stainless steel. In this guide, we will explore the step-by-step process of adhesive bonding for this specific application.
Step 1: Surface Preparation
Thoroughly clean the ceramic and stainless steel surfaces to remove dirt, grease, or contaminants. Use a gentle detergent and water or a suitable solvent.
Step 2: Surface Roughening
Enhance adhesion by roughening or etching the surfaces. Lightly sand the surfaces with sandpaper or apply an acid or abrasive solution to create a rougher texture.
Step 3: Adhesive Selection
Choose the right adhesive for a successful bond. Consider epoxy-based or cyanoacrylate adhesives designed specifically for bonding ceramic and stainless steel.
Step 4: Applying the Adhesive
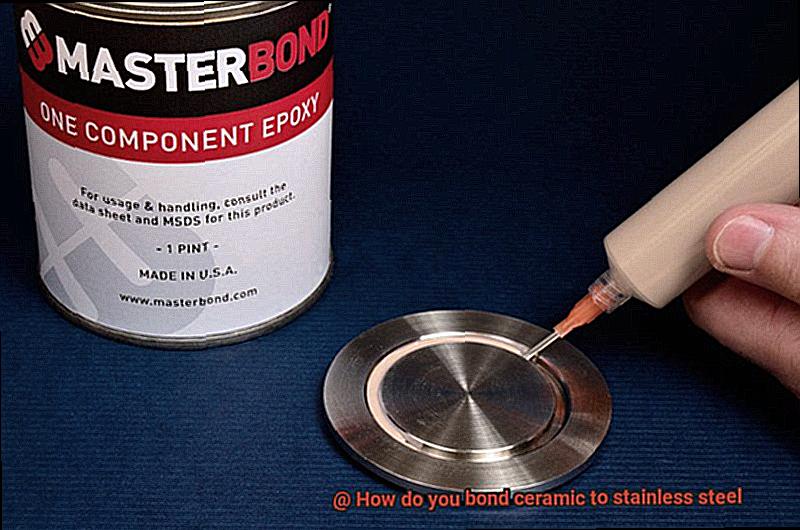
Apply the adhesive evenly, ensuring sufficient coverage and contact between the surfaces. Follow the manufacturer’s instructions using a brush or syringe for precise application.
Step 5: Bonding
Press the ceramic and stainless steel together firmly to create a tight bond. Use clamps or mechanical pressure to hold them while the adhesive cures. Ensure even pressure across the entire bonded area.
Step 6: Curing Time
Follow the manufacturer’s instructions for curing time and additional steps required for optimal bond strength. Avoid disturbing the bond during this period to allow the adhesive to fully cure.
Step 7: Testing and Evaluation
After full curing, subject the bonded materials to various conditions like temperature changes or mechanical stress to test strength and durability. Ensure the bond meets your application requirements.
Choosing the Right Adhesive
Adhesive bonding is a superpower, capable of forging unbreakable bonds between different materials. One thrilling challenge in the world of adhesive bonding is joining ceramic and stainless steel. Embark on a step-by-step guide to conquer this adventure and achieve a victorious bond.
Step 1: Prepare the Surfaces for Battle
Before embarking on our heroic mission, we must meticulously prepare our surfaces. Scrub away any dirt or grime, leaving them squeaky clean. Then, roughen up the surfaces, giving them a textured battle armor that enhances adhesion. Sanding or using special solutions that act as warriors against smoothness will do the trick.
Step 2: Choose Your Trusty Sidekick – The Perfect Adhesive
Step 3: Apply the Adhesive with Precision and Accuracy
With our adhesive at hand, we must apply it carefully onto both surfaces, ensuring every nook and cranny is covered in its sticky embrace. Wielding brushes or syringes with precision and accuracy, we create a seamless application.
Step 4: Unite Ceramic and Stainless Steel in a Tight Embrace
Step 5: Patience – The Ally of Heroes
Patience becomes our ally now as we allow the adhesive to cure fully according to the manufacturer’s instructions. During this process, we must resist any temptation to disturb the bond; after all, heroes need time to grow stronger.
Step 6: Testing for Victory
Once fully cured, it’s time for rigorous testing. Subject our bonded materials to extreme conditions like temperature changes and mechanical stress. Only then can we truly determine if our bond possesses the strength and durability needed for victory in your specific application.
Epoxy Adhesives
Today, we embark on an exciting journey into the world of glue, where we will uncover the secrets of bonding ceramic to stainless steel using epoxy adhesives. Get ready to witness the birth of an unbreakable bond that can withstand heat, chemicals, and moisture.
The Power of Epoxy Adhesives
Epoxy adhesives are revered for their reliability and effectiveness in bonding ceramic to stainless steel. With their ability to adhere to a wide range of materials and resist various environmental factors, these adhesives have become the go-to choice for industrial and DIY projects alike. Composed of two components—a resin and a hardener—epoxy adhesives create a chemical reaction that results in an incredibly strong bond.
Preparing the Surfaces
Properly preparing both the ceramic and stainless steel surfaces is crucial before applying epoxy adhesive. Thoroughly cleaning, drying, and removing any contaminants from the surfaces is essential for achieving a successful bond. Using mild detergents or solvents ensures a pristine surface for adhesive application.
Applying the Epoxy Adhesive
Mixing equal parts of the resin and hardener components according to the manufacturer’s instructions is paramount. This mixture should be applied evenly and consistently on one of the surfaces. Utilizing spatulas, brushes, or applicators ensures precise application.
The Bonding Ritual
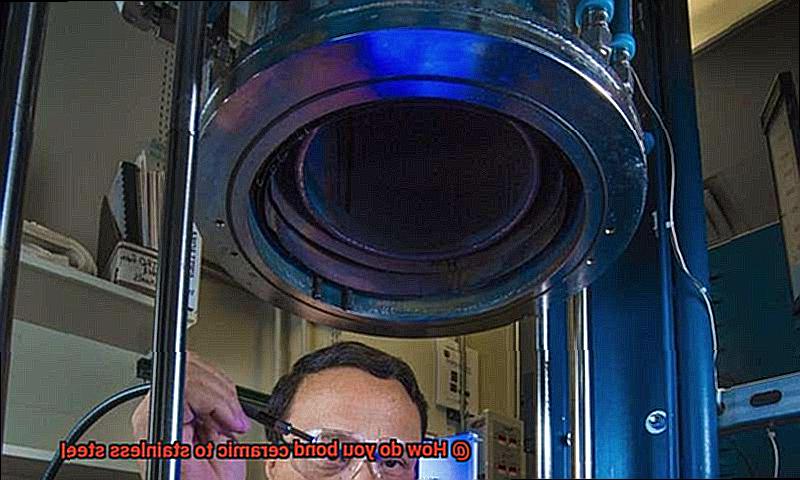
After applying the epoxy adhesive, firmly aligning and pressing the ceramic and stainless steel surfaces together is crucial. To maintain pressure during the curing process, clamps or suitable tools can be employed. Curing time varies but typically falls within a few hours to overnight.
The Final Test
Fully cured epoxy adhesives boast exceptional strength and durability, ensuring a successful bond between ceramic and stainless steel. However, it is important to recognize that epoxy adhesives may not be suitable for applications requiring flexibility or shock resistance. In such cases, it is advisable to explore alternative bonding methods or specialized adhesives.
Preparing the Surfaces for Bonding
Today, we embark on an exhilarating journey into the realm of bonding ceramic to stainless steel. Prepare yourself to unlock the secrets of surface preparation and discover the key to creating bonds that can withstand the test of time. With the mighty power of epoxy adhesives, we will delve into the art of forging unyielding connections that can endure scorching heat, corrosive chemicals, and relentless moisture. So, let us dive headfirst into this captivating endeavor.
Step 1: The Purity of Cleanliness
To achieve a bond that can weather any storm, we must rid our surfaces of all contaminants. Dirt, grease, oil, or residue are nothing but detriments to our cause. For ceramic surfaces, a gentle scrub with mild soap and water, followed by thorough rinsing and drying, is recommended. As for stainless steel, a specialized solvent or degreaser designed specifically for its surfaces will prove indispensable.
Step 2: Embrace the Roughness
Now, it is time to embrace the power of roughness. By roughening our surfaces, we create an expanded area for bonding. But exercise caution. We must not damage these precious materials. Utilize sandpaper or a wire brush to carve microscopic grooves and scratches into the surfaces—improving adhesion without sacrificing integrity. Remember, it is not about removing copious amounts of material; it is about creating a foundation for our bond to cling onto firmly.
Step 3: Bid Farewell to Loose Particles
With our surfaces clean and roughened, we must bid adieu to any loose particles or dust that may have accumulated. Achieving a state of pristine cleanliness is paramount because even the tiniest speck can undermine the strength of our bond. A lint-free cloth or a burst of compressed air will aid us in reaching this nirvana of cleanliness. Pay meticulous attention to ensure not a single particle remains.
Step 4: Harness the Power of Primer (Optional)
In certain cases, when dealing with specific ceramics or stainless steels, we can harness the power of primer or adhesion promoter to elevate our bond to new heights. These miraculous substances forge a chemical bond between the ceramic and stainless steel surfaces, amplifying adhesion. Simply brush or spray on the primer and allow it to dry according to the manufacturer’s instructions. Witness the transformation as your bond becomes a force to be reckoned with.
Mechanical Fastening
In this exploration, we delve into the remarkable process of bonding ceramic to stainless steel using the unsung heroes of screws, bolts, and clamps. While glue may claim the spotlight, it’s time to give credit where credit is due. Mechanical fasteners are the true champions in this bonding adventure.
The Compatibility Conundrum:
Harnessing the power of mechanical fastening requires us to comprehend the stark differences between ceramic and stainless steel. Stainless steel stands strong and rigid, akin to a superhero with a titanium backbone. In contrast, ceramic is delicate, vulnerable to even the slightest provocation. Consequently, we must select fasteners capable of withstanding stress without harming our fragile ceramic companion.
Screw It – But Not Too Tight.
One popular approach in mechanical fastening involves utilizing screws or bolts accompanied by washers. These mighty warriors are inserted through pre-drilled holes in both materials. Washers play a pivotal role in distributing load evenly across the joint while shielding the delicate ceramic surface from harm. Yet, caution must be exercised as overtightening these fasteners could inadvertently crack or chip our cherished ceramic.
Torque Talk:
The key to an enduring and steadfast bond lies in tightening those screws or bolts just right. However, determining this elusive “just right” requires guidance from manufacturer’s guidelines and experts well-versed in this torque-filled journey. By following their recommendations, we safeguard against potential mishaps and ensure our bond remains unyielding.
Adhesive-Backed Fasteners: The Silent Guardians
In certain scenarios, adhesive-backed fasteners silently emerge as an alternative for mechanical fastening. Cloaked in an adhesive layer on one side, these stealthy warriors securely adhere to both ceramic and stainless steel surfaces. They provide an additional layer of protection, vanquishing any movement or slippage between the two materials. Truly, these hidden heroes are worthy of our admiration.

Choosing Suitable Fasteners
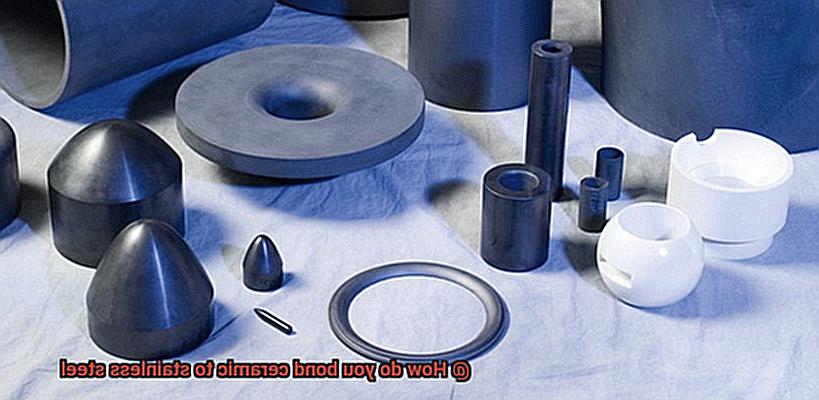
Fear not, for we are here to guide you through the world of fasteners and help you select the perfect one for this unique task.
When it comes to joining ceramic and stainless steel, fasteners become your trusted allies. They provide the strength and durability needed to create a bond that will withstand the test of time. So, let’s delve into the factors you should consider when choosing the right fastener for this application.
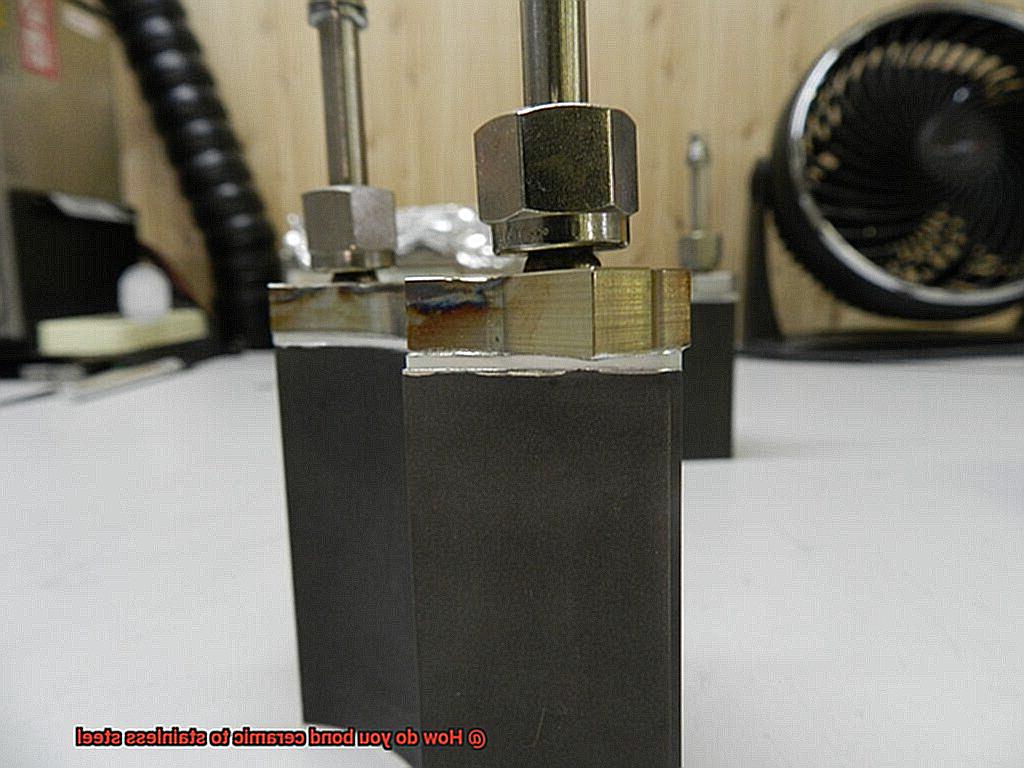
- Type of fastener: Stainless steel screws or bolts are your go-to options here. Their excellent corrosion resistance and strength make them ideal for bonding ceramic to stainless steel, even in challenging conditions.
- Material composition: It is crucial to select a stainless steel fastener with a similar composition as the stainless steel you’re bonding. This ensures compatibility between the two materials and prevents galvanic corrosion, which can occur when dissimilar metals come into contact.
- Design and thread type: Self-tapping screws are your best friends when it comes to bonding ceramic to stainless steel. These ingenious screws create their own threads as you drive them in, eliminating the need for pre-drilling holes in the ceramic. Talk about a time-saver.
- Length matters: When selecting a fastener, make sure it is long enough to penetrate through both the ceramic and stainless steel layers without protruding excessively on the other side. This ensures a secure bond and avoids any potential hazards or interference with other components.
- Special applications: Depending on your project’s requirements, you may need alternative fasteners like rivets or adhesive-backed studs. These options offer additional benefits such as increased load-bearing capacity or ease of installation, so keep them in mind if they suit your needs.
By considering these factors, you can confidently choose the perfect fastener for bonding ceramic to stainless steel. Remember, a strong connection between these two materials is vital for the success of your project.
So, the next time you embark on a ceramic-stainless steel bonding adventure, don’t forget to pick the right fastener. With the perfect fastener in hand, your bond will be unbreakable, and your project will stand the test of time.
Other Methods of Bonding
When it comes to bonding ceramic to stainless steel, glue is often the default choice. However, there are other methods available that can provide a strong and durable bond. In this article, we will explore various alternatives to glue, including mechanical bonding, thermal bonding, ultrasonic bonding, and adhesive bonding. By understanding these different methods, you can confidently choose the best approach for your ceramic-stainless steel bonding needs.
Mechanical Bonding:
Mechanical bonding involves physically attaching the two materials together. This can be achieved through techniques such as bolting, clamping, or using mechanical fasteners.
- Bolting: By drilling holes through both materials and inserting bolts tightened with nuts or fastening devices, a strong and durable bond is created.
- Clamping: This temporary bond is achieved by using clamps or similar devices to hold the materials together until a bond forms. It is ideal for situations where disassembly is required.
- Mechanical Fasteners: Screws or rivets can be inserted through pre-drilled holes and tightened or hammered into place. This method offers reliability and resistance to forces and vibrations.
Thermal Bonding:
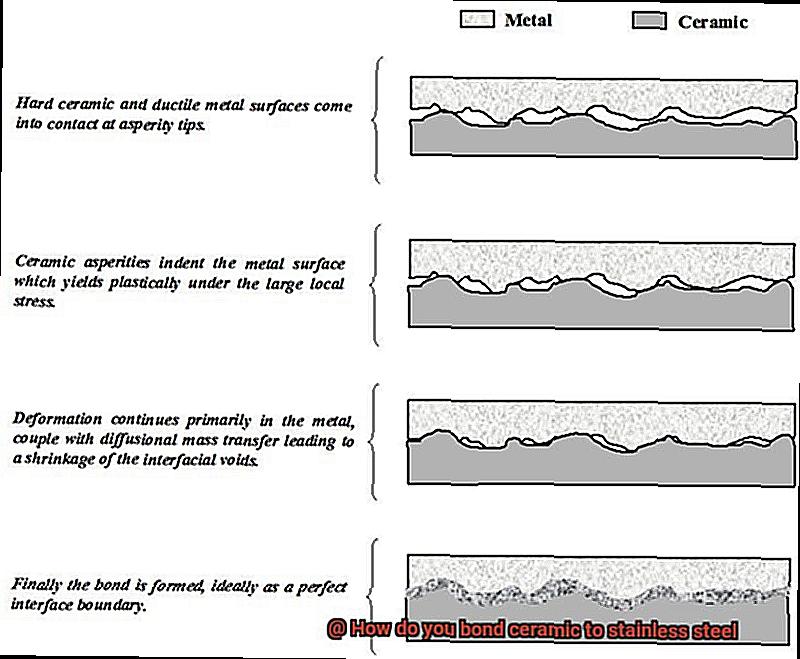
Thermal bonding utilizes heat to join the ceramic and stainless steel. One common method is brazing, which involves melting a filler metal with a lower melting point than the two materials. The molten filler metal flows into the joint, solidifying upon cooling and creating a strong bond.
Ultrasonic Bonding:
Ultrasonic bonding uses high-frequency vibrations to generate heat at the interface between the materials. The localized heat softens the surfaces of the ceramic and stainless steel, allowing them to fuse together precisely. This method is commonly used when a precise and localized bond is required.
Adhesive Bonding:
Adhesive bonding involves using specialized adhesives formulated for ceramic-to-stainless steel bonding. These adhesives are available as liquids, pastes, or tapes and can be cured or hardened through heat or pressure. They provide a strong and durable bond between the two materials.
Brazing
When it comes to joining ceramic to stainless steel, the possibilities may seem limited. But fear not, for there is a remarkable technique called brazing that can create a bond as strong as Hercules himself. In this article, we will delve into the captivating world of brazing and discover how it creates robust connections between these two diverse materials.
Preparing the Surfaces:
Before embarking on the brazing journey, it is imperative to ensure that both the ceramic and stainless steel surfaces are pristine and ready for union. Any impurities or contaminants can hinder the bonding process, so roll up your sleeves and give those surfaces a thorough cleaning.
The Superpower of Flux:
To achieve optimal adhesion and fend off the villainous oxidation during brazing, a special substance known as flux is applied to both the ceramic and stainless steel surfaces. This magical elixir banishes any oxides or impurities, allowing for superior wetting and bonding. Picture flux as the superhero that swoops in to save the day by creating a formidable barrier against pesky oxidation.
Choosing the Right Filler Metal:
The choice of filler metal is a crucial element in brazing ceramic to stainless steel. Since ceramics boast high melting points, it is vital to select a filler metal with a lower melting point that can form a sturdy bond without harming the delicate ceramic. Silver-based alloys, copper-based alloys, and nickel-based alloys are among the commonly used fillers. Choose wisely, my friends.
Igniting the Flames:
Now comes the moment of excitement. Once the surfaces are prepared and flux has been generously applied, it’s time to heat things up. The assembly is subjected to temperatures above the melting point of the filler metal but below that of the base materials. As the filler metal melts, it gracefully flows into the joint, seamlessly filling any gaps and forging an unyielding bond.
The Advantages of Brazing:
Brazed joints possess a multitude of advantages when it comes to bonding ceramic to stainless steel. They exhibit exceptional strength and durability, capable of withstanding scorching temperatures and formidable mechanical strain. Furthermore, brazed joints flaunt outstanding electrical conductivity, making them ideal for applications that require reliable electrical connections.
The Limitations:
While brazing is a formidable bonding technique, it does have its limitations. The process demands meticulous surface preparation and cleanliness for triumphant bonding. Moreover, the high temperatures involved may not be suitable for certain types of ceramics that are sensitive to thermal shock.
Welding
Today, we’re going on an adventure to explore the art of bonding ceramic to stainless steel. It’s a process that requires skill, precision, and a touch of magic. So, grab your welding helmet and let’s dive into this fascinating journey.
When it comes to welding ceramic to stainless steel, we have an arsenal of techniques at our disposal. One of the most popular choices is Tungsten Inert Gas (TIG) welding. Picture this: an electric arc dancing between a tungsten electrode and the stainless steel, generating intense heat that melts the ceramic and stainless steel surfaces. It’s like a passionate tango between fire and metal.
But before we can embark on this fiery dance, preparation is key. Just like getting ready for a hot date, cleanliness is crucial in welding. Both the ceramic and stainless steel surfaces must be free from any contaminants. Think of it as giving them a spa day before their sizzling rendezvous.
Once everything is squeaky clean, it’s time to get down to business. With the precision of an orchestra conductor, we carefully control the temperature and heat distribution to prevent any cracks or damage. Every note must be played just right for a harmonious fusion.
Sometimes, we need a little extra help to ensure a perfect bond between the ceramic and stainless steel. Enter filler materials, acting as cupid’s arrow to enhance the welding process and create a love story that lasts. These fillers improve the strength of the bond, making it as unbreakable as Thor’s hammer.
But remember, safety first. Welding can be dangerous if not done properly. So, suit up in your protective gear and make sure you have proper ventilation. We don’t want any superheroes getting hurt.
v_BE40k-ZYg” >
Conclusion
In conclusion, bonding ceramic to stainless steel is a complex process that requires careful consideration and the use of specialized techniques. By following these steps, you can successfully achieve a strong and durable bond between these two materials.
To begin with, it is crucial to ensure that both the ceramic and stainless steel surfaces are clean and free from any contaminants. This can be done by using solvents or cleaning agents specifically designed for each material.
Next, applying a primer or adhesive promoter to both surfaces can greatly enhance the bonding strength. These products create a chemical bond between the ceramic and stainless steel, improving adhesion and preventing delamination.
Once the primer has been applied, it is time to apply the adhesive. There are various types of adhesives available for bonding ceramic to stainless steel, including epoxy-based adhesives, cyanoacrylate adhesives, and silicone-based adhesives. It is important to choose an adhesive that is compatible with both materials and has high temperature resistance if required.
When applying the adhesive, it is essential to follow the manufacturer’s instructions carefully. This includes ensuring proper mixing ratios for two-part adhesives and applying an even layer of adhesive on both surfaces.
After applying the adhesive, carefully align the ceramic piece with the stainless steel surface and apply pressure to create a strong bond. Clamps or other mechanical aids can be used to hold the two pieces together while the adhesive cures.
Finally, allow sufficient curing time for the adhesive to fully set. This typically ranges from a few hours to several days depending on the type of adhesive used. Avoid subjecting the bonded assembly to excessive stress or temperature fluctuations during this curing period.
In summary, bonding ceramic to stainless steel requires meticulous preparation, suitable primers or adhesive promoters, choosing an appropriate adhesive type, precise application techniques, and adequate curing time.

