Are you dreaming of a cozy carpeted space in your basement or outdoor patio? You might be wondering how to securely anchor it to the concrete surface. Concrete is undoubtedly sturdy, but can pose a challenge when it comes to attaching decorative items like carpet.
Fret not. There are several methods that can help you anchor your carpet firmly to concrete, preventing it from shifting or wrinkling over time. From using adhesive tapes or carpet tacks to specialized concrete anchors, there are plenty of options available.
In this blog post, we’ll explore some of the most effective ways to anchor your carpet to concrete and share some tips for ensuring a smooth and seamless installation process. Whether you’re a DIY enthusiast or a seasoned professional, you’ll find plenty of valuable insights that will help you tackle this project with confidence.
So if you’re ready to learn how to anchor your carpet like a pro, read on and discover the many possibilities that await.
Adhesive Glue: Benefits and Installation Process
Contents
- 1 Adhesive Glue: Benefits and Installation Process
- 2 Tack Strips: Benefits and Installation Process
- 3 Double-Sided Tape: Benefits and Installation Process
- 4 Choosing the Right Method for Your Carpet Type
- 5 Preparing the Concrete Floor for Carpet Installation
- 6 Tips for a Secure Hold and Long-Lasting Results
- 7 Common Mistakes to Avoid When Anchoring Carpet to Concrete
- 8 Professional vs DIY Installation of Carpet on Concrete
- 9 Conclusion
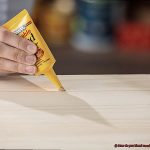
Adhesive glue is an excellent choice. This popular method provides numerous benefits, including a seamless finish, durability, and the ability to withstand heavy foot traffic.
To ensure successful installation, careful preparation is key. The concrete floor must be thoroughly cleaned and dried to create a strong bond, while the carpet should be stretched and trimmed precisely to fit the room’s dimensions. Once ready, the adhesive glue can be applied in sections using a trowel or roller, working quickly and efficiently to prevent it from drying too fast.
One of the significant advantages of using adhesive glue is that it creates a seamless finish. This makes it an ideal option for commercial spaces such as offices and hotels, where aesthetics are essential. Additionally, adhesive glue is easy to maintain, ensuring that your carpets remain securely anchored to the concrete floor for years.
In summary, adhesive glue is an excellent option for anchoring carpets to concrete floors. Its benefits include durability, ease of maintenance, and a seamless finish. With proper installation techniques and attention to detail, your carpets will remain securely anchored to your concrete floors for many years to come.
Tack Strips: Benefits and Installation Process
While adhesive glue is a popular option, tack strips offer added benefits that are worth considering. As an expert on the topic, I’m here to share with you the advantages and installation process of tack strips.
Firstly, let’s discuss the benefits of using tack strips. Not only do they provide a secure hold on the carpet, but they also prevent it from sliding or shifting over time, even in high-traffic areas. This not only makes your space safer but also preserves the look and feel of your carpet for longer. Additionally, using tack strips provides a professional finish to your installation, giving your space a polished look. Finally, when it comes time to replace your carpet, using tack strips makes the process much easier and less time-consuming.
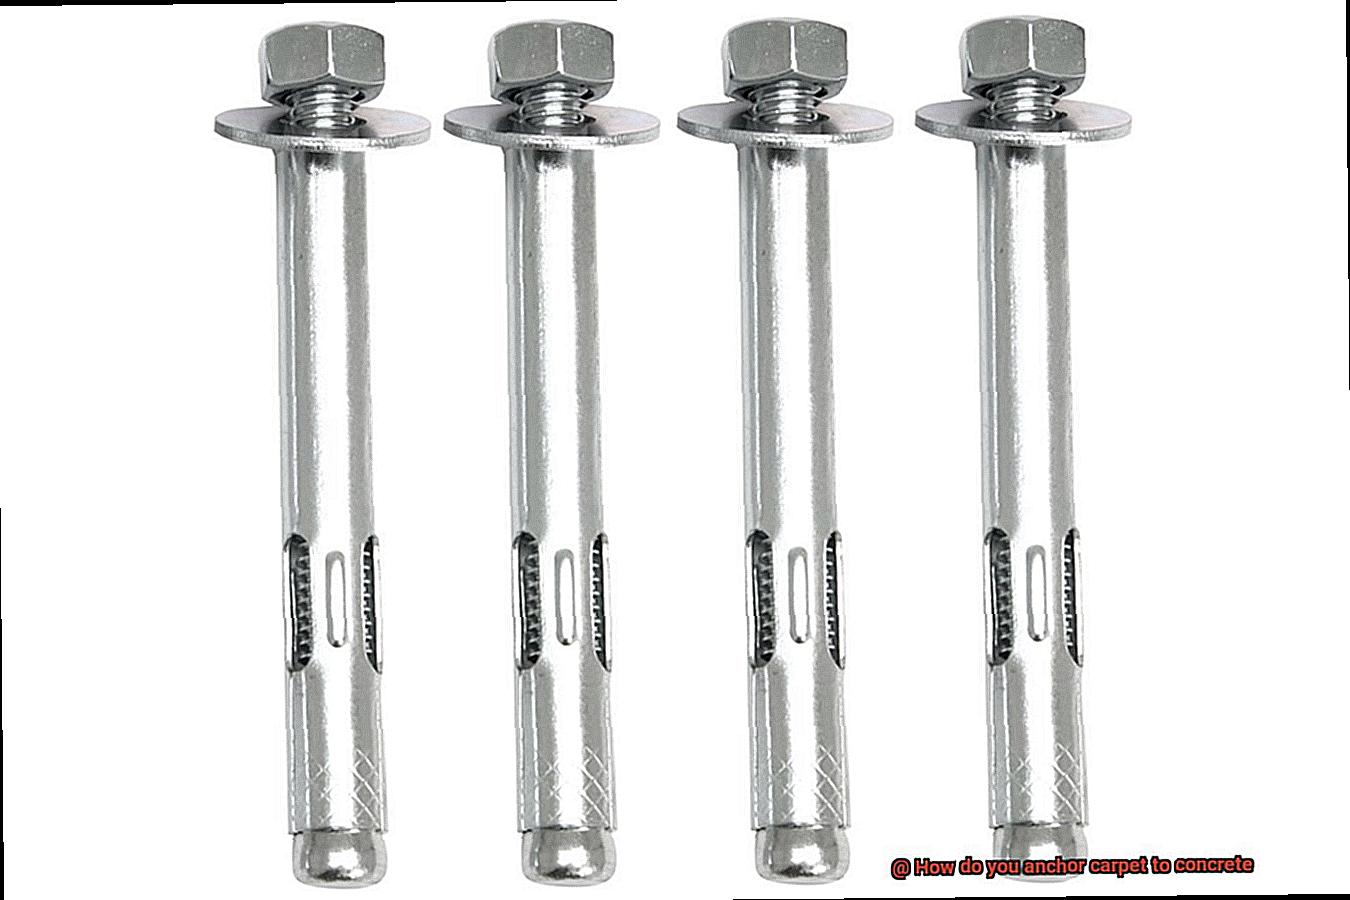
Now that we know the benefits let’s dive into how to install tack strips on concrete. The first step is to measure and mark out where the tack strips will be placed along the perimeter of your room. Next, use a hammer drill to create holes in the concrete where the nails will be inserted. To ensure a snug fit, use a drill bit that is slightly smaller than the nail size.
Once you’ve created the holes, insert nails into each one and hammer them in until they’re secured in place. Then place the tack strip over them, making sure it’s flush against the wall. Use concrete screws or adhesive to secure the tack strip in place if necessary. Finally, stretch and attach your carpet to the tack strip using a knee kicker or power stretcher tool.
Double-Sided Tape: Benefits and Installation Process
Look no further than double-sided tape. As an expert in this field, I can attest to the many benefits of using double-sided tape for carpet anchoring.
First and foremost, double-sided tape provides a strong and durable bond between your carpet and the concrete surface. This means that it can withstand heavy foot traffic, making it an ideal option for commercial spaces or high-traffic areas in your home. But that’s not all. Double-sided tape is also versatile enough for both permanent and temporary installations, making it a great option for renters or those who like to switch up their flooring.
But perhaps one of the greatest advantages of using double-sided tape is its clean installation process. Unlike messy glues or adhesives, double-sided tape eliminates the need for any clean-up or extra costs. To install double-sided tape, simply follow these steps:
Thoroughly clean the concrete surface to remove any dirt or debris.
Measure and cut the tape to fit the size of your carpet. Make sure to leave a small gap between the edges of the tape and the wall to allow for expansion.
Carefully peel off one side of the tape and press it firmly onto the concrete surface. Smooth out any air bubbles or wrinkles in the tape.
Peel off the other side of the tape and lay your carpet onto the adhesive surface.
Use a carpet roller or heavy object to press down firmly on the carpet and ensure a strong bond.
It really is that simple. With double-sided tape, you can say goodbye to shifting carpets and hello to a sturdy and reliable flooring solution. Plus, with its affordability and easy installation process, you can save both time and money.
Choosing the Right Method for Your Carpet Type
If so, it’s important to understand that not all carpets are created equal. Each type requires a specific anchoring method to ensure a secure and long-lasting installation. As an expert in carpet anchoring, I’ve done some research and compiled some notes to help you choose the right method for your carpet type.
Firstly, looped or Berber carpets tend to unravel or fray at the edges if not anchored properly. Therefore, a more aggressive anchoring method such as a strong adhesive or double-sided tape is necessary. On the other hand, cut-pile carpets can be anchored using a less aggressive method such as a carpet tack strip or glue dots. These methods provide a secure hold without damaging the carpet fibers.
The specific installation environment is another essential factor to consider when choosing an anchoring method. For example, if you are installing carpet in high-traffic areas or areas prone to moisture, like basements, you may need to use stronger adhesive or tape for a secure hold over time. Additionally, certain areas may require specific anchoring methods based on local building codes or regulations.
Choosing the wrong anchoring method for your carpet type and installation environment can lead to issues down the line. A weak hold could cause your carpet to shift or come loose, which creates tripping hazards and potentially damages your flooring. On the other hand, using an overly aggressive method could damage your carpet fibers and lead to fraying or unraveling.
Preparing the Concrete Floor for Carpet Installation
Before you lay down that plush carpet, it’s essential to ensure that your concrete floor is properly prepared for the job. This critical step will ensure that your carpet looks great and lasts for years to come. Here are some key steps to follow when preparing a concrete floor for carpet installation:
- Step 1: Clean the Surface – Start by giving the concrete surface a thorough cleaning. Remove any dirt, dust, or debris using a broom, vacuum cleaner, or leaf blower. This step is essential because any debris left on the surface can cause bumps or lumps in your carpet.
- Step 2: Inspect for Cracks and Holes – Check the surface for cracks, holes, or uneven areas. If you find any, fill them with a self-leveling compound or patching material and let them dry completely. A smooth and even surface is crucial to ensure that your carpet doesn’t buckle or wrinkle.
- Step 3: Level Out Uneven Areas – If the surface is still uneven even after filling in any cracks or holes, use a grinder or sander to level it out. This step may take some time, but it’s essential for a successful carpet installation.
- Step 4: Apply Primer – Applying a primer helps improve the adhesion of the glue to the concrete surface and prevents moisture from seeping through and damaging your carpet. Follow the manufacturer’s instructions carefully when applying the primer and allow it to dry completely.
- Step 5: Apply Glue – Use a high-quality adhesive specifically designed for carpet installation on concrete surfaces. Spread the glue evenly over the entire surface using a trowel or roller. Move quickly as the glue dries fast.
- Step 6: Lay Carpet – Carefully lay your carpet onto the surface, ensuring that it’s aligned properly. Use a carpet roller or heavy object to press down on the carpet and anchor it firmly to the concrete surface.
Tips for a Secure Hold and Long-Lasting Results
If you’re planning to install carpet on a concrete surface, it’s crucial to follow proper installation techniques to ensure a secure hold and long-lasting results. Here are five tips that can help you achieve this:
Firstly, make sure to clean the concrete surface thoroughly before installation. Dirt, debris, or moisture can compromise the adhesive bond between the carpet and concrete. A clean surface will provide a solid foundation for your carpet.
Secondly, choosing the right adhesive is critical for achieving a strong bond between the carpet and concrete surface. Different types of adhesives are available in the market, so selecting the right one that suits your carpet type, concrete surface, and environmental conditions is essential.
Thirdly, choose the appropriate type of carpet for your installation. Certain types of carpets require stronger adhesives to ensure a secure hold. Be sure to consider factors such as foot traffic, moisture levels, and overall durability when selecting your carpet.
Fourthly, give sufficient time for the adhesive to dry completely before installing the carpet. Hasty installation can result in an uneven surface or an inadequate bond between the carpet and concrete.
Finally, use a power stretcher to ensure that the carpet is taut and properly anchored to the concrete surface. This will prevent wrinkles, bulges or other imperfections that could affect both the appearance and longevity of the carpet.
Common Mistakes to Avoid When Anchoring Carpet to Concrete
Anchoring carpet to concrete can be an excellent solution. However, it’s important to avoid common mistakes that may result in an unsatisfactory outcome or even pose a safety risk. Here are the most frequent errors to steer clear of when anchoring carpet to concrete:
Neglecting to clean the concrete surface thoroughly before starting can lead to an uneven surface and poor adhesion. So, make sure you clear the area of debris and dirt.
Choosing the wrong adhesive is another common mistake. Different types of adhesives are available for anchoring carpet to concrete, so ensure you select one that suits your specific needs.
Not allowing enough time for the adhesive to dry completely can lead to a weak bond and cause your carpet to come loose over time. Follow the manufacturer’s instructions and be patient.
Failing to stretch the carpet correctly before applying the adhesive can result in wrinkles and bubbles, making it unattractive and uncomfortable to walk on.
Using too little adhesive can cause a weak bond, leading your carpet to come loose over time. So, make sure you use enough adhesive for a secure attachment.
Professional vs DIY Installation of Carpet on Concrete
Adding a new carpet to your concrete floors can give your home a cozy and comfortable feel. But before you start, it’s important to consider whether to hire professionals or take on the installation yourself.
Professional installation offers many benefits. Experienced installers have the knowledge, tools, and materials needed for proper installation. They can guarantee that your carpet is cut and installed correctly, ensuring no unsightly seams or gaps. Additionally, they often offer warranties or guarantees on their work, giving you peace of mind in case any issues arise.
However, professional installation comes with a higher upfront cost compared to DIY installation. Installation scheduling may also be less flexible than DIY options.
On the other hand, DIY installation may save you money upfront, but it requires a significant time and effort investment. It also requires purchasing the necessary tools and materials, which can add up in cost. Without proper knowledge and experience, DIY installers may struggle with anchoring the carpet properly, leading to potential safety hazards or damage to the concrete.
Ultimately, the decision between professional and DIY installation depends on individual preferences and circumstances. If you’re short on time or lack the necessary knowledge and experience, professional installation may be the best option for you. However, if you’re willing to put in effort and want to save some money, DIY installation may be viable.
If you choose DIY installation, remember to research and prepare properly before starting any project. Clean the surface, choose the right adhesive, allow enough drying time, stretch the carpet correctly, and use enough adhesive for a secure attachment.
US3hEBCkLJ0″ >
Conclusion
To sum it up, anchoring carpet to concrete might seem like a daunting task, but with the right approach and techniques, it can be a seamless and successful project. Whether you opt for adhesive glue, tack strips, or double-sided tape, each method has its advantages and installation process that should be followed meticulously. It’s crucial to choose the best anchoring method that suits your specific carpet type and installation environment to ensure a secure hold and long-lasting results.
Proper preparation of the concrete surface is also key to achieving excellent outcomes. This involves cleaning the surface thoroughly, filling any cracks or holes, leveling out uneven areas, applying primer and using high-quality adhesive.
When anchoring carpet to concrete floors, it’s essential to avoid common mistakes such as neglecting to clean the surface properly or not allowing enough drying time for the adhesive. The choice between professional or DIY installation depends on individual preferences and circumstances.
By following these tips and techniques carefully, you can achieve an impeccable finish that provides comfort and durability for years to come.