Do you cringe at the sight of nail holes and gaps in your prized wooden furniture or flooring? Fear not, my friend. Wood filler is here to save the day. But if you want your repairs to blend seamlessly with the surrounding wood, you need to know how to mix it with stain.
Don’t let the idea of blending wood filler with stain intimidate you. With just a few simple steps, you can achieve a flawless finish that will leave your woodwork looking like new. Whether you’re an experienced DIY enthusiast or a newbie to home repairs, mastering this skill will come in handy time and time again.
In this blog post, we’ll guide you through the process of blending wood filler with stain, one step at a time. We’ll cover everything from selecting the right colors to applying the mixture for a perfect finish. By the end of this post, you’ll be able to make your wooden surfaces look as good as new without breaking the bank on professional repairs.
So let’s dive into the art of blending wood filler with stain and get ready to impress yourself (and others.) with your newfound skills.
What is Wood Filler?
Contents
Wood filler is a remarkable material that helps to transform rough, uneven, and damaged wood surfaces into smooth, polished works of art. It is a putty-like substance made of wood fibers and binders like epoxy or vinyl that is used to fill gaps, cracks, and holes in wood surfaces. With its ability to create a seamless finish, wood filler is an essential material for any woodworking project.
One of the significant advantages of wood filler is that it comes in various colors, including natural wood tones. This allows it to blend in with the surrounding wood surface, making it ideal for covering up imperfections and creating a flawless finish. It can be used on unfinished or stained wood surfaces to create a smooth surface for staining or painting.
There are two types of wood fillers: solvent-based and water-based. Solvent-based fillers are made with solvents such as lacquer thinner, while water-based fillers are made with water. Water-based fillers are more eco-friendly and easier to clean up than solvent-based fillers. Therefore, it’s important to choose the correct color and type of wood filler for your project to ensure the best results.
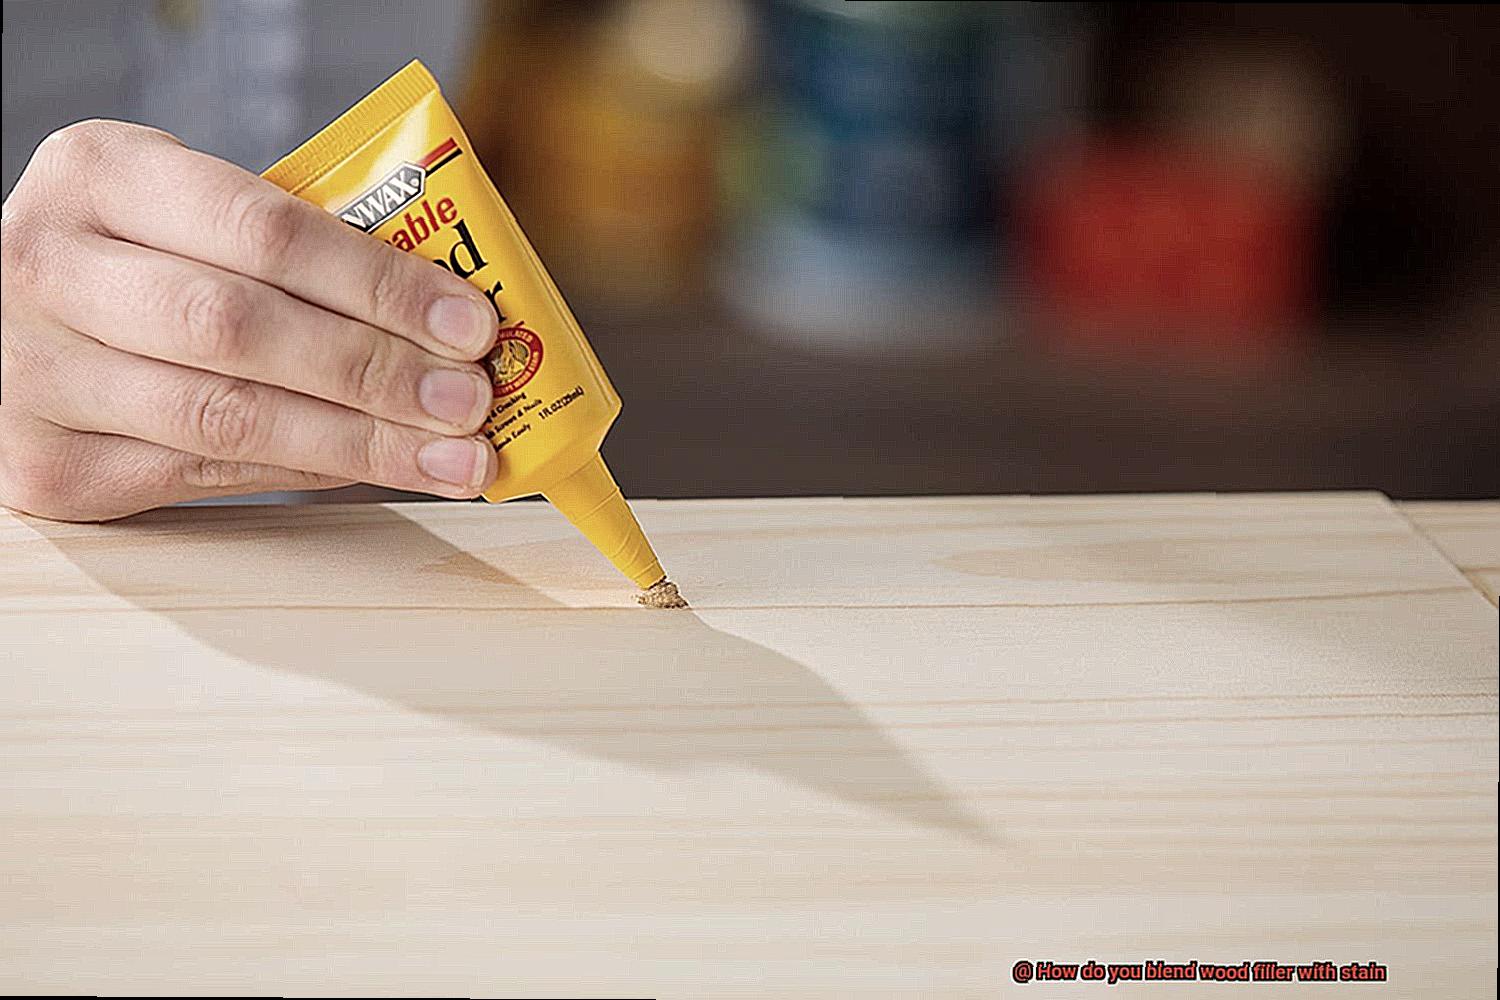
To apply wood filler, start by preparing the surface by sanding it down to remove any dirt or debris. Then, using a putty knife, apply the wood filler to the damaged area, making sure to fill in all gaps and cracks completely. Allow the filler to dry according to the manufacturer’s instructions before sanding it down again until it’s smooth and level.
Once the wood filler has dried, blending it with stain is crucial for achieving a seamless finish. To do this, mix small amounts of stain at a time until you achieve the desired color. Add a small amount of stain to the wood filler and mix it thoroughly until it’s evenly distributed. Pay close attention to the grain patterns of the surrounding wood when applying the mixture using a brush or sponge applicator. Blend in any excess stain until it’s evenly distributed, then allow it to dry completely.
Types of Wood Fillers
When it comes to repairing wooden surfaces, using wood filler is a must. But what happens when you need to blend it with stain to achieve a seamless finish? In this blog post, we will discuss how to blend wood filler with stain like a pro.
Selecting the Right Type of Wood Filler and Stain:
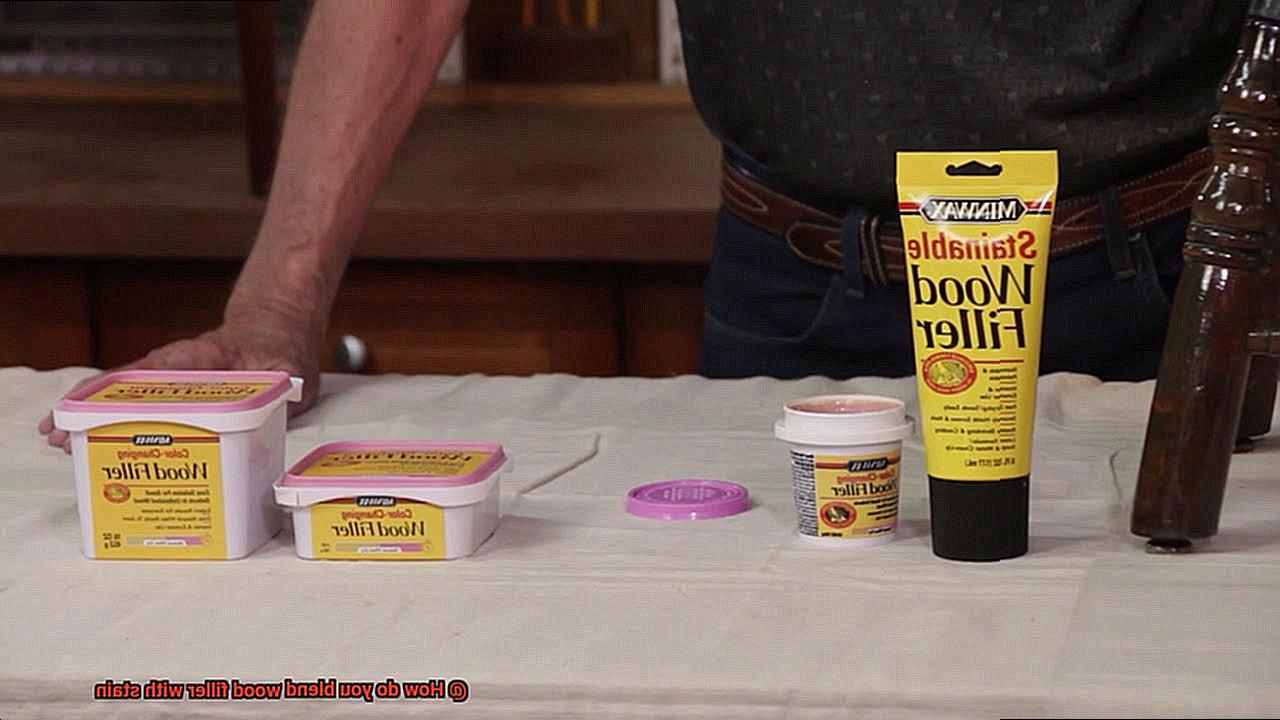
The first step in blending wood filler with stain is selecting the right type of wood filler and stain for your project. Water-based, solvent-based, epoxy-based, wood putty, and two-part wood fillers are available, each with its advantages and disadvantages. You should also choose a stain that matches the color of the surrounding wood.
Preparing the Surface:
Preparing the surface is essential when working with wood fillers. Sand down the damaged area to remove any dirt or debris before applying the wood filler. A clean surface ensures better adhesion and a smoother finish.
Applying the Wood Filler:
Using a putty knife, apply the wood filler to the damaged area, filling in all gaps and cracks completely. Depending on the type of wood filler you are using, allow it to dry according to the manufacturer’s instructions before sanding it down until it’s smooth and level.
Mixing the Stain:
To achieve a perfect match, mix small amounts of stain at a time until you reach the desired color. Add a small amount of stain to the wood filler and mix it thoroughly using a putty knife or mixing tool until it’s evenly distributed. It’s best to test the color on an inconspicuous area before applying it to the entire surface.
Applying the Stain:
When blending wood filler with stain, pay close attention to the grain patterns of the surrounding wood. Use a brush or sponge applicator to apply the mixture in long strokes that follow the grain pattern. Blend in any excess stain until it’s evenly distributed, then allow it to dry completely. If the color is not quite right, repeat the mixing and application process until you achieve the desired result.
Finishing Touches:
After the stain has dried completely, apply a coat of protective finish such as varnish or polyurethane to protect the surface from wear and tear. This will also give your repaired surface a polished look.
Preparing the Surface for Blending
If you’re looking to achieve a professional-looking finish when blending wood filler with stain, it all starts with properly preparing the surface. By following a few simple steps, you can ensure that your woodwork has a seamless and flawless finish.
Firstly, it’s essential to clean the surface thoroughly. Use a soft-bristled brush or a vacuum to remove any dust or debris that may be present. This step ensures that your blending process starts on a clean slate.
Next up is sanding. Sanding the surface until it’s smooth and even is crucial for opening up the pores of the wood, allowing for better absorption of the stain and wood filler. If there are any raised or rough areas, use a sanding block or sandpaper to smooth them out.
Once you’re done sanding, wipe down the surface with a damp cloth to remove any remaining dust particles. It’s important to wait until the surface is completely dry before proceeding to the next step.
If you’re working with bare wood, applying a pre-stain conditioner is highly recommended. This conditioning step helps to prevent blotching by evening out the absorption of the stain.
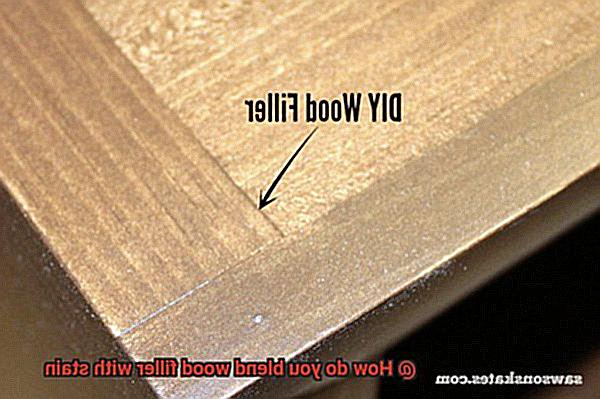
Finally, if your wood filler isn’t already tinted, mix it with some of the stain to match the surrounding wood’s color. Make sure to mix thoroughly until you achieve a smooth consistency without any lumps.
Choosing the Right Stain
Then, choosing the right stain is crucial when blending wood filler with stain.
But, how do you choose the perfect stain? Let’s start with the basics. There are different types of stains available in the market – oil-based, water-based, and gel stains. Each has its unique benefits and drawbacks. Oil-based stains are popular because they provide a deep and rich color that penetrates deeply into the wood. Water-based stains are ideal for those who want a quick-drying stain with low VOC emissions. Meanwhile, gel stains are thicker and more viscous than other types, making them perfect for vertical surfaces.
Now, let’s move on to the type and condition of the wood you’re working with. Different woods absorb stains differently, and some may not take stain well at all. Moreover, old or weathered wood may require a different type of stain than new, untreated wood. So, take note of these factors before choosing your stain.
Once you’ve considered the type and condition of the wood, it’s time to test your chosen stain on a small area of the wood. Testing on an inconspicuous area like the underside of a table or chair is recommended. By doing so, you can ensure that the color and finish match your desired outcome. If the color is too light, you can always apply more coats until you achieve your desired shade.
To summarize, choosing the right stain is crucial in blending wood filler with stain. Always consider the type and condition of the wood and test your chosen stain beforehand. With these things in mind, achieving a professional-looking and seamless finish is within your reach. Happy woodworking.
Mixing the Stain and Wood Filler
First and foremost, selecting a wood filler that matches the color of the wood you are working with is key. This will ensure that the final result looks natural and blends in with the surrounding wood. Once you have chosen your wood filler, it’s essential to prepare the surface by sanding it down and removing any debris or dust. This step is critical because it helps the wood filler adhere better to the surface.
Now it’s time to apply the wood filler using a putty knife, making sure to fill any gaps or holes evenly before letting it dry completely. Once the wood filler has dried, it’s time to move on to the mixing stage.
When mixing the stain and wood filler, be sure to use a stain that is compatible with your chosen wood filler. Pour out some of the stain into a separate container and add small amounts of wood filler at a time, stirring continuously until you achieve a smooth consistency. Mixing thoroughly is crucial to ensure that your final product comes out exactly how you want it.
Once you have achieved your desired consistency, it’s time to apply the mixture evenly over the surface of the wood using a brush or rag. Working in small sections is best, as it allows you to apply light pressure to ensure that the mixture seeps into all the crevices and gaps. This step is essential because it helps create an even finish that looks professional and seamless.
After allowing the mixture to dry completely, it’s time to sand down any excess material and buff the surface for a smooth finish. Sanding down any excess material is important because it ensures that your final product has no rough patches or uneven surfaces.
Applying the Mixture to the Surface
As a woodworking aficionado, you know that applying the mixture of wood filler and stain to the surface is the final step in restoring and staining wood. The process requires precision, care, and attention to detail to achieve a seamless finish that blends in with the surrounding wood.
To begin, ensure that the surface is clean and dry before combining the wood filler and stain. Once you have mixed them well, you can start applying the mixture to the damaged area using a putty knife or scraper. Spread it out evenly and fill all cracks and holes completely for an even application.
Afterward, use your putty knife or scraper to smooth out the surface carefully, making sure it is level with the rest of the wood. Take your time during this step to achieve a flawless finish that looks professional.
Once you have applied the mixture, allow it to dry completely following the manufacturer’s instructions. This step might take a few hours or even overnight, depending on the product you are using. After it has fully dried, use sandpaper to gently sand the surface until it is smooth and level with the surrounding wood.
Finally, add a protective finish over the repaired area such as varnish or polyurethane. The topcoat will safeguard the wood from future damage while giving it a polished look.
Blending in Excess Stain
Even the most experienced woodworker may end up with excess stain on the surface, which can be frustrating. But fear not, blending in excess stain is a simple process that can help you achieve a perfect finish.
To start, wait for the stain to dry completely. This step is crucial as working with wet stain can cause more harm than good. Once the stain is dry, use a clean cloth or rag to wipe away any excess on the surface.
But what if there’s still residue left? Don’t worry, it’s time to bring out the sandpaper. Using a fine-grit sandpaper, gently sand the surface in circular motions. Take your time and check your progress frequently to avoid removing too much of the stain and leaving an uneven finish.
If sanding doesn’t do the trick, try using a wood stain conditioner. This product helps even out the color and remove any blotchiness caused by excess stain. Apply the conditioner according to the manufacturer’s instructions and allow it to dry completely before proceeding with staining.
But what if you’re still not happy with the results? Applying a second coat of stain may be your last resort. However, be cautious not to apply too much as this will result in an overly dark finish. Apply the second coat carefully and evenly, making sure to blend it in with the existing stain.
Remember that blending in excess stain takes patience and attention to detail. Rushing through this process will only lead to disappointing results. Take your time and follow these steps carefully for a beautiful finish on your wood project.
In conclusion, blending in excess stain is an easy process that anyone can do with the right tools and techniques. Here’s a quick recap:
- Wait for the stain to dry completely
- Use a clean cloth or rag to wipe away any excess
- Sand the surface gently in circular motions
- Try using a wood stain conditioner
- Apply a second coat of stain as a last resort, but be careful not to apply too much
Finishing Touches
Today, we will delve into the art of blending wood filler with stain to create a seamless and smooth finish that will leave your projects looking like they were made by a pro.
To achieve a flawless finish, it all starts with selecting the right type of wood filler. You want to choose a filler that matches the species and tone of the surrounding wood. Once you’ve applied the filler and allowed it to dry, it’s time to gently sand the surface to create an even finish.
Now, the real fun begins – applying stain. Whether you opt for a brush or rag, make sure to apply the stain in smooth, even strokes. Take your time and work in small areas, avoiding overlapping too much as this can cause uneven coloration. It’s important to allow the stain to dry for at least 24 hours before assessing whether more coats are needed.
Once you’ve achieved your desired coloration, it’s time to protect your hard work with a topcoat. A clear coat of varnish or polyurethane will not only preserve your finished surface but also enhance its natural beauty. Plus, it will help guard against scratches and general wear and tear.
In summary, blending wood filler with stain requires patience, attention to detail, and a willingness to experiment until you achieve the desired results. To make things easier, here’s a quick checklist:
- Choose the right type of wood filler
- Gently sand the surface after applying the filler
- Apply stain in small areas using smooth and even strokes
- Allow stain to dry for at least 24 hours before assessing if more coats are needed
- Protect your finished surface with a clear coat of varnish or polyurethane
ns5CxiVx_ds” >
Conclusion
As a DIY enthusiast or woodworking professional, blending wood filler with stain is a skill you can’t afford to overlook. With the right approach, tools, and patience, you can transform damaged wooden surfaces into flawless masterpieces that look as good as new.
The process of blending wood filler with stain involves several critical steps. First, select the appropriate type of wood filler and stain for your project. Next, prepare the surface by sanding it down to ensure maximum adhesion. Then apply the mixture evenly over the damaged area and allow it to dry completely before sanding down any excess material.
Choosing the right stain is also crucial in achieving a professional-looking finish. Take into account factors such as the type and condition of your wood before testing your chosen stain on an inconspicuous area.
Blending in excess stain requires patience and attention to detail. Rushing through this process will only lead to disappointing results. Take your time and follow these steps carefully for a beautiful finish on your wood project.
In conclusion, mastering the art of blending wood filler with stain is essential for any woodworking project. By following these simple steps, you can achieve a flawless finish that will leave your wooden surfaces looking like they were crafted by an expert.