Picture this: you’ve just finished renovating your kitchen and installed a stunning new sink. You’re feeling pretty accomplished – you did your research, found the perfect sink, hired a pro to install it, and even splurged on a fancy faucet. But hold up, have you thought about using silicone to secure your sink in place?
If you’re not familiar with silicone, it’s a trusty adhesive that plumbers use all the time. It’s flexible, durable, and waterproof – basically everything you want when it comes to securing your sink. However, the question still remains: can silicone really hold your sink in place for good? Or do you need extra tools and techniques to keep it from wobbling around?
In this blog post, we’re going to dive deep into the world of silicone and its crucial role in sink installation. We’ll explore how effective silicone really is at keeping your sink steady as a rock, and give you some insider tips and tricks to ensure your sink stays put for years to come. So whether you’re a DIY enthusiast or a seasoned plumber, keep reading to learn all about the fascinating world of silicone adhesive and sink installation.
Benefits of Using Silicone to Hold a Sink in Place
Contents
- 1 Benefits of Using Silicone to Hold a Sink in Place
- 2 Factors to Consider When Using Silicone Adhesives
- 3 Quality Matters: Choosing the Right Silicone Adhesive for Installing a Sink
- 4 Preparing the Surface for Maximum Bond Strength
- 5 Additional Tips for Installing a Sink with Silicone Adhesive
- 6 Common Mistakes to Avoid When Using Silicone Adhesives
- 7 Troubleshooting Common Problems With Silicone Adhesives
- 8 Alternative Methods for Securing a Sink in Place
- 9 Conclusion
Installing a sink can be a daunting task, but with the right adhesive, it doesn’t have to be. Many professionals and DIYers alike prefer using silicone to hold a sink in place. And for good reason – silicone offers numerous benefits over other methods.
Strength and Durability
Silicone is an incredibly strong adhesive that can withstand a considerable amount of pressure and weight. This makes it ideal for securing a sink, as it can support the weight of the sink and resist any movement or shifting. And unlike other adhesives that may become brittle over time, silicone remains flexible even after curing. It can absorb any movement or vibration without cracking or breaking, ensuring a secure hold for years to come.
Water-Resistance
Silicone is also highly water-resistant, which is essential in a wet environment such as a sink. It can withstand exposure to water without deteriorating, which means it will maintain its strength and hold for years to come. This is particularly important in areas prone to moisture and high temperatures like kitchens and bathrooms.
Ease of Application
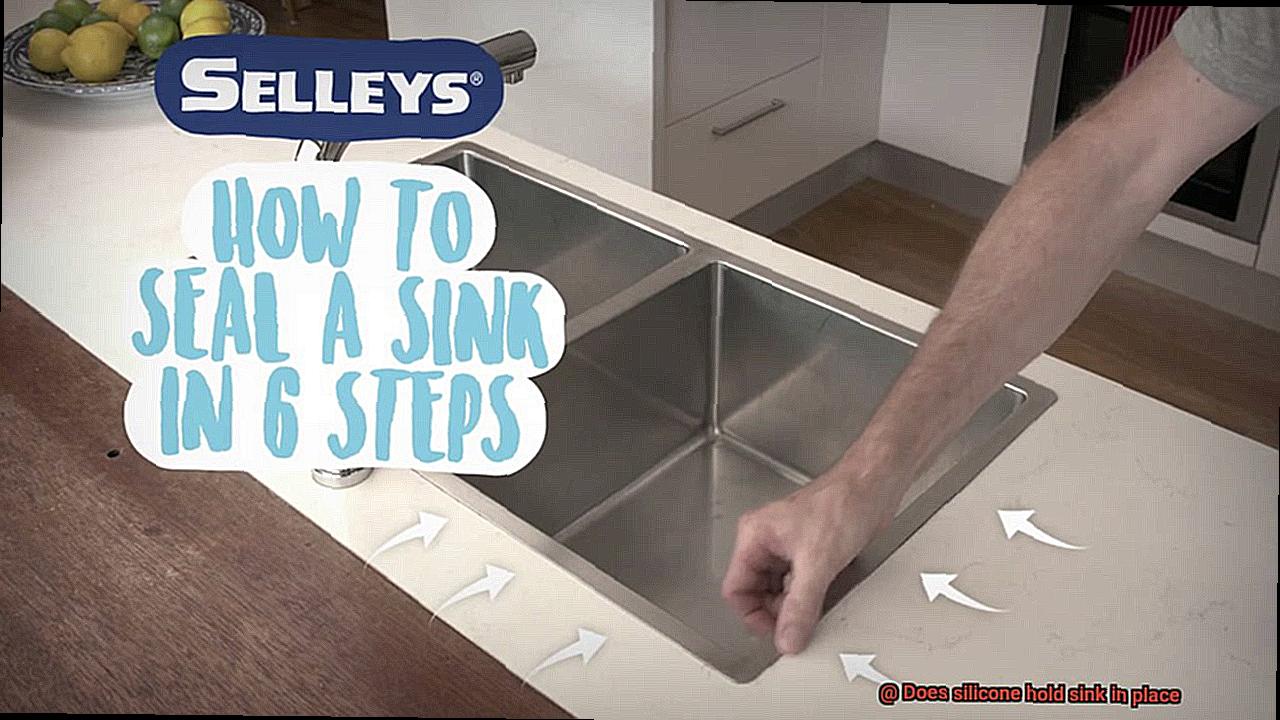
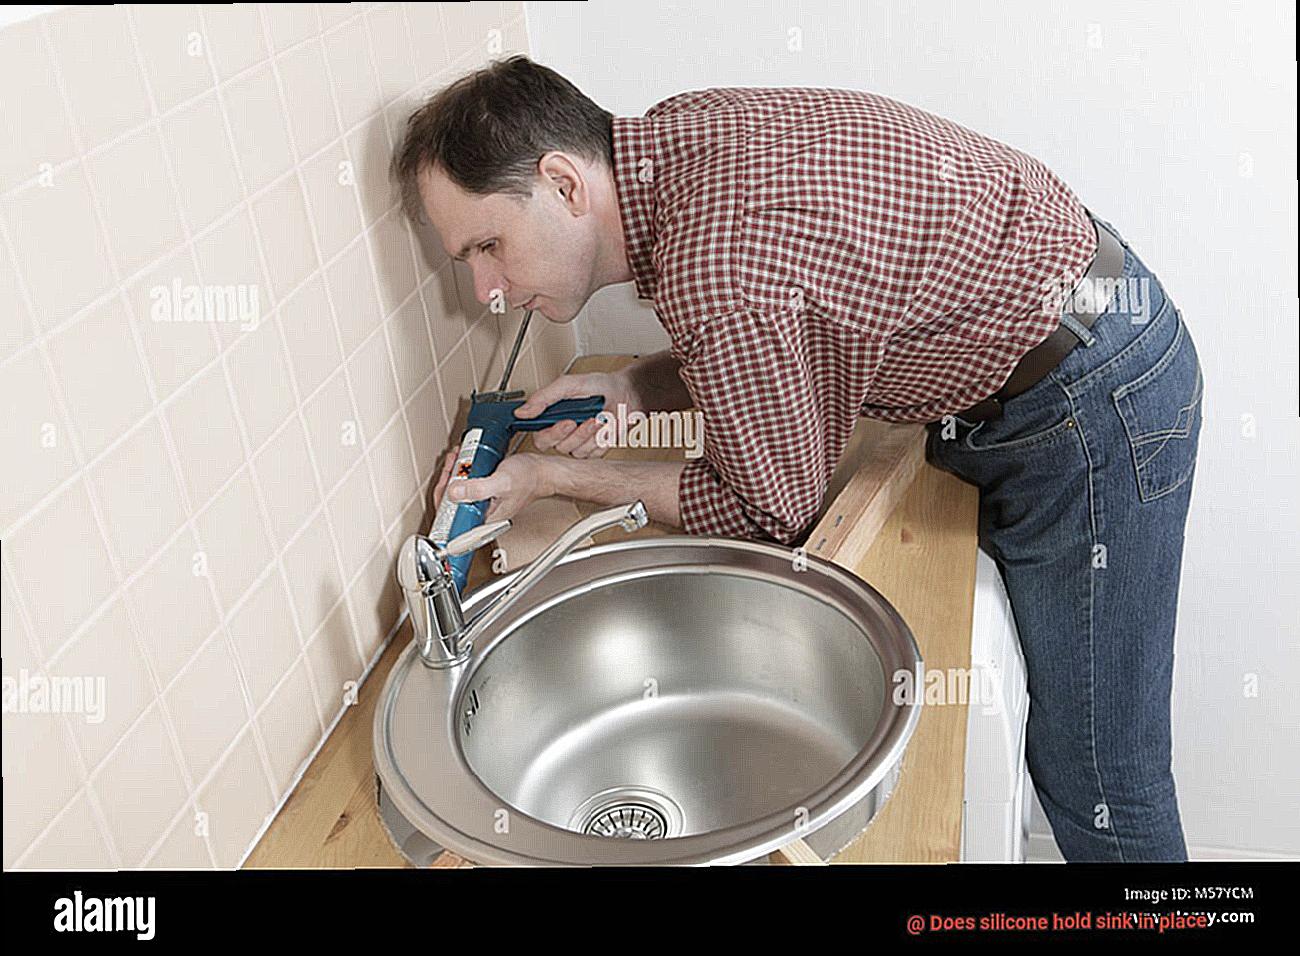
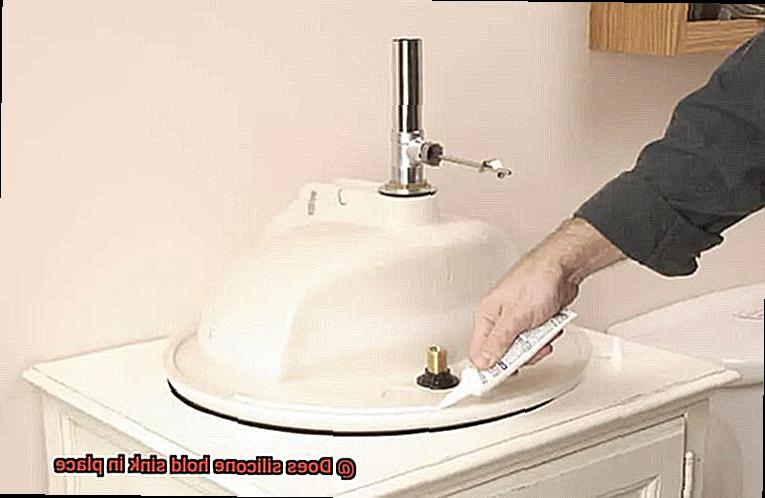
One of the biggest benefits of using silicone to hold a sink in place is how easy it is to apply. The process requires minimal tools and expertise. Simply apply a continuous bead of silicone around the perimeter of the sink, then lower the sink into place. Once the silicone has cured, the sink is securely held in place.
Versatility
Silicone can be used to secure all types of sinks, including stainless steel, porcelain, and ceramic. It also works well with any type of countertop material, including granite, quartz, and laminate. This versatility makes it an excellent choice for anyone looking to install or replace a sink.
Quality Matters
However, not all silicone adhesives are created equal. It is essential to use a high-quality silicone adhesive that is specifically designed for use with sinks to ensure that it can withstand the weight of the sink over time. Otherwise, the sink may become loose and pose a safety risk.
Surface Preparation
Another important factor to consider when using silicone to hold a sink in place is surface preparation. Silicone adheres best to clean, dry surfaces. So, before applying the adhesive, it is crucial to thoroughly clean and dry both the sink and the countertop or cabinet. Any oils or residues left on the surface can weaken the bond and cause the sink to become loose over time.
Factors to Consider When Using Silicone Adhesives
Installing a sink can be a daunting task, and choosing the right adhesive is crucial. Silicone adhesives are a popular choice for their strength, water-resistance, and versatility. However, using the wrong type or applying it incorrectly can lead to disastrous results. To ensure a secure and long-lasting bond, there are several factors to consider when using silicone adhesives.
First and foremost, surface preparation is key. The surface where the sink is being installed must be clean, dry, and free from any contaminants. Any dirt, grease, or moisture can interfere with the bonding process and weaken the adhesive’s hold. A thorough cleaning is essential to ensure proper adhesion.
Another factor to consider is the type of sink being installed. Silicone adhesives work best with non-porous surfaces such as ceramic, porcelain, or stainless steel. If you’re installing a sink made of a porous material like marble or granite, it may require a different type of adhesive or installation method. It’s important to research and choose the appropriate adhesive for the specific sink material.
The temperature and humidity levels of the installation area also play a critical role in the effectiveness of silicone adhesives. The ideal temperature range is between 60-80 degrees Fahrenheit, with humidity below 50%. High humidity can slow down the curing process of the adhesive and affect its strength. It’s important to take these factors into consideration when planning your installation.
Choosing the right type of silicone adhesive is also crucial. There are several options available in clear, white, and colored varieties. Clear adhesives are perfect for use on transparent or light-colored surfaces while white or colored adhesives are better suited for darker or more opaque surfaces. It’s important to choose the right one for your project to ensure a seamless finish.
Finally, following the manufacturer’s instructions carefully is essential when using silicone adhesives. Applying the adhesive in a continuous bead around the edge of the sink and allowing it to cure fully before using the sink is critical. Rushing this process can result in a weaker bond and potentially cause the sink to come loose over time.
Quality Matters: Choosing the Right Silicone Adhesive for Installing a Sink
Installing a sink can be a daunting task, but using the right silicone adhesive can make all the difference in ensuring a strong and long-lasting bond. Not all silicone adhesives are created equal, and choosing the wrong one can lead to a sink that isn’t securely in place. That’s why it’s important to consider quality when selecting a silicone adhesive for sink installation.
To start, let’s talk about the type of silicone. There are two main types of silicone used for sink installation: acetoxy-cure and neutral-cure. Acetoxy-cure silicone is less expensive and more commonly used, but it releases acetic acid as it cures, which can damage some surfaces and cause discoloration over time. On the other hand, neutral-cure silicone is more expensive but doesn’t release any harmful byproducts, making it a better choice for sinks that will come into contact with delicate surfaces.
Once you’ve selected the type of silicone, it’s important to consider strength and flexibility. A good silicone adhesive should provide a strong bond between the sink and countertop while also allowing for some flexibility to accommodate any movement or shifting over time. Look for an adhesive that has a high tensile strength and elongation rating to ensure that your sink stays securely in place.
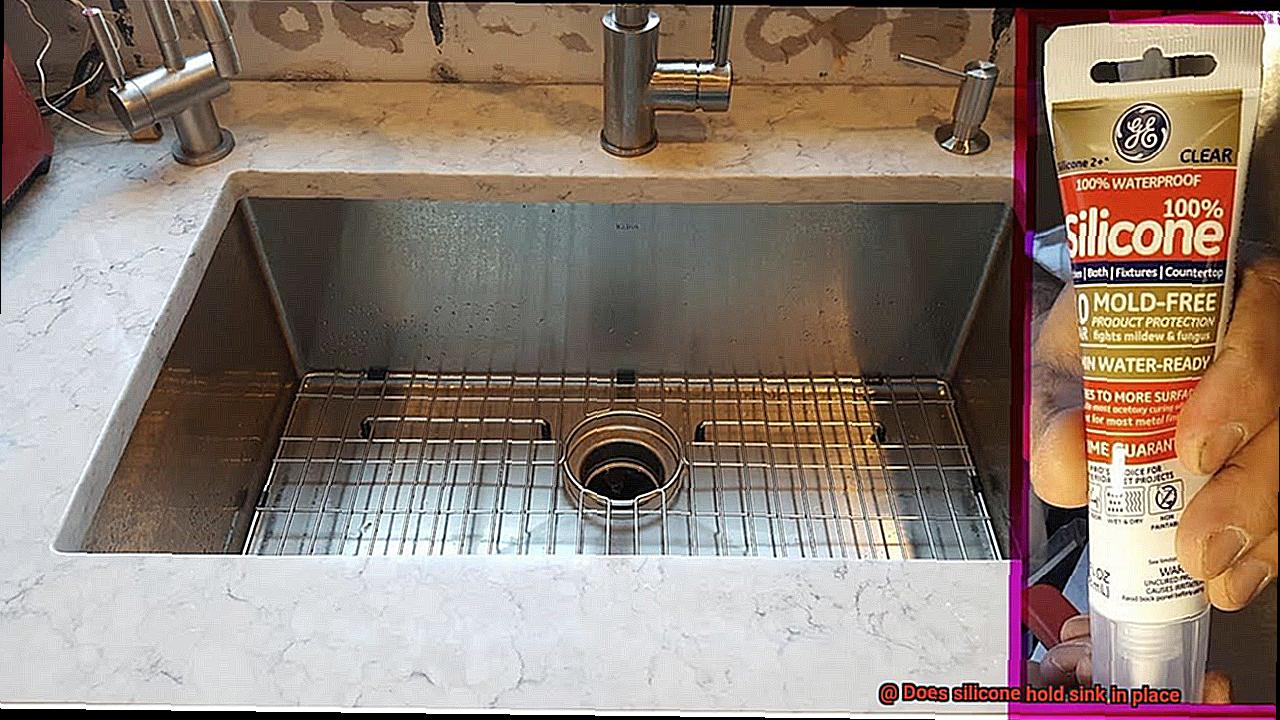
In addition to strength and flexibility, it’s crucial to choose a silicone adhesive that is waterproof and resistant to mold and mildew growth. Sinks are constantly exposed to water, which can cause damage over time if the adhesive isn’t up to par. Look for an adhesive that is specifically marketed as waterproof and mold-resistant to ensure that your sink stays clean and hygienic.
Lastly, although seemingly minor, consider the color of the silicone adhesive. Using an adhesive that matches the color of your sink or countertop can create a more polished and professional-looking installation.
Preparing the Surface for Maximum Bond Strength
Before you dive into the exciting world of silicone adhesives, it’s important to take a step back and focus on preparing the surface for maximum bond strength.
To begin with, the surface needs to be clean, dry, and free of any debris or contaminants that could hinder the bond. Removing any old caulk or adhesive using a caulk removal tool or a razor blade is the first step. Don’t forget to wear gloves and protective eyewear for safety.
Once the old caulk is removed, give the area a good scrub with a non-abrasive cleaner and brush. Be sure to pay extra attention to the edges where the sink will be placed as this is where most of the weight will be distributed. Rinse thoroughly with water and allow it to dry completely before moving on to the next step.
If you’re working with a porous surface like natural stone or concrete, you may need to use a bonding agent or primer. Applying this agent before silicone will create a stronger bond between the surface and silicone. This step should never be skipped as it could be the difference between a sink that stays put and one that wobbles around every time you wash dishes.
Before applying the silicone, ensure that your sink is properly supported and level. Use shims or blocks to ensure that everything is in the right position. Trust us; you don’t want to finish installing your sink only to realize it’s lopsided.
Overall, taking the time to properly prepare the surface will pay off in the long run. You’ll have a strong and secure bond between your sink and silicone adhesive, which means you can enjoy your new sink without worrying about it coming loose or wobbling around.
In summary, here’s what you need to do:
- Remove old caulk or adhesive
- Clean the area thoroughly
- Use a bonding agent or primer for porous surfaces
- Ensure the sink is properly supported and level before applying silicone
Additional Tips for Installing a Sink with Silicone Adhesive
Installing a sink with silicone adhesive can be a great way to ensure a tight, waterproof seal that lasts for years. However, to ensure a successful installation, there are some additional tips that you should consider. Here are five sub-sections that will guide you through the process.
Prepare the Surface
Before applying the silicone adhesive, it is essential to prepare the surface where the sink will be installed. This means thoroughly cleaning and drying the area, ensuring it is free from any debris or residue. Use a mild detergent and water to clean the surface and dry it thoroughly with a clean cloth.
Apply Silicone Adhesive in a Continuous Bead
When applying the silicone adhesive, use a caulking gun to ensure an even and consistent application. Apply the adhesive generously along the entire perimeter of the sink, leaving no gaps or spaces. It’s also recommended to apply a second bead of silicone around the underside of the sink rim for added support.
Allow Ample Time for Drying and Curing
Once the sink is in place, it’s important to allow the silicone adhesive ample time to dry and cure before using the sink. This can take anywhere from 24 to 48 hours, depending on the type of silicone adhesive used and the humidity levels in the room. Avoid using the sink until you’re sure that it’s dried completely.
Check for Movement Periodically
After installation, periodically check the sink to ensure that it remains securely in place. If any movement or shifting is detected, additional silicone adhesive may need to be applied to reinforce the bond between the sink and countertop.
Use High-Quality Silicone Adhesive
Not all silicone adhesives are created equal, so it’s important to use a high-quality silicone adhesive specifically designed for sink installation. This will ensure maximum adhesion and durability. Choose a brand that’s recommended by professionals or has good reviews.
Common Mistakes to Avoid When Using Silicone Adhesives
Installing a sink with silicone adhesive may seem like an easy task, but it requires careful attention to detail to ensure that the sink is securely held in place. Unfortunately, there are some common mistakes that people tend to make when using silicone adhesives, which can lead to problems down the line. In this article, we’ll discuss some of the most common mistakes to avoid when using silicone adhesives to hold a sink in place.
The first mistake that people often make is not cleaning the surfaces properly. To ensure a strong bond, it’s crucial to clean the surfaces thoroughly and remove any dirt, grease, or other contaminants. If you skip this step, the adhesive may not bond correctly, and the sink may not be securely held in place. So, before applying the adhesive, make sure you use a degreaser or rubbing alcohol to clean the surfaces properly.
Another mistake that people often make is using too much adhesive. While it may seem like using more adhesive will make the sink more secure, using too much adhesive can actually do more harm than good. When too much adhesive is used, it takes longer for it to dry and cure, which can result in the sink shifting or moving before the adhesive has fully set. So, use just enough adhesive to hold the sink in place without going overboard.
Applying the adhesive incorrectly is also a common mistake that people tend to make. It’s essential to apply the silicone adhesive in a consistent and even manner, ensuring there are no gaps or areas where the adhesive is thicker or thinner than elsewhere. You should apply it in a continuous bead around the edge of the sink for an even distribution. Don’t rush the process; take your time and apply it carefully.
Finally, not giving the adhesive enough time to dry is another common mistake. Silicone adhesives take time to dry and cure fully, so it’s essential to give them enough time before using the sink or putting any weight on it. Rushing this process can result in the adhesive not bonding correctly, leading to the sink coming loose over time. Depending on the specific product being used, it may take up to 24 hours or more for the adhesive to fully cure and dry.
Troubleshooting Common Problems With Silicone Adhesives
Problems can arise during the installation process that can cause headaches and frustration. As an expert in troubleshooting common problems with silicone adhesives, I want to provide some helpful tips to ensure your sink stays securely in place.
One of the most common issues that arise during installation is improper surface preparation. Before applying silicone adhesive, make sure the surface of the sink and countertop is clean, dry, and free from any debris or grease. A dirty surface can prevent the adhesive from bonding correctly, leading to a wobbly sink that won’t hold water.
Another issue that can cause problems is not giving enough time for the adhesive to cure. Waiting at least 24 hours before using the sink after applying silicone adhesive is recommended. Rushing this step can cause the sink to shift or move out of place, which is not only frustrating but also potentially dangerous.
Proper application of the silicone adhesive is also crucial. Apply it evenly and in a consistent manner, making sure not to use too much. Excess squeeze-out can create an unsightly appearance and be difficult to remove. It’s also essential to avoid smearing the adhesive as this will create an uneven bond.
Temperature and humidity can also affect the performance of silicone adhesives. If it’s too cold or too hot, the adhesive may not cure properly. Similarly, if the humidity is too high, it may take longer for the adhesive to cure. Be mindful of these factors when installing your sink.
Alternative Methods for Securing a Sink in Place
If you’re tired of using the same old silicone to secure your sink in place, fret not because there are a variety of alternative methods available that can provide just as much stability and support. In this article, we’ll be discussing some of the best alternative methods for securing a sink in place.
Adhesive Foam Tape:
Adhesive foam tape is a strong and durable option that is ideal for securing sinks. It can be easily applied to the underside of the sink before being pressed firmly in place against the countertop. This type of tape creates a robust bond between the sink and the countertop, preventing any movement or wobbling.
Mounting Brackets or Clips:
Mounting brackets or clips are another secure option to keep your sink in place. These are typically installed on the underside of the sink and then secured to the countertop using screws or bolts, creating a sturdy base for your sink. This method ensures that your sink remains firmly in its position, without any unwanted movement.
Plumber’s Putty:
For those looking for a more traditional approach, plumber’s putty is an ideal solution. While typically used to create a watertight seal around pipes and fittings, it can also be used to secure sinks. Simply apply a small amount of putty around the edges of the sink before placing it on top of the countertop. The putty will harden over time and create a strong bond between the sink and the countertop.
Conclusion
To sum it up, silicone adhesive is a reliable and flexible option for anchoring your sink in place. Its robustness, endurance, water resistance, ease of use, and versatility have made it a popular choice among professionals and DIY enthusiasts alike. However, to ensure maximum bond strength and longevity when using silicone adhesive, there are several factors to consider.
Proper surface preparation, selecting the appropriate type of silicone adhesive, allowing sufficient time for drying and curing, checking for movement regularly, and avoiding common mistakes can all contribute to a successful installation. Moreover, alternative methods like adhesive foam tape, mounting brackets or clips, and plumber’s putty can provide equal stability and support.
When it comes to sink installation with silicone adhesive or any other approach, quality is paramount. Using high-quality products specifically designed for sink installation can prevent safety hazards and ensure a long-lasting bond between the sink and countertop.