Imagine this: after hours of hard work, your DIY project is finally complete. You can’t wait to show off your masterpiece. But there’s one problem that’s sticking out like a sore thumb – those stubborn dried-up spots of Gorilla Glue clinging onto your surfaces.
Whether it’s on your precious wooden furniture, tiles, or even your favorite pair of jeans, don’t panic just yet. The burning question remains: how do you effectively get rid of these seemingly permanent adhesive stains?
Fear not. In this all-inclusive guide, we’re here to spill the secrets on banishing dried Gorilla Glue for good. With a treasure trove of tips and tricks at our disposal, we’ll explore tried-and-tested techniques and game-changing DIY concoctions that will restore your surfaces’ former glory.
Our journey will take us through a range of remedies, from household solvents to heat application and mechanical methods. But that’s not all – we’ll also uncover some lesser-known alternatives like natural and eco-friendly solutions for those with sensitive skin or environmental concerns.
Get ready to bid farewell to those unsightly adhesive residues that haunt your dreams. Armed with expert insights, you’ll gain the knowledge and confidence needed to tackle the challenge of removing Gorilla Glue head-on. Prepare yourself for a mesmerizing transformation as your surfaces reclaim their original shine.
Join us on this remedial escapade as we discover the definitive solution to removing dried Gorilla Glue. Unlock a world of possibilities and say goodbye once and for all to that sticky nightmare.
What is Gorilla Glue?
Contents
- 1 What is Gorilla Glue?
- 2 How to Remove Dried Gorilla Glue Using Mechanical Means
- 3 How to Remove Dried Gorilla Glue Using Heat
- 4 How to Remove Dried Gorilla Glue Using Chemical Solvents
- 5 How to Remove Dried Gorilla Glue from Fabric and Clothing
- 6 How to Remove Dried Gorilla Glue from Delicate Surfaces Such as Glass and Electronics
- 7 Tips for Preventing Accidental Drying of Gorilla Glue
- 8 Conclusion
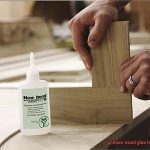
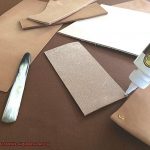
When it comes to bonding materials with unparalleled strength and durability, one name stands above the rest – Gorilla Glue. Since its introduction to the market in 1999, this adhesive has become a go-to choice for DIY enthusiasts, craftsmen, and professionals alike. In this article, we will delve into the fascinating world of Gorilla Glue, exploring its unique features and why it has gained such popularity in various projects.
The Formidable Formula:
At the heart of Gorilla Glue lies a formidable formula that combines polyurethane, water, and other chemicals. This powerful concoction creates an adhesive with exceptional bonding power that can withstand extreme temperatures, moisture, and vibrations. From wood to metal, stone to ceramics, glass to foam – there’s no material that Gorilla Glue can’t firmly unite.
Expand and Conquer:
Prepare to be amazed by one of Gorilla Glue’s standout features – its ability to expand while it cures. This remarkable expansion allows the adhesive to fill in gaps and create a bond that is both powerful and reliable. No matter the project at hand, Gorilla Glue can adapt to different surfaces and conquer any challenge.
Forms for Every Need:
Gorilla Glue offers a range of forms to cater to different project requirements. Liquid glue provides versatility for intricate applications, while gel glue offers control and precision. And for those quick fixes or temporary bonds, look no further than Gorilla Tape. Whichever form you choose, rest assured that Gorilla Glue’s strength and reliability remain consistent.
Clear and Paintable:
Who says strong adhesives can’t be aesthetically pleasing? Not Gorilla Glue. This adhesive dries clear, ensuring that your hard work remains visually appealing. And the best part? It becomes paintable once fully cured, allowing you to seamlessly integrate it into any visible or hidden application.
Proper Application for Optimal Results:
To unlock the full bonding strength of Gorilla Glue, it is crucial to follow the instructions provided by the manufacturer. The adhesive requires moisture to activate and achieve its full potential. By dampening one surface before applying the glue, you ensure proper curing and an unbreakable bond that will withstand the test of time.
How to Remove Dried Gorilla Glue Using Mechanical Means
Dried Gorilla Glue can be a stubborn foe, but don’t despair. As an expert in the art of removing this formidable adhesive using mechanical means, I’m here to share some invaluable tips that will make the process a breeze. With a little patience and the right techniques, you’ll bid farewell to dried Gorilla Glue and restore your surfaces to their former glory. Let’s dive in and conquer this adhesive beast.
The Mighty Warrior: Scraping
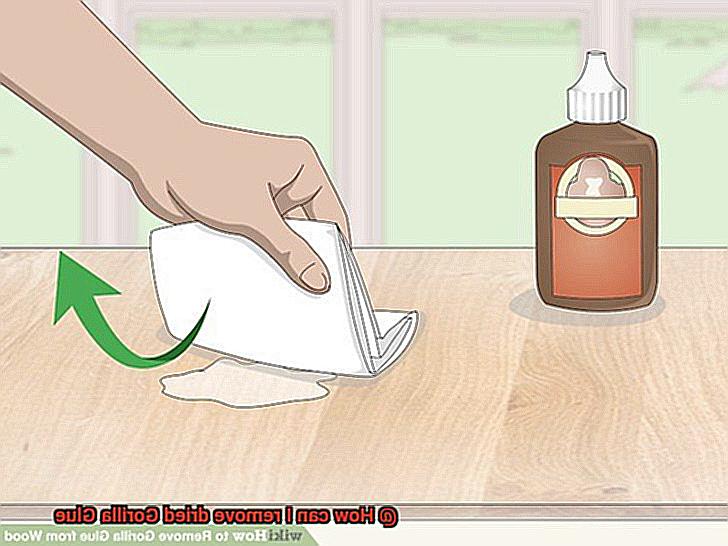
When it comes to battling dried Gorilla Glue, scraping is your trusted ally. Armed with a sharp putty knife or scraper, position the tool at an angle against the glue and begin gently chipping away at it. Be careful not to harm the underlying surface, especially if it’s delicate or prone to scratches. This technique works wonders on hard surfaces like metal or plastic, where the glue’s grip is no match for your scraping prowess.
The Magic Touch: Sanding
For larger areas of dried Gorilla Glue, sanding is a powerful technique that yields impressive results. Equip yourself with fine-grit sandpaper or a sanding block and delicately rub the surface of the glue in a back-and-forth motion. Gradually, the hardened glue will wear down, becoming thinner until it ultimately dissolves. Exercise caution to avoid applying excessive pressure that could cause unintended damage.
The Houdini Trick: Heat
Heat is a formidable weapon in your arsenal when combating dried Gorilla Glue. Unleash the power of a hairdryer or heat gun set at its highest temperature to soften the adhesive. Keep the heat source a few inches away from the glue and skillfully move it around in circular motions. As the glue warms up, its tenacious grip weakens, allowing you to effortlessly scrape it off or wipe it away with a cloth.
The Relaxing Retreat: Soaking
If you find yourself grappling with dried Gorilla Glue on fabric or clothing, fear not. Soaking is your tranquil solution. Fill a container with warm, soapy water (avoid boiling) and immerse the affected area for approximately 30 minutes. The gentle combination of heat and moisture works its magic, softening the glue and making it more pliable for removal. Armed with a scrub brush or old toothbrush, gently agitate the fabric, watching in satisfaction as the stubborn glue loosens its grip.
How to Remove Dried Gorilla Glue Using Heat
In this comprehensive guide, we will dive into the world of heat and how it can effectively soften dried Gorilla Glue. So grab your tools and get ready to say goodbye to unwanted adhesive.
The Heat Duo
When it comes to removing dried Gorilla Glue, two heroes emerge: the hairdryer and the heat gun. These powerful tools deliver intense heat that can soften even the toughest adhesive. To begin, set your hairdryer on its highest heat setting or use a heat gun on low heat. Hold the heat source a safe distance from the glue and move it back and forth to evenly distribute the heat. Caution is key here, as overheating may cause damage.
Gentle Precision: Scraping Away the Glue
As the heat begins to work its magic, arm yourself with a plastic scraper or an old credit card. With steady hands, gently scrape away the softened glue. Remember, using non-metallic tools is essential to protect the surface underneath from scratches or damage. If the glue starts to harden again, reapply the heat and continue scraping until all traces are gone.
Embrace Warmth: The Hot Water Method
Don’t have a hairdryer or heat gun? No problem. Hot water can also come to your rescue when removing dried Gorilla Glue. Fill a bowl with hot water that is not boiling, but still hot enough to soften the adhesive. Submerge the affected area in the hot water for several minutes, allowing the warmth to penetrate and loosen the glue. Once softened, use a plastic scraper or old credit card to gently scrape away the glue.
Patience Prevails: Slow and Steady Wins the Race
Removing dried Gorilla Glue using heat requires a healthy dose of patience. Rushing the process or applying excessive force can lead to surface damage or injury. Take your time, repeat the heating and scraping steps as necessary, and soon enough, all traces of the glue will vanish. Remember, slow and steady wins the race.
The Final Touch: Post-Glue Residue
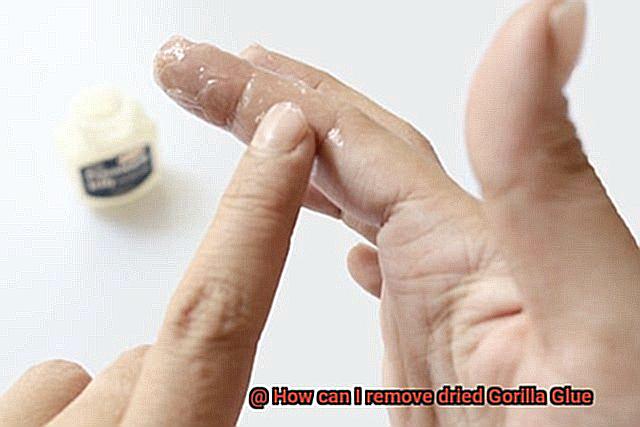
After successfully removing the dried Gorilla Glue, you may encounter some stubborn residue. But fear not, for we have a solution. Dab a small amount of acetone or nail polish remover onto a cotton ball or cloth. Gently rub the affected area, being cautious not to oversaturate the surface and cause discoloration or damage. Finally, wipe away any excess residue with a clean cloth.
How to Remove Dried Gorilla Glue Using Chemical Solvents
The secret lies in the power of chemical solvents. In this guide, we will delve into the realm of chemical solvents and reveal their prowess in effortlessly removing dried Gorilla Glue while keeping your surfaces unharmed. Prepare to bid farewell to stubborn adhesives.
The Mighty Acetone: The Ultimate Adhesive Vanquisher
When it comes to battling dried Gorilla Glue, acetone emerges as the undisputed hero. This solvent possesses a unique ability to break down the adhesive properties of the glue, rendering it vulnerable and easy to remove.
However, before embarking on your adhesive eradication mission, exercise caution by conducting a small patch test in an inconspicuous area to ensure compatibility with the surface.
Once you’ve established compatibility, soak a clean cloth or cotton ball with a small amount of acetone and gently massage the affected area in circular motions. Behold as the glue succumbs, softens, and ultimately disappears. For more tenacious glue residues, repeated applications may be necessary.
Safety First: Protecting Yourself from the Unknown
As you prepare to engage in battle against dried Gorilla Glue using chemical solvents, remember that safety should always take precedence. Acetone emits potent fumes; hence, it is crucial to work in a well-ventilated area to safeguard your respiratory system. Furthermore, donning protective gloves shields your hands from both strong solvents and potential mishaps during the removal process. By prioritizing safety, you ensure a victorious and unharmed outcome.
Alternatives to Acetone: A Multitude of Options
Should acetone elude your grasp at the moment of need, fear not, for other chemical solvents can offer a helping hand. Nail polish remover and paint thinner present viable alternatives; however, be aware that these substitutes may require more persistence and repeated applications to achieve desired results. Remember to test these solvents on a small, discreet area of the surface to ascertain their compatibility before proceeding with full-scale removal.
Time and Patience: The Virtues of Successful Removal
Removal of dried Gorilla Glue demands time and patience. After applying your chosen chemical solvent, grant it ample time to work its magic. Allow it to permeate the glue for approximately 10-15 minutes, adjusting the duration based on the glue’s thickness. During this intermission, prepare yourself for the astonishing sight of glue effortlessly detaching from the surface before your eyes.
How to Remove Dried Gorilla Glue from Fabric and Clothing
Gorilla Glue, known for its strong bond and versatility, can be a nightmare when it accidentally ends up on fabric or clothing. Removing dried Gorilla Glue requires quick action and the right techniques to avoid causing damage. In this article, we will provide detailed instructions on how to effectively remove dried Gorilla Glue from fabric and clothing.
Step 1: Carefully Scrape off Excess Glue
To start, gently scrape off any excess dried Gorilla Glue using a blunt object like a spoon or butter knife. Be cautious not to tear or snag the fabric while doing this. Take your time and carefully remove as much of the dried glue as possible.
Step 2: Apply Heat to Soften the Glue
Next, apply heat to soften the remaining dried glue. Place a clean cloth over the glue and use a low-heat iron to gently warm the area. The heat will soften the glue, making it easier to remove. Be careful not to overheat or scorch the fabric; short bursts of heat are better than prolonged exposure.
Step 3: Peel Off the Softened Glue
After heating the glue, try peeling it off gently using your fingers or a pair of tweezers. If the glue doesn’t come off easily, don’t force it. Proceed to the next step instead.
Step 4: Dab with Acetone or Nail Polish Remover
To further loosen the dried Gorilla Glue, apply a small amount of acetone or nail polish remover onto a clean cloth or cotton ball. Before using it on the affected area, test the acetone on a small, inconspicuous part of the fabric to ensure it doesn’t cause any discoloration or damage. Gently dab the acetone-soaked cloth onto the dried glue stain, allowing it to penetrate and soften the adhesive. Avoid vigorous rubbing, as it can spread the glue further into the fabric fibers.
Step 5: Launder Fabric as Usual
Once the glue has softened, gently scrape it off with a blunt tool. Repeat the process if necessary until all traces of glue are removed. After successfully removing the dried Gorilla Glue, launder the fabric as usual to eliminate any residual acetone or alcohol.
How to Remove Dried Gorilla Glue from Delicate Surfaces Such as Glass and Electronics
When Gorilla Glue dries on delicate surfaces like glass or electronics, it can be a daunting task to remove without causing damage. This article provides safe and effective methods to remove dried Gorilla Glue from these delicate surfaces, ensuring their integrity remains intact.
Isopropyl Alcohol:
Isopropyl alcohol is a tried and true solution for removing dried Gorilla Glue from glass and electronics.
Soak a clean cloth or cotton ball with isopropyl alcohol and gently dab the affected area.
Allow the alcohol to work its magic for a few minutes, softening the glue.
Then, using a soft cloth or sponge, gently rub the glue in circular motions until it begins to loosen. Repeat the process until all traces of glue are gone.
Acetone (for glass surfaces only):
Acetone, commonly found in nail polish removers, is another effective solvent for dissolving dried Gorilla Glue. However, exercise caution as acetone should only be used on glass surfaces and not electronics, as it can damage delicate components.
Dampen a clean cloth with acetone and carefully dab it onto the glue.
Give it a few minutes to work its magic before gently rubbing the glue in circular motions. Be mindful not to exert too much pressure, as this could scratch the glass surface.
Warm Soapy Water:
For more delicate surfaces like electronics, using warm soapy water is a safer alternative.
Fill a basin or bowl with warm water and add a few drops of mild dish soap. Dip a soft cloth or sponge into the soapy water, ensuring it’s not overly saturated.
Carefully dab the cloth onto the dried Gorilla Glue, allowing the soapy water to penetrate for a few minutes. Gently rub the glue in circular motions, repeating the process until the glue is fully removed.
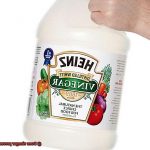
Vinegar:
Vinegar, a household staple, can also be used to remove dried Gorilla Glue from delicate surfaces. Moisten a cloth or cotton ball with white vinegar and apply it to the affected area. Let the vinegar sit for a few minutes, allowing its acidity to break down the glue. Gently rub the glue in circular motions until it loosens. Once the glue is removed, wipe away any residue with a clean cloth.
Plastic Scraper:
In cases where dried Gorilla Glue proves particularly stubborn, a plastic scraper can be a useful tool for careful removal without surface damage. Ensure that the scraper is made of plastic and not metal, as metal can cause scratching. Slowly and gently scrape off the glue, applying minimal pressure to avoid any damage. Once most of the glue has been removed, utilize one of the aforementioned methods to clean off any remaining residue.
Tips for Preventing Accidental Drying of Gorilla Glue
Gorilla Glue is renowned for its strong adhesive properties, making it an ideal choice for bonding various materials together. However, accidental drying of this powerful glue can be a challenge to rectify. To ensure a successful adhesive application without any unwanted consequences, it is crucial to follow these essential tips for preventing accidental drying.
Thoroughly Understand and Follow Instructions:
To start off on the right foot, always take the time to carefully read and fully understand the instructions provided by the manufacturer. These instructions contain valuable information about proper application techniques and recommended drying times. By following them meticulously, you can use Gorilla Glue with confidence and minimize the risk of accidental drying.
Create a Well-Ventilated Workspace:
When working with Gorilla Glue, prioritize your safety by setting up in a well-ventilated area. The fumes emitted during the drying process can be potent and potentially harmful if inhaled in excessive amounts. Ensuring proper ventilation not only protects your health but also reduces the chances of accidentally spreading the glue onto unintended surfaces due to air currents.
Shield Your Skin with Protective Gloves:
Protective gloves are an indispensable accessory when handling Gorilla Glue. Not only do they shield your hands from potential irritation or allergic reactions caused by direct contact with the adhesive, but they also serve as a barrier that prevents accidental spreading or drying on your skin. By wearing gloves throughout your project, you significantly reduce the risk of unwanted glue mishaps.
Safeguard Surrounding Surfaces:
Before commencing your project, take proactive measures to safeguard nearby surfaces that could come into contact with Gorilla Glue. Covering these areas with a drop cloth, newspaper, or any other protective material acts as a barrier, effectively preventing accidental spills or drips from bonding to unintended surfaces. This simple step can save you significant time and effort in cleanup.
Work Swiftly and Precisely:
The rapid drying properties of Gorilla Glue necessitate a swift and efficient approach to your project. Plan your steps ahead of time, ensuring that you have all the necessary tools and materials readily accessible. By working with precision and purpose, you reduce the likelihood of accidental drying due to delays or extended exposure to air.
Seal the Container Tightly:
Proper storage of Gorilla Glue is paramount in preventing premature drying. After each use, meticulously clean the nozzle by wiping off any excess glue and tightly seal the container with its cap. This crucial step ensures that the remaining adhesive maintains its effectiveness and prevents wastage due to accidental drying.
QYmZSDjLQ9A” >
Conclusion
Removing dried Gorilla Glue can be a daunting task, but fear not.
There are several effective methods you can try. One option is to use acetone, a powerful solvent that can break down the glue’s bond.
Simply soak a cloth or sponge in acetone and gently rub it on the affected area. Another method is to apply heat to the glue using a hairdryer or heat gun.
The heat will soften the glue, making it easier to scrape off with a plastic scraper or credit card. If these methods don’t work, you can also try using rubbing alcohol or vinegar as alternative solvents.
Just remember to test them on a small, inconspicuous area first to ensure they won’t damage the surface.