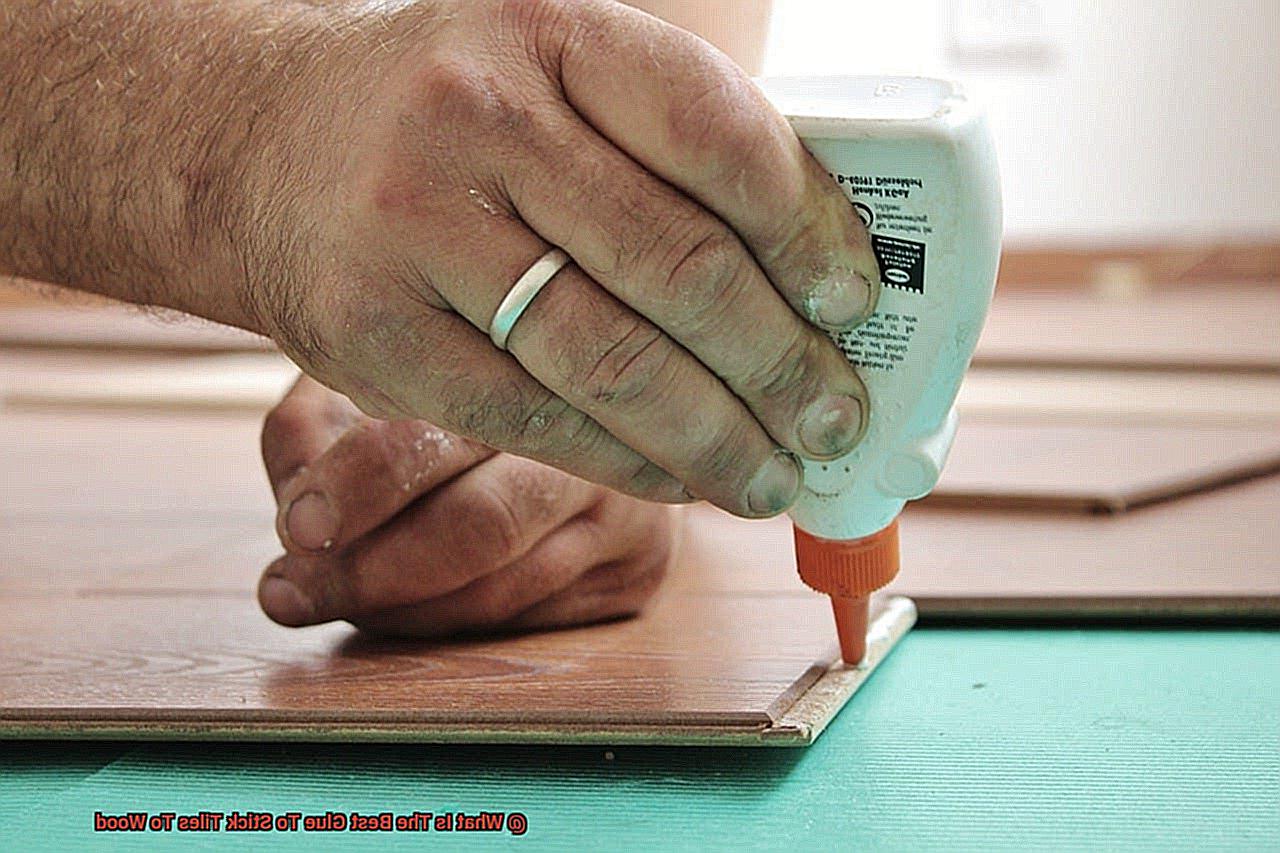
Imagine this: You’ve spent hours dreaming up the perfect fusion of hardwood floors and jaw-dropping ceramic tiles for your living room. The colors, patterns, and overall aesthetic come together flawlessly in your mind’s eye. But there’s one obstacle standing in your way – finding the best glue to stick tiles to wood.
Fear not, my fellow flooring enthusiasts. I’m about to spill the beans on a secret that will revolutionize your approach to this task. Prepare yourself for a game-changing adhesive formula that effortlessly bonds tiles to wood, creating a connection so strong it defies time and moisture.
After years of tireless research and countless experiments, adhesive experts have cracked the code. They’ve developed a glue that doesn’t just stick tiles to wood; it creates an unbreakable bond capable of withstanding temperature fluctuations, heavy foot traffic, and even spills.
But what sets this adhesive apart from the rest? Its exceptional qualities lie in its ability to strike a harmonious balance between flexibility and strength. This magical potion is designed to absorb stress and structural movements, ensuring a rock-solid connection that will stand the test of time.
In this blog post, we’re lifting the curtain on the best glue for sticking tiles to wood. We’ll dive deep into its remarkable characteristics that make it a cut above the competition. From essential factors to consider before embarking on your flooring journey to foolproof application techniques for flawless results – we’ve got you covered.
So buckle up for this adhesive adventure as we unveil the secrets behind achieving a tile-to-wood bond that surpasses mere stickiness. Get ready to be blown away by the endless possibilities as your home transforms into an awe-inspiring symphony of elegance and craftsmanship.
What Factors to Consider When Choosing the Best Glue for Tiles and Wood
Contents
- 1 What Factors to Consider When Choosing the Best Glue for Tiles and Wood
- 2 Epoxy Adhesive: Pros and Cons
- 3 Polyurethane Construction Adhesive: Pros and Cons
- 4 Modified Thin-Set Mortar: Pros and Cons
- 5 Specialized Tile-to-Wood Adhesives: Pros and Cons
- 6 Tips for Selecting the Right Glue for Your Project
- 7 Preparing the Surface Before Applying Glue
- 8 Applying Glue Properly to Ensure Durability and Longevity of Bond
- 9 Conclusion
When it comes to sticking tiles to wood, selecting the perfect glue is essential for a strong and durable bond. With a wide range of options available, finding the right glue can be overwhelming. In this comprehensive guide, we will explore the key factors to consider when choosing the best glue for tiles and wood. From bonding strength to compatibility, drying time to waterproof properties, and ease of use to cost, we’ve got you covered.
Factor 1: The Type of Glue
- Epoxy adhesive, construction adhesive, and tile adhesive are all viable options.
- Each type has its own strengths and weaknesses.
- Consider the specific requirements of your project before making a decision.
Factor 2: Bonding Strength
- Look for a glue that creates a strong and durable bond between tiles and wood.
- Consider the weight and stress that may be applied to the tiles over time.
- Ensure the glue can withstand these factors without compromising the bond.
Factor 3: Compatibility
- Ensure the glue is compatible with both the tiles and the wood surface.
- Incompatible glues may lead to weak bonds or failure.
- Check the manufacturer’s recommendations for compatibility before purchasing any glue.
Factor 4: Drying Time
- Consider the drying time of the glue.
- Quick-drying glues are ideal for time-sensitive projects.
- Slower drying glues allow for better adjustments and positioning of the tiles.
Factor 5: Waterproof Properties
- Choose a glue with waterproof properties if installing tiles in moisture-prone areas.
- Prevent water damage and maintain a strong bond in wet conditions.
Factor 6: Ease of Use
- Consider how easy the glue is to work with.
- Some glues require mixing before application, while others are ready-to-use.
- Check for any specific application requirements, such as temperature or humidity conditions.
Factor 7: Cost
- Consider your budget when selecting the best glue.
- Prices can vary significantly depending on the brand and type of glue.
- Find a balance between high-quality and affordable options.
Epoxy Adhesive: Pros and Cons
When it comes to sticking tiles to wood, epoxy adhesive is the go-to choice, and for good reason. This two-component adhesive, consisting of a resin and a hardener, creates a bond that is not only strong but also long-lasting.
Let’s start with the pros. One of the standout advantages of epoxy adhesive is its exceptional strength. It’s like having the Incredible Hulk on your side – capable of withstanding heavy loads and high impact without breaking a sweat. So if you want a bond that can handle whatever you throw at it, epoxy adhesive is your best bet.
But it’s not just about strength; epoxy adhesive also boasts impressive resistance to moisture and temperature changes. While other glues may weaken or degrade when exposed to water or extreme temperatures, epoxy adhesive stays strong. This makes it the perfect choice for areas like bathrooms or kitchens, where humidity and temperature fluctuations are common.
Durability is another feather in epoxy adhesive’s cap. Its excellent chemical resistance means it can withstand the harsh chemicals found in household products without losing its bond integrity. So go ahead, clean away – your tiles will stay securely attached.
Now let’s talk about aesthetics. Once cured, epoxy adhesive creates a seamless and smooth finish. No more unsightly gaps or seams to ruin the beauty of your tiles and wood. Instead, you’ll have a professional-looking bond that lets the natural elegance of your materials shine through.
Of course, no product is perfect, and epoxy adhesive does have its downsides. One drawback is its relatively long curing time. Compared to other glues, epoxy adhesive requires several hours, or even days, to reach its maximum strength. So if you’re working on a tight deadline or need immediate use or installation, this might not be the best option for you.
Another con is that working with epoxy adhesive can be a bit challenging. Precise mixing of the resin and hardener in the correct proportions is essential for proper curing and bonding. And be prepared for a bit of mess – epoxy adhesive can be a bit tricky to clean up if you’re not careful.
Last but not least, let’s address the cost. Epoxy adhesive tends to be pricier than other glues, but there’s a reason for that. Its superior bonding properties and durability make it worth the investment for projects that require a strong and long-lasting bond.
Polyurethane Construction Adhesive: Pros and Cons
Polyurethane construction adhesive is the go-to choice for sticking tiles to wood, and for good reason. Let’s explore the pros and cons of using this adhesive for tile installations.
Pros:
- Strong bond: When it comes to bonding tiles to wood surfaces, polyurethane construction adhesive is a force to be reckoned with. It forms a robust and durable bond, ensuring that your tiles stay firmly in place even in high-traffic areas. Say goodbye to loose or shifting tiles.
- Water resistance: Polyurethane adhesive is a superhero when it comes to resisting water. This makes it perfect for tile installations in wet areas like bathrooms and kitchens. It can withstand exposure to moisture without compromising the bond between the tiles and wood. No more worrying about water damage.
- Flexibility: Wood surfaces have a tendency to expand or contract due to changes in temperature or humidity. Thankfully, polyurethane adhesive has some flexibility to accommodate these movements. It can absorb minor shifts or vibrations without cracking or breaking, keeping your tiles intact and crack-free.
- Versatility: If you’re working with different tile materials and wood types, polyurethane construction adhesive has got you covered. It adheres well to various tile materials such as ceramic, porcelain, glass, and natural stone. It also works great with different types of wood, making it suitable for a wide range of tile-to-wood applications.
Cons:
- Time-consuming curing process: Patience is key when using polyurethane adhesive. It requires sufficient time to fully cure and achieve its maximum strength. Depending on factors like temperature and humidity, the curing process can take anywhere from 24 to 72 hours. So plan your project accordingly and resist the urge to rush.
- Difficult to remove: Once polyurethane adhesive is fully cured, removing it without damaging the wood or tiles becomes a challenge. This can be problematic if you ever need to replace or repair individual tiles in the future. Make sure you’re happy with your tile placement before the adhesive sets.
- Strong odor: Let’s address the elephant in the room – the strong odor that polyurethane construction adhesive emits during the curing process. It’s not the most pleasant smell, to say the least. To minimize exposure to these fumes, it’s best to use this adhesive in a well-ventilated area.
Modified Thin-Set Mortar: Pros and Cons
Are you ready to transform your wooden surfaces with the elegance of tiled flooring? Look no further than modified thin-set mortar, the ultimate adhesive superhero for this task. This remarkable adhesive offers a wide array of benefits that make it the perfect choice for sticking tiles to wood surfaces. In this captivating article, we will delve into the pros and cons of using modified thin-set mortar, enabling you to make an informed decision for your next tiling project.
Pros:
Unyielding Bonding Strength:
Say goodbye to worries about tiles coming loose or popping off over time. Modified thin-set mortar is specifically engineered to create an unbreakable bond between tiles and wood substrates. With its modified properties, this adhesive can withstand the stresses and movements associated with wooden surfaces, guaranteeing a durable and long-lasting installation.
Defiant Moisture Resistance:
Wood surfaces are notorious for their vulnerability to moisture damage. But fear not. Modified thin-set mortar contains ingenious additives that enhance its water resistance, making it the ideal choice for moisture-prone areas like bathrooms and kitchens. Bid farewell to concerns about water seeping through and causing your tiles to detach.
Agile Flexibility:
Uneven wood surfaces or slight imperfections can create challenges during tile installation. However, modified thin-set mortar comes to the rescue. Its remarkable flexibility allows it to fill in gaps and adapt to irregularities on the wood surface. The result? A flawlessly level and aesthetically pleasing tile installation that will leave you in awe.
Indestructible Impact Resistance:
Don’t let heavy foot traffic or accidental impacts tarnish the beauty of your tiled wood floors. Modified thin-set mortar boasts unparalleled impact resistance, ensuring that your tiles remain securely attached even under the harshest conditions. No more fretting about cracked or loose tiles – this adhesive has got you covered.
Cons:
Preparation Prerequisites:
To unlock the full potential of modified thin-set mortar, proper preparation is a must. The wood surface must undergo meticulous cleaning, drying, and elimination of any contaminants that could hinder the bonding process. Additionally, some modified thin-set mortars may require the application of a primer before the adhesive can be used. Although this adds an extra step to the installation process, it guarantees a robust and reliable bond that will stand the test of time.
Specialized Tile-to-Wood Adhesives: Pros and Cons
Are you ready to elevate your wooden floors with the timeless beauty of tiled flooring? Look no further than specialized tile-to-wood adhesives, the superheroes of bonding. These adhesives are specifically engineered to create an unbreakable connection between tiles and wood substrates. In this article, we will explore the captivating pros and cons of using specialized tile-to-wood adhesives, empowering you to make an informed decision for your next tile installation project.
Pro: Unmatched Bond Strength
Prepare to be amazed by the exceptional bond strength offered by specialized tile-to-wood adhesives. Formulated with precision, these adhesives establish an unyielding and enduring bond capable of withstanding heavy foot traffic and other demanding stresses. With these adhesives as your ally, rest assured that your tiles will remain steadfastly in place for years to come.
Pro: Defying Moisture and Humidity
While wood is susceptible to the whims of moisture, specialized tile-to-wood adhesives fearlessly resist its advances. These remarkable adhesives shield against moisture penetration, preserving their integrity and preventing degradation over time. Say goodbye to worries about your tiles losing their grip in areas prone to moisture or humidity.
Pro: Flexibility for Harmonious Movements
Wood, a living material, dances to the rhythm of temperature and humidity changes through expansion and contraction. Specialized tile-to-wood adhesives boast magnificent flexibility, embracing the graceful movements of wood and harmonizing with them effortlessly. This adaptability reduces the risk of unsightly cracks or tiles popping off, allowing your installation to retain its flawless beauty.
Pro: The Heat Endurance Champion
For those seeking to embellish areas near heat sources like fireplaces or radiant heating systems, specialized tile-to-wood adhesives emerge as the undefeated champion. Even in the face of scorching temperatures, these adhesives exhibit unparalleled heat resistance without jeopardizing their bonding strength or integrity. Experience a long-lasting installation that withstands the test of intense heat.
Tips for Selecting the Right Glue for Your Project
Embarking on a project that involves sticking tiles to wood? Fear not. We’ve curated a collection of expert tips to guide you in selecting the perfect glue for your endeavor. From understanding the nuances of different tile types and wood surfaces to considering the location and intended use of your project, we’ve got you covered. Let’s dive in and ensure that your tiles affix to the wood with unwavering strength and precision.
Tailored to Tile Types:
Primarily, ponder upon the specific type of tiles you intend to use. Each tile variety may demand a distinct adhesive approach. Ceramic tiles? Glass tiles? Porcelain tiles? Each warrants careful consideration when selecting the adhesive. For instance, ceramic tiles may necessitate an adhesive formulation unlike that required for glass or porcelain tiles. To be certain, refer to the manufacturer’s recommendations or consult an expert for guidance.
Surface Sensibility:
Next, take into account the nature of the wood surface you’ll be working with. Not all glues adhere uniformly to every type of wood. Unique characteristics of certain woods may call for specialized adhesives. Hence, before making your choice, conduct thorough research or seek advice from an expert to ascertain compatibility between the glue and your wood surface.
Locational Logistics and Intended Use:
Deliberate upon the location and intended use of your project. Will it reside in a high-moisture realm like a bathroom or kitchen backsplash? In such cases, a waterproof adhesive capable of withstanding water and humidity exposure is indispensable. Conversely, if your project occupies a low-moisture domain like a fireplace surround or wall decor, a conventional tile adhesive may suffice.
Unraveling Labels and Instructions:
Unravel the mysteries hidden within labels and instructions affixed to various glues before reaching a decision. The manufacturer’s recommendations proffer invaluable insights into the specific application and suitability of the glue for your project. Adhering to instructions diligently will pave the way for optimal outcomes.
Recommendations and Application Ease:
Harness the wisdom of professionals or seasoned DIYers who have employed specific glues for analogous projects. Their invaluable feedback will illuminate the performance and durability of diverse adhesives. Additionally, contemplate the ease of application and cleanup when selecting your glue. Some glues may necessitate specialized tools or techniques, while others boast user-friendly attributes. Furthermore, consider whether easy removal is of significance in case future alterations or repairs become necessary.
Preparing the Surface Before Applying Glue
In our quest for unwavering strength, we must first delve into the art of surface preparation. By following these expert steps, you will lay the groundwork for a bond that surpasses expectations. Let’s dive in.
Step 1: A Clean Slate
Prepare your wood surface for perfection by banishing dirt and debris. With the flick of a broom or the hum of a vacuum cleaner, bid farewell to loose particles. Then, with the precision of a surgeon, wipe away any lingering dust using a damp cloth. Prepare yourself for a smooth and seamless bond.
Step 2: Smoothing Out Imperfections
Unleash your inner craftsman and conquer imperfections on the wood surface. Run your hand over every inch, identifying rough spots and high points that threaten the harmony of your bond. Fear not; sandpaper is your trusted companion on this journey. With each stroke, transform imperfections into a level playing field for our tiles.
Step 3: Dry as a Bone
Patience becomes your virtue as you await the perfect moment to apply glue. Moisture, like a saboteur in disguise, can compromise your adhesive’s strength. Allow your wood surface to bask in the air until it is completely dry. Only then will you unveil its full potential and create an unbreakable bond.
Step 4: Priming for Success
In some cases, the secret ingredient lies in priming or sealing the wood surface. Embrace this vital step if your wood craves extra protection against moisture’s relentless advances. The primer or sealer acts as an impenetrable shield, warding off any attempts by the glue to be absorbed into the wood. Follow the manufacturer’s instructions with meticulous care, using a brush or roller to coat the wood surface evenly. Remember, patience is your ally as you await the drying process.
Applying Glue Properly to Ensure Durability and Longevity of Bond
Embarking on a tiling project requires more than just picking out the perfect tiles and wood surface. It demands a keen understanding of how to properly apply glue to ensure a bond that can withstand the test of time. From creating a clean and pristine surface to using the right adhesive, this guide will take you through the essential steps that guarantee durability and longevity in your tile-to-wood bond.
Step 1: Cleanliness is Key – A Pristine Canvas for Success
Before even thinking about applying glue, take a moment to appreciate the importance of a clean wood surface. Dust, dirt, and grease can be detrimental to achieving a strong bond. Give your wood surface a thorough cleaning using a mild detergent and water solution or a specially formulated cleaner for wood. This ensures that your tiles have a pristine canvas to adhere to.
Step 2: Test and Choose Your Glue Wisely – No Room for Compromise
Glues are not created equal, especially when it comes to tiling wood surfaces. Testing your chosen adhesive on an inconspicuous area of the wood is crucial. This step allows you to check for any adverse reactions like discoloration or warping. Additionally, consider the specific needs of your project. In high-moisture areas like bathrooms or kitchen backsplashes, opt for a waterproof adhesive for added peace of mind.
Step 3: Follow Manufacturer’s Instructions – Unlocking the Full Potential
One of the most overlooked steps in glue application is heeding the manufacturer’s instructions. Every adhesive has its own set of guidelines, including recommended application methods, curing time, and safety precautions. Take the time to read and understand these instructions thoroughly before diving into your project. By doing so, you maximize the adhesive’s performance and ensure a reliable bond.
Step 4: Spread It Evenly – Building a Solid Foundation
The key to a strong bond lies in an even distribution of adhesive. Utilize a notched trowel or a serrated spreader to create a consistent layer of glue. This technique guarantees that the adhesive reaches every corner, leaving no room for weak spots. By building a solid foundation, you set the stage for a tile-to-wood bond that will stand strong for years to come.
Conclusion
When it comes to sticking tiles to wood, finding the best glue is crucial for a successful and long-lasting bond. With so many options available, it can be overwhelming to choose the right one. But fear not. I’m here to guide you through the process and help you make an informed decision.
One of the top contenders for gluing tiles to wood is epoxy adhesive. This powerful glue offers exceptional strength and durability, ensuring that your tiles stay firmly in place. Its ability to withstand moisture and temperature changes makes it ideal for both indoor and outdoor applications.
Another fantastic option is polyurethane adhesive. Known for its flexibility and resistance to water, this glue forms a strong bond between tiles and wood surfaces. It’s particularly suitable for areas prone to high humidity or frequent exposure to water, such as bathrooms or kitchens.
If you’re looking for a quick and easy solution, consider using construction adhesive. This versatile glue works well on various materials, including wood and tile. Its fast-drying formula allows for efficient installation while providing excellent adhesion.
For those seeking an eco-friendly alternative, there are also tile adhesives made from natural ingredients like linseed oil or cellulose-based compounds. These options are not only environmentally conscious but also deliver reliable performance when adhering tiles to wood surfaces.
In conclusion, choosing the best glue to stick tiles to wood depends on your specific needs and preferences. Whether you prioritize strength, flexibility, ease of use, or environmental friendliness, there’s a perfect adhesive out there for you.