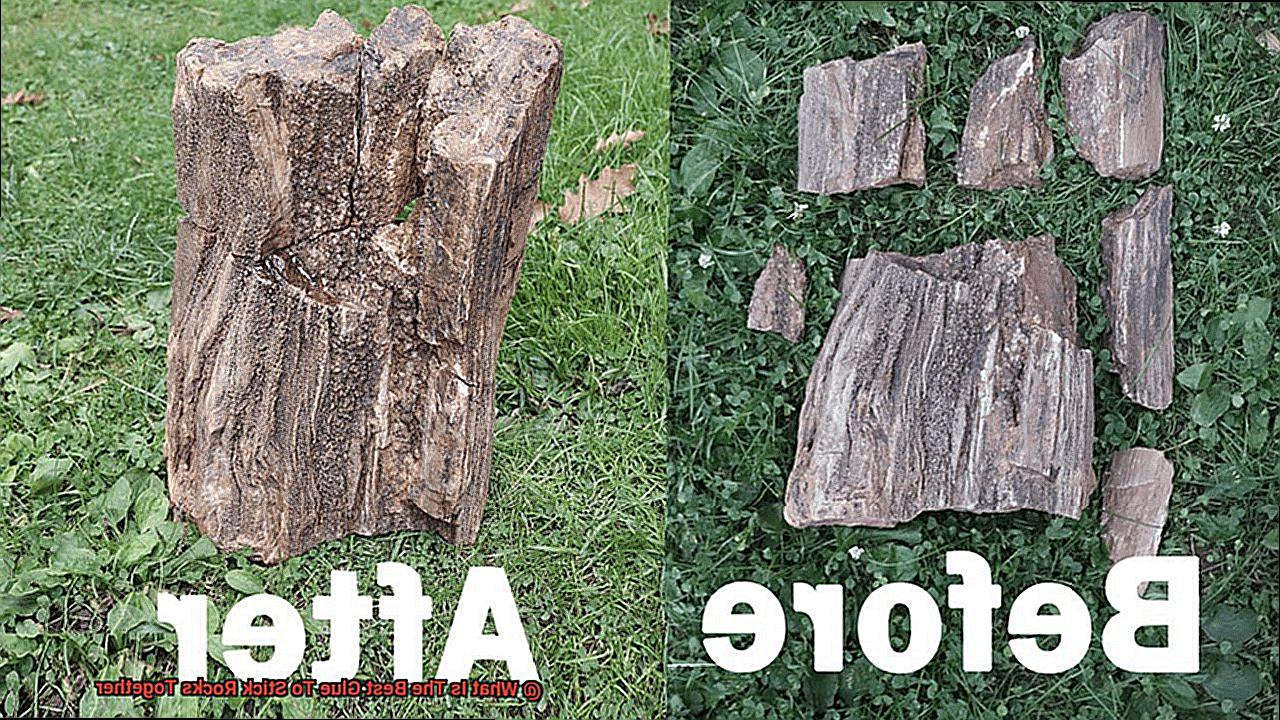
Close your eyes and imagine a mesmerizing tower of rocks, defying gravity with an artistic flair that leaves you breathless. Now, envision that magnificent creation crumbling into a pile of rubble, all because of a feeble adhesive. Heart-wrenching, isn’t it?
Whether you’re an aspiring rock artist or simply yearning to mend geological masterpieces, finding the ultimate glue to stick rocks together is no trivial task. But fear not, fellow adventurers in the realm of rocks. Today, we embark on a thrilling journey to unravel the secrets behind selecting the perfect adhesive—one that can withstand the test of time and nature’s relentless forces.
Now, you might be wondering what makes the best glue for rock bonding truly exceptional. First and foremost, it must possess Herculean strength to defy gravity and weathering. After all, rocks are weighty creatures, and without the right adhesive holding them together, they’ll come crashing down like a flimsy house of cards.
Flexibility is another crucial factor. Rocks are stubbornly rigid by nature, so our chosen adhesive must have the resilience to endure occasional jostling or expansion without cracking or giving way.
Last but not least, efficiency and user-friendliness are paramount—a glue that bonds effortlessly, dries swiftly, and clings tenaciously for eternity.
In the chapters ahead, we will explore an array of adhesives—both natural wonders and synthetic marvels—that have captured the hearts of rock enthusiasts worldwide. From tried-and-true classics like epoxy and superglue to unconventional alternatives like geopolymer cement, we’ll dive deep into their pros and cons to unravel their enchanting bonding wizardry.

So grab your trusty hard hat, dust off your chisel, and get ready to unlock the secrets. Join us as we unveil the best glue to stick rocks together, ensuring your rock formations stand tall and unyielding for all eternity.
What is the Best Glue for Sticking Rocks Together?
Contents
- 1 What is the Best Glue for Sticking Rocks Together?
- 2 Advantages of Epoxy Adhesives
- 3 Selecting the Right Epoxy Adhesive
- 4 Other Glue Options for Sticking Rocks Together
- 5 Cleaning and Drying the Surface Prior to Application
- 6 Applying the Glue in Thin Layers
- 7 Following Manufacturer Instructions for Proper Curing of the Glue
- 8 Conclusion
Embark on a rock-sticking adventure with confidence. Whether you’re creating stunning sculptures or repairing broken rocks, the glue you choose will determine the success and longevity of your project. In this comprehensive guide, we’ll delve into the world of rock adhesives, exploring the best options available and sharing invaluable tips for achieving a bond that stands the test of time.
Epoxy Adhesive: The Rock Solid Choice
When it comes to sticking rocks together, epoxy adhesive reigns supreme. Renowned for its strength and durability, epoxy is the go-to option for bonding rocks. Make sure to select an epoxy adhesive specifically formulated for rocks or stones. These products have a thicker consistency, designed to withstand the weight and pressure exerted by rocks.
Mind the Clock: Drying Time Matters
Time is of the essence. If you’re working on a project with tight deadlines, opt for an epoxy adhesive with a reasonable drying time without compromising on strength. Certain epoxy adhesives require longer curing periods, so be sure to consult the product’s instructions before making your purchase.
Weather Resistance and Waterproofing: A Bond That Braves the Elements
If your glued rocks are destined for the great outdoors, weather resistance and waterproofing become paramount. Choose an epoxy adhesive explicitly labeled as weather-resistant or suitable for outdoor use. Without this protection, exposure to moisture and temperature fluctuations can weaken your bond over time.
Alternative Options: Polyurethane Adhesive
While not as popular as epoxy adhesives, polyurethane-based construction adhesives can also provide a robust bond for sticking rocks together. These adhesives are ideal for outdoor applications and offer resistance to water and other elements. Keep in mind that polyurethane adhesives may take longer to cure compared to their epoxy counterparts.
Surface Preparation: The Foundation for Success
Before diving into the gluing process, ensure your rocks are impeccably clean and dry. Any lingering dirt, dust, or moisture can interfere with the bonding process, leading to a weaker bond. Take the time to thoroughly clean your rocks to guarantee a strong and long-lasting connection.
Advantages of Epoxy Adhesives
Get ready to experience the incredible advantages of using epoxy adhesives for bonding rocks together. From their unbeatable strength to their versatile applications, epoxy adhesives are the rock-solid choice for any project.
First and foremost, epoxy adhesives create an incredibly strong bond between various materials, including rocks. With their high tensile strength and ability to withstand heavy loads, these adhesives ensure that your rocks stay securely bonded. No matter the size or shape of your project, you can trust that the bond will hold strong.
Versatility is another key advantage of epoxy adhesives. They can be used on a wide range of surfaces, including porous materials like rocks. From bonding rocks of different sizes and shapes to adhering them to metals, ceramics, plastics, and wood, epoxy adhesive has got you covered. It’s the ultimate adhesive for all your creative needs.
When it comes to durability, epoxy adhesives are second to none. Once cured, they form a strong and durable bond that is resistant to moisture, chemicals, and temperature fluctuations. This means that your bonded rocks can withstand the elements without losing their integrity. Whether your project is indoors or outdoors, you can rely on epoxy adhesive for long-lasting stability.
But what about those irregularly shaped rocks with uneven surfaces? Don’t worry – epoxy adhesives have the incredible ability to fill gaps between surfaces. This feature is particularly useful when sticking rocks together, as they may not have perfectly flat surfaces. The adhesive fills in these gaps seamlessly, creating a bond that is both strong and aesthetically pleasing.
Time is precious, especially when you’re in the middle of a creative project. That’s why many epoxy adhesives have a relatively quick setting time. They cure and harden rapidly once applied, allowing for efficient bonding of rocks without the need for extended waiting periods. With epoxy adhesive, you can spend more time creating and less time waiting.
If you want your bonded rocks to look as natural as possible, look no further than epoxy adhesives. Some options offer a transparent or clear finish when cured. This means that there are no visible adhesive lines, allowing the natural beauty and color of the rocks to shine through. Your finished project will look seamless and stunning, as if the rocks were always meant to be together.
Selecting the Right Epoxy Adhesive
In our quest to create awe-inspiring rock projects, we must not overlook the crucial step of selecting the right epoxy adhesive. Join us as we delve into the world of epoxy adhesives and explore the essential factors to consider when bonding rocks together. Get ready to elevate your rock projects to new heights.
Factor #1: The Mighty Type of Epoxy Adhesive
In the realm of epoxy adhesives, two contenders reign supreme: two-part epoxy and one-part epoxy. Two-part epoxy adhesives boast unmatched strength and durability but demand a pre-use mixing ritual. On the other hand, one-part epoxies offer convenience with their no-mix formula, though they may sacrifice some bonding power. Choose wisely, based on your project’s specific demands.
Factor #2: Time Waits for No Bond
Timing is everything when it comes to working with epoxy adhesives. The working time grants you precious moments to artfully position and adjust your rocks before the adhesive begins its curing journey. Be sure to select an epoxy adhesive with a working time that allows you ample flexibility to achieve perfection. And remember, patience is key during the curing time – the period it takes for the adhesive to achieve its full strength. Consider a quick-drying epoxy if you’re short on time but never compromise on a rock-solid connection.
Factor #3: A Palette of Colors
If your rock bond will be on display, color compatibility becomes an artistic necessity. Some epoxy adhesives dry clear, allowing your rocks’ natural beauty to shine through without interruption. Others may possess a subtle hue or tint that can harmonize or contrast with your rocks, adding depth and visual appeal. Opt for an epoxy adhesive that blends seamlessly with your rocks’ colors, creating an enchanting bond that captivates the eye.
Factor #4: Unlocking the Secrets of Specialized Formulations
When bonding stones or rocks, ordinary epoxy adhesives won’t cut it. Seek out the hidden gems – specialized formulations designed explicitly for porous and irregular surfaces. These extraordinary adhesives possess enhanced properties that elevate their bond strength and durability on rocks, ensuring your creations withstand the test of time. Embrace the power of a tailor-made epoxy adhesive, crafted to conquer the unique challenges of rock bonding.
Other Glue Options for Sticking Rocks Together
Prepare to be amazed as we embark on an exhilarating journey through the world of alternative rock adhesives. From the robust polyurethane adhesive to the mighty construction adhesive and the flexible silicone adhesive, we will explore an array of possibilities. Buckle up and get ready for a wild ride as we uncover the secrets of sticking rocks together.
Polyurethane Adhesive:
When it comes to braving the elements, polyurethane adhesive stands tall as a true hero. With its strong bond and ability to withstand extreme temperatures, this adhesive is a perfect match for outdoor rock projects. Whether you’re creating a stunning garden sculpture or an exquisite patio masterpiece, polyurethane adhesive ensures your rocks remain steadfast against nature’s forces.
Construction Adhesive:
For heavy-duty bonding, construction adhesive takes center stage. Designed to tackle materials like stone and concrete, this glue forms an unyielding bond that can resist moisture. Whether you’re constructing a magnificent stone wall or crafting a captivating water feature, construction adhesive is the ultimate companion.
Silicone Adhesive:
Flexibility meets durability with silicone adhesive. This versatile glue is ideal for projects that require movement or flexibility. If your rock project demands a little wiggle room, silicone adhesive is your answer. Its ability to withstand various weather conditions makes it perfect for outdoor installations that need that extra touch of resilience.
Specialized Rock Glues:
For those who crave perfection, specialized rock glues offer tailored solutions. Formulated specifically for bonding rocks, these glues often contain additives that enhance their strength and ability to bond porous surfaces. Elevate your rock project with these specially crafted glues for optimal results that will leave you in awe.
Cleaning and Drying the Surface Prior to Application
Cleaning and drying the surface prior to application is a crucial step in the rock-sticking process. To ensure a strong and long-lasting bond between your rocks, follow these steps:
- Remove loose dirt and debris: Before applying any glue, gently wipe away any particles that could hinder the bonding process. A soft brush or cloth will do the trick.
- Tackle stubborn stains: If your rocks have stubborn stains or residues, use a mild detergent or soap solution to clean them. Avoid harsh chemicals or abrasive cleaners to prevent damage to the surface.
- Rinse thoroughly: After cleaning, rinse the rocks with clean water to remove any traces of the cleaning solution. Thoroughly rinsing ensures no soap residue is left behind, which could interfere with the bonding process.
- Air dry completely: Allow the rocks to air dry completely before applying glue. Moisture weakens the bond, so ensure there is no moisture left on the surface. Drying times may vary depending on rock size and porosity.
- Speed up drying cautiously: If you’re in a hurry, you can use a hairdryer or place the rocks in an oven on low heat to accelerate the drying process. Be cautious with heat as excessive temperatures can damage certain types of rocks.
- Additional steps for porous rocks: Porous rocks like sandstone or limestone absorb moisture more readily. Consider sealing them with an appropriate sealant before applying glue to improve adhesion.
Applying the Glue in Thin Layers
Today, we unravel the secrets behind applying glue in thin layers to achieve a bond that will withstand the test of time. Get ready to elevate your creations with this technique that ensures strength, durability, and pure artistic magic. Grab your tools and let’s dive in.
Why Thin Layers Matter:
Imagine a masterpiece in the making – your rocks are cleaned and primed, ready to be bonded. But before you proceed, let’s understand why applying glue in thin layers is essential.
Unbreakable Adhesion:
Thin layers of glue guarantee superior adhesion between rocks. Unlike a thick layer that takes ages to dry, a thin layer allows the glue to penetrate the rock’s pores, creating an unbreakable connection. This means your creation will stand strong against the test of time.
Meticulous Distribution:
To achieve breathtaking results, you need the right tools at your disposal. Picture a small brush or even a toothpick delicately sweeping across the rocks’ surface, ensuring an even distribution of glue. This meticulous approach ensures that every corner and crevice is covered without any excess build-up that could mar your artistic vision.
Say Goodbye to Squeeze-Out Mishaps:
Imagine this – you apply a thick layer of glue, exerting maximum force to press the rocks together. Suddenly, excess glue oozes out, creating a sticky mess and ruining the balance of your masterpiece. Fear not. By employing a light touch and avoiding excessive pressure, you can prevent these mishaps and achieve that perfect thin layer.
The Process Unveiled:
Now that we understand the importance of thin layers, let’s walk through the process step-by-step:
A Clean Canvas:
Prepare your rocks by ensuring they are clean and dry, ready for their transformative journey. Remember, a strong bond starts with a pristine surface.
The Right Tools:
Equip yourself with the perfect tools for the task at hand. Whether it’s a small brush or a trusty toothpick, these instruments will guide you in spreading the glue evenly and precisely, guaranteeing comprehensive coverage.
The Gentle Touch:
Remember, finesse is key. Approach the application with a delicate touch, gently brushing or dabbing the glue onto the surface. Avoid applying excessive pressure that could lead to an uneven distribution.
Following Manufacturer Instructions for Proper Curing of the Glue
In our previous section, we delved into the captivating world of applying glue to rocks, exploring techniques that bring strength, durability, and pure artistic magic to your creations. But hold on tight, because today we’re going to unlock the key to success – following the manufacturer’s instructions for proper curing of the glue. Get ready for a journey that will ensure your bond stands the test of time. So grab your favorite rock specimens and let’s dive right in.
The Science Behind Curing:
Curing is the secret ingredient that transforms a mere connection into an unbreakable union. It’s the process of allowing the glue to dry and harden fully, creating a bond that can withstand even the harshest conditions. Different glues have different curing requirements, so pay close attention to the instructions provided by the manufacturer and become a master of this science.
Timing Is Everything:
Impatience can be the downfall of even the most promising rock bonding endeavors. Rushing the curing process leads to weak bonds that easily break or come undone – a nightmare for any rock enthusiast. To avoid this catastrophe, give your glue ample time to cure. Read and understand the recommended curing time provided by the manufacturer, and resist the temptation to handle or apply pressure on the bonded rocks before they’re ready. Remember, patience is key.
The Devil Is in the Details:
Following curing instructions alone is not enough – environmental factors can impact the bonding process as well. Temperature and humidity levels play a significant role in how quickly and effectively your glue cures. Create an ideal setting for bonding by working in a well-ventilated area with moderate temperatures. Avoid extreme conditions that could hinder the curing process and compromise your masterpiece. Attention to detail will elevate your results.
Special Instructions for Special Glues:
Some glues require additional steps or precautions during the curing process to achieve optimal results. For example, certain epoxy glues might recommend applying pressure or clamping the rocks together while they cure, ensuring a tight and unbreakable bond. These specific instructions should be followed diligently, as they hold the key to unlocking maximum strength and durability for your rock creation. Don’t overlook the power of these special instructions.
Conclusion
In conclusion, the glue you choose to stick rocks together can make or break the longevity and stability of your rock creations. When it comes to strength, versatility, and durability, epoxy adhesive reigns supreme. Its exceptional bonding power can handle the weight of rocks while resisting weathering and moisture.
When selecting an epoxy adhesive, take into account factors like drying time, weather resistance, and surface preparation. Look for an epoxy specifically formulated for rocks or stones – these have a thicker consistency designed to withstand the immense pressure exerted by rocks. And don’t forget to ensure your rocks are clean and dry before applying the glue for a rock-solid connection.
While epoxy adhesives are the top choice, don’t discount alternatives like polyurethane adhesive or construction adhesive. These options can provide robust bonding for outdoor rock projects or heavy-duty applications.
Remember to follow manufacturer instructions carefully when it comes to curing the glue. Patience is key here – allowing sufficient time for the glue to dry and harden fully will result in a bond that can withstand anything. Keep an eye on environmental factors such as temperature and humidity levels too – they can affect how well the glue cures.
By selecting the right adhesive, prepping your surfaces diligently, applying thin layers of glue, and following curing instructions meticulously, you’ll be able to create awe-inspiring rock formations that stand tall and unyielding for years to come.