Imagine this: you’re cruising down the open road in your brand new, sleek ride, only to spot an annoying residue clinging onto your flawless paintwork. Those pesky adhesive marks can be a real headache, tarnishing the beauty of your beloved automobile. But fear not. We’ve got your back with the ultimate solution to tackle this sticky situation.
In this blog post, we dive into the captivating world of adhesive removers, uncovering the secrets behind finding the absolute best one specifically designed for your car’s delicate paint. Whether it’s leftover gunk from a decal, stubborn glue residue after a repair job, or that pesky sticker mark that has been stuck there since forever, we’re here to offer you the golden opportunity to restore your ride’s flawless finish.
From tried-and-true traditional formulas to groundbreaking advancements, we’ve put countless adhesive removers through rigorous testing on various car finishes. Our mission is to enlighten you, our esteemed readers, on the most effective and safe products available in the market.
Throughout this exploration, we’ll emphasize how crucial it is to choose an adhesive remover that effortlessly eliminates stubborn residues while leaving your car’s paintwork unharmed and radiant. Our research takes into account factors like ease of use, quick action, and environmental impact – ensuring your satisfaction on all fronts.
So buckle up and join us on this enthralling journey as we unveil the champion adhesive removers that will help you restore your car’s former glory. Bid farewell to adhesive nightmares and welcome a world where you can cruise with absolute confidence – reflecting your style and personality in every gleaming detail.
Popular Adhesive Removers for Car Paint
Contents
- 1 Popular Adhesive Removers for Car Paint
- 2 Goo Gone: The Citrus-Based Adhesive Remover
- 3 3M Adhesive Remover: A Solvent-Based Option
- 4 WD-40 as an Alternative Adhesive Remover
- 5 Choosing the Right Adhesive Remover for Your Car Paint
- 6 Testing the Adhesive Remover Before Use
- 7 Additional Tools to Aid in Removal Process
- 8 Cleaning After the Removal Process
Keeping your car’s paintwork free from unsightly adhesive residue is crucial for maintaining its pristine appearance. Stickers, decals, and adhesives can leave stubborn marks that are challenging to remove without causing damage. Luckily, there is an array of popular adhesive removers available on the market. In this comprehensive guide, we will delve into the top choices, showcasing their advantages and potential limitations. By exploring these options, you can confidently select the perfect adhesive remover for your car paint.
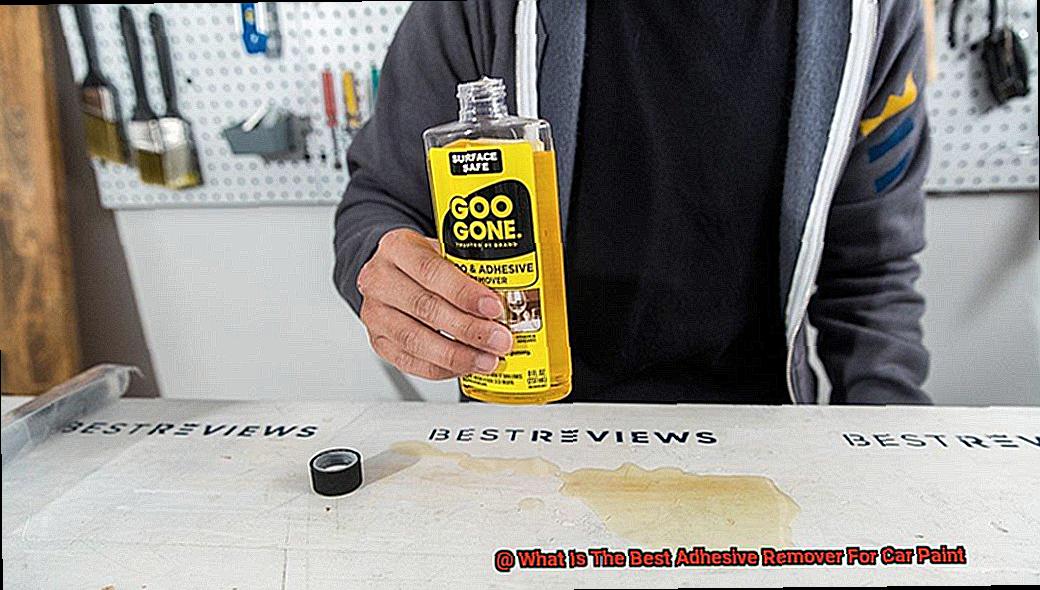
Goo Gone: The Citrus Sensation
Boasting remarkable versatility, Goo Gone is a citrus-based adhesive remover that excels at safely eliminating sticky residues from various surfaces, including car paint. Its gentle yet effective formula ensures compatibility with both clear coat and traditional automotive finishes. The power lies in its citrus properties, which delicately dissolve adhesives without any harm to the paint surface. However, it is recommended to conduct a patch test on a small area before applying it more extensively.
3M General Purpose Adhesive Remover: The Tough Stain Slayer
Car owners frequently turn to the 3M General Purpose Adhesive Remover for its ability to conquer even the most stubborn stains, adhesives, and tar on car surfaces. This solvent-based remover is specifically formulated for automotive use and deemed safe for most automotive paints. However, exercise caution when applying it to freshly painted or sensitive surfaces. Prioritize conducting a small-scale compatibility test before proceeding.
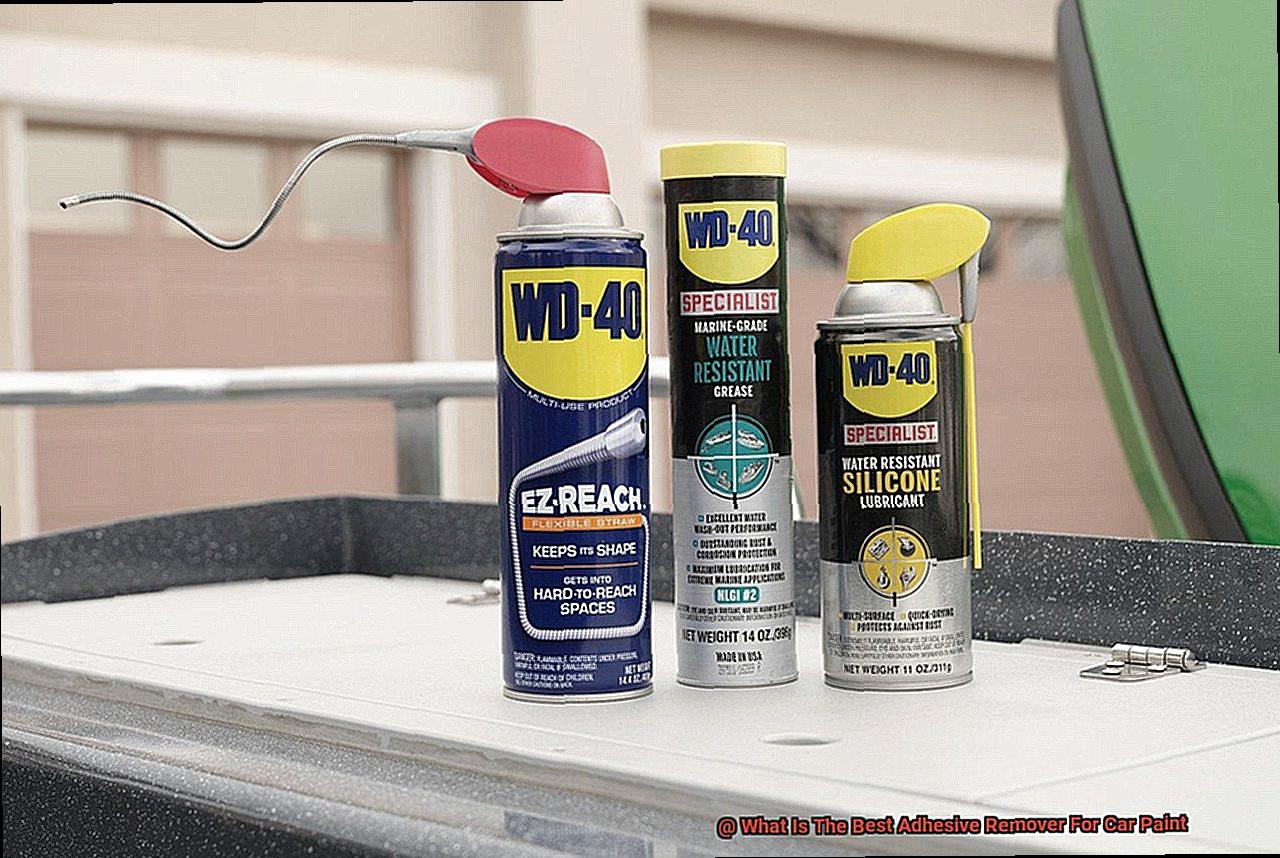
WD-40: More Than Just a Lubricant
While renowned as a trusted lubricant, WD-40 also possesses remarkable adhesive removal properties for car paint. Its versatile formula effortlessly dissolves sticky residues, including adhesives, providing ease and convenience. However, tread carefully when using WD-40 as an adhesive remover; a patch test is essential, as prolonged contact may harm specific automotive finishes.
Meguiar’s Ultimate Compound: The Paint Perfectionist
Primarily marketed as a paint correction product, Meguiar’s Ultimate Compound surprisingly packs a punch when it comes to adhesive removal from car paint. Its advanced formula tackles blemishes and imperfections, making it an excellent option for adhesive residue removal as well. Exercise caution when using this product to avoid excessive rubbing or pressure, as these actions may inadvertently damage the paint surface.
Goo Gone: The Citrus-Based Adhesive Remover
- Look no further than Goo Gone: The Citrus-Based Adhesive Remover. This magical potion is the secret weapon of car enthusiasts everywhere, and here’s why:
- Citrus power: Goo Gone is not your average adhesive remover. It’s infused with natural citrus extracts like orange, lemon, and grapefruit, giving it a refreshing scent and a powerful punch when it comes to dissolving adhesives.
- Safe for your car paint: Worried about damaging or discoloring your precious car paint? Don’t be. Goo Gone’s citrus-based formula is specially designed to be safe on most surfaces, including car paint. It works its magic without leaving a trace.
- Versatility at its finest: Goo Gone is the MacGyver of adhesive removers. It tackles all kinds of adhesives with ease – sticker residue, tape marks, gum, tar, grease, you name it. Whatever sticky situation you find yourself in, Goo Gone has got you covered.
- Easy-peasy application: No need to stress about using Goo Gone. It’s as simple as pie. Just apply a small amount onto a clean cloth or sponge, gently rub it onto the adhesive residue, let it sit for a few minutes to work its magic, and wipe away or rinse off with water. It’s quick and hassle-free.
- Handle with care: While Goo Gone is a superhero in the world of adhesive removal, remember to use it responsibly. Don’t leave it on your car paint for too long, as it may cause damage. Always follow the instructions and test it on a small area before going all-in.
- Widely available and trusted: Finding Goo Gone is a breeze. It’s available in hardware stores, automotive supply shops, and online retailers. Plus, it comes in different sizes to suit your needs, whether you’re a casual car enthusiast or a professional detailer.
- Safety first: Just like with any product, it’s important to prioritize safety. Read the label, follow the manufacturer’s guidelines, and use Goo Gone correctly and safely. This will ensure a smooth and worry-free adhesive removal experience.
3M Adhesive Remover: A Solvent-Based Option
Say goodbye to the frustration of stubborn adhesive residue on your car and hello to the game-changer in adhesive removers: 3M Adhesive Remover. With its solvent-based formula, this mighty product is your secret weapon for effortlessly tackling even the toughest adhesives while protecting your precious paint job. Let’s explore the exceptional benefits of using 3M Adhesive Remover and why it should be your go-to solution.
Powerful Formula:
Prepare to be amazed by the sheer power of 3M Adhesive Remover. Its potent formula, packed with specially designed solvents, effortlessly breaks down and dissolves adhesive residue. Whether you’re dealing with sticky sticker remnants, stubborn tar, or greasy residue, this mighty product gets the job done with ease. Say goodbye to endless hours of scrubbing and hello to a hassle-free adhesive removal experience that leaves no trace behind.
Versatility at Its Finest:
Not only does 3M Adhesive Remover excel at removing adhesive residue from car paint, but its versatility extends to other surfaces as well. Whether you need to tackle stubborn adhesives on painted metal, glass, plastic, or vinyl, rest assured that this all-in-one product has got you covered. No more fumbling around with multiple removers for different parts of your vehicle – 3M Adhesive Remover is your one-stop solution for all adhesive removal needs.
Easy Application:
Experience the simplicity of using 3M Adhesive Remover. Just apply a small amount of the product onto a clean cloth or sponge and gently rub it onto the adhesive residue. Witness the powerful formula at work as it dissolves the adhesive, making it a breeze to remove. For optimal results, allow the remover to sit for a few minutes, allowing it to penetrate the adhesive before effortlessly wiping it away. Save time, effort, and frustration with this quick and effective application method.
Safety First:
While 3M Adhesive Remover is generally safe for use on car paint, prioritizing safety is paramount. Before applying it to your entire vehicle, conduct a small patch test on an inconspicuous area to ensure no adverse reactions occur. Additionally, always remember to wear protective gloves and work in a well-ventilated area when handling any solvent-based product. With 3M Adhesive Remover, safety is never compromised.
WD-40 as an Alternative Adhesive Remover
In the world of adhesive removers, one product reigns supreme as a versatile superhero: WD-40. Renowned for its multifaceted applications, WD-40 can also come to the rescue when it comes to removing stubborn adhesives from your car’s paint. This article will delve into the secrets of using WD-40 as an alternative adhesive remover and provide indispensable tips to ensure your car stays in pristine condition.
The Mighty Power of WD-40:
WD-40 isn’t your average lubricant; it contains a potent blend of solvents and lubricants that effortlessly break down and dissolve adhesives. Its true magic lies in its ability to penetrate and loosen even the most tenacious adhesive residues on various surfaces.
Using WD-40 as an Adhesive Remover for Car Paint:
- Test the Waters: Before embarking on your adhesive removal adventure, perform a patch test on a small, inconspicuous area. This crucial step guarantees that WD-40 won’t unleash any undesirable damage or discoloration on your car’s paint.
- Apply, Engage, and Await: Once you’ve determined that WD-40 is safe for your car’s paint, apply it directly to the adhesive. Allow this miracle worker a few minutes to sit and engage with the adhesive, penetrating its stubborn layers and softening it for easier removal.
- Gentle Scrape or Delicate Wipe: As the waiting period comes to an end, gently scrape off the now softened adhesive using a plastic scraper or a soft cloth. Remember, nothing abrasive should ever touch your car’s precious paint. A delicate touch is the key to success here.
- Cleanse the Battlefield: After successfully banishing the adhesive, cleanse the battleground with soap and water. This final cleansing act eradicates any residue left behind by the WD-40, ensuring a pristine surface for subsequent treatments.
- Restore and Shield: To resurrect your car’s former glory and safeguard its paint, apply a coat of wax or polish. This additional layer acts as a shield, defending your car’s paint from future adhesive encounters while restoring its radiant shine.
Choosing the Right Adhesive Remover for Your Car Paint
Well, fret no more. In this comprehensive guide, we’ll delve into the world of adhesive removers and arm you with the knowledge to choose the perfect one for your car’s paint. Bid farewell to blemishes and say hello to a restored, showroom-worthy shine.
The Type of Adhesive Matters:
When it comes to adhesive residue, not all adhesives are created equal. Sticker residue can be easily tackled with a gentle adhesive remover that won’t harm your car’s paint. However, when faced with more tenacious residues from body moldings or badges, you’ll need a stronger adhesive remover to do the trick.
Consider Your Car’s Paint Type:
Just as each adhesive requires a specific remover, your car’s paint type must also be taken into account. Older or delicate finishes demand extra care, as some adhesive removers may prove too harsh and cause unwanted discoloration or damage. Always do your due diligence to ensure compatibility with your car’s paint type.
Application Methods and Convenience:
Adhesive removers come in an array of forms – sprays, liquids, gels, and wipes. Selecting the right form depends on the size and intricacy of the area you’re treating. Sprays or liquids offer convenience for larger areas, while wipes or gels provide better control for those intricate sections that require meticulous attention.
Automotive-Specific Formulations:
While multipurpose adhesive removers sound enticing, it’s best to opt for a product specifically formulated for automotive use. These specialized removers are tailor-made to cater to the unique needs of car paint, ensuring effective removal of adhesive residue without compromising its integrity.
Customer Reviews and Recommendations:
When it comes to choosing the right adhesive remover, don’t just rely on guesswork. Take advantage of the experiences and insights of other car enthusiasts. Read customer reviews and ratings to gauge the effectiveness and safety of different adhesive removers. Look for products that have garnered positive feedback and are highly recommended for automotive use.
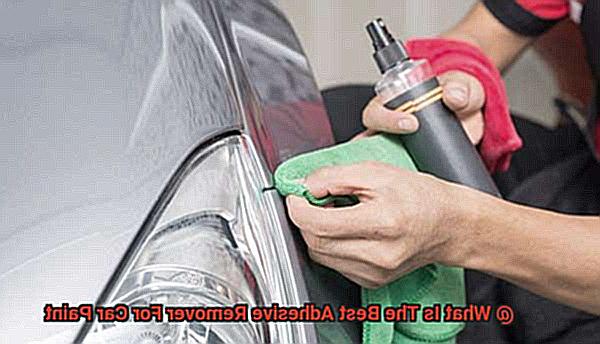
Testing the Adhesive Remover Before Use
We all know the frustration of discovering stubborn adhesive residue tarnishing our car’s paint. It’s like a tiny, persistent blemish that mocks our efforts to maintain a pristine appearance. But fear not. In this guide, we’ll walk you through the crucial steps of testing an adhesive remover before unleashing it on your precious vehicle. Trust me, it’s always better to err on the side of caution when it comes to preserving your car’s showroom-worthy shine.
Step 1: Seek Out the Hidden Haven
Before diving headfirst into adhesive removal, find a discreet spot on your car to conduct the remover test. This hidden haven could be behind a door or under the hood, representing the overall paint surface. Steer clear of spots already damaged or scratched, as they might skew your test results.
Step 2: Apply and Massage
Now that you’ve located your testing oasis, it’s time to get down and dirty. Grab a clean cloth or sponge and apply a small amount of adhesive remover as per the manufacturer’s instructions. Remember, less is more. Lovingly massage the remover onto the spot using gentle circular motions, allowing its enchanting powers to work their magic.
Step 3: Observe and Evaluate
After applying the adhesive remover, take a step back and closely scrutinize any changes on the spot. Keep your eagle eyes peeled for signs of discoloration, fading, or paint damage. If all appears well after a few minutes, you’re on track to adhesive removal success.
Step 4: Proceed with Prudence
If your test spot emerges unscathed, congratulations. You’re now ready to conquer larger areas of your car with the adhesive remover. However, if you detect any negative effects like unsightly discoloration or paint damage, it’s crucial to halt the use of that particular remover and seek a more compatible alternative. Remember, not all adhesive removers are created equal, and finding the perfect match may require some trial and error.
Additional Tools to Aid in Removal Process
You’ve discovered some stubborn adhesive residue on your beloved ride and you’re eager to get rid of it without causing any damage. Well, fear not. In addition to using the right adhesive remover, there are some additional tools that can make the removal process a breeze. Let’s dive in and explore these handy helpers.
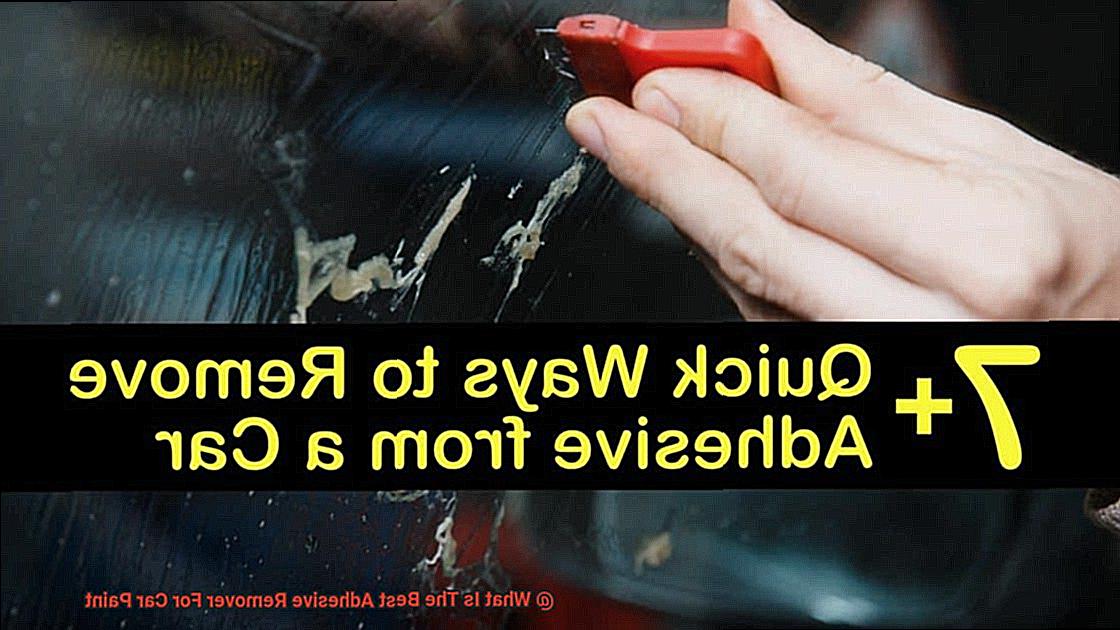
First up, we have plastic scrapers. These nifty tools are an absolute must when it comes to removing adhesive from car paint. Unlike metal scrapers that can leave unsightly scratches, plastic scrapers are gentle on your paint job. They effectively remove adhesive residue without causing any harm to the underlying paint. Remember to apply gentle pressure and work in small sections to avoid any potential damage.
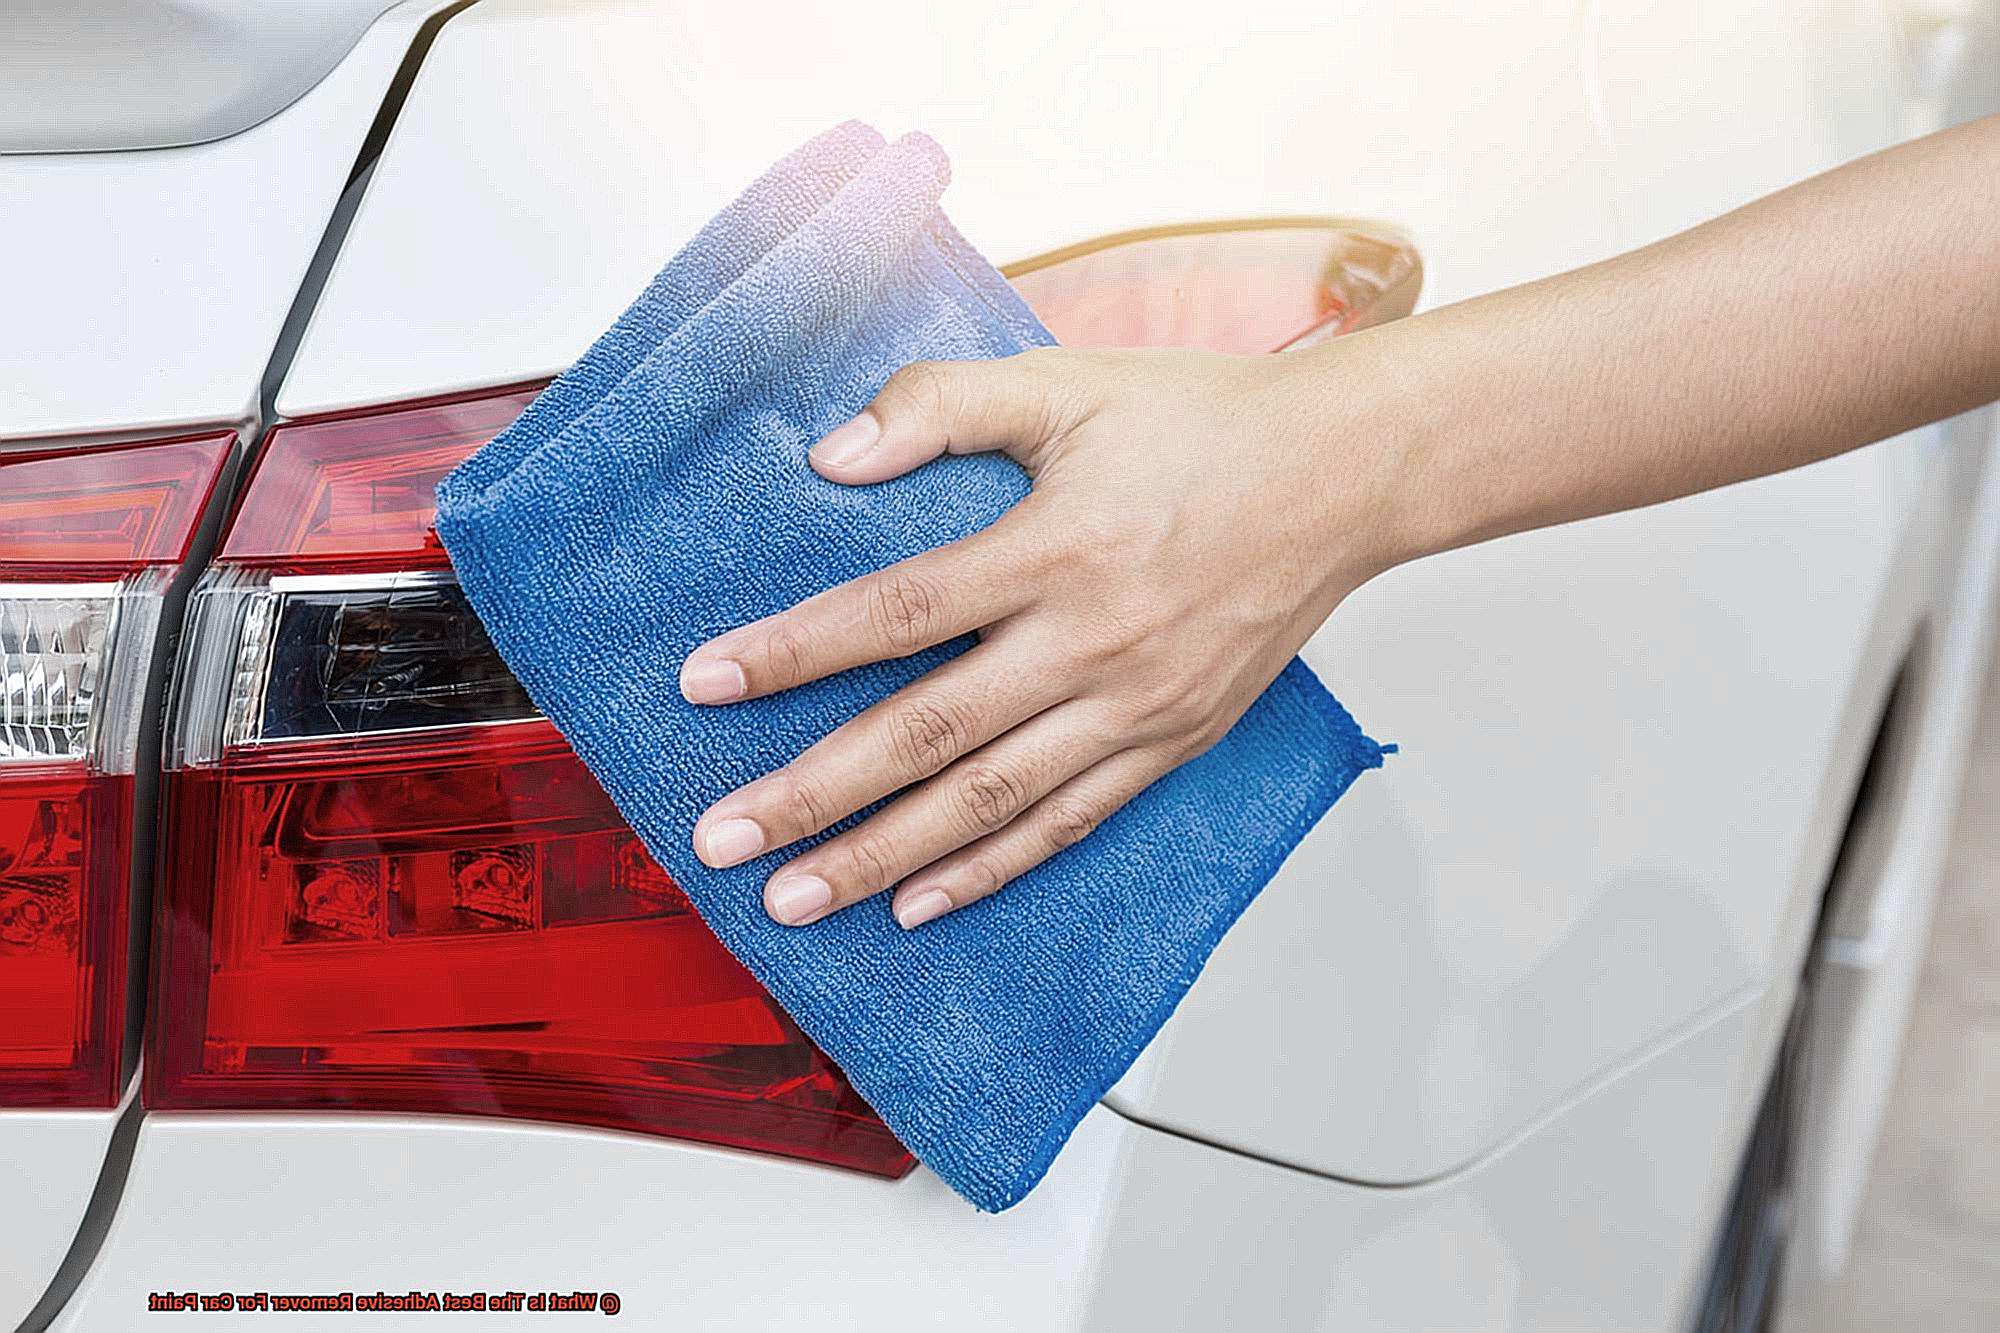
Next on our list are microfiber cloths. These soft and lint-free cloths are like superheroes when it comes to wiping away adhesive residue. Known for their ability to trap and lift dirt and grime without leaving scratches or streaks, microfiber cloths will ensure your car’s paint looks clean and polished after adhesive removal. They’re perfect for getting rid of any remaining traces of adhesive.
Now, let’s talk about those hard-to-reach areas. Adhesive has a knack for getting into crevices and textured surfaces of your car. That’s where soft-bristle brushes come to the rescue. These brushes allow for gentle scrubbing without causing any damage to your precious paint job. A small handheld brush with soft bristles is all you need to loosen and remove adhesive from those tricky spots.
Ah, isopropyl alcohol. This trusty solvent is a game-changer when it comes to adhesive removal. It breaks down the adhesives, making them easier to remove. Simply apply some isopropyl alcohol onto a clean cloth or sponge and gently rub it over the adhesive residue. The alcohol will dissolve the adhesive, making it a breeze to wipe away. Easy-peasy.
Last but not least, let’s talk about heat guns or hairdryers. Heat can be a powerful ally in the adhesive removal process. By applying heat to the adhesive, it becomes softer and more pliable, making it easier to remove. Here’s a pro tip: use a heat gun or a hairdryer set on low heat to warm up the adhesive. Be extra cautious not to overheat the paint, as excessive heat can cause damage. Once warmed, gently scrape off the adhesive using a plastic scraper.
Cleaning After the Removal Process
However, your work isn’t quite done yet. In this comprehensive guide, I will walk you through the necessary steps for cleaning your car’s paint after adhesive removal. By following these steps and using appropriate cleaning methods, you can achieve a spotless and gleaming exterior without compromising its appearance.
Step 1: Wipe Away Residual Adhesive:
To begin the cleaning process, grab a clean, soft cloth or microfiber towel and give the area a thorough wipe down. This simple step helps remove any leftover adhesive or cleaning solution that may still be clinging onto your paint.
Step 2: Tackle Stubborn Residue:
For those persistent residues that refuse to budge, it’s time to bring out the big guns – a mild soap solution. Create a mixture of warm water and a small amount of dish soap. Apply this solution to the affected area using a sponge or cloth, and gently scrub the surface in circular motions until the residue starts to lift. Patience is key here.
Step 3: Rinse, Rinse, Rinse:
Now that you have conquered the stubborn adhesive residue, it’s time to rinse it all away. Use clean water to thoroughly rinse the area, ensuring that every trace of adhesive and cleaning solution is banished from your paint.
Step 4: Dry, Dry, Dry:
After all your hard work, don’t let water spots or streaks ruin your efforts. Take a clean towel and dry the surface thoroughly. Alternatively, if you have some extra time on your hands, allow it to air dry. Remember, a dry surface equals a flawless finish.
Step 5: Restore Shine and Protection:
If your car’s paint is looking dull after adhesive removal, fear not. You can bring back its shine by applying a wax or polish. Opt for a product specifically designed for automotive use and carefully follow the manufacturer’s instructions for application. Not only will this step restore the shine, but it also provides added protection to your paint finish.
Step 6: Avoid Harsh Chemical Solvents:
As an expert, I cannot stress enough the importance of avoiding harsh chemical solvents during the cleaning process. These substances can wreak havoc on your car’s paint. Stick to mild soap solutions and products specifically formulated for automotive use to achieve the best results.
GsK6AW6du-c” >