Are you ready to give your home a fresh new look?
Contents
- 1 What is Glue Down Vinyl Plank Flooring?
- 2 Choosing the Right Vinyl Planks
- 3 Types of Adhesives for Glue Down Vinyl Plank Flooring
- 4 Trowel Selection and Application
- 5 Preparing the Subfloor
- 6 Using a Moisture Barrier or Underlayment
- 7 Tools Needed for Installation
- 8 Following Manufacturer Instructions
- 9 Conclusion
Glue down vinyl plank flooring is the way to go. It’s tough, budget-friendly, and can be installed with ease.
But before you begin, there are a few essentials you need to know about. In this blog post, we’ll dive into all the materials and techniques required for a successful installation.
From adhesive and trowels to moisture barriers and floor prep, we’ve got you covered. Whether you’re a DIY pro or hiring a pro, this guide will ensure that your floors turn out stunning and stand the test of time.
So let’s get started.
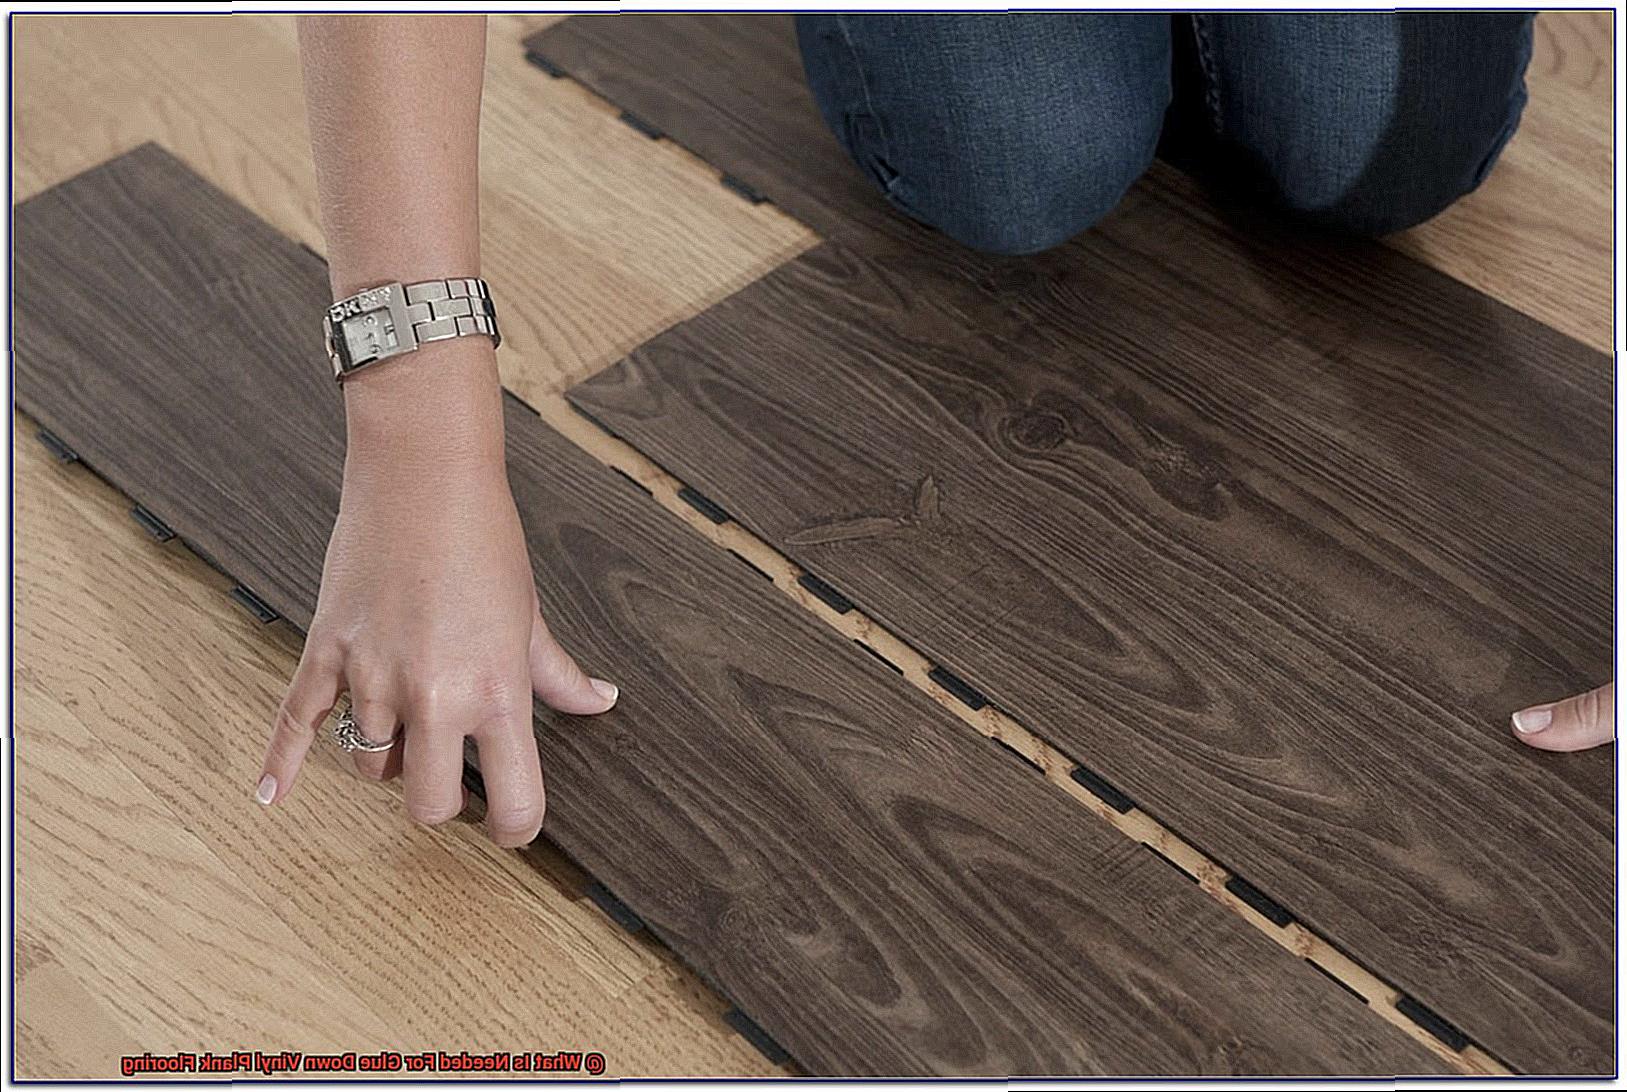
What is Glue Down Vinyl Plank Flooring?
With its realistic wood or tile appearance, easy installation process, and long-lasting performance, it has become a popular choice for many households.
Advantages:
- Durability: Glue down vinyl plank flooring is highly resistant to scratches, stains, and fading. The top protective wear layer ensures that the flooring maintains its beauty even in high-traffic areas or homes with pets and children.
- Realistic Appearance: The printed design layer of glue down vinyl plank mimics the look of natural wood or tile, providing an aesthetically pleasing floor that adds warmth and character to any space. With a wide range of colors and patterns available, homeowners can find the perfect style to match their decor.
- Easy Maintenance: Glue down vinyl plank flooring is effortless to clean and maintain. Regular sweeping or vacuuming, along with occasional damp mopping, is all that is needed to keep the floor looking pristine. Unlike natural hardwood or tile, there is no need for refinishing or resealing.
- Water Resistance: Vinyl plank flooring is highly resistant to water damage, making it an ideal choice for kitchens, bathrooms, and basements where moisture is present. The moisture barrier layer prevents water from seeping into the subfloor and causing mold or mildew growth.
- Installation Versatility: Glue down vinyl plank flooring can be installed on various subfloors, including concrete, plywood, or existing flooring such as tile or vinyl. This versatility allows homeowners to choose this type of flooring for both new construction and remodeling projects.
Disadvantages:
- Difficult Removal: The strong adhesive used in glue down vinyl plank flooring makes it challenging to remove if necessary. This can be a disadvantage if you plan on changing your flooring in the future or want the flexibility to switch to a different flooring type.
- Installation Time: Glue down vinyl plank flooring requires careful preparation of the subfloor, adhesive application, and precise installation of each plank. This process can be time-consuming, especially for larger spaces, and may require professional installation to ensure proper adhesion.
- Subfloor Imperfections: Glue down vinyl plank flooring requires a smooth and level subfloor for optimal results. Any imperfections, such as cracks or unevenness, may affect the appearance and performance of the flooring. Subfloor preparation may require additional time and effort.
- Adhesive Odor: The adhesive used in glue down vinyl plank flooring can emit strong odors during the installation process. This can be a temporary inconvenience for homeowners who are sensitive to smells or have respiratory issues. Proper ventilation is recommended during installation.
- Cost: While glue down vinyl plank flooring is generally more affordable than natural hardwood or tile, it can still be more expensive than other types of vinyl flooring options.
Installation Process:
Choosing the Right Vinyl Planks
Selecting the perfect vinyl planks for glue down installation requires careful consideration of several factors. By taking these into account, you can ensure that you choose the right vinyl planks that meet your specific needs and preferences, while providing durability and long-term satisfaction with your flooring choice.
First and foremost, pay attention to the thickness and wear layer of the vinyl planks. Thicker planks tend to be more robust and can withstand heavy foot traffic better. Additionally, a thicker wear layer provides superior protection against scratches, stains, and fading. So, when perusing options, look for vinyl planks that boast substantial thickness and a wear layer that meets your requirements.
Next, think about the design and style of the vinyl planks. Vinyl planks come in an extensive array of colors, patterns, and textures, ensuring you find the perfect match for your desired aesthetic. Whether you desire a natural wood look or a more contemporary and sleek design, there are options available to suit every taste. Take your time to explore different designs and choose one that complements your overall interior design scheme.
Quality is another vital factor to consider when selecting vinyl planks. Seek out planks made from high-quality materials that have undergone rigorous testing for durability and performance. It’s also wise to choose brands that offer warranties on their products, as this demonstrates their confidence in the longevity of their vinyl planks.
The installation method required for glue down vinyl plank flooring is another crucial consideration. Make sure you select planks specifically designed for glue down installation to ensure proper adhesion and longevity. It’s important to meticulously follow the manufacturer’s instructions during installation to achieve a successful and long-lasting result.
Finally, consider your budget when choosing vinyl planks. Prices can vary based on factors such as thickness, wear layer, and brand. Striking a balance between quality and affordability is key, ensuring you get value for your money without compromising on durability and aesthetics.
Types of Adhesives for Glue Down Vinyl Plank Flooring
If so, you’ll need to know about the different types of adhesives available and the considerations to keep in mind when selecting the right one. Let’s dive in and explore the world of adhesives for glue down vinyl plank flooring.
Types of Adhesives:
When it comes to glue down vinyl plank flooring, there are several types of adhesives to choose from. One popular option is pressure-sensitive adhesive, which is easy to use and allows for adjustments during installation. This type of adhesive is commonly used in residential applications due to its convenience and versatility. Another option is moisture-cured urethane adhesive, which provides a strong and durable bond, making it suitable for areas with high moisture levels. Additionally, acrylic adhesives are environmentally friendly and easy to clean up.
Manufacturer’s Recommendations:
Before you start your installation, it’s important to check the manufacturer’s guidelines and recommendations for adhesive compatibility. Different vinyl plank flooring products may require specific types of adhesives to ensure proper installation and warranty coverage. Following the manufacturer’s recommendations will help you achieve the best results and avoid any potential issues down the line.
Subfloor Considerations:
The condition of your subfloor is an important factor to consider when selecting an adhesive. Some adhesives are better suited for uneven or porous subfloors, while others may require additional preparation or priming. It’s crucial to assess the condition of your subfloor and choose an adhesive that is compatible with its specific requirements.
Temperature and Humidity:
Certain adhesives may have specific requirements for temperature and humidity levels during installation. It’s crucial to follow these guidelines to ensure proper curing and bonding of the adhesive. Failure to do so can result in a weak bond or other installation issues.
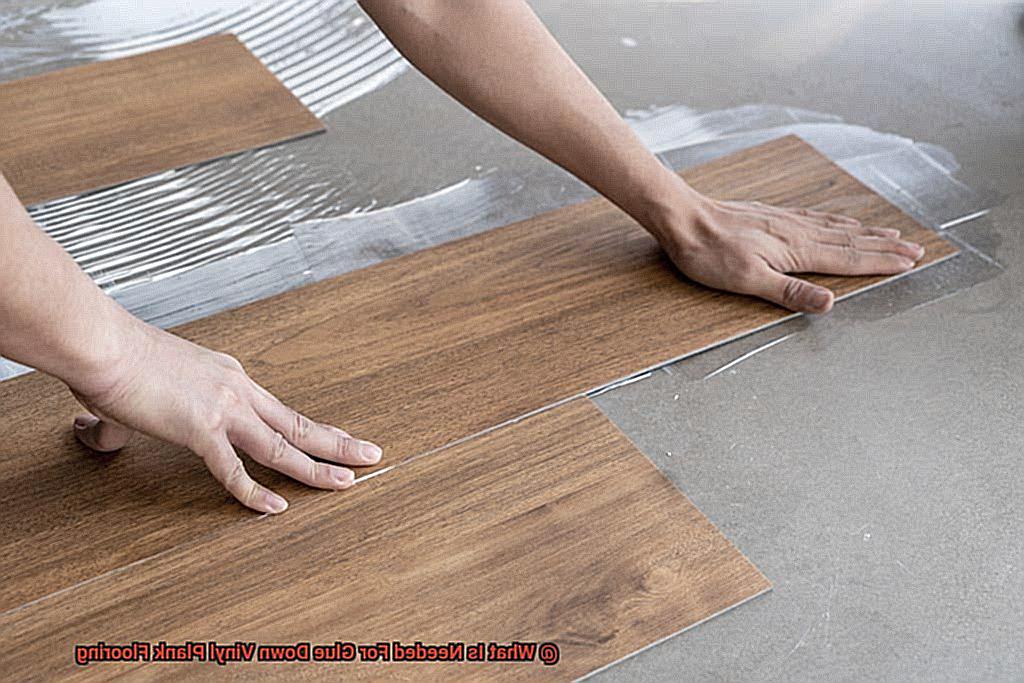
Application Techniques:
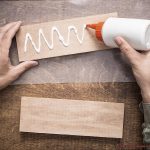
When it comes to applying adhesive for glue down vinyl plank flooring, it’s important to follow the manufacturer’s instructions carefully. Apply the adhesive evenly and avoid applying too much or too little, as this can affect the bond between the vinyl planks and the subfloor. Taking the time to apply the adhesive correctly will ensure a strong and long-lasting installation.
Drying Time:
After installing the vinyl plank flooring, it’s important to allow the adhesive to dry or cure according to the manufacturer’s instructions. This drying time can vary depending on the type of adhesive used. It’s crucial to be patient and wait for the adhesive to fully cure before allowing foot traffic or placing heavy furniture on the newly installed vinyl plank flooring.
Trowel Selection and Application
Get ready to dive into the captivating world of trowel selection and application for glue down vinyl plank flooring. This is not your average DIY project – it’s a meticulous process that requires finesse and attention to detail. In this article, we will explore the importance of choosing the right trowel and applying it with precision to ensure a flawless installation that will stand the test of time.
Let’s start by discussing trowel selection. Think of the trowel as your secret weapon in the battle against uneven surfaces and air gaps. The size and shape of the notches on the trowel’s edge play a crucial role in creating those beautiful ridges of adhesive that will bond your vinyl planks to the subfloor.
There are two main types of trowels commonly used for glue down vinyl plank flooring: V-notch and square-notch trowels. The V-notch trowel creates a charming V-shaped ridge pattern, while the square-notch trowel offers a trendy square ridge pattern. It’s like choosing between a classic V-neck or a modern square neckline for your favorite outfit – both have their own unique charm.
Now, how do you decide which notch size to go for? It all comes down to thickness. Thinner vinyl planks require smaller notches, while thicker planks need larger notches. Just like finding the perfect pair of jeans – you want them to fit just right, not too loose or too tight. Following this rule ensures that you apply just the right amount of adhesive for a strong bond.
But before you go rogue with your trowel, always check the manufacturer’s instructions for specific recommendations based on the type and brand of vinyl plank flooring you’re using. They’ve done their homework, so trust their expertise.
Now that we’ve covered trowel selection, let’s talk about application techniques. Consistency is key here. Maintain a steady angle and pressure throughout the entire process to achieve an even spread of adhesive. Think of it as applying icing on a cake – you want it to be smooth and evenly distributed, not lumpy or too thin in some areas.
Working in small sections is also a smart move. Apply adhesive to one area at a time, rather than spreading it across the entire subfloor. This allows for better control and prevents the adhesive from drying out too quickly. Remember, patience is a virtue.
Once you’ve applied the adhesive with finesse, give it some time to work its magic. Let it set for the recommended period before installing the vinyl planks. This allows the adhesive to reach its optimal tackiness and ensures a strong bond. You wouldn’t rush into a relationship without getting to know each other first, right?
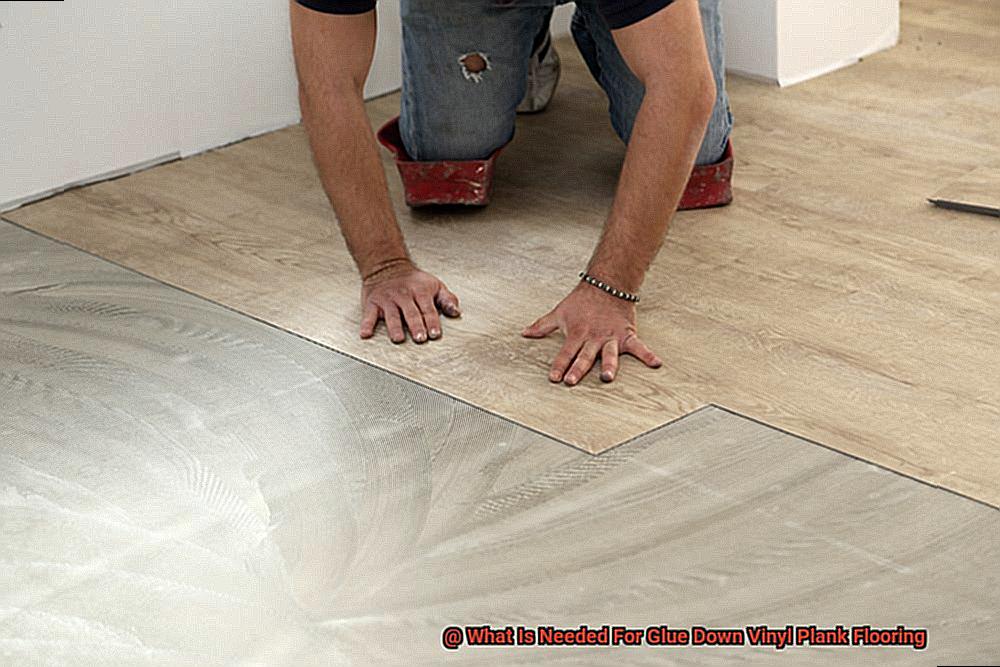
Preparing the Subfloor
Before you dive into the installation process, it’s important to properly prepare your subfloor. This crucial step ensures a smooth and long-lasting result that you’ll love for years to come.
First things first, remove any existing flooring material from the subfloor. Whether it’s carpet, laminate, or tile, everything must go. This allows for a clean slate and a solid base for your new vinyl planks.
Once the old flooring is out of the way, give the subfloor a good cleaning. Sweep or vacuum away any dirt, dust, or debris that may be lingering. For any stubborn stains or adhesive residue, use a cleaner or solvent recommended by the manufacturer to ensure a pristine surface.
Now it’s time for a thorough inspection of the subfloor. Look for any signs of damage or unevenness. Cracks, holes, or bumps need to be addressed before proceeding. Use a suitable patching compound to fill and level these areas. Follow the manufacturer’s instructions carefully and allow ample time for the compound to fully cure.
Depending on your specific subfloor type, you may need to install an underlayment. This additional layer provides cushioning, noise reduction, and helps smooth out minor imperfections. Read the manufacturer’s instructions for proper installation, ensuring that it is secure and free from any wrinkles or gaps. If you’re installing in a moisture-prone area like a bathroom or basement, consider using an underlayment with a built-in moisture barrier for added protection.
Before diving into the installation process, don’t forget to acclimate your vinyl planks. This involves storing them in the room where they’ll be installed for a certain period of time. This allows them to adjust to the temperature and humidity conditions of the space, ensuring a proper fit and reducing the risk of future issues.
By taking the time to properly prepare your subfloor, you’re setting yourself up for a successful and beautiful installation of your glue down vinyl plank flooring. So roll up your sleeves, follow these steps, and get ready to enjoy the benefits of a stunning and durable new floor.
In summary, the process of preparing a subfloor for construction involves several important steps:
- Remove any existing flooring material to create a clean base.
- Thoroughly clean the subfloor to remove dirt, dust, and debris.
- Inspect the subfloor for damage or unevenness and address any issues with a suitable patching compound.
- Install an underlayment if necessary for added cushioning, noise reduction, and to smooth out minor imperfections.
- Acclimate the vinyl planks by storing them in the installation room for a certain period of time.
Using a Moisture Barrier or Underlayment
When it comes to installing glue down vinyl plank flooring, achieving a flawless, long-lasting result requires careful attention to detail. Among the essential steps in this process is the strategic use of moisture barriers and underlayments. In this comprehensive guide, we will delve into the critical role these components play, exploring their benefits and highlighting the various types available.
Safeguarding Against Moisture Damage:
Moisture poses a significant threat to all types of flooring materials, including glue down vinyl planks. A moisture barrier acts as an impenetrable shield, preventing any moisture from permeating the subfloor and causing damage to the vinyl surface. This is particularly vital in areas prone to high humidity or dampness, such as basements and bathrooms.
Creating a Flawless Foundation:
An underlayment serves as a reliable foundation for your vinyl planks, ensuring a smooth and even surface for installation. By eliminating imperfections or irregularities in the subfloor, it guarantees that the vinyl planks lay flat and securely in place. Not only does this enhance the aesthetic appeal of your flooring, but it also extends its lifespan.
Embracing Comfort and Quiet:
Beyond moisture protection, an underlayment offers an added layer of comfort by providing cushioning underfoot. This feature proves particularly beneficial in areas where extended standing is common, such as kitchens or laundry rooms. Furthermore, certain types of underlayments are specifically engineered to minimize sound transmission between floors, making them ideal for multi-story buildings or apartments.
Exploring Your Options:
When selecting a moisture barrier or underlayment for glue down vinyl plank flooring, you have several options at your disposal. Plastic sheeting, foam underlayment, and specialized moisture-resistant membranes are just a few of the popular choices. The selection process should consider the specific needs of your installation and the type of subfloor involved.
Ensuring Proper Installation:
To maximize the effectiveness of your moisture barrier or underlayment, proper installation is paramount. Every seam and overlap must be meticulously sealed to prevent any moisture from seeping through. Additionally, it is crucial to ensure that the underlayment remains free from debris or imperfections that could compromise the adhesion of the vinyl planks.
Tools Needed for Installation
Installing glue down vinyl plank flooring requires a specific set of tools to ensure a successful and professional-looking result. Here are the essential tools you’ll need for this type of installation:
- Trowel: A 1/16-inch V-notched trowel is recommended for spreading adhesive evenly across the subfloor. This ensures proper coverage and adhesion of the vinyl planks.
- Utility knife or vinyl cutter: These tools are essential for cutting the vinyl planks to size during installation. With a sharp blade, you can easily score and cut through the planks, allowing for precise cuts and clean edges.
- Measuring tape: Accurate measurements are crucial for any flooring installation. A measuring tape allows you to take precise measurements of both the planks and the room, ensuring a seamless installation.
- Rubber mallet or tapping block: These tools are used to gently tap or nudge the planks into position, ensuring they are snugly fitted together. This helps prevent gaps between the planks and ensures a tight and professional-looking installation.
- Carpenter’s square: This tool helps check the alignment of the planks and ensures they are laid down in straight lines. It helps maintain consistency throughout the installation process, resulting in a visually pleasing final result.
In addition to these specific tools, there are a few other general tools that may be needed for the installation of glue down vinyl plank flooring:
- Pry bar or chisel: For removing any existing flooring before installation.
- Broom or vacuum cleaner: For cleaning the subfloor before installation.
- Safety equipment: Knee pads and goggles to protect yourself during the installation process.
Following Manufacturer Instructions
In this blog post, we will delve into the significance of following the manufacturer’s instructions when installing this flooring type. From subfloor preparation to adhesive selection and layout techniques, adhering to these instructions guarantees a flawless and long-lasting installation.
Subfloor Preparation: A Solid Foundation
To achieve a pristine installation, the manufacturer’s instructions provide explicit guidance on preparing the subfloor. By meticulously following these instructions, you ensure a clean, level, and debris-free surface. Some manufacturers may even recommend primers or sealers to enhance adhesion and safeguard your investment.
Choosing the Right Adhesive: The Perfect Match
Different vinyl plank flooring brands necessitate specific adhesives for optimal performance. By selecting the adhesive recommended by the manufacturer, you guarantee proper adhesion, preventing issues like floor lifting or peeling. Remember, using an incompatible adhesive jeopardizes the integrity of your installation.
Acclimation for Stability: Harmonizing with the Environment
Manufacturer instructions often include guidelines on acclimating the vinyl plank flooring before installation. This step allows the planks to adjust to the ambient conditions of the installation site, minimizing the risk of expansion or contraction post-installation. Following these instructions wards off problems such as buckling or warping.
Layout and Installation Techniques: Precision and Visual Appeal
The manufacturer’s instructions encompass recommendations on starting points, installation direction, and staggering patterns. Complying with these guidelines ensures a professional-looking and structurally sound installation. You create an aesthetically pleasing result while maintaining consistency throughout your space.
Care and Maintenance: Nurturing Your Investment
Once your glue down vinyl plank flooring is installed, following the manufacturer’s instructions for care and maintenance is vital. This includes using recommended cleaning products, following maintenance procedures, and taking precautions to avoid damage. By adhering to these instructions, you extend the lifespan of your flooring and preserve its immaculate appearance.
Also Read: What kind of glue do you use on vinyl flooring?
Conclusion
To successfully install glue down vinyl plank flooring, there are a few essential items you will need. First and foremost, you will need the vinyl planks themselves. These come in various styles and colors, allowing you to choose the perfect look for your space.
Next, you will need adhesive specifically designed for vinyl flooring installation. This adhesive is crucial as it ensures a strong bond between the planks and the subfloor, preventing any shifting or movement over time.
In addition to the adhesive, you will also need a trowel or notched spreader to evenly apply the glue onto the subfloor. This tool helps ensure that the adhesive is applied in a consistent layer, maximizing its effectiveness.
Furthermore, having a clean and level subfloor is vital for a successful installation. Make sure to thoroughly clean and remove any debris from the subfloor before applying the adhesive. Additionally, check for any uneven areas and use leveling compound if necessary to create a smooth surface.
Lastly, having proper safety equipment is essential when working with adhesives. Wear gloves to protect your hands from any potential irritation or chemical exposure. Additionally, consider using knee pads to provide comfort and protection while working on your knees during installation.
By gathering these necessary items and taking appropriate precautions, you can confidently proceed with installing glue down vinyl plank flooring.