Glass, with its enchanting purity and captivating transparency, has always held a special place in the hearts of creators. From dazzling sculptures to elegant tableware, its allure knows no bounds. But when it comes to seamlessly joining two glass pieces together, finding the perfect adhesive can feel like searching for a needle in a haystack.
But fret not, my fellow glass enthusiasts. Today, we’re about to unveil the secret behind achieving unbreakable bonds in the realm of glass-to-glass adhesion. Brace yourself for the ultimate glue that will leave you awestruck by its strength and reliability.
Crafted with meticulous precision and extensively tested for flawless performance, this adhesive is a true master at forging an unyielding union between glass surfaces. Its unique combination of chemical properties allows it to penetrate microscopic imperfections on glass surfaces, resulting in a bond that’s as strong as steel.
What sets this adhesive apart is its remarkable transparency. Unlike ordinary glues that leave unsightly residue or cloudiness behind, this adhesive dries clear, preserving the exquisite aesthetic appeal of your glass creations. Whether you’re repairing a cherished heirloom or creating a breathtaking glass mosaic, this adhesive merges two glass surfaces with an invisible bond that’s truly mesmerizing.
And here’s the best part – applying this remarkable adhesive is as easy as pie. Its smooth consistency ensures easy and controlled application without any messy drips or clumps. Just apply a thin layer to both surfaces, press them firmly together, and let time work its magic. As the adhesive cures, it strengthens gradually, creating a bond that can withstand anything life throws at it.
When it comes to bonding glass to glass, many factors come into play. But fear not. This adhesive excels in all aspects – delivering unrivaled strength, invisible bonds, and a fuss-free application process. So whether you’re a seasoned glass artist or a DIY enthusiast with a project in mind, it’s time to embrace the unbreakable potential of this powerful glue and dive into the art of glass creations like never before.
Types of Strong Glues for Glass to Glass
Contents
- 1 Types of Strong Glues for Glass to Glass
- 1.1 Cyanoacrylate Adhesive (Super Glue):
- 1.2 Considerations:
- 1.3 Cyanoacrylate Adhesive (Super Glue)
- 1.4 Epoxy Resin Adhesive
- 1.5 UV-Curing Adhesives
- 1.6 Lightning-Fast Curing Time:
- 1.7 Indomitable Adhesion:
- 1.8 Transparency and Aesthetic Brilliance:
- 1.9 Resilience Against Nature’s Fury:
- 1.10 Silicone Adhesives
- 2 Preparing the Surfaces for Bonding
- 3 Applying the Adhesive
- 3.1 Step 1: Surface Preparation – Setting the Stage for Success
- 3.2 Step 2: Creating the Perfect Foundation – Adding Texture to Brilliance
- 3.3 Step 3: Banishing Lingering Debris – A Meticulous Surgeon’s Touch
- 3.4 Step 4: Priming for Success – Unleashing Magical Concoctions
- 3.5 Step 5: Choosing the Perfect Adhesive – Picking Your Artistic Medium
- 3.6 Step 6: Applying Adhesive with Precision – A Delicate Art
- 4 Curing Time and Strength Considerations
- 5 Transparency of the Adhesive
- 6 Testing the Adhesive on a Small Area First
- 7 Tips and Tricks for Bonding Glass to Glass
- 8 Conclusion
Glass, a delicate material requiring special care, demands the right glue for bonding. Whether you’re tackling a DIY project or repairing a broken glass item, choosing the correct adhesive is crucial for achieving a robust and long-lasting bond. In this guide, we will explore various types of strong glues specifically designed for bonding glass to glass.
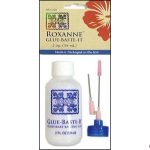
Cyanoacrylate Adhesive (Super Glue):
When time is of the essence, cyanoacrylate adhesive steps in as the hero. Also known as super glue or instant glue, this fast-drying adhesive forms an instant bond between surfaces. While it may lack the same strength as epoxy or silicone adhesives, cyanoacrylate adhesive remains effective for smaller and less demanding glass projects.
Considerations:
When selecting a strong glue for glass to glass bonding, several factors come into play. These include the intended use, necessary surface preparation, curing time, and required durability. Always adhere to the manufacturer’s instructions and perform a small compatibility test before applying the adhesive to the entire surface. By following these steps and choosing the right glue, you can achieve a long-lasting bond between your glass pieces for DIY projects or repairs.
Bonding glass to glass necessitates a robust adhesive capable of withstanding the stress and strain that glass surfaces experience. Epoxy, UV-curing, silicone, and cyanoacrylate adhesives are among the most common options.
Cyanoacrylate Adhesive (Super Glue)
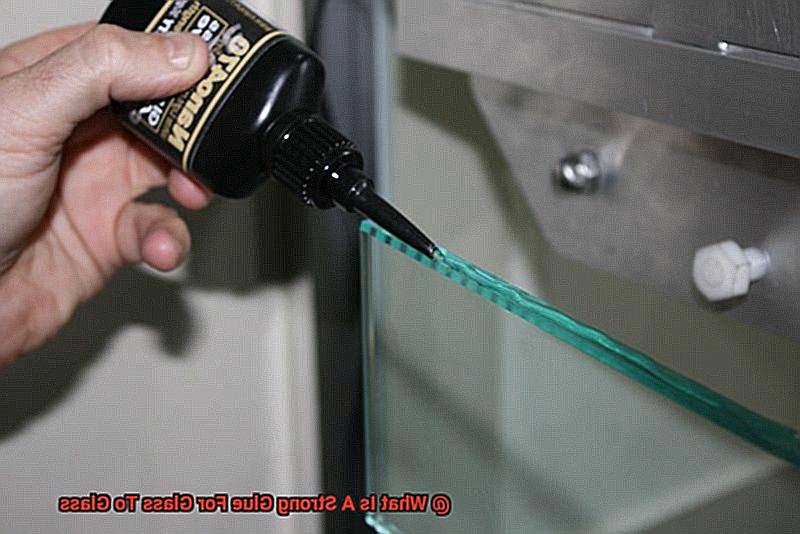
Cyanoacrylate adhesive, also known as super glue, is a remarkable adhesive that has revolutionized the world of glass bonding. With its exceptional strength and rapid action, it has become the go-to choice for joining glass to glass.
Ensuring safety is paramount when working with super glue. Wearing gloves and operating in a well-ventilated area are crucial precautions. These safeguards protect your skin from accidental bonding and ensure a healthy work environment.
Preparing the glass surfaces is crucial for optimal adhesion. Cleanliness is key – any dirt, dust, or moisture can compromise the effectiveness of the adhesive. Once the surfaces are pristine and dry, apply a small amount of super glue to one of them. Then, press the two glass pieces together firmly. The adhesive sets quickly, usually within seconds or minutes, depending on the brand and formulation.
While super glue is an excellent choice for bonding glass objects like vases or figurines, it may not be ideal for applications involving flexibility or extreme temperature changes. Flexibility and extreme temperatures can cause the adhesive to become brittle over time. Therefore, it’s crucial to consider these factors when selecting an adhesive for your project.
Accidental spills or excess glue need not be a cause for panic. Acetone or nail polish remover can dissolve the adhesive. However, it is essential to test these solvents on an inconspicuous area first to avoid any damage or discoloration.
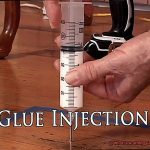
Epoxy Resin Adhesive
Glass, with its delicate nature, requires a glue that can provide a powerful and dependable bond. Enter epoxy resin adhesive, the unsung hero of the glue world. This adhesive has gained popularity due to its exceptional strength and versatility in bonding glass to glass. Let’s delve into why epoxy resin adhesive is a top contender and explore its numerous advantages.
First and foremost, epoxy resin adhesive is renowned for its incredible bonding strength. When the epoxy resin and hardener components are mixed together, a chemical reaction takes place, resulting in a strong and permanent bond. This molecular bond ensures that the glass pieces remain securely connected, standing the test of time.
Versatility is another key advantage of epoxy resin adhesive. It has the ability to adhere to a wide range of materials, including glass. This makes it suitable for various glass-to-glass bonding applications, whether you’re repairing a broken vase or creating a masterpiece with stained glass.
To utilize epoxy resin adhesive for bonding glass to glass effectively, it is crucial to carefully follow the manufacturer’s instructions. Thoroughly clean the glass surfaces before applying the adhesive to ensure maximum adhesion. Apply the adhesive evenly on both surfaces and firmly press them together. Clamps or other types of pressure can be used to hold the pieces in place while the adhesive cures.
It’s worth noting that epoxy resin adhesives may require longer curing times compared to other glues. This is because the curing process involves a chemical reaction that takes time to complete fully. Therefore, patience is key when working with epoxy resin adhesive, as rushing the process can result in a weaker bond.
Once fully cured, epoxy resin adhesives offer excellent resistance to moisture, heat, and chemicals. This makes them ideal for applications where the bonded glass may be exposed to harsh conditions or temperature variations.
UV-Curing Adhesives
Look no further. In this captivating exploration, we will plunge into the captivating realm of UV-curing adhesives and unlock the secrets behind their unrivaled ability to bond glass to glass. Brace yourself to be astounded by the rapidity, strength, and transparency of these extraordinary adhesives.
Lightning-Fast Curing Time:
In the world of adhesive magic, UV-curing adhesives reign supreme. These enchanting compounds are meticulously formulated to cure within mere seconds upon exposure to ultraviolet light. Gone are the days of tedious clamping and interminable drying periods. Simply harness the power of a UV light, and watch as your glass pieces become inseparably fused together. It’s a spellbinding transformation that defies all expectations.
Indomitable Adhesion:
When it comes to bonding glass to glass, mediocrity is simply not an option. Fear not, for UV-curing adhesives possess a Herculean grip that endures the test of time. They cling tenaciously to glass surfaces, forging an unbreakable and enduring bond that will never let you down. Their unwavering strength is a testament to their unparalleled prowess.
Transparency and Aesthetic Brilliance:
No artist desires unsightly glue stains marring their ethereal glass masterpieces. Fear not, for UV-curing adhesives wield a nearly invisible touch when cured, allowing your glass opus to radiate unadulterated magnificence. Whether you are assembling resplendent glass furniture or fashioning resplendent stained glass art, these adhesives ensure a seamless and transparent union that accentuates the splendor of your creations.
Resilience Against Nature’s Fury:
UV-curing adhesives are formidable warriors, impervious to the whims of nature. They valiantly withstand the ravages of moisture, temperature fluctuations, and even harsh chemicals. Rain-soaked or sun-kissed, these adhesives remain steadfast in their duty. Your bond will endure unscathed, regardless of what Mother Nature hurls its way.
Silicone Adhesives
Silicone adhesives are a truly remarkable solution when it comes to bonding glass to glass. Prepare to be amazed as we delve into the fascinating world of these adhesives and explore their numerous advantages. Whether you’re a DIY enthusiast or a seasoned professional, silicone adhesives are sure to captivate you with their exceptional qualities.
First and foremost, silicone adhesives are incredibly versatile. They have the ability to bond different types of glass surfaces, from tempered glass to laminated glass and even frosted glass. No matter what type of glass you’re working with, silicone adhesives can provide a reliable and durable bond, ensuring that your project is held together securely.
But that’s not all. Silicone adhesives also boast excellent resistance to environmental factors. They can withstand extreme temperatures, from freezing cold to scorching heat, without losing their adhesive properties. This makes them perfect for both indoor and outdoor applications, giving you peace of mind that your glass-to-glass bond will remain intact even in the harshest conditions. Whether it’s a window exposed to harsh sunlight or a glass fixture in a freezing cold environment, silicone adhesives will maintain their strength and reliability.
Flexibility is another key advantage of silicone adhesives. Unlike some other glues that may become brittle over time, silicone adhesives retain their flexibility even after curing. This is crucial because it allows the bonded glass surfaces to expand and contract without causing stress on the adhesive bond. It also helps in absorbing shocks and vibrations, making silicone adhesives ideal for applications where movement or impact resistance is required. Whether it’s a car windshield encountering bumps on the road or a windowpane exposed to strong winds, silicone adhesives can withstand the challenges of everyday use.
Applying silicone adhesives is a breeze as well. They come in various forms like tubes, cartridges, or syringes, making it easy for you to choose the best option for your needs. And don’t worry about complicated application processes – silicone adhesives can be applied directly onto the glass surfaces using a caulking gun or a syringe for more precise application. This ensures a hassle-free and efficient bonding process, saving you time and effort.
Once applied, silicone adhesives require some curing time to develop their full strength. This curing time may vary depending on factors like temperature and humidity, so it’s important to follow the manufacturer’s instructions for optimal bond strength. But once the adhesive is fully cured, you can rest assured that your glass-to-glass bond is as strong as can be. The durability and longevity of silicone adhesives make them a reliable choice for any project requiring the bonding of glass surfaces.
Preparing the Surfaces for Bonding
Look no further. I have the ultimate solution for you – silicone adhesives. But before we dive into the wonderful world of silicone adhesives, let’s discuss the crucial step of properly preparing the surfaces for bonding.
Imagine this: you’ve finally found the perfect glue for your glass-to-glass project. You’re eager to create a strong and durable bond. But hold on just a minute. Did you know that the success of your bond heavily relies on how well you prepare the surfaces? That’s right – surface preparation is essential for maximizing bonding strength and durability.
So, how do you properly prepare the surfaces for glass-to-glass bonding? Let’s break it down into a few simple steps:
- Cleanliness is key: Before applying any adhesive, thoroughly clean the surfaces. Dirt, dust, and oils can interfere with the bonding process and weaken the adhesive’s effectiveness. Use a mild detergent or glass cleaner to remove contaminants. Don’t forget to dry the glass completely.
- Roughen up a bit: To improve adhesion, it may be necessary to lightly sand or use a glass etching cream to roughen the surfaces. Be careful not to scratch or damage the glass while doing so.
- No residue left behind: After roughening the surfaces, remove any residue or debris. Wipe the glass with a lint-free cloth or use compressed air to ensure cleanliness and eliminate particles that could interfere with bonding.
Primer or activator, anyone? Depending on the adhesive used, applying a primer or activator may be necessary to enhance adhesion. These products promote chemical bonding between the adhesive and the glass surfaces, resulting in a strong and durable bond. Follow the instructions provided by the adhesive manufacturer.
Choose the right adhesive: Not all glass adhesives are created equal. Some are designed for specific types of glass, such as tempered or laminated glass. Ensure the adhesive selected is suitable for the type of glass being bonded.
Remember, surface preparation is just the beginning. Factors like temperature and humidity can also affect the bonding process. Follow the adhesive manufacturer’s guidelines for optimum conditions during bonding.
Applying the Adhesive
Prepare to immerse yourself in the enchanting world of glass-to-glass bonding as we unveil the secrets to creating unbreakable connections. Get ready for an adhesive adventure that will leave you with a smile as radiant as freshly cleaned glass.
Step 1: Surface Preparation – Setting the Stage for Success
Just like a master chef preps ingredients for a delectable dish, surface preparation is crucial for achieving maximum strength and durability. Begin by meticulously wiping down both glass surfaces using a high-quality glass cleaner or rubbing alcohol. This ensures that any lurking dust, oils, or residue are banished, providing a pristine canvas for your adhesive masterpiece.
Step 2: Creating the Perfect Foundation – Adding Texture to Brilliance
Roughen up those sleek surfaces gently but purposefully. Think of it as adding texture to a canvas before painting a masterpiece. This step enhances adhesion by increasing the surface area for the adhesive to grip onto, ensuring an unyielding bond. Remember, be gentle and don’t mar those precious panes.
Step 3: Banishing Lingering Debris – A Meticulous Surgeon’s Touch
Like a meticulous surgeon, ensure no stray particles are left behind. Utilize a lint-free cloth or gentle bursts of compressed air to remove any lingering residue or debris from the prepared surfaces. We want nothing to come between our glass surfaces and their unyielding bond.
Step 4: Priming for Success – Unleashing Magical Concoctions
Introduce your secret weapons – primers and activators. These extraordinary elixirs enhance the chemical bonding between adhesive and glass, transforming them into an unstoppable duo. Embrace their power by closely following their instructions to unlock their full potential and achieve an even stronger bond.
Step 5: Choosing the Perfect Adhesive – Picking Your Artistic Medium
Not all glues are created equal. Just as each artist has their preferred medium, different adhesives cater to specific types of glass. Whether it’s tempered, laminated, or specialized glass, selecting the right adhesive ensures compatibility and guarantees a bond that will withstand the test of time.
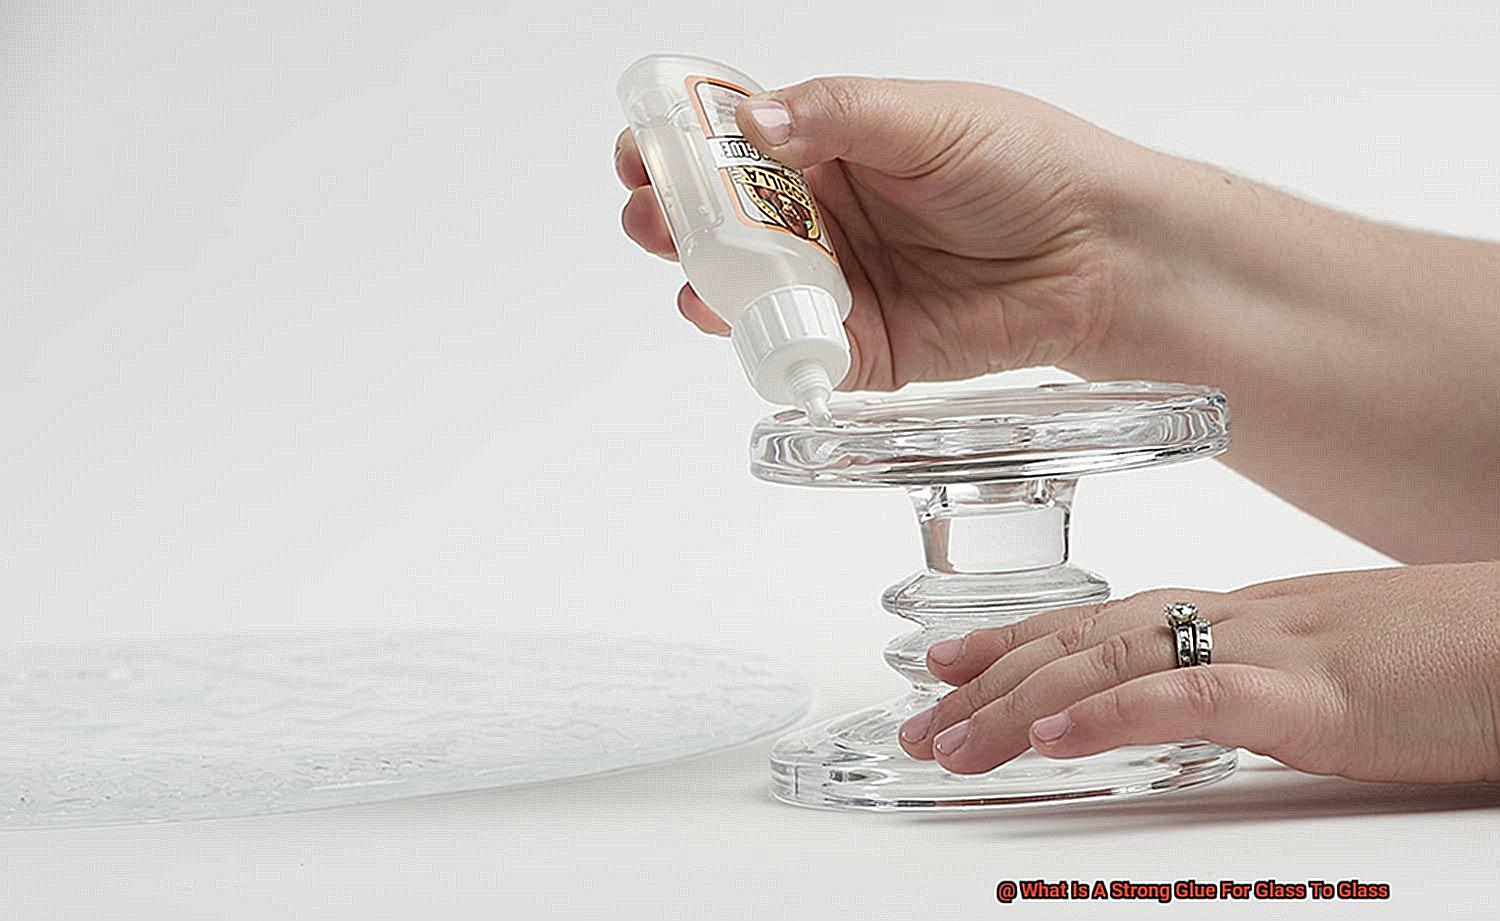
Step 6: Applying Adhesive with Precision – A Delicate Art
Now, it’s time to apply the adhesive. Follow the manufacturer’s instructions meticulously for the recommended application method and quantity. Remember, too much adhesive can lead to messy results, while too little may not provide a strong bond. Aim for even coverage and ensure every nook and cranny is coated in this delicate dance of adhesive application.
Curing Time and Strength Considerations
As you embark on this adhesive adventure, it’s essential to grasp the significance of two key factors: curing time and strength. These considerations will determine the reliability and longevity of your bond, ensuring that your glass creations remain unbreakable. So, let’s dive in and explore why these factors are essential when selecting a glue for glass-to-glass bonding.
Curing Time: Patience is Key
The duration it takes for an adhesive to fully dry and reach its maximum strength is known as curing time. Choosing a glue with the right curing time is crucial for your project. If time is of the essence or immediate use of the bonded glass is necessary, opt for a fast-curing adhesive. But if you prioritize maximum bond strength, go for an adhesive with a longer curing time.
Strength: A Bond That Holds Firm
When selecting a glue for glass-to-glass bonding, strength is paramount. Different types of strength should be considered: tensile strength, shear strength, and peel strength. Tensile strength measures resistance to being pulled apart along the bond line, while shear strength assesses resistance to sliding or slipping parallel to the bond line. Peel strength determines how well the adhesive can withstand forces trying to peel it off from the substrate.
Matching Strength Requirements:
To ensure a successful bond, choose an adhesive that matches your project’s specific strength requirements. For heavy loads or constant stress on your glass surfaces, select an adhesive with high tensile and shear strength. Also, consider the durability and long-term stability of the bond when exposed to varying environmental conditions or temperature fluctuations.
Transparency of the Adhesive
Step into a world where glass becomes art, defying gravity and captivating the eye with its seamless fusion. This magical transformation is made possible by the right adhesive – one that offers both transparency and strength. In this blog post, we will delve into the world of transparent glass bonding, exploring the different types of adhesives available and the factors that affect their transparency.
Types of Transparent Adhesives:
Clear Epoxy: The Strong and Invisible Bond
- Combines strength and transparency
- Dries clear for an invisible bond
- Ideal for glass artwork and delicate glassware
UV-Curing Glue: The Speedster of Bonds
- Provides quick bonding solution without compromising transparency
- Cures under ultraviolet light for a crystal-clear bond
- Requires specialized equipment like a UV lamp for proper curing
Clear Silicone: Flexibility Meets Transparency
- Offers good transparency when dry
- Provides necessary flexibility for projects requiring movement or expansion
- Choose a silicone adhesive specifically designed for glass applications.
Factors Affecting Transparency:
Thickness of the adhesive layer:
Adhesion to glass surfaces:
- Test adhesive on a small, inconspicuous area before applying it to the entire surface.
- Ensures desired level of transparency.
Testing the Adhesive on a Small Area First
Today, we embark on a thrilling adventure into the enchanting world of glass-to-glass bonding. Picture this: you have a beautiful glass project in mind, and you’ve carefully selected the perfect adhesive to bring your vision to life. But before you dive headfirst into gluing your masterpiece together, there’s one crucial step you mustn’t overlook – testing the adhesive on a small area first.
Now, you may be wondering, why is this step so important? Well, my friends, let me enlighten you. Testing the adhesive on a small area allows you to ensure that it’s compatible with the glass surface you’re working with. You see, not all adhesives play nicely with every type of glass. By conducting a mini-experiment on a discreet corner or edge of your glass, you can determine if the adhesive will bond effectively and provide the strength and durability you desire.
But wait, there’s more. Testing also gives you the opportunity to evaluate the adhesive’s transparency and aesthetic appeal. After all, no one wants a glue that leaves an unsightly residue or discoloration behind, especially when working with transparent or decorative glass surfaces. By testing on a small area, you can assess whether the adhesive dries clear and complements the overall beauty of your project.
Oh, but we’re not done yet. Testing also allows you to gauge the drying time of your chosen adhesive. Different adhesives have varying drying times, and it’s crucial to select one that aligns with your project’s timeline. By applying a small amount of adhesive and observing how long it takes to dry completely, you can plan accordingly and avoid any unnecessary waiting around.
So there you have it, my friends – testing the adhesive on a small area first is an absolute must when venturing into the captivating world of glass-to-glass bonding. It ensures compatibility, assesses transparency and drying time, and ultimately leads to a successful and visually stunning result.
Tips and Tricks for Bonding Glass to Glass
Glass, with its delicate and fragile nature, requires careful techniques and the right adhesive to create a secure bond between two glass surfaces. Whether you’re embarking on a DIY project or repairing a cherished glass item, here are some invaluable tips and tricks to help you achieve a strong and durable connection that will stand the test of time.
Cleanse with precision:
Prior to bonding glass to glass, it is imperative to meticulously clean both surfaces. Wipe away any trace of dirt, dust, or grease using a high-quality glass cleaner and a lint-free cloth. This meticulous step ensures that the adhesive can establish direct contact with the glass, enhancing its bonding strength.
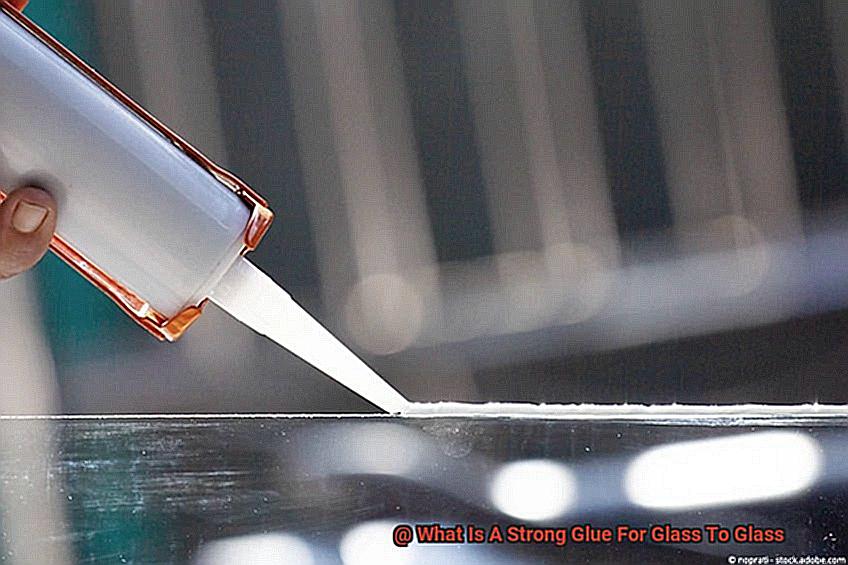
Select the adhesive wisely:
The choice of adhesive is paramount for a successful bond. Opt for an adhesive that is specifically formulated for bonding glass to glass. Epoxy adhesives are highly recommended for their exceptional strength and durability. Silicone-based adhesives can also be suitable for certain applications. Ensure that the adhesive you choose is designed specifically for glass-to-glass bonding.
Apply the adhesive with finesse:
Follow the manufacturer’s instructions precisely when applying the adhesive. It is generally best to apply an even layer of adhesive onto one of the glass surfaces using a brush or applicator. Excessive application should be avoided as it can lead to an untidy appearance and unnecessary spillage.
Allow ample curing time:
After applying the adhesive, exercise patience and allow sufficient time for it to cure and bond the glass surfaces together effectively. The curing time can vary depending on the type of adhesive used, so consult the manufacturer’s instructions for specific guidelines. During this curing period, refrain from disturbing or exerting stress on the bonded pieces.
Harness the power of UV-curing adhesives:
Consider utilizing UV-curing adhesives, particularly for projects involving intricate or hard-to-reach areas. These adhesives offer rapid curing times and boast high bond strength. To activate the curing process, exposure to ultraviolet light is required. UV-curing adhesives can prove invaluable in ensuring a swift and robust bond.
Apply gentle pressure during curing:
To ensure optimal contact between the glass surfaces and the adhesive, apply gentle pressure while the adhesive cures. Utilize clamps, weights, or tape to hold the glass pieces together firmly during this process. However, exercise caution to avoid applying excessive pressure that could potentially damage the delicate glass.
5xRNNXQpkOU” >
Conclusion
When it comes to bonding glass to glass, finding a strong and reliable adhesive is crucial. You need something that can withstand the test of time and keep those pieces of glass securely together. Thankfully, there are several options available that can do just that.
One popular choice is epoxy resin. This adhesive forms a strong bond between two glass surfaces, creating a durable connection that won’t easily break. Epoxy resin is known for its excellent adhesion properties and ability to withstand extreme temperatures and moisture.
Another option is UV-curing glue. This type of adhesive uses ultraviolet light to harden and create a strong bond between glass surfaces. It offers quick curing times and high strength, making it ideal for projects that require an instant hold.
If you’re looking for something more versatile, silicone adhesive could be the answer. Silicone adhesives provide flexibility and durability, making them suitable for both indoor and outdoor applications. They are also resistant to water, chemicals, and temperature fluctuations.
For those seeking a more traditional approach, cyanoacrylate glue (commonly known as super glue) can also be used to bond glass to glass. It forms an incredibly strong bond in a matter of seconds but may not be as resistant to moisture or extreme temperatures as some other options.
When choosing the right adhesive for your specific needs, consider factors such as the intended use, environmental conditions, and desired strength of the bond. Always follow the manufacturer’s instructions for application and safety precautions.
In conclusion, when it comes to gluing glass to glass, there are several strong adhesive options available. Whether you opt for epoxy resin, UV-curing glue, silicone adhesive, or cyanoacrylate glue (super glue), make sure to choose one that suits your project requirements.