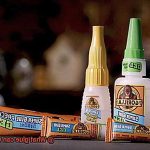
You’ve got this fantastic idea to jazz up your glassware with some string magic. But hold up – before you dive headfirst into your project, let’s talk about the glue situation. Because let’s face it, using the wrong adhesive can turn your masterpiece into a hot mess real quick.
We all want that perfect bond that keeps our string securely attached to glass, no matter how many times we accidentally knock it over (oops.). That’s why finding the right glue is absolutely crucial. Lucky for you, I’ve done my homework and I’m here to spill the beans on the best glues out there for sticking string onto glass.
Whether you’re a DIY enthusiast, a macrame maestro, or just someone who loves adding a touch of pizzazz to their glass decorations, stick around because we’re about to dive deep into the world of adhesives. We’ll explore different types of glues that offer unbeatable strength, long-lasting durability, and easy-peasy application. By the time we’re done here, you’ll be armed with all the knowledge you need to make an informed decision and get your string-glass combo game on point.
So grab your favorite cuppa (or maybe even a glass of wine – no judgment here.), sit back, and let’s get ready to stick it together like pros.
Types of Glue for String to Glass Bonding
Contents
- 1 Types of Glue for String to Glass Bonding
- 2 Epoxy Resin
- 3 Cleaning the Glass Surface for Optimal Adhesion
- 4 Applying the Glue Precisely and Carefully
- 5 Factors to Consider When Choosing an Adhesive
- 6 Tips for Best Results When Using Epoxy Resin
- 7 Tips for Best Results When Using Super Glue
- 7.1 Prepare and Clean the Surfaces:
- 7.2 Similarly, clean the string by wiping it with a clean cloth or an alcohol swab. This eliminates any oils or contaminants that may prevent proper adhesion between the string and the glass.
- 7.3 Apply Sparingly:
- 7.4 Press and Hold:
- 7.5 Allow Ample Drying Time:
- 7.6 Let it Set Undisturbed:
- 7.7 Removal Tips:
- 8 Tips for Best Results When Using Hot Glue
- 9 Tips for Best Results When Using Specialized Glass Bonding Glues
- 10 Conclusion
Bonding string to glass can create stunning and unique designs. However, finding the right glue for this task can be a challenge. In this article, we will explore the top glues that are ideal for attaching string to glass.
Whether you want a superhero-like bond or a quick and mighty attachment, we’ve got you covered.
Epoxy Glue – The Superhero of Bonding:
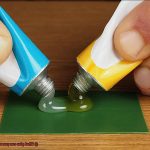
When it comes to bonding string to glass, epoxy glue is the superhero you need. This two-part adhesive combines resin and hardener to create an incredibly strong and durable bond. Just like a superhero, epoxy glue can withstand moisture, heat, and even chemicals. Not only does it provide exceptional strength, but it also dries clear, ensuring that your string-to-glass masterpiece looks flawless.
Super Glue – The Quick and Mighty:
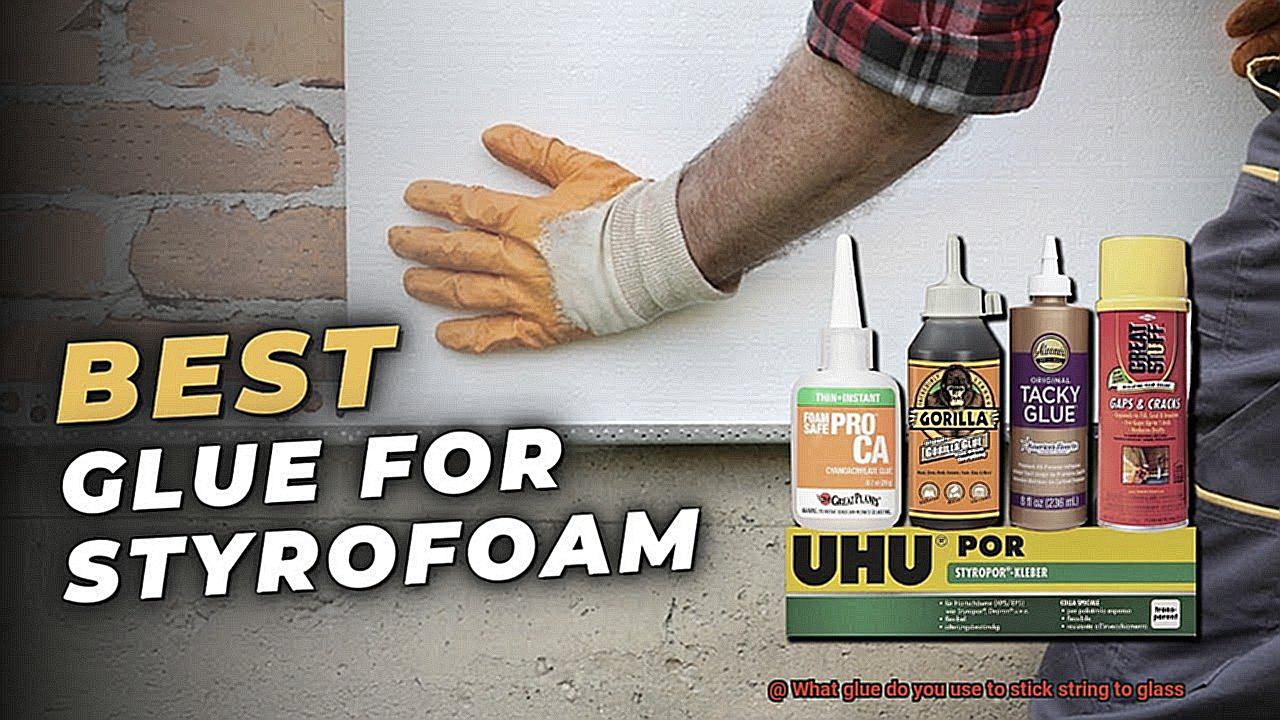
If you’re in a time crunch or working on smaller crafts, super glue is your go-to option. Also known as cyanoacrylate adhesive, this fast-setting glue forms an ultra-strong bond in just seconds.
With just a tiny drop on the glass surface, pressing the string firmly creates a secure attachment that will hold up under pressure. The quick and mighty nature of super glue makes it perfect for those projects where time is of the essence.
Hot Glue – The Versatile Buddy:
When it comes to attaching string to glass, hot glue is like your trusty sidekick. This versatile adhesive is easy to use with a hot glue gun and dries quickly upon contact with the glass. Hot glue is excellent for craft projects or lighter applications where strength requirements aren’t as high. However, keep in mind that the strength of the bond may vary depending on the quality of the hot glue used.
Specialized Glass Bonding Glues – The Experts:
When it comes to bonding glass surfaces, specialized glues designed explicitly for glass bonding are the experts. These glues are formulated to provide excellent adhesion to glass and often have added strength and flexibility properties.
They create a secure and long-lasting bond, making them ideal for attaching string to glass. For the ultimate expertise in bonding, these specialized glues will ensure your string stays firmly attached to the glass surface.
Now that you know about the different types of glues for bonding string to glass, you can confidently embark on your craft projects or DIY gifts.
Whether you choose epoxy glue, super glue, hot glue, or specialized glass bonding glues, make sure to clean the glass surface thoroughly before applying the adhesive and follow the manufacturer’s instructions for the best results.
Epoxy Resin
When it comes to sticking string to glass, you need a glue superhero that can withstand tension, provide a secure bond, and remain invisible. Enter epoxy resin – the ultimate adhesive that ticks all the boxes. In this blog post, we will explore why epoxy resin is the best option for this task and how you can use it effectively.
Advantages of Epoxy Resin:
Epoxy resin offers a range of advantages that make it the go-to choice for bonding string to glass:
- Unmatched Strength: With an incredibly strong bond, epoxy resin can withstand pulling forces and ensure your project stands the test of time.
- Transparency: Unlike other glues, epoxy resin cures to a transparent finish. This means that once applied, it becomes virtually invisible, allowing the string to shine on its own without any distracting marks or residue.
- Durability: Epoxy resin is highly resistant to moisture, heat, and chemicals. It can withstand various environmental conditions without losing its adhesive properties, ensuring that your string remains securely attached to the glass surface.
Application Tips:
To achieve the best results when using epoxy resin for bonding string to glass, follow these application tips:
- Surface Preparation: Thoroughly clean both the glass and string to remove any dust or debris. This will ensure a strong bond between the surfaces. Use a mild detergent solution and a gentle wipe to get them squeaky clean.
- Mixing: Follow the manufacturer’s instructions precisely when mixing the epoxy resin and hardener in the correct proportions. Proper mixing is crucial for achieving optimal bonding strength.
- Application: Use a disposable applicator such as a popsicle stick or toothpick to apply a small amount of epoxy resin onto the glass surface. Spread it evenly in the desired area where you want to attach the string.
- Attachment: Gently press the string into the epoxy resin, ensuring good contact between the adhesive and the surface. Take care not to disturb the adhesive while attaching the string.
- Curing: Allow the epoxy resin to cure undisturbed for the recommended time specified by the manufacturer. This usually takes several hours or overnight. A fully cured bond will be strong and secure.
Epoxy resin emerges as the glue superhero for sticking string to glass surfaces. Its unmatched strength, transparency, and durability make it the best option for achieving a long-lasting bond that remains invisible.
By following proper surface preparation, mixing, application, and curing steps, you can unleash the full potential of epoxy resin and create stunning projects that defy gravity.
Super Glue
Super Glue, also known as cyanoacrylate adhesive, is the ultimate superhero of adhesives. With its quick-drying formula and unparalleled bonding capabilities, it is the go-to solution for sticking string to glass. So, if you’re a DIY enthusiast or a crafting wizard, get ready to embark on a magical journey with Super Glue as your trusty sidekick.
Cleanliness is the key to success when it comes to using Super Glue. Before diving into your project, ensure that both the glass surface and the string are squeaky clean and completely dry. Dust, dirt, or even a hint of moisture can hinder the adhesive’s effectiveness. Wiping away impurities with rubbing alcohol or a glass cleaner will make all the difference in achieving a bond that’s as strong as steel.
When it’s time to apply Super Glue, remember that less is more. Squeeze a small amount onto one end of the string – no need to go overboard. Then, press that glued end firmly onto the desired area of the glass. Hold it in place for just a few seconds, and watch the magic happen before your very eyes. The stage is set for an unbreakable bond that will defy gravity.
Super Glue is compatible with various string materials – nylon, polyester, cotton, and even thin metal wires. It has the power to unite different worlds and create something extraordinary. However, before unleashing your creativity, it’s always wise to test a small area first. This precaution ensures that you achieve a proper bond without causing any damage to either the string or glass surface.
Just like any superhero power, Super Glue comes with great responsibility. Keep in mind that once it creates a bond, it’s there to stay. If you ever need to remove the string later on, proceed with caution. Acetone or nail polish remover can be your allies in dissolving the adhesive, but be mindful when using them on glass. They have the potential to cause damage or leave behind unwanted residue.
So, whether you’re crafting stunning hanging decorations or fixing broken glass objects, Super Glue is your ultimate ally. Its powerful bonding properties and quick-drying formula will never let you down. Just follow these best practices, and your imagination will soar to unimaginable heights.
Hot Glue
Hot glue, the versatile adhesive that we all love, is an absolute game-changer when it comes to sticking string to glass. Whether you’re working on a craft project or creating DIY decorations, hot glue is your trusty sidekick. But before you dive into a gluing frenzy, let’s explore the pros and cons of using hot glue for this purpose.
Pros:
- Strong Bonding: Hot glue is a superstar when it comes to bonding. It forms an unbreakable connection between the string and glass, ensuring that your creation stays intact even through some serious wear and tear.
- Quick and Easy: Time is precious, especially when you’re in the zone of creating something beautiful. Lucky for us, hot glue dries in a flash. Say goodbye to frustrating waiting times and hello to efficient crafting sessions.
- Versatility at its Finest: Hot glue is a true champion when it comes to compatibility. It works like a charm with various types of strings, whether they’re thick and chunky or delicate and dainty. Twine, yarn, ribbon – you name it, hot glue can handle it.
- A Clean Finish: No one likes messy residue ruining their masterpiece. Thankfully, hot glue leaves no trace behind. Your glass surface will remain squeaky clean and free from any unsightly marks.
Cons:
- Handle with Care: While hot glue generally plays well with glass surfaces, caution is key when working with delicate or fragile glass. The heat from the glue gun can potentially cause cracks or even shattering if not handled carefully.
- Compatibility Check: Not all strings are created equal in the hot glue world. Some materials may resist its charms or have slippery surfaces that just won’t stick. To avoid disappointment, it’s essential to test a small area before committing.
Specialized Glass Bonding Glues
When it comes to attaching string to glass, regular glues simply won’t hold up. That’s where specialized glass bonding glues come into play. These magical adhesives are formulated to create a strong and durable bond between string and glass surfaces. In this article, we will explore the different types of specialized glass bonding glues and their unique advantages. So, put on your reading glasses and let’s dive into the fascinating world of glue.
Epoxy Resin: The Unbreakable Bond
One of the most popular choices for glass bonding is epoxy resin. This mighty two-part adhesive consists of a resin and a hardener that, when combined, create an unbreakable bond. Renowned for its exceptional adhesion properties, epoxy resin is perfect for attaching string to glass. It is a reliable option for various types of string and guarantees a long-lasting bond.
UV-Curing Adhesive: A Flash of Brilliance
When speed and efficiency are paramount, UV-curing adhesive is your go-to option. Activated by ultraviolet light, this adhesive quickly bonds the string to the glass surface. It is perfect for projects that require a fast curing time, allowing you to move forward without delay.
Silicone Adhesive: Flexibility at Its Finest
Challenging conditions call for the flexibility and resistance offered by silicone adhesive. This remarkable adhesive excels in moisture and temperature resistance while providing a reliable bond between string and glass. Whether it’s humidity or extreme heat, silicone adhesive has got you covered.
Choosing the Right Glue
- Selecting the perfect glue depends on several factors: the type of string being used, the intended application, and the desired strength of the bond. Take into consideration the compatibility between the glue and your specific requirements to ensure optimal results.
- Epoxy resin: Unbreakable bond, exceptional adhesion
- UV-curing adhesive: Fast curing, efficient bonding
- Silicone adhesive: Flexibility, resistance to challenging conditions
Instructions for Success
To achieve the best bond, always follow the manufacturer’s instructions. These guidelines provide valuable information on surface preparation, application techniques, and curing time. By adhering to these instructions, you will maximize the durability of your bond and ensure a successful project.
Cleaning the Glass Surface for Optimal Adhesion
Don’t despair. We have the secret to achieving optimal adhesion when bonding glass surfaces – a perfectly cleaned surface. In this article, we will guide you through the essential steps to ensure your glass surface is squeaky clean and ready for bonding.
Step 1: Bid Farewell to Loose Debris
Before diving into the cleaning process, let’s start by getting rid of any loose debris on your glass surface. Use a soft brush or a trusty microfiber cloth to gently sweep away dust, dirt, or loose fibers. We want a clean canvas for the adhesive to work its magic.
Step 2: Suds Up with Mild Detergent
Now that the surface is free of loose debris, it’s time to give it a proper wash. Mix a small amount of mild detergent or glass cleaner with water in a bucket or spray bottle. Apply the solution to the glass and use a non-abrasive sponge or cloth to gently scrub away any stubborn dirt or grime. Rinse the glass thoroughly with clean water afterward.
Step 3: Conquering Stubborn Stains and Residues
Sometimes, even mild detergent can’t defeat those stubborn stains or adhesive residues. In these cases, it’s time to bring out the big guns. Grab some isopropyl alcohol or nail polish remover (acetone-based) and apply a small amount to a clean cloth. Gently rub the affected area until the stain or residue disappears. Rinse the glass properly with water once again.
Step 4: Dry It Like a Pro
Moisture is the enemy of adhesive strength, so it’s crucial to make sure your glass surface is completely dry before bonding. Grab a clean, lint-free cloth and give the glass a thorough drying session. Pay extra attention to corners and crevices where water may linger.
Step 5: Protect with Clean Hands
Now that your glass is sparkling clean and dry, take a moment to admire your work. However, before touching the glass with bare hands, remember that our skin contains natural oils that can interfere with adhesive properties. If necessary, wear clean gloves or handle the glass using clean, dry tools to prevent any contamination.
Applying the Glue Precisely and Carefully
When it comes to attaching string to glass, how you apply glue can determine the success of your project. In this article, we will explore the importance of precise and careful glue application, along with valuable tips and techniques to achieve professional results.
Choose the Right Glue:
For a strong bond between string and glass, opt for clear drying glues like cyanoacrylate (super glue) or clear epoxy resin. These adhesives offer the necessary strength for a secure attachment.
Prepare the Glass Surface:
Thoroughly clean the glass surface before applying glue to remove dirt, dust, or oil residue that can weaken the bond. Use a mild detergent or glass cleaner with a lint-free cloth or paper towel. Ensure the surface is completely dry before proceeding.
Apply Glue with Precision:
To avoid wasting excessive glue, create a glue palette using disposable materials like cardboard or wax paper. Dip a small brush or toothpick into the glue and apply a thin, even layer to the desired area of the glass where you want to attach the string. Be cautious not to apply too much glue as excess can compromise aesthetics.
Securely Attach the String:
Gently press the string onto the glued area of the glass, ensuring even adherence without excessive pressure. Hold it in place for a few seconds to allow for initial bonding. Avoid moving or disturbing the string during curing to maintain a strong bond.
Curved or Irregular Surfaces:
For curved or irregular glass surfaces, apply small dots of glue spaced along the length of the string. This technique provides flexibility and conformity to the shape of the glass.
Factors to Consider When Choosing an Adhesive
Choosing the perfect adhesive to stick string to glass can feel like navigating through a maze. But fear not. We’re here to help you find the ideal partner for your project. Let’s dive into the factors that need to be considered when making this important decision.
Strength is paramount when it comes to sticking string to glass. Glass is smooth and non-porous, making it challenging for adhesives to bond properly. Look for adhesives specifically designed for bonding glass with a strong adhesive strength. You don’t want your string falling off after a few days.
Transparency is another crucial factor. If you want the adhesive to be invisible on the glass, choose a transparent option. This ensures that your string adheres seamlessly without any visible traces of glue. Opt for clear or transparent adhesives that dry clear, providing a clean and professional finish.
Flexibility is essential, especially if your project involves movement or stress on the string. Hanging ornaments or picture frames, for example, require an adhesive that can withstand these forces without losing its bond. Choose an adhesive that offers flexibility when needed.
Consider the drying time of the adhesive. Some glues take hours or even overnight to fully set and provide a strong bond. If you’re working on a tight schedule, look for adhesives with quicker drying times to save yourself unnecessary stress.
Temperature resistance is also crucial. If your project will be exposed to heat or cold, choose an adhesive specifically formulated to withstand extreme temperatures. You don’t want your creation melting or falling apart due to weather conditions.
Application method matters too. Some adhesives come in tubes with nozzles for precise application, while others may require brushes or spatulas for spreading. Pick an adhesive that suits your preferred method and is easy to work with.
Lastly, always consider the toxicity and safety of the adhesive. Especially if you’re working with children or in a poorly ventilated area, choose a non-toxic and low odor adhesive whenever possible. Craft without any health hazards.
Tips for Best Results When Using Epoxy Resin
Crafting with glass can be a fascinating and creative experience. Whether you’re making beautiful hanging ornaments, personalized picture frames, or stunning jewelry, using epoxy resin to adhere string to glass can give your projects a professional and durable finish. To help you achieve the best results, we’ve compiled some important tips and tricks to consider when working with epoxy resin on glass.
Choose the Right Epoxy Resin:
To ensure a strong and long-lasting bond between the string and glass, it’s essential to choose epoxy resin specifically designed for bonding these materials. Look for a clear, high-strength epoxy resin that is suitable for use on both glass and various types of strings. This will ensure that your finished project looks professional and stands the test of time.
Prepare Your Materials:
Before starting your project, take the time to properly prepare your materials. Clean the glass surface thoroughly using a glass cleaner or a mixture of warm water and mild detergent. This will remove any dirt, oils, or residue that may prevent the epoxy resin from adhering properly. Similarly, make sure the string is clean and free from any oils or coatings that could hinder the bonding process.
Measure Accurately and Mix Thoroughly:
Epoxy resin consists of two components – the resin and the hardener. It’s crucial to measure these components accurately using a scale or graduated mixing cups. Even a slight variation in the ratio can affect the strength and durability of the bond. Once measured, mix the two components together thoroughly using a stir stick or a mixing tool. Proper mixing ensures that the epoxy resin cures evenly and produces a strong bond.
Apply in Thin Layers:
When applying epoxy resin to adhere string to glass, it’s best to work in thin layers rather than applying a thick coat all at once. This allows for better control and ensures that the epoxy can penetrate and bond both materials effectively. Apply a thin layer of epoxy onto the glass surface, then press the string into place before adding another layer if needed. Avoid applying too much resin, as it can seep out from under the string and create a messy appearance.
Allow Sufficient Curing Time:
Once you’ve applied the epoxy resin and positioned the string, it’s important to allow sufficient curing time for the bond to fully develop its maximum strength. Follow the manufacturer’s instructions regarding the recommended curing time for the specific epoxy resin you are using. Avoid touching or moving the glued string during this curing period to prevent any weakening of the bond. Patience is key to achieving a strong and durable result.
Tips for Best Results When Using Super Glue
Look no further than super glue for a strong and reliable bond. In this article, we’ll provide you with essential tips to ensure the best results when using super glue to attach string to glass.
Prepare and Clean the Surfaces:
Before applying super glue, it is crucial to prepare both the glass surface and the string. Begin by thoroughly cleaning the glass surface with a mild detergent or glass cleaner. This step removes any fingerprints, oils, or residues that can hinder the adhesive’s effectiveness. Ensure the surface is completely dry by wiping it with a lint-free cloth or paper towel.
Similarly, clean the string by wiping it with a clean cloth or an alcohol swab. This eliminates any oils or contaminants that may prevent proper adhesion between the string and the glass.
By starting with clean and dry surfaces, you create an ideal foundation for the super glue to bond effectively.
Apply Sparingly:
When working with super glue, remember that less is more. Apply a thin line of glue along the length of the string or on the specific area of the glass where you want to attach it. Excessive glue can result in messy applications and longer drying times. A small amount of super glue goes a long way in creating a strong bond.
Press and Hold:
After applying the super glue, carefully press the string onto the glass surface and hold it in place for a few seconds. Applying slight pressure ensures a secure bond between the two materials. You can use your fingers or a tool like tweezers to hold the string in place while the glue sets.
Allow Ample Drying Time:
To achieve optimal results, avoid moving or disturbing the glued area until the adhesive has fully cured. The drying time can vary depending on the brand and type of super glue used, so refer to the product instructions for specific guidelines. Patience is key to ensure a strong and long-lasting bond.
Let it Set Undisturbed:
For the best outcome, let the glued object sit undisturbed for at least 24 hours before subjecting it to any stress or strain. This gives the adhesive ample time to fully cure and establish a secure bond. During this period, refrain from touching or tugging on the glued area.
Removal Tips:
If you ever need to remove super glue from glass, you can use acetone or nail polish remover. Apply a small amount of acetone on a clean cloth and gently rub the glued area until the adhesive starts to dissolve. Take care not to damage the glass surface while removing the glue.
Tips for Best Results When Using Hot Glue
Look no further than hot glue, the adhesive of choice for its exceptional bonding capabilities and versatility. This article will delve into the key tips for achieving the best results when using hot glue to stick string to glass, ensuring your project turns out beautifully.
Prepare the Surface:
Before diving into the gluing process, take the time to properly prep the glass surface. Begin by diligently cleaning the glass with a high-quality glass cleaner or rubbing alcohol and a soft, lint-free cloth. This step ensures that any dust, dirt, or oils are eliminated, creating an ideal surface for strong glue adhesion.
Invest in a High-Quality Glue Gun:
To achieve optimal results, it’s crucial to invest in a high-quality hot glue gun and compatible glue sticks. Cheaper alternatives may lack adequate heat or consistent flow, leading to subpar bonding. Look for a hot glue gun with adjustable temperature settings, providing you with better control over the flow and output.
Heat Up the Glue Gun:
Follow the manufacturer’s instructions to heat up your chosen hot glue gun. Allow it a few minutes to reach the optimum temperature before use. It is essential that the glue is fully melted and in a liquid state before applying it to the glass.
Apply Glue in Thin Layers:
To ensure neat and even results, apply the hot glue in thin, even layers. Avoid excessive amounts of glue, as this can create messy and uneven bonds. Begin by applying a small amount of glue to one end of the string and pressing it firmly onto the glass surface. Continue slowly and meticulously, pressing the string onto the glass and applying more glue as necessary.
Work Efficiently while Practicing Caution:
Hot glue dries rapidly, necessitating both efficiency and caution. Prior to commencing your project, gather all necessary materials and have them readily accessible. Take your time to position the string correctly and press it firmly into place. Rushing through this process can lead to errors or uneven application.
Smooth Out the String:
To achieve a secure bond and a polished appearance, employ a tool or your fingers to smooth out the string on the glass. When using your fingers, exercise caution as hot glue carries the risk of burns. Consider wearing protective gloves or waiting for the glue to cool slightly before smoothing out the string.
Tips for Best Results When Using Specialized Glass Bonding Glues
To create a strong and secure bond between string and glass, it is crucial to use specialized glass bonding glues. Whether you are working on a craft project or repairing a broken glass item, these tips will help you achieve the best results.
Choose the Right Glue:
Selecting the right glue is essential for a successful bond. Look for specialized glass bonding glues that are specifically designed for strong adhesion to glass surfaces. These glues offer superior durability and can withstand different environmental conditions.
Clean and Prepare the Surfaces:
Thoroughly clean both the glass surface and the string before applying the glue. Use mild soap or glass cleaner to remove dirt, dust, and oils from the glass. Wipe the string with a clean cloth or an alcohol wipe to eliminate any residues that may hinder adhesion.
Apply the Glue Evenly:
Achieve optimal results by applying the glue evenly on both the glass surface and the string. Use a small brush or applicator to spread a thin layer of glue on the areas where you want the string to adhere. Ensure complete coverage without leaving any gaps or clumps of glue.
Allow for Sufficient Drying Time:
Be patient and allow sufficient drying time for the adhesive to set properly. Follow the instructions provided by the manufacturer for specific drying times, as different glues may require different durations. Avoid touching or moving the string during this period to prevent disruption in bonding.
Apply Pressure for Strong Bonding:
After the glue has dried sufficiently, apply gentle pressure on the string to ensure a strong bond with the glass surface. Use your fingers or a smooth object like a roller or credit card to press down firmly but gently. Maximize contact between the string and glass for a secure bond.
ILXJWRK45w0″ >
Conclusion
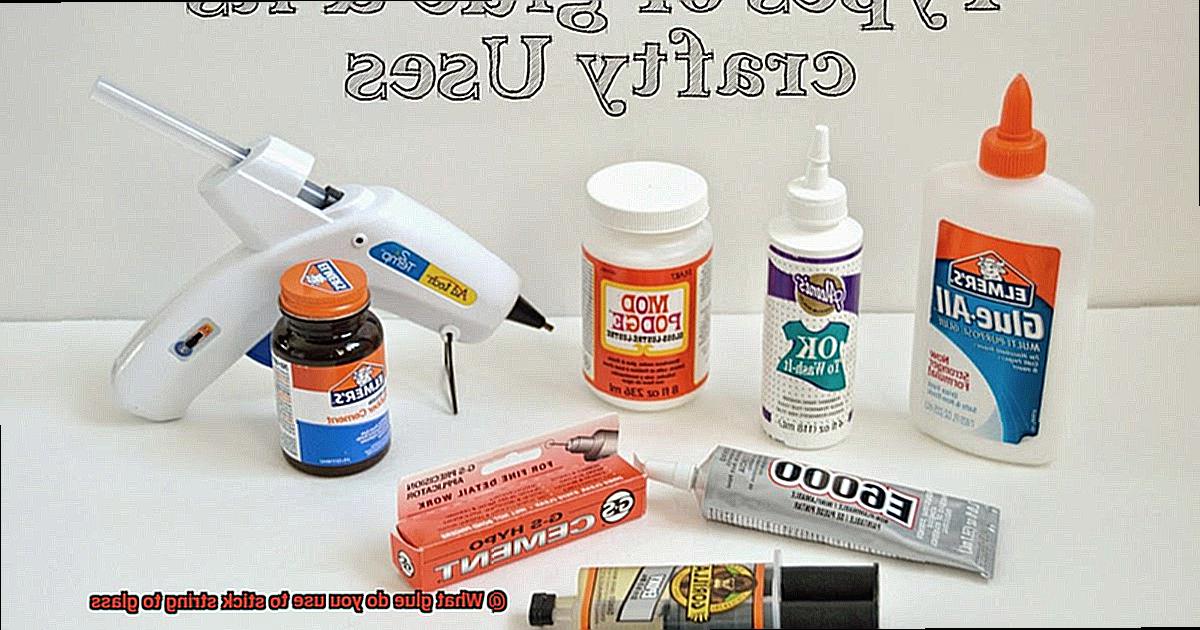
When it comes to adhering string to glass, selecting the right glue is crucial. One reliable option is a clear adhesive called E6000. This versatile glue not only bonds string securely to glass but also provides a strong hold that can withstand various conditions.
Another excellent choice is silicone adhesive, known for its flexibility and durability. It forms a resilient bond between string and glass, ensuring a long-lasting attachment.
For those seeking a quick fix, hot glue guns can come in handy. With their fast-drying nature, they offer convenience and efficiency when sticking string to glass. However, keep in mind that hot glue may not be as durable as other options.
Alternatively, if you’re working on delicate or decorative projects, opt for a specialized craft glue designed specifically for bonding materials like string to glass. These glues often have precise applicators that allow for accurate placement and minimize mess.
Remember, regardless of the adhesive you choose, it’s essential to clean the glass surface thoroughly before applying any glue. This ensures optimal adhesion and prevents any residue from interfering with the bond.
In conclusion, selecting the right glue depends on your specific needs and preferences. Whether it’s E6000, silicone adhesive, hot glue guns, or specialized craft glues – each offers its own advantages when it comes to sticking string to glass.

