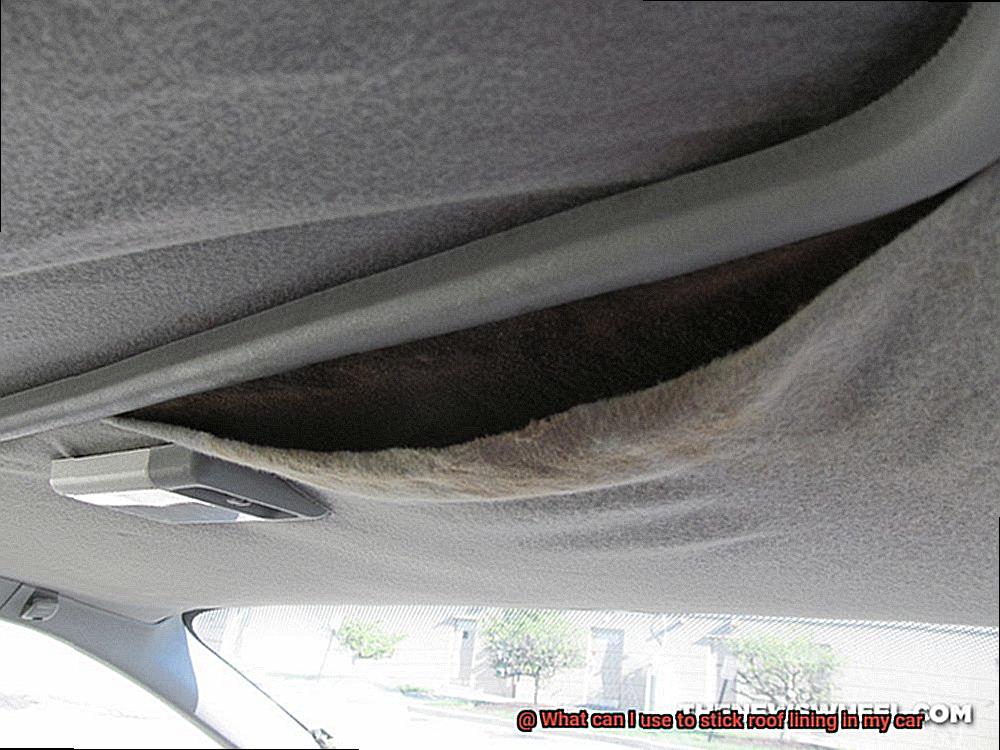
Imagine this: you’re out on the open road, wind in your hair, and your favorite tunes blasting through the speakers. Life couldn’t get any better…until you notice that pesky roof lining hanging down like a sad curtain, threatening to ruin your blissful driving experience. Don’t worry, my friend, because we’ve got your back.
When it comes to fixing or replacing the roof lining in your car, finding the right adhesive is key. But with so many options out there, it’s easy to feel overwhelmed and lost. That’s where we step in.
In this blog post, we’ll take you on a journey through the world of adhesives for sticking roof lining in your car. From tried-and-true classics to cutting-edge innovations, we’ll explore each adhesive’s strengths and weaknesses so that you can make an informed decision based on what suits you best.
Whether you’re a DIY guru or planning to call in the professionals, we’ve got all the information you need to rescue your car’s sagging fabric and restore harmony to your cabin. Say goodbye to drooping headliners and hello to a comfortable and stylish ride once again.
So, buckle up and get ready for an adhesive adventure that will leave you feeling like a true expert when it comes to sticking roof lining in your car. Let’s hit the road together.
What is Automotive Headliner Adhesive?
Contents
- 1 What is Automotive Headliner Adhesive?
- 2 What are the Benefits of Using Automotive Headliner Adhesive?
- 3 What is Spray Adhesive and How Does it Work?
- 4 What are the Benefits of Using Spray Adhesive?
- 5 What is Contact Adhesive and How Does it Work?
- 6 What are the Benefits of Using Contact Adhesive?
- 7 Preparing the Surface for Application
- 8 Testing the Adhesive Before Applying
- 9 Conclusion
When it comes to preserving the integrity of your car’s roof lining, there is one adhesive that stands above the rest – automotive headliner adhesive. This remarkable glue is specifically formulated to securely attach the fabric to the roof of your vehicle, ensuring a lasting and reliable bond.
In this article, we will explore the world of automotive headliner adhesive, examining its purpose, features, and essential application techniques.
The Quest for the Perfect Adhesive:
Before delving into the intricacies of automotive headliner adhesive, it is important to acknowledge that other adhesive options exist. Spray adhesives and contact adhesives are popular alternatives when it comes to securing fabric in cars.
However, automotive headliner adhesive surpasses them in terms of its resistance to extreme temperatures and long-term durability.
Features and Formulation:
Automotive headliner adhesive is meticulously designed to withstand the harsh conditions found inside a car. It effortlessly endures scorching heat, relentless vibrations, and the test of time, ensuring that your roof lining remains firmly intact. With its impressive strength and resistance to sagging or drooping, this adhesive offers unparalleled peace of mind regarding the preservation of your car’s interior.
Application Tips:
To achieve optimal results with automotive headliner adhesive, meticulous surface preparation is paramount. Begin by thoroughly cleaning the roof, eliminating any traces of dirt, grease, or remnants of previous adhesive applications.
Additionally, ensure that the surface is dry before commencing the adhesive application process. To guarantee compatibility with your specific fabric material, it is advisable to perform a small compatibility test on an inconspicuous area.
Applying the adhesive uniformly and allowing ample drying time are pivotal factors in achieving a robust bond between the fabric and the roof.
Adhere closely to the manufacturer’s instructions, applying an even layer of adhesive on both surfaces. Once the adhesive becomes tacky, press the fabric and the roof together firmly for a secure and unyielding hold.
In conclusion, automotive headliner adhesive plays a crucial role in maintaining the integrity of your car’s roof lining. Its exceptional strength, resistance to extreme temperatures, and unwavering durability make it an indispensable choice for automotive applications.
By diligently preparing the surface and adhering to the manufacturer’s instructions, you can achieve a bond that can withstand the rigors of driving.
What are the Benefits of Using Automotive Headliner Adhesive?
Look no further. In this guide, we will uncover the benefits of using automotive headliner adhesive, the secret weapon to maintaining a flawless interior.
Whether you’re a car enthusiast or simply want to keep your vehicle in top shape, this article is for you.
Strong and Durable Bond:
Automotive headliner adhesive creates a permanent bond between the headliner fabric and the roof, ensuring it stays in place even under extreme conditions like vibrations, movement, and temperature changes.
No more worrying about loose fabric while cruising on rough roads.
Easy Application:
With its convenient spray or aerosol can, applying automotive headliner adhesive is a breeze.
Simply spray it onto the desired surface, press the headliner fabric onto it, and watch as it dries quickly to form a strong bond within minutes.
Excellent Heat Resistance:
Let’s face it – car interiors can get scorching hot, especially during summer or in regions with high temperatures.
Thankfully, automotive headliner adhesive is designed to withstand these conditions without losing its bonding strength or causing the headliner fabric to sag or come loose.
Moisture and Humidity Resistance:
Cars are often exposed to changing weather conditions, including rain and humidity.
Automotive headliner adhesive prevents moisture from seeping into the fabric, eliminating the risk of mold or mildew growth and unpleasant odors.
Keep your car fresh and comfortable during any weather.
Noise Reduction:
Loose or poorly attached headliners can cause annoying rattling and noise while driving.
Automotive headliner adhesive creates a tight bond between the fabric and the roof, minimizing vibrations and reducing interior noise levels for a smoother and quieter ride.
Versatility:
Not only is automotive headliner adhesive perfect for attaching the roof lining, but it can also be used for various other interior trim applications. From attaching door panels to securing carpeting or dashboard covers, this versatile adhesive is a cost-effective solution for every car owner.
Long-lasting and Resistant:
Get ready for an adhesive that can withstand the everyday wear and tear of your car’s interior. Automotive headliner adhesive is designed to be long-lasting, ensuring that once the headliner fabric is attached, it will stay in place without the need for frequent repairs or reattachments.
What is Spray Adhesive and How Does it Work?
Fear not, for spray adhesive is here to save the day. In this comprehensive guide, we will delve into the captivating world of spray adhesive, exploring its composition, application process, advantages, and safety precautions. Prepare to be amazed by the wonders of this versatile glue.
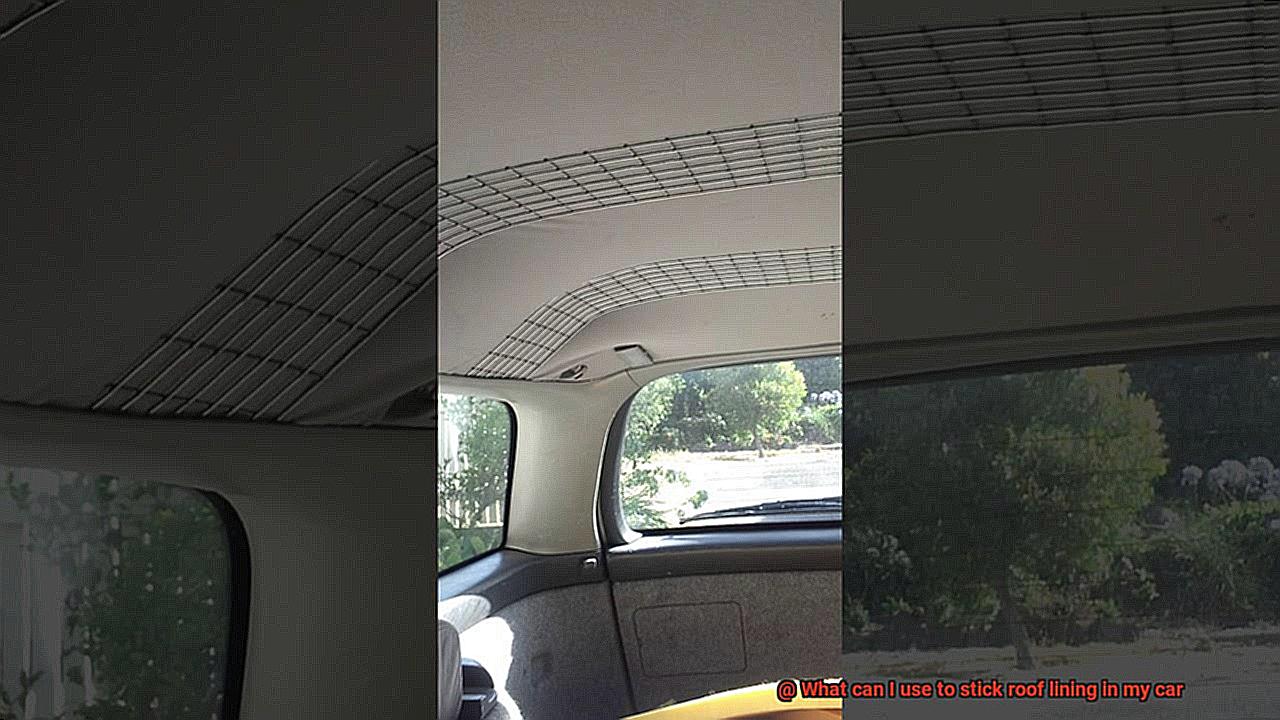
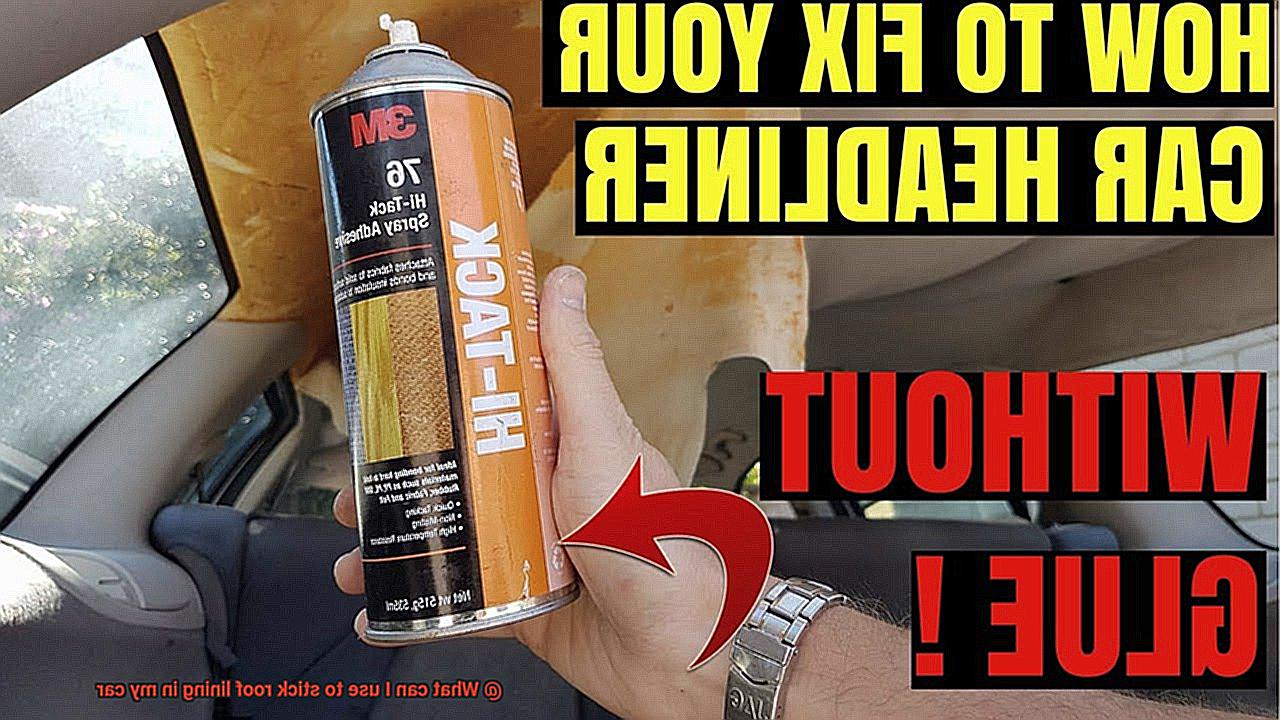
What is Spray Adhesive?
- A can or aerosol form of glue with a multitude of applications.
- A powerful concoction of solvents, resins, and binding agents that create an unbreakable bond.
How Does It Work?
- Surface Preparation: Thoroughly clean the surface to eliminate dirt and grease.
- Shake and Spray: Vigorously shake the can and evenly spray from a distance of 6-8 inches.
- Tackiness: Wait for the adhesive to reach the perfect tackiness before bonding.
- Bonding: Firmly press the materials together, smoothing out wrinkles or bubbles.
Advantages of Spray Adhesive:
- Temporary Bond: Initial bond allows for repositioning if needed.
- Strength and Durability: Offers unparalleled bond strength that withstands the test of time.
- Versatility: Bonds various materials like fabric, foam, wood, plastic, and metal.
- Rapid Drying Time: Some adhesives dry within minutes for instant results.
Safety Precautions:
- Ventilation is Key: Work in a well-ventilated area to avoid inhaling strong fumes.
- Guard Your Hands: Wear protective gloves to shield your skin from direct contact with the adhesive.
Spray adhesive is a true game-changer when it comes to tackling roof linings in cars or any gluing task at hand.
Its convenience, adaptability, and indomitable strength make it an indispensable tool for DIY enthusiasts and professionals alike.
So, whether you’re embarking on an awe-inspiring artsy project or determined to fix that pesky roof lining, remember to grab a can of spray adhesive and watch the magic unfold before your eyes.
What are the Benefits of Using Spray Adhesive?
The superhero of adhesives has arrived – spray adhesive. This incredible glue possesses a range of benefits that make it the ultimate solution for installing car roof linings and tackling various gluing tasks.
In this article, we will explore the marvels of spray adhesive and why it should be your go-to choice for all your adhesive needs.
Ease of Application:
Say goodbye to brushes and spreading tools. Spray adhesive offers direct and even application onto surfaces, making the process quick and convenient.
No more struggling with large areas like car roof linings – simply spray, stick, and voila.
Unyielding Bonding:
Spray adhesives possess exceptional bonding capabilities, creating a secure and long-lasting bond between different materials. This is crucial for car roof linings, as they need to withstand heat, humidity, and vibrations while driving.
With spray adhesive, you can rest assured knowing that your roof lining will stay put.
Versatility at Its Finest:
Spray adhesives are incredibly versatile and can be used on a variety of materials such as fabric, foam, rubber, leather, and even metal surfaces.
This makes them an invaluable adhesive for any DIY enthusiast or professional looking to tackle different projects or repairs.
Consistent Coverage:
Achieving an even coverage across the entire surface can be challenging with traditional adhesives. Spray adhesive eliminates this problem by ensuring a consistent and uniform application.
No more lumps or uneven areas that compromise the functionality and appearance of your car’s interior.
Time-Saving Efficiency:
Time is precious, especially when it comes to car repairs or projects. Spray adhesives offer a significant time-saving advantage with their quick-drying formula.
Immediate bonding means less waiting time, allowing you to get back on the road faster.
Minimal Mess:
No one likes a messy glue mishap. Spray adhesive minimizes mess and spills commonly associated with liquid glues.
The aerosol can ensures precise and controlled application, reducing the chances of sticky residue or accidental spills on unintended surfaces.
Reversible Flexibility:
Mistakes happen, but spray adhesive has got you covered. Some types of spray adhesives are designed to allow for repositioning or removal of bonded materials within a certain timeframe after application. This gives you the flexibility to correct any errors or replace the roof lining in the future.
What is Contact Adhesive and How Does it Work?
When it comes to sticky situations, messy glues and long drying times can be a real headache. That’s where contact adhesive swoops in like a superhero, revolutionizing your DIY projects, especially when it comes to sticking roof linings in your car.
So, what exactly is contact adhesive? It’s a type of glue renowned for its strong and durable bond. Sold in liquid form, it can be applied to both porous and non-porous materials. But what sets contact adhesive apart from other glues is its ability to create an instant bond when two surfaces come into contact with each other. No need for clamping or waiting for hours for it to dry – it sticks right away.
How does this magical adhesive work? The secret lies in solvent evaporation. The adhesive contains rubber polymers dissolved in a volatile solvent. When you apply the adhesive to a surface, the solvent starts to evaporate, leaving behind sticky rubber particles. These particles rapidly solidify and form a robust bond when they come into contact with another surface coated with the same adhesive.
Versatility is contact adhesive’s superpower. It can bond an array of materials, including fabric, leather, foam, metal, wood, plastic, and glass. This makes it perfect for sticking roof linings in cars since they are often made of fabric or foam and require secure attachment to the car’s roof.
Using contact adhesive is a breeze. Just ensure that both surfaces are clean and free from dust or grease. Apply the adhesive evenly to both surfaces using a brush or roller, and let it dry for a few minutes. Then, align the surfaces and apply even pressure across the entire area to ensure a strong bond.
But beware. Contact adhesive creates a permanent bond that is difficult to undo. So take your time to align everything correctly before bringing the surfaces together. Once the bond is formed, repositioning or removing the glued materials without causing damage becomes a formidable challenge.
What are the Benefits of Using Contact Adhesive?
When it comes to sticking roof linings in cars, finding a reliable adhesive is crucial. Look no further than contact adhesive. With exceptional bonding strength, ease of application, and long-lasting results, contact adhesive has become the go-to choice for this task.
In this article, we will explore the many benefits of using contact adhesive for sticking roof linings in cars.
Strong and Durable Bond:
Contact adhesive is renowned for its unyielding bond. It withstands varying temperatures, vibrations, and even the wildest off-road adventures. Say goodbye to sagging roof linings.
Versatility:
Contact adhesive works seamlessly on various materials commonly found in car interiors. Whether it’s fabric, foam, vinyl, or leather, contact adhesive has got you covered. It is suitable for any car model or interior design.
Easy Application for DIY Enthusiasts:
With user-friendly spray or brush-on options, applying contact adhesive is a breeze. Simply coat both the roof lining material and the car’s surface evenly, let it partially dry, and firmly press the surfaces together. It’s that simple.
Quick Drying Time:
Unlike other adhesives that require lengthy drying times, contact adhesive dries relatively quickly. No more waiting around for hours on end. Follow the manufacturer’s instructions for optimal results.
Heat Resistance:
Contact adhesives are designed to withstand high temperatures without losing their adhesive properties. Your roof lining will stay securely attached even during scorching summer days or extended sun exposure.
Flexibility for a Perfect Fit:
Contact adhesive makes dealing with awkwardly shaped surfaces a breeze. Its flexibility allows the roof lining material to stretch and adjust easily during installation, ensuring a smooth and seamless finish on curved or irregular surfaces.
Clean and Mess-Free:
Contact adhesives minimize mess during application. No additional tools or equipment required, and any excess adhesive can be easily cleaned using solvents or rubbing alcohol. Convenient and hassle-free.
Long-Lasting Results:
Contact adhesive provides a reliable and long-lasting solution for sticking roof linings in cars. Your investment of time and effort will pay off as the roof lining remains securely attached for years to come.
Preparing the Surface for Application
Before embarking on the exciting journey of installing a car’s roof lining, it is essential to properly prepare the surface. This ensures that the roof lining adheres well and remains in place for an extended period. To achieve this, there are several key steps to follow.
First and foremost, the surface must be thoroughly cleaned. Dirt, dust, and grease can hinder the adhesive’s effectiveness, so it is crucial to eliminate them. Create a mixture of mild detergent and water, and gently wipe away any unwanted substances using a soft cloth or sponge. The goal here is to achieve a squeaky clean surface.
Once the surface is immaculate, it must be dried completely. Moisture and adhesive do not make good companions, so it is imperative to ensure that not a single drop remains. This can be achieved by using a clean towel or allowing the surface to air dry naturally. Remember, patience is a virtue.
With the surface now dry and ready for action, it is time to inspect it for imperfections. Any cracks, holes, or uneven areas should be addressed before applying the adhesive. Smooth out these blemishes like a true professional using filler or putty.
To enhance the adhesive’s grip, lightly sand the surface with fine-grit sandpaper. This creates an optimal bonding paradise for the roof lining material. However, be gentle during this process. Our goal is to roughen up the surface, not destroy it.
Next on the agenda is eliminating any loose bits of fabric or foam from the previous roof lining. A soft brush or vacuum cleaner will efficiently handle this task, ensuring that no rogue fluff interferes with our glue party.
Now comes the secret weapon – primer or adhesion promoter. These mighty products take adhesive performance to the next level by enhancing the bond between the surface and the roof lining material. Follow the manufacturer’s instructions diligently and allow ample drying time before proceeding.
Congratulations. The surface is now prepared for the roof lining’s application. Give yourself a well-deserved pat on the back, because you are ready to conquer the world of glue and create a professional, long-lasting installation that will leave your car looking and feeling incredible.
Testing the Adhesive Before Applying
Hold your horses before slapping on that adhesive. Testing it beforehand is a crucial step you shouldn’t overlook. Trust me, this little extra effort will save you from potential headaches down the road.
So why is testing the adhesive so important? Let’s break it down:
- Material Compatibility: Different roof lining materials require different adhesives. You wouldn’t want to use fabric adhesive on a vinyl roof lining, would you? Test the adhesive to ensure it’s suitable for your specific material and ensure optimal bonding.
- Surface Compatibility: The adhesive needs to adhere well not only to the roof lining material but also to your car’s roof surface. Conduct a small test patch on both surfaces to ensure they bond seamlessly.
- Drying Time and Strength: Waiting forever for the adhesive to dry is nobody’s idea of fun. Test its drying time to know how long you’ll have to wait before moving forward. Additionally, check its strength so that once dried, it provides a strong and long-lasting bond.
- Resistance to Heat and Moisture: Cars face temperature changes and weather conditions. Choose an adhesive that can withstand these factors without losing its bond. Test its resistance to heat and moisture for peace of mind knowing your roof lining will stay put regardless of Mother Nature’s whims.
- Compatibility with Other Products: If additional products like primers or activators are recommended for optimal bonding, test their compatibility with the adhesive. Ensure all products work together harmoniously, providing a strong and durable bond.
LfjogwGECUM” >
Conclusion
When it comes to sticking roof lining in your car, you need a reliable and effective adhesive. There are several options available that can get the job done.
One popular choice is automotive-grade spray adhesive. This type of adhesive is specifically designed for automotive applications and provides a strong bond that can withstand the temperature changes and vibrations experienced in a car.
Another option is headliner adhesive, which is specifically formulated for attaching fabric to the roof lining. This adhesive is often available in aerosol cans, making it easy to apply evenly.
If you prefer a more permanent solution, you can also use contact adhesive. This type of adhesive requires both surfaces to be coated before they are pressed together, creating a strong bond that will last for years.
No matter which adhesive you choose, it’s important to properly prepare the surfaces before applying the glue. Make sure to clean the roof lining thoroughly and remove any old adhesive or debris.
In conclusion, when it comes to sticking roof lining in your car, there are several options at your disposal.

