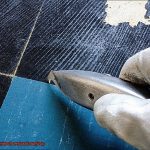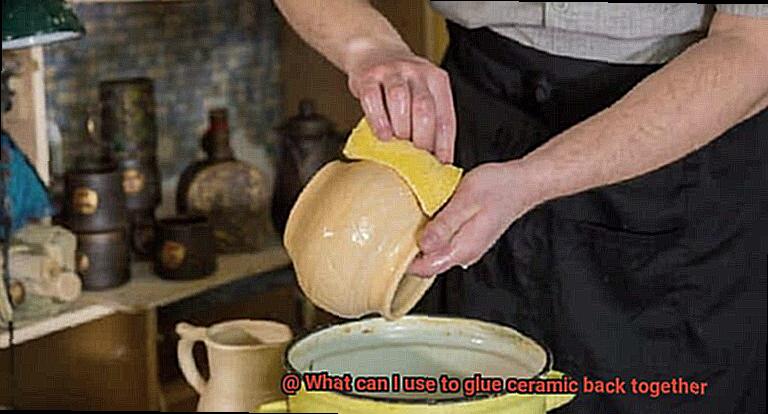
Life is full of unexpected twists and turns, and sometimes those twists result in shattered ceramic pieces. It’s a gut-wrenching moment when your beloved ceramic item breaks into fragments, but fret not.
There’s hope for restoration. With the right adhesive and a gentle touch, you can piece together your broken ceramics and bring them back to life.
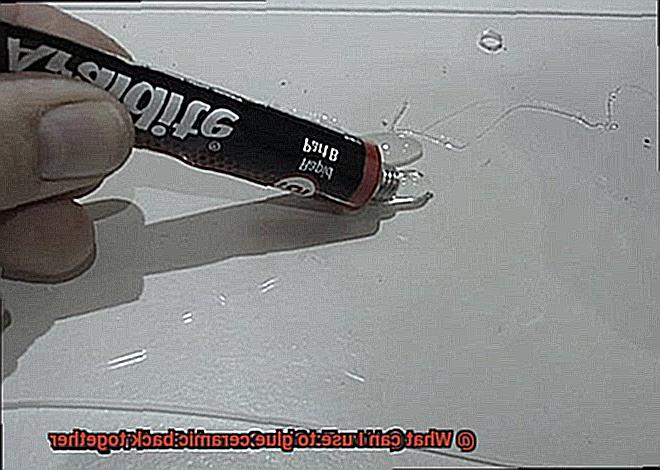
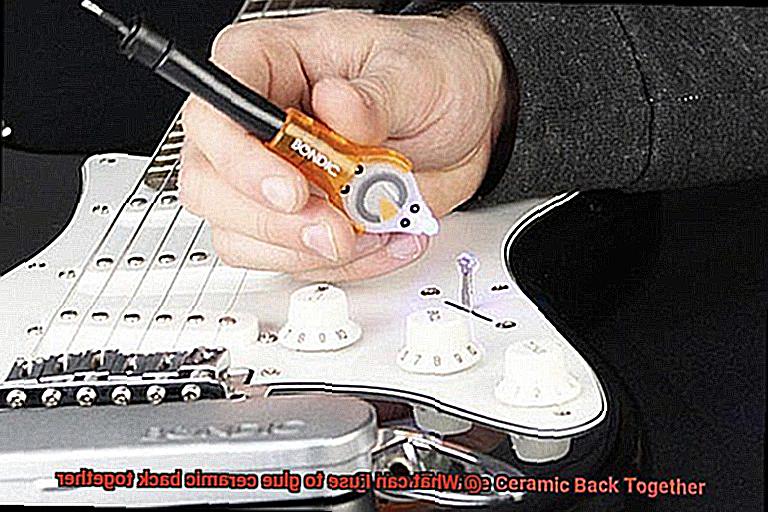
So, what magical substance can you use to glue ceramic back together? In this all-encompassing guide, we’ll dive deep into the realm of ceramic repair, exploring the finest methods and adhesives to seamlessly mend those shattered treasures.
Bid farewell to despair as we embark on a journey through the art of ceramic repair, one broken fragment at a time.
Types of Adhesives for Ceramic Repairs
Contents
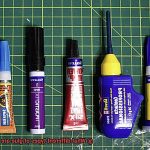
Ceramics are delicate treasures that can easily break or chip, but fear not. With the right adhesive, you can fix your favorite ceramic pieces and restore them to their former glory. Let’s explore the different types of adhesives available for ceramic repairs and find out which one is perfect for your needs.
Epoxy Adhesives
If you’re looking for a strong and durable bond, epoxy adhesives are the way to go. These adhesives consist of two components that need to be mixed together before application. Once cured, epoxy adhesives create a super-strong bond that can withstand high temperatures. So whether it’s a broken teacup or a chipped ceramic vase, epoxy will hold it all together.
Cyanoacrylate Adhesives (Super Glue)
When it comes to quick fixes, super glue is your best friend. Cyanoacrylate adhesives bond quickly and provide a strong hold. However, they may not be as durable as epoxy adhesives and may not withstand high temperatures. So if you have a small repair job or a delicate ceramic piece, super glue is the way to go.
Polyurethane Adhesives
Flexibility is the name of the game with polyurethane adhesives. These adhesives are perfect for ceramic repairs that need to withstand movement or stress. They provide a strong bond and are resistant to water and heat. So if you have a ceramic figurine that needs a little extra love, polyurethane adhesive will get the job done.
Silicone Adhesives
When it comes to sealing and bonding ceramics, silicone adhesives are the go-to choice. They offer excellent resistance to water and heat, making them suitable for repairs in areas exposed to moisture or high temperatures. However, silicone adhesives may not provide the same level of strength as epoxy or polyurethane adhesives. So if you have a ceramic pot that needs sealing or a broken tile in your bathroom, silicone adhesive will do the trick.
Ceramic-Specific Adhesives
For the ultimate ceramic repair, consider using a ceramic-specific adhesive. These adhesives are specially formulated for bonding ceramics and offer excellent strength and durability. They may come in different forms such as liquid, gel, or paste, allowing for easy application depending on the repair requirements. So whether it’s a cracked ceramic plate or a broken porcelain doll, ceramic-specific adhesive is your best bet.
Now that you know the different types of adhesives for ceramic repairs, you can confidently fix your favorite ceramics and keep them looking beautiful for years to come. Remember to follow the manufacturer’s instructions and properly prepare the surfaces before applying any adhesive.
Benefits of Epoxy Adhesive
Imagine the heart-wrenching sight of your beloved ceramic treasure shattered into countless fragments. The despair can be overwhelming. But fret not. Enter epoxy adhesive, a true hero in the world of ceramic restoration. Its exceptional strength, versatility, resistance to chemicals and moisture, and long-term durability make it the go-to choice for gluing ceramic materials back together.
Let’s start with strength – the backbone of any adhesive worth its salt. Epoxy adhesive creates a bond that defies the laws of fragility, capable of withstanding heavy loads without cracking or breaking. Whether you’re repairing a delicate teacup or a grand ceramic sculpture, epoxy adhesive ensures a reliable and long-lasting bond that won’t let you down.
But epoxy adhesive isn’t just about brute strength; it’s a versatile companion that adapts to your needs. It embraces different types of ceramics with open arms – from porcelain to stoneware to earthenware, it bonds them all. No matter how complex or diverse your ceramic repair project may be, epoxy adhesive rises to the occasion and forms an unbreakable alliance.
Now, let’s talk about resilience. Epoxy adhesive scoffs at chemicals, moisture, and temperature variations. It’s like a shield against the elements, allowing your repaired ceramic object to brave the outdoors without losing its adhesive properties or deteriorating over time. Rain or shine, your restored treasure will stand tall, unfazed by Mother Nature’s whims.
But it doesn’t stop there – epoxy adhesive understands the importance of time. It grants you an extended working time compared to other glues, giving you ample room to position and align your ceramic pieces flawlessly. No rushed repairs or misalignments here – precision and perfection are the name of the game.
And let’s not forget about appearance. Epoxy adhesive offers a visually appealing finish that seamlessly blends into your ceramic object once cured. It can be sanded and painted over, allowing you to restore the original beauty of your treasure with ease. A true artist’s dream come true.
Lastly, durability – the crown jewel of epoxy adhesive. It endures regular use and cleaning without compromising the bond strength. Your repaired ceramic object will hold strong for years to come, a testament to the power of epoxy adhesive.
Cyanoacrylate Glue (Super Glue)
Imagine the feeling of panic when you accidentally break a cherished ceramic item. But fear not. Introducing cyanoacrylate glue, commonly known as super glue, the superhero of adhesives. In this article, we will explore the concept of cyanoacrylate glue and its advantages and disadvantages, so you can harness its power to repair your precious possessions.
Advantages of Cyanoacrylate Glue:
- Rapid Bonding: When time is of the essence, cyanoacrylate glue swoops in to save the day. Known for its lightning-fast bonding capabilities, this adhesive forms an instant bond when two surfaces are brought together. You can use your repaired item almost immediately.
- Precision Repairs: Cyanoacrylate glue is ideal for delicate ceramic pieces that require precise alignment during the bonding process. Its fast-acting nature ensures a strong bond without any messy drips or excess adhesive. Say goodbye to unsightly glue marks.
- Easy Accessibility: Whether you’re at a hardware store or an arts and crafts shop, cyanoacrylate glue is readily available. It comes in different viscosities to cater to your specific needs, making it convenient to find and use wherever you are.
Tips for Using Cyanoacrylate Glue:
- Prep Work Matters: Before applying cyanoacrylate glue, ensure that both broken pieces are clean and free from dirt or debris. Use a mild detergent and water to gently clean them, taking care not to cause further damage.
- Less is More: Remember, a little goes a long way with cyanoacrylate glue. Apply a thin layer on one broken edge, press the pieces firmly together, and hold them in place for approximately 30 seconds. This allows the glue to set and create a durable bond.
Disadvantages of Cyanoacrylate Glue:
- Porous Limitations: While cyanoacrylate glue works wonders on non-porous ceramics like porcelain and glazed ceramics, it may not be suitable for porous materials such as terracotta or unglazed ceramics. In such cases, it is best to explore adhesives specifically designed for porous surfaces.
- Heat and Water Resistance: Cyanoacrylate glue may not withstand extreme heat or constant exposure to water. If you’re repairing a ceramic object that will encounter these conditions, consider alternative adhesive options that offer greater resistance.
Ceramic-Specific Adhesives
These specialized adhesives are carefully formulated to create a bond that is not only strong but also durable, ensuring that your ceramic creations will stand the test of time. Let’s dive into the world of ceramic-specific adhesives and explore their different types, advantages, and disadvantages.
First on our list is the mighty epoxy resin. This adhesive is renowned for its exceptional bonding properties and its ability to withstand high temperatures and moisture. It forms a rock-solid bond that can handle whatever you throw at it. But beware, my friends, for the key to success lies in following the manufacturer’s instructions meticulously. Apply this adhesive evenly on both surfaces being bonded, and you’ll be amazed by the results.
Next up is the famous cyanoacrylate glue, also known as super glue. This adhesive is a lifesaver when you’re in a hurry to fix your beloved ceramic piece. It bonds rapidly and with precision. However, before you get carried away, remember that not all ceramic surfaces are compatible with this adhesive. Porous ceramics may not respond well to its charm. And take note, my friends, this adhesive does not fare well with heat or water exposure.
If you’re seeking flexibility and resistance to temperature changes, look no further than silicone-based adhesives. These adhesives offer a robust bond while accommodating the natural movement of ceramics caused by temperature fluctuations. But here’s a tip: choose a silicone adhesive specifically designed for ceramics to ensure that perfect bonding experience.
And finally, we have ceramic-specific adhesives available in the form of tapes or pads. These pre-cut adhesive materials provide a quick and convenient bonding solution. Just apply them to your ceramic surfaces, and voila. Your masterpiece is ready for display.
Preparing the Surfaces for Gluing
If you’ve ever yearned to restore a cherished ceramic piece to its former glory, you’ve found your calling. In this comprehensive guide, we will delve into the essential steps for preparing surfaces before gluing, ensuring that your repairs stand the test of time.
Step 1: Cleanse the Surfaces
Before embarking on the gluing process, it is imperative to start with a blank canvas. Rid the surfaces of dirt, dust, and grease by employing a mild detergent or soap and water. Thoroughly dry the ceramic before proceeding to the next step.
Step 2: Smooth with Sandpaper
Creating a textured surface is the key to achieving optimal adhesion. Gently caress the surfaces with fine-grit sandpaper or an abrasive pad, applying soft pressure in circular motions. Take care not to mar the delicate ceramic.
Step 3: Banish Old Adhesive
If remnants of previous adhesive applications linger, they must be banished. Employ a scraper or razor blade to meticulously scrape off any vestiges of old adhesive. Exercise caution to avoid scratching or chipping the ceramic during this process.
Step 4: Test the Fit
To ensure a seamless repair, it is pivotal to test fit the broken pieces together. This meticulous examination guarantees proper alignment before adhesive application.
Step 5: Harness the Power of Masking Tape
To maintain stability during gluing, enlist the aid of masking tape. Adhere strips of this magical tape across the fractured edges, ensuring precise alignment. This temporary reinforcement will secure everything in place as you work your enchantment.
Step 6: Select the Supreme Adhesive
Choosing an appropriate adhesive is paramount for a triumphant repair. Consider factors such as ceramic type, intended use, and required strength. Epoxy resin, super glue (cyanoacrylate), and silicone-based adhesives reign supreme in the realm of ceramic repairs.
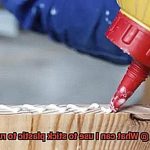
Step 7: Apply the Adhesive
Once you have selected the optimal adhesive, diligently apply it to one of the surfaces using a small brush or applicator. Abide by the recommended amount and application method stipulated by the adhesive manufacturer. Remember, moderation is key – avoid excessive amounts that may seep out.
Step 8: Unite the Pieces
After adhesive application, gently align and bond the broken pieces together. Exert delicate pressure to forge a steadfast union. Eradicate any surplus adhesive that may have escaped from the joints.
Applying the Adhesive
When your cherished ceramic piece shatters, it can be heart-wrenching. But fret not. With the right adhesive and a little expertise, you can bring your broken treasure back to life. In this comprehensive guide, we will walk you through the intricate process of applying adhesive to glue ceramic objects together, ensuring a sturdy and enduring bond that will revive your beloved item.
Choosing the Right Adhesive:
Before embarking on the repair journey, it is imperative to select the perfect adhesive for ceramics.
Two popular options are epoxy resin and cyanoacrylate glue, commonly known as super glue. Epoxy resin boasts exceptional bonding properties and versatility, while cyanoacrylate glue offers rapid bonding and unmatched durability.
Take into account the specific requirements of your ceramic piece when making your adhesive choice.
Preparing the Surfaces:
To achieve a seamless repair, meticulous surface preparation is key. Begin by ensuring that the surfaces you are about to glue are immaculately clean, dry, and free from any dust or debris. Rid them of any loose fragments or remnants of old adhesive. A pristine surface guarantees optimal adhesion and a flawless restoration.
Application Techniques:
When the time comes to apply the adhesive, use a small amount and evenly spread it across both surfaces using a brush, spatula, or applicator tool. Avoid excessive adhesive application as it may hinder the bond or result in an unsightly outcome.
Pressing and Holding:
Once the adhesive is applied, exert firm pressure to join the two surfaces together. This pressure aids in establishing a robust connection between the ceramic pieces. Adhere to the recommended holding time specified by the manufacturer’s instructions to allow the adhesive to fully cure.
Removing Excess Glue:
After the adhesive has completely cured, carefully eliminate any excess glue. This can be accomplished by delicately scraping it off with a sharp tool or employing a solvent specifically recommended for the adhesive used. Skillful removal ensures a refined and polished final result.
Considerations and Professional Assistance:
While adhesive can work wonders in reuniting ceramic pieces, it is essential to manage your expectations. The strength of the bond can be influenced by factors such as the type of adhesive, the condition of the ceramics, and the effectiveness of surface preparation. In instances of extensive damage or when a seamless repair is desired, seeking professional assistance may be necessary.
Clamping and Curing the Repair
The shattering of a beloved ceramic piece can be devastating, akin to losing a cherished friend. But fear not. With the right adhesive, meticulous preparation, and expert clamping and curing techniques, you can bring your broken ceramic back to life.
In this article, we will explore the crucial role of clamping and curing in the repair process, ensuring a bond that will withstand the test of time.
Choosing the Perfect Clamps:
Clamps are not created equal when it comes to repairing ceramics. Opt for adjustable clamps with rubber or padded tips that distribute pressure evenly without causing further damage to the fragile material. These clamps provide the perfect balance between strength and delicacy.
The Art of Cleaning:
Before clamping, it is vital to remove any excess adhesive that may have oozed out between the broken pieces. This not only improves the repair’s appearance but also prevents unsightly marks or residue. Employ a cotton swab or small brush to meticulously clean the surfaces.
Alignment is Key:
Once excess adhesive is eliminated, carefully align the broken pieces and apply pressure using your chosen clamps. The pressure should be firm enough to hold the pieces securely but gentle enough to avoid causing additional harm. Consult the adhesive manufacturer’s instructions for recommended clamping time.
The Precious Curing Process:
During the curing process, it is crucial to keep the repaired ceramic undisturbed. Any movement or jostling could weaken the bond and compromise your repair effort. Find a stable and level surface where you can place your clamped piece without any risk of accidental disturbance.
Patience is a Virtue:
Curing times vary depending on the adhesive used. Some require several hours or even overnight curing, while others set within a shorter period. Give the adhesive ample time to fully cure before removing the clamps. Rushing this step could undo all your hard work and result in a subpar repair.
The Final Touch:
After the recommended curing time, gently remove the clamps and inspect your repair. If there are any visible gaps or unevenness, apply a small amount of additional adhesive to fill them. Remember, moderation is key. Excessive adhesive can compromise the repair, leading to an unsightly finish.
Protecting Your Masterpiece:
Consider the environment in which your repaired ceramic piece will reside. Extreme temperatures or moisture can affect the adhesive bond. Keep your beloved item away from harsh conditions that may weaken or damage the repair, ensuring its longevity.
Long-Term Durability of the Repair
In our previous section, we explored the meticulous process of repairing shattered ceramics. Now, let’s delve deeper into what determines the long-term durability of these repairs. From adhesive selection to proper application techniques, ceramic condition, environmental factors, and maintenance and care, understanding these factors is crucial for achieving lasting results.
Adhesive Selection:
- Adhesive selection is crucial in determining long-term durability.
- Epoxy resin is highly recommended for its exceptional strength and resistance to wear and tear.
- Cyanoacrylate glue, or super glue, provides decent durability for minor repairs.
Proper Application Techniques:
- Following the manufacturer’s instructions is essential for maximized durability.
- Apply adhesive evenly and in the correct amount for a strong bond.
- Uneven application or excessive adhesive can compromise the repair’s strength.
Ceramic Condition:
- The ceramic’s condition significantly impacts long-term durability.
- Weakened or damaged ceramics may struggle to maintain a lasting repair.
- Assessing structural integrity before repair is crucial.
Environmental Factors:
- The environment where the repaired ceramic will be used affects durability.
- Extreme temperatures, moisture, or chemicals can weaken the adhesive bond.
- Avoid subjecting repaired ceramics to harsh conditions or excessive stress.
Maintenance and Care:
- Regular maintenance and proper care prolong durability.
- Handle with care to avoid compromising the adhesive bond.
- Periodic inspections help identify potential issues and allow for timely repairs.
M2vtfNxHVv0″ >
Also Read: How To Glue Ceramic Back Together?
Conclusion
When it comes to reassembling broken ceramic pieces, finding the right adhesive is crucial.
Luckily, there are several options available that can effectively bond ceramics back together. One popular choice is epoxy glue, which offers a strong and durable hold.
Another option is cyanoacrylate glue, commonly known as super glue, which dries quickly and forms a tight bond. For more intricate repairs or delicate ceramics, you might consider using a specialized ceramic adhesive specifically designed for this purpose.
Whichever adhesive you choose, make sure to follow the instructions carefully and allow sufficient drying time for the best results.