If you’ve ever attempted to attach something to ceramic tile, you know it can be a real head-scratcher. But fear not.
We’re here to save the day. In this blog post, we’ll embark on a thrilling adventure through the realm of adhesives and uncover the secret formulas that will stick like glue to your beloved ceramic tiles.
Prepare yourself for a deep dive into the world of epoxy adhesive, construction adhesive, silicone adhesive, and mastic. We’ll weigh their pros and cons, so you can make an informed decision for your next project.
Whether you’re hanging up a mirror or creating a jaw-dropping mosaic masterpiece, we’ve got your back. So grab your tool belt and let’s get stuck on finding the perfect adhesive for your ceramic tile endeavor.
Stay tuned.
Types of Adhesives Suitable for Ceramic Tile Bonding
Contents
Don’t forget to consider the type of adhesive you’ll use. The right adhesive ensures a secure bond between the tiles and the surface, guaranteeing a beautiful and long-lasting installation. In this blog post, we’ll explore various types of adhesives suitable for ceramic tile bonding.
Cement-Based Adhesives:
Cement-based adhesives, crafted from a blend of cement, sand, and additives, are a popular choice for ceramic tile bonding. With their exceptional strength and durability, they bond well to concrete, plywood, and cement backer boards, making them suitable for both indoor and outdoor applications. Whether you’re tiling your kitchen floor or revamping your outdoor patio, cement-based adhesives provide a reliable solution.
Epoxy Adhesives:
For areas prone to moisture or high-stress environments, epoxy adhesives are the go-to option. Their superior resistance to water, chemicals, and temperature changes guarantees a strong and long-lasting bond. Whether you’re tiling a bathroom wall or installing a kitchen backsplash, epoxy adhesives offer the reliability you need. However, keep in mind that proper mixing and application techniques are crucial when working with epoxy adhesives.
Acrylic Adhesives:
When it comes to versatility and ease of use, acrylic adhesives shine. Available in water-based or solvent-based formulations, they offer excellent bonding strength and flexibility. Tiling walls or floors? No problem. Acrylic adhesives adhere well to various surfaces such as concrete, plywood, and gypsum board. Whether you’re a DIY enthusiast or a professional contractor, acrylic adhesives make your ceramic tile installation a breeze.
Polyurethane Adhesives:
If you’re seeking exceptional bonding strength and flexibility, look no further than polyurethane adhesives. These adhesives can withstand heavy foot traffic and temperature changes, making them perfect for both indoor and outdoor applications.
Whether you’re renovating a busy hallway or revamping your outdoor patio, polyurethane adhesives provide the reliability you need. Just bear in mind that they may require longer curing times compared to other options.
Silicone Adhesives:
For wet areas like bathrooms or swimming pools, silicone adhesives are highly recommended. Their excellent resistance to water and moisture ensures a flexible bond that accommodates movement without cracking. When selecting silicone adhesives, opt for neutral-cure formulations specifically designed for ceramic tile bonding. With silicone adhesives, you can confidently tile your shower walls or install a poolside mosaic.
Choosing the right adhesive for ceramic tile bonding is essential for a successful installation. Whether you opt for cement-based, epoxy, acrylic, polyurethane, or silicone adhesives, following the manufacturer’s instructions is key to achieving optimal results.
Thin-Set Mortar
When it comes to tiling projects, the adhesive used is crucial for ensuring a strong and durable bond between tiles and the substrate. Thin-set mortar, a popular choice among professionals and DIY enthusiasts alike, offers exceptional adhesion and versatility. In this article, we will explore the uses and importance of thin-set mortar in tiling projects.
Composition and Types of Thin-Set Mortar:
Thin-set mortar is a powerful blend of Portland cement, sand, and carefully selected additives that enhance its bonding properties and workability. There are two main types of thin-set mortar: modified and unmodified.
Modified thin-set mortar contains polymers that improve flexibility, adhesion, and water resistance, making it ideal for areas prone to moisture or temperature fluctuations. On the other hand, unmodified thin-set mortar is suitable for standard applications where additional additives are unnecessary.
Creating a Strong Bond:
The primary function of thin-set mortar is to create a reliable bond between tiles and the substrate. Thin-set mortar provides excellent adhesion to various surfaces such as floors, walls, and countertops, ensuring stability and longevity for your tiled surface.
Proper Application Techniques:
To achieve a successful tile installation, it is crucial to follow the manufacturer’s instructions regarding mixing ratios, application techniques, and curing times. Before applying thin-set mortar, proper surface preparation is essential. The substrate should be clean, dry, and structurally sound. Any loose or damaged areas should be repaired beforehand.
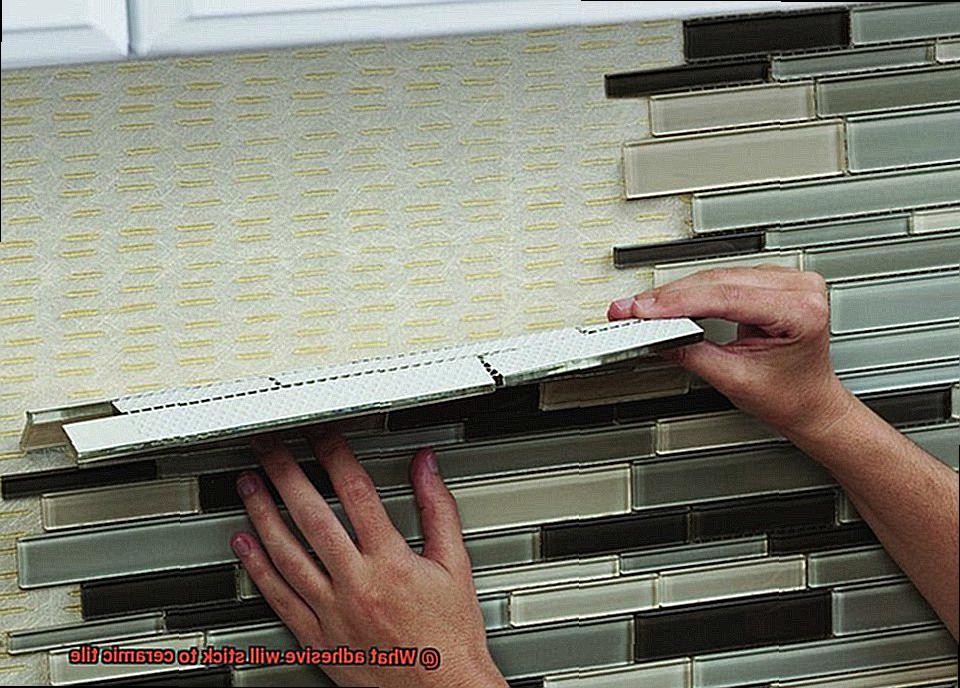
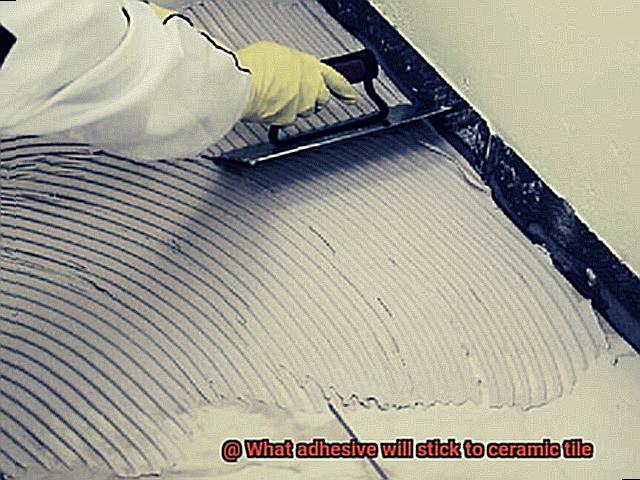
Notched Trowel Application:
Thin-set mortar is typically applied using a notched trowel to create even ridges on the substrate. The notches allow for an optimal amount of mortar to be applied while providing air pockets for better adhesion. The tile is then pressed into the mortar at a slight angle and adjusted for proper alignment. Ensuring sufficient coverage between the tile and the substrate is vital to prevent hollow spots or weak bond areas.
Compatibility with Different Tile Types:
Thin-set mortar is compatible with various types of ceramic tiles, including porcelain, ceramic, and stone tiles. This versatility makes it an excellent choice for a wide range of tiling projects. However, it is important to note that certain large-format or heavy tiles may require specific types of adhesives for optimal results.
Curing and Grouting:
After installing the tiles with thin-set mortar, allowing sufficient curing time is crucial before grouting. This ensures that the tiles are firmly bonded in place and minimizes the risk of future issues such as cracks or loose tiles. Following the recommended curing time specified by the manufacturer is essential for a successful tile installation.
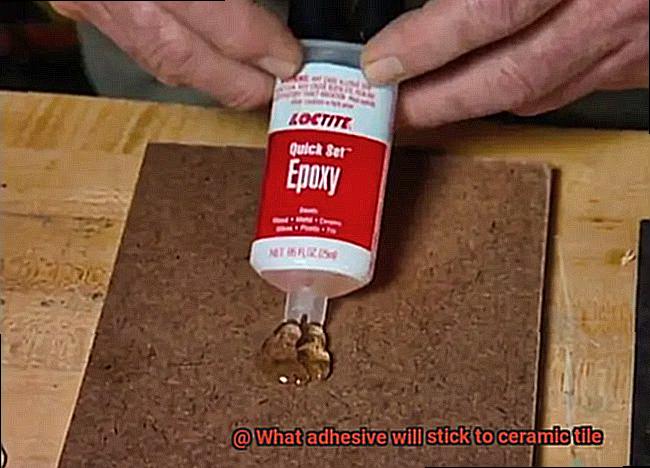
Epoxy Adhesive
If you’re embarking on a tiling project in your home, you’ll want to choose the best adhesive for sticking those beautiful ceramic tiles. Look no further than epoxy adhesive. This powerful bonding agent is renowned for its exceptional strength and durability, making it the go-to option for tile installations.
One of the greatest benefits of using epoxy adhesive for ceramic tiles is its ability to bond to various surfaces. From ceramics and glass to metal and even certain plastics, epoxy adhesive has got you covered. This versatility makes it the perfect choice for tile installations in different areas of your home, such as the kitchen or bathroom.
To ensure a successful tile installation, proper surface preparation is key. Before applying the epoxy adhesive, ensure that the surface is clean and free from any dust, grease, or other contaminants that could hinder the bonding process. Use a mild detergent or specially formulated tile cleaner to remove any dirt or grime.
To enhance adhesion, it’s advisable to slightly roughen the surface of the tiles before applying the adhesive. Use sandpaper or a sanding block to create a better grip for the epoxy adhesive, ensuring a strong bond.
Next, it’s time to mix the two components of the epoxy adhesive – the resin and the hardener. It’s crucial to follow the manufacturer’s instructions and use the recommended mixing ratio for proper curing and bonding. Once mixed, apply the adhesive onto the back of the tile using a notched trowel or a putty knife. Spread it evenly across the entire surface.
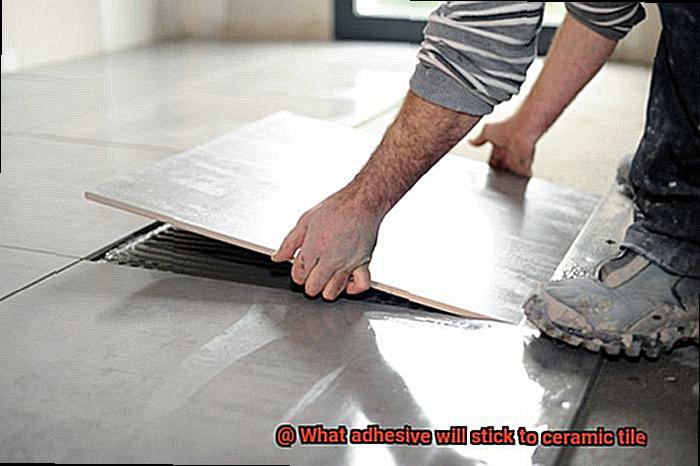
Now comes the exciting part – sticking those tiles in place. Press each tile firmly onto the substrate, ensuring proper alignment and spacing. Use spacers between tiles to maintain uniform grout joints. And don’t forget to immediately remove any excess adhesive that squeezes out from the sides of the tile using a damp cloth or sponge.
After placing the tiles, allow the epoxy adhesive to cure completely before grouting. Curing time can vary, so refer to the manufacturer’s instructions for guidance. During the curing process, avoid walking on or disturbing the tiles to ensure a strong and lasting bond.
Acrylic-Based Adhesive
If you’re planning a ceramic tile installation or repair project, look no further than acrylic-based adhesive. This versatile adhesive offers a range of benefits that make it the perfect choice for bonding ceramic tiles.
Let’s dive into the advantages of using acrylic-based adhesives, from their ability to adhere to different surfaces to their resistance to moisture and temperature variations.
Versatile Bonding Capabilities:
Acrylic-based adhesives are known for their ability to adhere to a wide range of surfaces, including ceramic tiles. Whether your tile surface is smooth or textured, this adhesive will provide a secure bond. It’s perfect for both indoor and outdoor applications, giving you the flexibility to use it anywhere in your home.
Resistance to Moisture and Temperature Variations:
Ceramic tiles often face exposure to water and changes in temperature, which can strain the adhesive used to bond them. Acrylic-based adhesives offer excellent resistance to moisture and temperature variations, ensuring that your tiles stay firmly in place even under challenging conditions. This durability is crucial for maintaining the integrity of your tile installation over time.
Fast-Drying Properties:
Time is of the essence when it comes to tile installations or repairs. Luckily, acrylic-based adhesives have a relatively short curing time, meaning they dry quickly once applied to the ceramic tile. This allows for faster installation or project completion, saving you valuable time and effort.
Flexibility and Elasticity:
Ceramic tiles may expand or contract due to temperature changes, which can cause cracking or loosening of the adhesive bond. Fortunately, acrylic-based adhesives offer good flexibility and elasticity, allowing them to accommodate these movements without compromising their strength. This ensures that your tile installation remains intact even when subjected to temperature fluctuations.
When selecting an adhesive for your ceramic tile project, it’s important to choose one specifically formulated for this purpose. Look for products labeled as suitable for ceramic tiles and check their reputation for bonding capabilities to ensure optimal results.
Silicone-Based Adhesive
When it comes to ceramic tile installation, selecting the right adhesive is crucial for a successful and durable outcome. Among the options available, silicone-based adhesive emerges as a true superhero in the world of tile bonding. This remarkable adhesive boasts exceptional adhesion properties, flexibility, and resistance to moisture, making it the ultimate savior for your tile projects.
Advantages of Silicone-Based Adhesive for Ceramic Tile Bonding:
- Waterproof Seal: Silicone-based adhesive creates a robust and reliable waterproof seal, making it an ideal choice for areas exposed to water, such as bathrooms and kitchens. This ensures that your tiles stay firmly in place while preventing any water damage.
- Flexibility: Unlike rigid adhesives, silicone-based adhesive offers high flexibility, allowing it to absorb vibrations and movements without compromising its grip. This makes it perfect for areas prone to temperature fluctuations or structural shifts, like floors or countertops.
- Resistance to Moisture, Heat, and Chemicals: The silicone polymers present in this adhesive provide excellent resistance to moisture, heat, and chemicals. This versatility makes it suitable for various applications and guarantees durability even in challenging environments.
Considerations for Using Silicone-Based Adhesive:
- Surface Preparation: To maximize the adhesive’s bonding strength, ensure that the tile surface is meticulously clean and free from dirt, dust, or grease before applying the adhesive. This step is crucial for achieving a strong and long-lasting bond.
- Primer Application: Enhance the adhesive’s adhesion to the ceramic surface by applying a primer beforehand. The primer creates a secure bond between the adhesive and the tile, ensuring a steadfast installation that stands the test of time.
- Curing Time: Allow sufficient time for the adhesive to cure and reach its maximum strength. Curing times may vary depending on the product but typically range from 24 hours to several days. Patience is key to achieving a durable and high-quality tile installation.
- Tile Compatibility: While silicone-based adhesive is suitable for most ceramic tiles, it may not be ideal for tiles with porous surfaces or low porosity. To determine the best adhesive for your specific tile, consult with a professional or the tile manufacturer.
Choosing the Right Adhesive for Ceramic Tiles
Selecting the perfect adhesive for your ceramic tiles is crucial for a secure and long-lasting bond. With a myriad of options available, it can be overwhelming to make the right choice. But fret not. We’re here to guide you through the adhesive maze and help you find the ideal one for your ceramic tiles.
First and foremost, consider the type of ceramic tile you’re working with. Porcelain, ceramic, and glass tiles all have unique properties and require specific adhesives. Porcelain tiles, for instance, are denser and less porous than ceramic tiles, necessitating a stronger adhesive that can bear their weight and density.
Next, think about the surface where the tiles will be installed. Adhesives for ceramic tiles are designed to adhere to various substrates like concrete, plywood, and cement backer boards. It’s crucial to choose an adhesive that is compatible with the substrate to ensure a proper bond.
Don’t forget to take the setting environment into account. If you’re installing ceramic tiles in moisture-prone areas like bathrooms or kitchens, opt for a waterproof or water-resistant adhesive. This will prevent the adhesive from deteriorating over time due to moisture exposure.
The size and format of the ceramic tiles should also influence your adhesive choice. Larger tiles may require a stronger adhesive with higher bond strength to support their weight and prevent slippage. On the other hand, smaller mosaic tiles may need an adhesive with better tack or grip to hold them in place.
Be aware that some adhesives may require additional preparation or application techniques. Epoxy adhesives, for example, often need mixing two components before application, while ready-to-use adhesives can be applied straight from the container. Consider your comfort level with these requirements when making your selection.
Consulting the manufacturer’s recommendations and specifications is always prudent. They often provide guidelines on which adhesives are suitable for their specific tiles, ensuring optimal performance and durability. Don’t hesitate to reach out to them for advice.
Lastly, think about the ease of application and cleanup. Consider your skill level and the project’s complexity when choosing an adhesive. Some adhesives may have a shorter working time or require special tools, while others may be easier to handle and clean up.
Preparation Before Applying the Adhesive
Are you ready to dive into your ceramic tile project? Hold on, my friend. Before you start slathering on the adhesive, there’s an important step that could make or break your project: preparing the ceramic tile surface. Trust me, taking the time to prep will save you tons of headaches down the line.
So, why is preparation so crucial? Let’s break it down:
- Cleanliness is key: Before applying adhesive, wipe down the tile with a mild detergent solution. This removes dirt, dust, and grease, ensuring a proper bond between the adhesive and the tile.
- Adhesive-free zone: Don’t let old residue ruin your project. Remove any previous adhesive using a scraper or putty knife. And if things get sticky, a solvent for adhesive removal can be your best friend.
- Rough it up: Smooth or glossy tiles need some texture for the adhesive to grip onto. Lightly sanding the surface creates a rougher texture and improves adhesion.
- Dust bunnies be gone: After sanding, give the tile a thorough cleaning to remove any dust or debris. A damp cloth or sponge works wonders here.
- Dry as a bone: Moisture is not your friend when it comes to adhesion. Make sure the tile is completely dry before applying adhesive. This ensures a strong bond and prevents any weakening caused by moisture.
- Follow instructions: Don’t skip the fine print. Read and follow the manufacturer’s instructions for both the adhesive and the ceramic tile. Different adhesives may have specific requirements or recommendations for application.
- Test it out: Before committing to the full application, conduct a small test area. This allows you to address any potential issues or incompatibilities before it’s too late.
By taking these steps, you’re setting yourself up for success. Your ceramic tiles will stick like a champ, creating a beautiful and long-lasting result.
Tips for Installing Ceramic Tiles with Adhesives
The key to a successful installation lies in choosing the right adhesive. This comprehensive guide will explore different types of adhesives suitable for ceramic tile installation and provide tips on selecting the right adhesive for your specific needs.
Prepare the Surface:
Before installing ceramic tiles with adhesives, ensure the surface is clean, dry, and free from debris. Use a scraper or putty knife to remove any existing adhesive or paint. Thoroughly clean the surface with a suitable cleaner, ensuring a smooth and even base for the adhesive.
Choose the Right Adhesive:
Not all adhesives are suitable for ceramic tiles. Select an adhesive specifically designed for use with ceramic tiles. Look for adhesives labeled as “ceramic tile adhesive” or “ceramic tile glue.” These adhesives provide a strong bond and ensure proper adhesion.
Proper Application Technique:
Follow the manufacturer’s instructions for application and drying time. Each adhesive may have specific requirements. Use a notched trowel to apply an even layer of adhesive, creating ridges that improve bonding ability. Work in small sections, preventing the adhesive from drying out before installing the tiles.
Ensure Proper Alignment and Leveling:
When placing each tile onto the adhesive, press firmly to ensure good contact and adhesion. Use a level or straightedge to check that each tile is level and aligned with neighboring tiles. Make adjustments immediately after placing each tile to correct misalignments.
Allow Sufficient Curing Time:
After installing the ceramic tiles, allow sufficient time for the adhesive to cure before applying grout. The curing time varies depending on the adhesive, humidity levels, and temperature. Refer to the manufacturer’s instructions for recommended curing time.
qrNu0g_zC74″ >
Conclusion
When it comes to finding an adhesive that will stick to ceramic tile, you want something reliable and long-lasting.
Look no further than epoxy adhesive. This powerful adhesive is specifically designed for bonding ceramic surfaces, ensuring a strong and durable hold.
Its unique formula creates a chemical bond that can withstand the test of time, even in high-moisture environments like bathrooms or kitchens. So whether you’re working on a DIY project or repairing broken tiles, epoxy adhesive is your go-to solution.
Don’t settle for adhesives that won’t adhere properly or lose their grip over time.