Are you tired of messy, unclear finishes on your art projects or decoupage creations? Look no further. Today, we’re diving into the world of Mod Podge and answering the burning question: “Is Mod Podge clear after drying?” As a crafting expert, let me assure you that Mod Podge is the ultimate solution for achieving a crystal-clear, glossy finish that will leave your projects looking professionally done.
Mod Podge stands out because it dries to a clear and transparent finish. Unlike other adhesives or sealants that leave behind cloudy residues, Mod Podge dries crystal clear. Your artwork or crafts will shine through effortlessly. Whether you’re scrapbooking, making collages, or decorating your home, this versatile medium ensures that your project remains uncompromised and polished.
So why is Mod Podge so clear after drying? The secret lies in its special formula. It’s meticulously designed with a blend of ingredients to provide a flawless finish. Its water-based nature also contributes to its clarity. As it dries, it won’t yellow or distort the appearance of your project. This makes it perfect for preserving photographs or delicate artworks.
But wait, there’s more. Not only does Mod Podge dry clear, but it also dries to a smooth and durable finish. Say goodbye to rough and uneven surfaces. Once dry, Mod Podge forms a protective coating that enhances the colors and details of your artwork while adding resilience to your projects. Your creations will withstand the test of time with this attractive and long-lasting finish.
In conclusion, if you need an adhesive, sealant, and finish all in one product, look no further than Mod Podge. With its unparalleled clarity and ability to dry clear, this incredible medium ensures that your projects retain their original beauty and charm. So go ahead and liberally apply Mod Podge to your next creation knowing that the end result will leave you – and anyone who sees it – truly impressed. Stay tuned for more tips and tricks on how to elevate your crafting game with Mod Podge.
Does Mod Podge Dry Clear?
Contents
- 1 Does Mod Podge Dry Clear?
- 2 Types of Mod Podge and Their Effects on Drying Clarity
- 3 Tips for Achieving a Clear Finish with Mod Podge
- 4 Potential Issues with Dried Mod Podge Clarity
- 5 Troubleshooting Cloudy or Milky Results from Dried Mod Podge
- 6 Benefits of Using Mod Podge for Decoupage Projects
- 7 Alternatives to Mod Podge for Decoupage Projects
- 8 Conclusion
Prepare to unravel the enchantment of Mod Podge and its remarkable drying properties. Have you ever wondered if this beloved crafting adhesive truly dries clear? Well, wonder no more. Grab your glue and let’s embark on a journey to discover the truth.
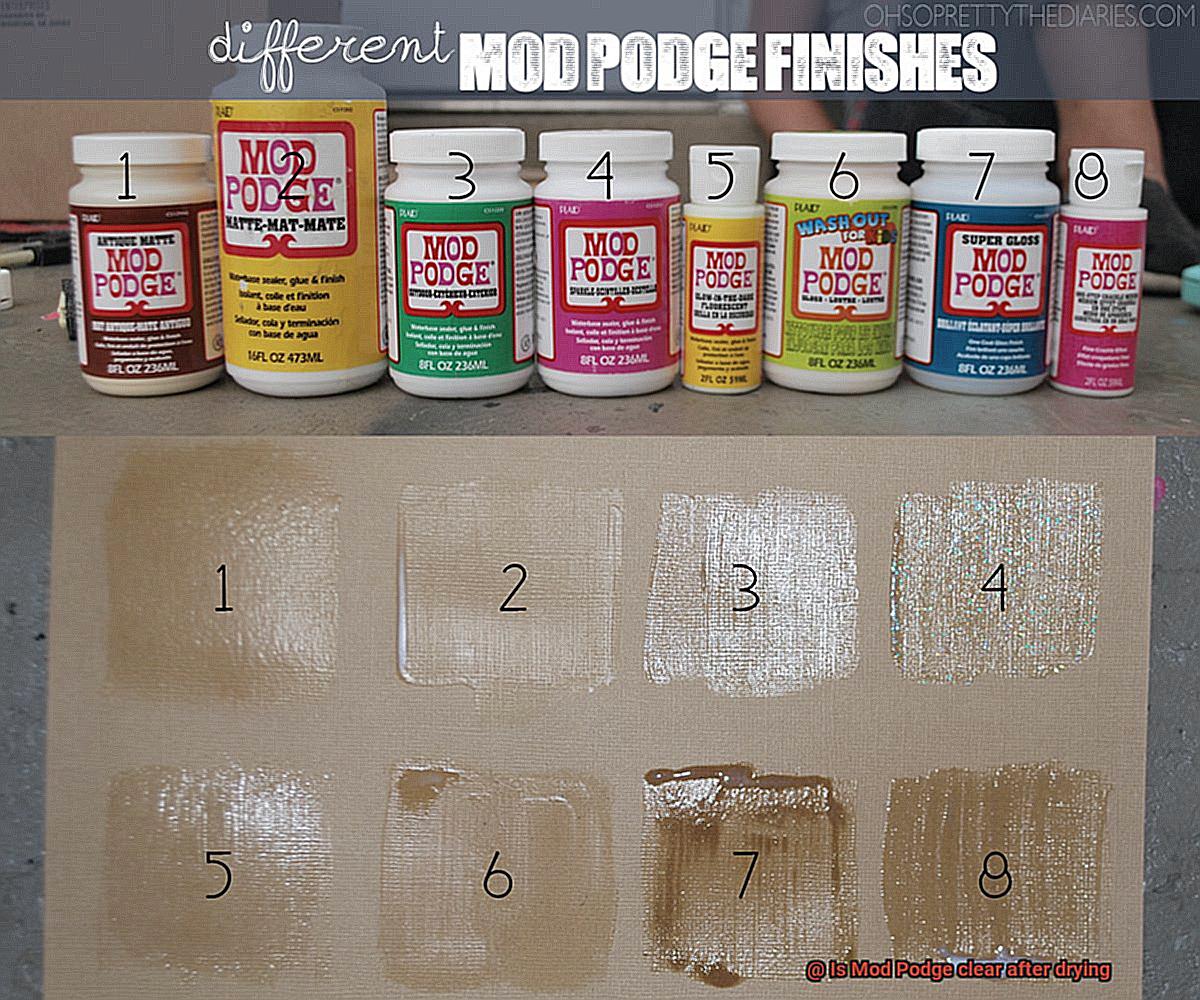
The Diverse Formulas:
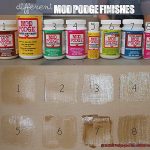
Mod Podge comes in a captivating range of formulas, including Matte, Gloss, Satin, and Sparkle finishes. While each formula possesses its own distinct characteristics, they all share an extraordinary attribute – they dry clear. So gather your favorite formula, and watch as your craft project transforms into a transparent masterpiece.
The Fascinating Drying Process:
The drying time of Mod Podge is a thrilling adventure that may vary depending on factors like humidity, temperature, and application thickness. On average, it takes approximately 15-30 minutes for Mod Podge to dry to the touch. However, the grand finale of complete curing can take up to 24 hours. Patience is key on this magical journey.
Embracing Temporary Cloudiness:
During the drying process, Mod Podge may cast a temporary spell of milky or cloudy appearance, causing a slight tremor among crafters. Fear not. This enchanting cloudiness is merely an illusion that dissipates as the adhesive dries completely. So stay calm and trust in the magic that lies ahead.
The Spellbinding Thin Layers:
To ensure an enchantingly crystal-clear finish with Mod Podge, it is best to apply thin and even layers. Thick applications may prolong the drying time and result in a slightly cloudy finish. By skillfully layering multiple thin coats and allowing each layer to dry before adding another, you will conjure up that desired clarity in your projects.
The Sheen Enigma:
Depending on the formula used (Matte, Gloss, or Satin), Mod Podge may leave a subtle sheen or shimmer on the surface after drying. This mystical touch adds an elegant allure to your creations. However, if you prefer an entirely matte finish, the Matte formula will grant your wish.
Types of Mod Podge and Their Effects on Drying Clarity
If you’re curious about how different types of Mod Podge impact the drying clarity of your projects, you’ve come to the right place. In this essay, we’ll delve into the various formulations available and their effects on achieving that crystal-clear finish you desire. So, let’s dive in and uncover the secrets of Mod Podge.
Gloss Mod Podge – Unleash Radiant Brilliance:
When it comes to adding a captivating, glossy finish to your creations, Gloss Mod Podge is your ultimate ally. This magical elixir dries transparently, allowing the vibrant colors and intricate details of your artwork to gleam brilliantly. It’s like giving your crafts a spotlight on center stage. However, take care to apply thin and even coats to avoid visible brush strokes or texture.
Matte Mod Podge – Embrace Subtle Sophistication:
For those who prefer a more understated or vintage look, Matte Mod Podge is here to grace you with its presence. When this enchanting formula dries, it offers a non-glossy and slightly muted finish. It’s perfect for creating artful masterpieces without overwhelming shine. Moreover, Matte Mod Podge forgives surface imperfections, allowing you to create with confidence.

Satin Mod Podge – Find Harmonious Elegance:
Craving a touch of sophistication? Satin Mod Podge strikes a harmonious balance between glossy and matte finishes. With its gentle satin sheen, this type of Mod Podge elevates your projects by enhancing colors without being overly shiny. It’s like wrapping your crafts in a soft satin ribbon – pure elegance.
Sparkle Mod Podge – Let Your Creations Shine:
Who doesn’t love a little sparkle? Sparkle Mod Podge adds a touch of magic to your creations by incorporating glitter particles. When it dries, your projects will dazzle with a shimmering effect, making them perfect for special occasions or when you simply want to add some pizzazz. Just remember that the glitter particles may slightly obscure fine details, so choose your canvas wisely.
Outdoor Mod Podge – Brave the Elements in Style:
When your crafts need to withstand the mighty forces of nature, Outdoor Mod Podge is your trusty companion. This superhero formula offers a waterproof and UV-resistant finish, protecting your creations from rain, sun, and all outdoor elements. Even after prolonged exposure, the colors remain vibrant and true, ensuring your crafts stand the test of time.
Tips for Achieving a Clear Finish with Mod Podge
Mod Podge is a versatile adhesive that can be used for various crafts. If you’ve ever wondered how to achieve a clear and shiny finish with Mod Podge, you’re in luck. In this blog post, we will share some valuable tips and techniques to help you create a beautiful and flawless finish with Mod Podge.
Choose the right Mod Podge formula for a shiny finish:
When it comes to achieving a clear and shiny finish, selecting the right Mod Podge formula is crucial. For optimal results, use the Gloss Mod Podge. This formula is specifically designed to dry with a high shine, giving your project a polished and professional look.
Apply thin coats for a flawless finish:
To ensure a clear and smooth result, it’s important to apply Mod Podge in thin layers. Avoid applying thick coats as they can result in a cloudy or uneven appearance. Instead, apply multiple thin coats, allowing each layer to dry completely before adding the next one. This technique will help you achieve a flawless and crystal-clear finish.
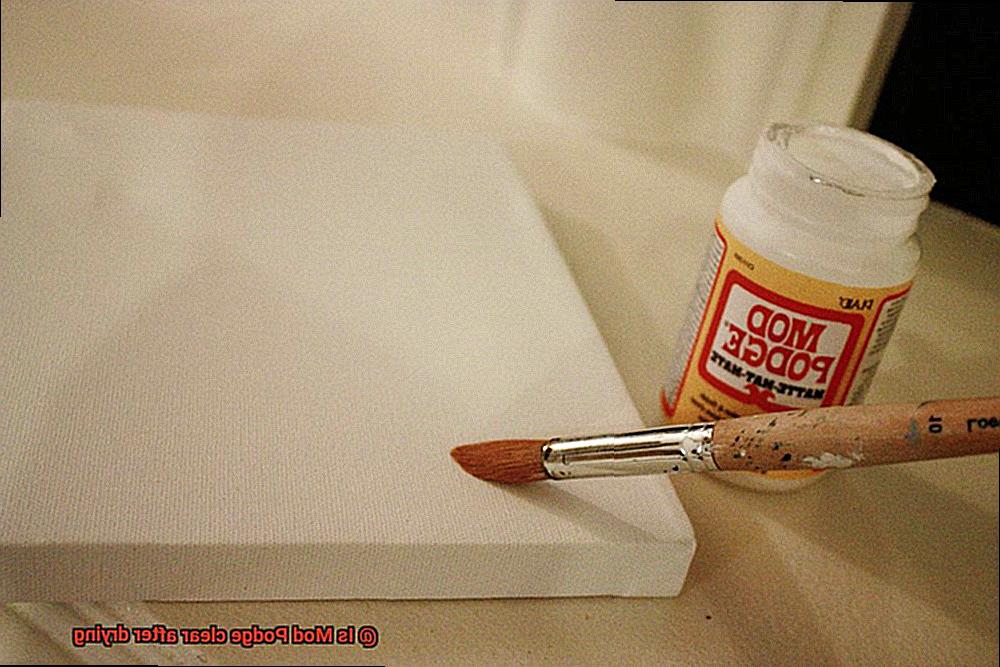
Use a high-quality brush for even application:
To achieve an even application of Mod Podge, using a high-quality brush is essential. Opt for synthetic brushes with smooth bristles to prevent streaks or hairs from marring your project’s surface. Soft bristles will give you better control over the application and ensure a clear and professional-looking finish.
Prepare the surface for a smooth base:
Before applying Mod Podge, it’s important to prepare the surface properly. Ensure that it is clean and smooth by lightly sanding it with fine-grit sandpaper. This step will create a smooth base for the Mod Podge, ensuring that your finished project has a clear and polished appearance.
Allow adequate drying time for a clear result:
Patience is key when working with Mod Podge. It’s crucial to allow each coat to dry completely before applying the next one. Rushing the drying process can result in a cloudy or uneven finish. To ensure clarity, let each coat dry for at least 15-20 minutes before adding another layer.
Potential Issues with Dried Mod Podge Clarity
Today, we embark on an exploration of the captivating world of glue, specifically dried Mod Podge clarity. Known for its versatility and ability to impart a glossy finish to countless projects, Mod Podge’s crystal-clear allure can sometimes encounter obstacles. So, grab your glue guns and join us as we uncover the potential issues and discover how to triumph over them.
- Yellowing: Imagine investing hours in meticulously crafting a masterpiece, only to witness it succumb to an unsightly yellow hue over time. The horror. Alas, yellowing is a potential issue with dried Mod Podge. Exposure to sunlight or UV radiation can cause this lamentable transformation, tarnishing the transparency you so painstakingly achieved.
- Cloudiness: Ah, the bane of every crafter’s existence – the dreaded cloudiness. Picture applying Mod Podge with precision, eagerly awaiting its drying process, only to be met with a mysterious haze veiling your creation like a foggy mirror. Yes, Mod Podge can occasionally dry with a cloudy or hazy appearance, leaving your project bereft of its desired luster.
- Brush Strokes: We all strive for flawlessly smooth finishes, yet those pesky brush strokes can sneakily reveal themselves. Whether due to uneven application or an exuberant brush hand, visible brush strokes can mar the surface of your project and compromise its polished and professional appearance.
- Bubbling: Ahoy, bubbles. As you apply Mod Podge, mischievous air bubbles may find their way into your layers of glue, resulting in a textured and bumpy surface. Not exactly the clarity you had in mind, right? Exercise care during application and allow ample drying time to minimize this frothy nuisance.
- Uneven Finish: Achieving a smooth and even finish is the Holy Grail of Mod Podge enthusiasts. However, it can prove to be quite the challenge. Uneven application or inconsistent layering can lead to an irregular appearance, detracting from the clarity and transparency you seek. Committing to diligent adherence to instructions and applying each layer evenly is key to conquering this issue.
- Incompatibility with Certain Materials: At times, Mod Podge fails to harmonize with specific materials. For example, porous surfaces like unfinished wood or fabric may absorb the glue, rendering it difficult to attain the clear finish you crave. To evade disappointment, always test Mod Podge on a discreet section before embarking on your entire project.
Troubleshooting Cloudy or Milky Results from Dried Mod Podge
Today, we embark on an exciting journey into the world of glue, where we uncover the secrets of dried Mod Podge clarity. Known for its incredible versatility and ability to add a glossy finish to countless projects, Mod Podge’s crystal-clear allure can sometimes face challenges.
So, grab your glue guns and join us as we unveil potential issues and learn how to triumph over them.
First up, let’s address the issue of yellowing. While Mod Podge boasts excellent durability, prolonged exposure to sunlight or UV radiation can cause it to turn yellow over time. To prevent this unfortunate transformation, consider using a UV-resistant sealer over your Mod Podge-coated project. This will provide an extra layer of protection and help maintain the original clarity of your masterpiece.
Next, we encounter the dreaded cloudiness. Picture applying Mod Podge with precision, eagerly awaiting its drying process, only to be met with a mysterious haze veiling your creation like a foggy mirror.
Cloudiness can often be attributed to applying Mod Podge too thickly. Remember, thin and even layers are the key to achieving a clear finish. If you find yourself facing cloudiness, gently sanding the affected area with fine-grit sandpaper can help remove excess Mod Podge. Then, simply apply a new layer more thinly and allow it to dry completely.
Speaking of application, let’s address brush strokes. We all strive for flawlessly smooth finishes but those pesky brush strokes can sneakily reveal themselves. To minimize brush strokes, use a high-quality brush and apply Mod Podge in long, smooth strokes in one direction. Additionally, consider using a foam brush or sponge applicator for an even smoother application.
As you apply Mod Podge, mischievous air bubbles may find their way into your layers of glue, resulting in a textured and bumpy surface. To avoid this frothy nuisance, gently tap your project on a flat surface or use a foam brush to smooth out any bubbles as you apply Mod Podge. Additionally, allowing each layer to dry completely before applying the next can help prevent bubble formation.
Now, let’s tackle the issue of an uneven finish. Achieving a smooth and even finish is the Holy Grail of Mod Podge enthusiasts. However, it can prove to be quite the challenge. To conquer this issue, be sure to apply Mod Podge in thin, even layers and allow each layer to dry completely before adding the next. Working in a clean and dust-free environment can also help ensure an even finish.
Lastly, we must address the compatibility of Mod Podge with certain materials. While Mod Podge is suitable for most surfaces, porous materials like unfinished wood or fabric may absorb the glue, making it difficult to attain a clear finish. In these cases, it’s best to seal the surface before applying Mod Podge or consider using a fabric-specific formula for fabric projects.
Benefits of Using Mod Podge for Decoupage Projects
Look no further than the remarkable Mod Podge, the crafting glue that will elevate your projects to new heights of artistic expression. With its myriad benefits, Mod Podge has become a beloved staple for crafters across the globe.
One of the most outstanding advantages of using Mod Podge for decoupage is its extraordinary ability to dry clear as crystal. Bid adieu to unsightly residue and embrace the seamless finish that Mod Podge bestows upon your creations. This feature is particularly crucial when working with delicate and intricate designs, as it allows the true beauty of your artwork or pattern to radiate without any interference.
Versatility is another key facet of Mod Podge’s charm. It effortlessly adheres to an extensive range of surfaces, including wood, glass, ceramic, fabric, and even plastic. This makes it the ultimate choice for an array of projects, from fashioning decorative items to revamping furniture to personalizing everyday objects. The possibilities are as infinite as your imagination.
Not only does Mod Podge act as a formidable adhesive that securely holds your materials in place, but it also doubles as a formidable sealer. By creating an unbreakable bond between the layers of your project, it prevents any unfortunate peeling or lifting over time. Moreover, once your masterpiece is complete, Mod Podge can be used as a protective sealant to safeguard it from moisture, dirt, and other external factors. Your decoupaged treasure will remain in pristine condition for countless years to come.
Safety is always paramount in the realm of crafting, especially when little ones are present. Fortunately, Mod Podge boasts a non-toxic formula that ensures both adults and children can use it with absolute peace of mind. Moreover, any spills or accidents can be effortlessly cleaned up with a dash of soap and water. A tranquil crafting experience and effortless cleanup? Count us in.
Mod Podge also offers unparalleled convenience and ease of use. With its vast array of formulas and finishes, you can select the one that best suits your project. Whether you prefer a matte, gloss, satin, or even sparkling finish, Mod Podge has you covered. Applying the glue is a breeze with the aid of a brush or sponge applicator, allowing you to work with precision and utmost control.
In the realm of crafting, time is of the essence, and Mod Podge comprehends this all too well. With its relatively swift drying time of a mere 15-30 minutes, you can complete your projects with remarkable efficiency and seamlessly transition to the next step without enduring tedious waiting periods. No more twiddling your thumbs while your creation languishes in the clutches of slow-drying glue.
Alternatives to Mod Podge for Decoupage Projects
If you’re a fan of decoupage projects but want to explore alternatives to Mod Podge, you’re in luck. While Mod Podge is a fantastic option, there are numerous alternatives that can yield equally stunning results. Let’s dive into some of these alternatives and find the perfect fit for your next crafting adventure.
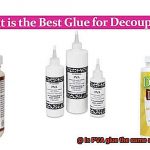
- White Glue: An accessible and cost-effective option is plain old white glue, like Elmer’s Glue-All. By diluting it with water to achieve a thinner consistency, white glue works great for decoupage projects. It dries clear and provides a strong bond, making it an excellent alternative to Mod Podge.
- Decoupage Medium or Gel Medium: For a more professional finish, decoupage medium or gel medium is the way to go. These specially formulated products are designed specifically for decoupage projects. With various finishes available, including matte and glossy, they dry clear and offer a more durable and long-lasting finish compared to regular white glue.
- Water-Based Varnishes: Another alternative to Mod Podge is water-based varnishes or sealants. Polyurethane or acrylic varnishes can be applied over your decoupage layers to seal and protect your project. They dry clear and provide either a glossy or matte finish, depending on your preference.
- Mod Podge Variations: Did you know that Mod Podge itself has different variations? Mod Podge Dishwasher-Safe Gloss and Mod Podge Outdoor are just a couple of examples. These variations offer similar adhesive and sealing properties as regular Mod Podge but with additional benefits. For example, Mod Podge Dishwasher-Safe Gloss allows your decoupaged items to be safe for the dishwasher, while Mod Podge Outdoor is resistant to outdoor elements.
- Homemade Pastes: If you prefer a more natural approach, consider homemade alternatives like flour paste or cornstarch paste. These pastes are made by mixing flour or cornstarch with water to create a thick consistency that can be used as an adhesive and sealant. While they may not provide the same level of durability as commercial products, they are non-toxic and inexpensive options.
When choosing an alternative to Mod Podge, consider your project’s specific requirements, such as the desired finish, durability, and compatibility with different materials. It’s always a good idea to test the alternative on a small area or scrap material before applying it to ensure it meets your expectations.
Cwoi5CEQ9IU” >
Conclusion
Mod Podge is a popular crafting adhesive that many people use for various projects.
One common question that arises when using Mod Podge is whether it dries clear or not. Well, the good news is that yes, Mod Podge does dry clear after drying.
This means that you don’t have to worry about any cloudy or hazy residue ruining your finished piece. Instead, you can expect a smooth and transparent finish that enhances the overall look of your project.
Whether you’re working on decoupage, collages, or other crafts, Mod Podge will leave you with a professional and polished result.