Are you a DIY enthusiast or someone who loves tackling home projects?
If so, you’ve probably faced the challenge of finding the perfect adhesive for working with vinyl. Well, fear not.
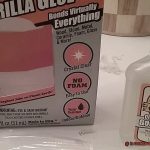
Gorilla Glue is here to save the day. Renowned for its incredible strength and versatility, Gorilla Glue has become a favorite among DIYers.
But can it work its magic on vinyl too? In this blog post, we’ll uncover the truth about using Gorilla Glue with vinyl materials.
Let’s get started.
What Is Gorilla Glue?
Contents
In the world of adhesives, one brand reigns supreme with its unrivaled strength and versatility – Gorilla Glue. Whether you’re a seasoned tradesperson or a passionate DIY enthusiast, understanding the might and magic of this adhesive can elevate your projects to new heights. Brace yourself as we delve into the world of Gorilla Glue, exploring its composition, reasons for its popularity, and essential tips for maximum effectiveness.
Gorilla Glue is an extraordinary polyurethane-based adhesive that connects various materials with indomitable force. From wood and metal to stone and ceramic, this glue forms an unyielding, permanent bond capable of withstanding heavy loads and extreme conditions. Ranging from liquid to gel to tape forms, Gorilla Glue caters to diverse applications with ease.
Why is it so Popular?
- Unmatched Versatility: Gorilla Glue transcends boundaries, adhering to surfaces both indoors and outdoors. Its incredible adaptability makes it the adhesive solution for any project.
- Defying the Elements: With its impressive waterproof properties, Gorilla Glue fearlessly battles moisture and endures exposure to the elements, making it ideal for projects that demand unwavering resilience.
- Master of Gaps: The glue expands during the curing process, ingeniously filling gaps and creating an impenetrable bond between materials that defies separation.
- Time-Tested Durability: With a curing time of 24 hours or more, Gorilla Glue guarantees long-lasting results in industries such as construction, woodworking, and automotive repairs.
Using Gorilla Glue Effectively:
- Respect the Instructions: To unlock the full potential of Gorilla Glue, meticulously read and follow the manufacturer’s instructions.
- Surface Preparation: Before the glue’s touch, ensure surfaces are pristine, free from dirt, dust, or grease. A clean canvas ensures an unbreakable masterpiece.
- Specialized Solutions: While the original Gorilla Glue formula might not be ideal for vinyl bonding due to its expanding nature, fear not. Specialized adhesives like Gorilla Clear PVC Cement cater to specific applications.
- Material Matters: Different vinyl materials demand different adhesives. Choose wisely to prevent damage or distortion, ensuring a seamless and secure bond.
What Is Vinyl?

Vinyl, a synthetic material that has taken various industries by storm, is known for its unparalleled versatility and durability. From flooring to upholstery, clothing to records, vinyl has become a staple choice. But what exactly is vinyl, and why is it so highly regarded? Prepare to embark on a journey into the captivating world of vinyl and discover its key benefits.
At its core, vinyl is made from a remarkable synthetic material called polyvinyl chloride (PVC). This type of plastic is renowned for its resilience and moisture-resistant properties. In fact, one of vinyl’s most remarkable features is its ability to withstand water damage. Unlike natural materials like wood or fabric, vinyl doesn’t absorb water, making it the perfect choice for areas prone to spills or high humidity. Additionally, vinyl’s resistance to mold and mildew growth makes it an ideal option for moist environments.
Durability is another remarkable advantage of vinyl. Its composition comprises multiple layers that work harmoniously to protect the material from wear and tear. The top layer, known as the wear layer, acts as a guardian shield against scratches, scuffs, and stains. This means that even in high-traffic areas like bustling households or commercial spaces, vinyl can maintain its pristine appearance over time. If you have playful pets or energetic children, vinyl’s ability to withstand their antics without showing signs of wear is truly remarkable.
But it doesn’t end there – maintenance with vinyl is a breeze. A simple wipe with a damp cloth or mop using mild detergents is all it takes to keep your vinyl looking brand new. The non-porous surface of vinyl prevents the accumulation of dirt and allergens, promoting better indoor air quality. So if you’re searching for a material that not only exudes durability but also offers effortless maintenance, look no further than vinyl.
Why Not Use Original Gorilla Glue on Vinyl?
Vinyl, renowned for its flexibility and durability, requires a specialized adhesive to ensure a proper bond. Let’s explore the details to understand why original Gorilla Glue falls short in this regard.
Foaming Nature of Gorilla Glue:
Original Gorilla Glue’s foaming nature is one of the primary reasons it is ill-suited for vinyl. When applied, this adhesive expands, creating a powerful bond. While this expansion property can be beneficial in certain applications, it can lead to complications when used on vinyl. The glue’s expansion can stretch and distort the vinyl surface, resulting in an uneven and unattractive bond.
Solvent-Based Formula:
Another issue with using Gorilla Glue on vinyl lies in its solvent-based formula. Original Gorilla Glue contains polyurethane, a chemical that requires moisture for activation and proper curing. However, as vinyl is a non-porous material with limited moisture absorption, the adhesive may not fully cure. This incomplete curing process can lead to weak bonding and potential failure over time.
Difficulty in Reversing or Repairing:
Furthermore, the strong bond created by Gorilla Glue poses challenges when it comes to reversing or repairing the bond if necessary. Vinyl often requires maintenance or replacement over time, and using an adhesive that cannot be easily removed can make these tasks arduous and costly.
Specialized Adhesives for Vinyl:
It is crucial to note that there are specialized adhesives specifically designed for bonding vinyl. These adhesives have been formulated to provide strong adhesion without damaging or distorting the vinyl surface. Typically water-based or solvent-free, they ensure compatibility with vinyl’s non-porous nature.
While original Gorilla Glue is a versatile adhesive suitable for a range of materials, it is not recommended for use on vinyl. Its foaming nature, solvent-based formula, and difficulty in reversing the bond make it unsuitable for vinyl applications. To ensure proper adhesion and durability without compromising the integrity of vinyl, it is essential to use specialized adhesives specifically designed for vinyl bonding.
What Adhesive Should I Use to Bond Vinyl?
Vinyl is a versatile and durable material used in various applications, making it important to choose the right adhesive for bonding vinyl. In this informative guide, we will explore the key factors to consider when selecting an adhesive for vinyl bonding and highlight some top adhesive options specifically designed for vinyl surfaces.
Factors to Consider:
- Compatibility: Vinyl is highly resistant to solvents and chemicals, so it’s crucial to choose an adhesive labeled as safe for use on vinyl surfaces. Using an incompatible adhesive can result in degradation or discoloration of the vinyl over time.
- Flexibility: Vinyl surfaces often endure stress and movement, especially in flooring or upholstery applications. Therefore, it’s essential to select an adhesive that can withstand this movement without compromising its bond strength. Look for adhesives specifically formulated for vinyl applications, as they offer excellent flexibility.
- Application Method: Consider the practicality and suitability of the adhesive’s application method. Some adhesives require heat activation or special tools, which may not be feasible for all vinyl bonding projects. Opt for an adhesive that can be easily applied using common tools and techniques.
Top Adhesive Options:
- Water-Based Vinyl Adhesive: These adhesives are popular due to their user-friendly nature, low odor, and environmental friendliness. They provide a strong bond while remaining flexible, making them suitable for various vinyl applications such as flooring, upholstery, and signage.
- Solvent-Free Vinyl Adhesive: Specifically designed for bonding vinyl surfaces without relying on solvents for activation and curing, these adhesives offer excellent compatibility with vinyl. They provide a reliable bond without the risk of discoloration or degradation over time.
Pros and Cons:
Water-Based Vinyl Adhesive:
- Pros: Easy to use, low odor, environmentally friendly, strong bond, flexibility.
- Cons: May have longer drying times compared to solvent-based adhesives.
Solvent-Free Vinyl Adhesive:
- Pros: Safe for vinyl surfaces, strong and durable bond, no risk of discoloration or degradation.
- Cons: May have a higher initial cost compared to some solvent-based adhesives.
How Do I Prepare the Surface for Bonding?
Whether you’re repairing a cherished vase or creating a masterpiece from scratch, having the right adhesive is crucial. In this comprehensive guide, we will walk you through the essential steps to prepare your surface for bonding with the dependable Gorilla glue. So, grab your trusty tool kit and let’s dive in.
Step 1: Cleanliness is Key
Before you begin, ensure that your surface is squeaky clean. Pesky dirt, sneaky dust, and stubborn grease can sabotage proper adhesion. Arm yourself with a mild detergent or trusty rubbing alcohol to give your surface a thorough cleansing. This meticulous cleaning ensures maximum bonding strength and long-lasting durability.
Step 2: Roughen It Up
Next, it’s time to get a little rough – not with your friends, but with your surface. Gently sand the area you wish to bond using fine-grit sandpaper or wield a wire brush. This technique creates more surface area for the glue to cling onto, amplifying the strength of the bond. Remember, don’t go overboard. A gentle sanding will suffice without jeopardizing your precious materials.
Step 3: Dust Off and Wipe Down
After roughening the surface, it is imperative to banish any debris generated during sanding. Grab a clean cloth or reliable paper towel and thoroughly wipe down the area. This meticulous step ensures that no stray particles interfere with the bonding process, guaranteeing seamless adhesion.
Step 4: Primer (Sometimes)
In certain instances, particularly with vinyl materials, employing a primer can elevate your bond to new heights. A primer establishes a superior connection between the glue and the surface. Ensure that you select a primer compatible with both the material and Gorilla glue. Follow the manufacturer’s instructions meticulously to achieve optimal results.
Step 5: Apply That Glue.
Now comes the thrilling part – applying Gorilla glue. Follow the step-by-step instructions provided by Gorilla Glue for proper application. As a general rule, a thin layer of glue on one of the surfaces is recommended. Firmly press the surfaces together and maintain this pressure for the suggested drying time. Congratulations. You have created a robust and enduring bond.
How Do I Apply the Adhesive to Vinyl?
Applying adhesive to vinyl is a simple process that requires a few easy steps. So, grab your favorite Gorilla glue and let’s get started.
Step 1: Clean the Surface
Before applying any adhesive, it’s crucial to ensure that the surface of the vinyl is clean and free from any dirt or debris. Grab a mild soap and water solution, gently clean the vinyl, and then dry it thoroughly with a soft cloth. This will ensure that the adhesive bonds properly.
Step 2: Choose the Right Adhesive
Not all adhesives are created equal, my friend. When it comes to vinyl, it’s essential to select an adhesive specifically designed for this material. Check the label on your glue bottle to confirm if it is suitable for vinyl. If not, don’t panic. There are plenty of other options available that are perfect for your project.
Step 3: Apply the Adhesive
Now comes the fun part – applying the adhesive. Take your brush or applicator and apply a thin layer of glue to one side of the vinyl surface. Make sure to spread it evenly across the entire area. You want full coverage for a strong bond.
Step 4: Press and Smooth
Align the vinyl with the desired area and press it firmly in place. Get rid of any pesky air bubbles or wrinkles by gently pressing down on the vinyl with your hands or using a roller. Smooth out those imperfections for a flawless finish.
Step 5: Let It Dry
Patience is key here, my friend. Allow the adhesive to dry according to the manufacturer’s instructions. This could take a few hours or overnight, depending on the product. Avoid touching or moving the vinyl during this drying period to ensure a secure bond.
Step 6: Inspect and Reapply if Needed
Once the adhesive has fully dried, inspect the bond to ensure it’s secure and strong. If you notice any weak spots or signs of lifting or peeling, don’t stress. Simply reapply adhesive as necessary and repeat the bonding process until you achieve the desired result.
Different Types of Vinyl Need Different Adhesives
Vinyl is an incredibly versatile material that finds its way into a multitude of projects. However, what many people don’t realize is that different types of vinyl require different adhesives for optimal bonding. In this blog post, we will delve into the reasons behind this and provide you with some invaluable tips to ensure your vinyl projects are both strong and durable.
Understanding Vinyl Composition:
Vinyl can be derived from various materials such as PVC or PU. PVC vinyl, which is commonly used for flooring and wall coverings, demands solvent-based adhesives for a robust bond. Conversely, PU vinyl, often found in upholstery and clothing, requires water-based adhesives for optimal bonding.
The Significance of Compatibility:
Not every adhesive labeled for use with vinyl is appropriate for all types of vinyl. It is absolutely crucial to carefully read the manufacturer’s instructions and test compatibility before applying any adhesive. Even Gorilla glue, a widely popular adhesive, may not be the best option for all vinyl types.
Soft Vinyl vs. Rigid Vinyl:
Soft vinyl boasts remarkable flexibility, necessitating a specific adhesive capable of enduring stretching and bending without compromising its bond. In these instances, Gorilla glue may not possess the necessary qualities suitable for soft vinyl applications. Conversely, Gorilla glue can be an excellent choice for rigid vinyl projects that don’t require as much flexibility.
Specialized Vinyl Adhesives:
Consider utilizing specialized adhesives specifically formulated to bond vinyl materials effectively. These adhesives provide optimal bonding strength while simultaneously maintaining the required flexibility or rigidity based on the type of vinyl being used. They come in various forms to facilitate easy application.
Proper Surface Preparation:
Before applying any adhesive to vinyl, it is essential to adequately prepare the surface by thoroughly cleaning it to remove any dirt, dust, or grease that could potentially hinder the bonding process. Utilize a mild detergent or vinyl cleaner alongside a soft cloth for gentle cleaning.
Follow Manufacturer’s Instructions:
Always adhere to the manufacturer’s instructions when using adhesive on vinyl. Apply a thin, even layer of adhesive on both surfaces and press them firmly together. Hold them in place for the recommended curing time to ensure a strong and long-lasting bond.
eTv4dL_CJeA” >
Also Read: What kind of glue do you use on vinyl flooring?
Conclusion
To sum up, while Gorilla Glue is a popular and versatile adhesive for many materials, it’s not the best choice for vinyl. Why? Well, the foaming action of Gorilla Glue can actually stretch and warp the vinyl, leaving you with an uneven bond that’s far from ideal. And let’s not forget about the solvent-based formula – it might not fully cure on non-porous vinyl surfaces, which means weak bonding over time. Yikes.
But fear not. There are specialized adhesives out there specifically designed for vinyl bonding. These babies are formulated to provide a strong grip without wreaking havoc on your precious vinyl surface. Look for water-based or solvent-free options that play nice with vinyl’s non-porous nature.
Remember, folks: proper surface prep and following those manufacturer instructions will make all the difference in achieving a bond that lasts longer than a Taylor Swift album on repeat.