Are you feeling stuck with your old and out-of-style linoleum flooring?
Or maybe it’s damaged and needs to be replaced. Whatever your reason for wanting to remove glue down linoleum, we’ve got you covered.
In this post, we’ll guide you through the process step-by-step, so you can update your space without breaking the bank. Removing glue down linoleum may seem like a daunting task, but fear not.
With just a few basic tools and some elbow grease, it’s a DIY project that anyone can tackle. We’ll show you how to do it safely and effectively without damaging your subfloor.
From using a heat gun or chemical adhesive remover to trying unconventional methods like dry ice or even peanut butter (yes, really. ), we’ll explore all the options available to help you choose the best approach for your specific situation.
We’ve got all the tips and tricks you need on how to remove glue down linoleum.
What Tools Are Needed to Remove Glue Down Linoleum?
Contents
Removing glue down linoleum may seem like a daunting task, but fear not. With the right tools and techniques, you can tackle this project like a pro. Here are the five essential tools you’ll need to remove glue down linoleum successfully.
Scraper
The scraper is the workhorse of this process. This tool will help you remove the top layer of linoleum and expose the adhesive underneath. For larger areas, a floor scraper with a long handle and sharp blade is recommended. For smaller spaces or tighter corners, a handheld scraper or putty knife will do the trick. A sharp scraper will make your job easier and faster, so investing in one is highly recommended.
Heat Gun or Hairdryer
Using heat to soften the adhesive is crucial for removing glue down linoleum. The heat gun or hairdryer will help you soften the adhesive underneath the linoleum, making it easier to remove. A heat gun is more powerful than a hairdryer and can quickly heat up larger areas. A hairdryer is suitable for smaller areas and tight spaces.
Solvent
The solvent is used to dissolve the adhesive, making it easier to remove. There are different types of solvents available on the market, such as mineral spirits, acetone, or adhesive removers. It’s important to choose the right solvent for your linoleum type and adhesive. Be sure to check with your local home improvement store for recommendations.
Protective Gear
Don’t forget to protect yourself during this process. Protective gear such as gloves and goggles are necessary to prevent any injury or exposure to harmful chemicals during the removal process. Safety first.
Floor Sander
Once you’ve removed all of the linoleum and adhesive residue, it’s time to give your subfloor some TLC. A floor sander will help you sand down any remaining adhesive residue, ensuring that the subfloor is smooth and ready for new flooring. Think of it like giving your subfloor a spa day – it deserves some pampering after all that hard work.
So, removing glue down linoleum requires specific tools and techniques, but with the right equipment and some patience, you can achieve a successful removal process that leaves your subfloor ready for new flooring.
Step-by-Step Guide to Removing Glue Down Linoleum
With the right tools and techniques, this process can be easy and stress-free.
Follow these step-by-step instructions to remove your linoleum and have a smooth subfloor ready for any new installation.
Step 1: Gather your tools
Firstly, gather all the necessary tools for the job: a utility knife, floor scraper, heat gun or hair dryer, putty knife, and adhesive remover. Think of these as the essential tools for your subfloor’s spa day.
Step 2: Cut the linoleum
Using a utility knife, cut the linoleum into manageable sections.
This will make it easier to remove and prevent damage to the subfloor. Think of this as giving your old floors a relaxing massage before moving on to something new.
Step 3: Heat up the adhesive
Use a heat gun or hair dryer on high heat to soften the adhesive underneath the linoleum.
This will make it easier to scrape off later on. Imagine yourself as a therapist gently easing away tension from your subfloor.
Step 4: Scrape off the adhesive
Using a floor scraper or putty knife, carefully scrape off the softened adhesive.
Work in small sections and apply even pressure to avoid damaging your subfloor. Think of yourself as a masseuse, carefully removing any knots or tension from your subfloor.
Step 5: Apply adhesive remover
For any stubborn areas where adhesive remains, apply an adhesive remover according to manufacturer instructions.
Wear protective gloves and work in a well-ventilated area for safety. The adhesive remover is like a refreshing facial treatment for your subfloor.
Step 6: Clean up
Once all adhesive has been removed, clean up any remaining debris with a damp cloth or mop.
Your subfloor is now feeling refreshed and rejuvenated after its spa day. Allow it to dry completely before proceeding with any further installation.
Remember to take your time, be patient, and think of yourself as a therapist for your subfloor.
Softening the Adhesive
Softening the adhesive is a crucial step in this process, but fear not, there are several methods to choose from that will leave your subfloor feeling pampered and refreshed.
You can use a heat gun or hairdryer to melt the adhesive. It’s like giving your subfloor a warm massage that will leave it feeling relaxed and ready for a new look.
Just be sure to hold the heat source about six inches away from the surface and avoid getting too close. We wouldn’t want any accidental fires or damage to your flooring.
If heat isn’t your thing, don’t worry, there are other options available. Chemical adhesive removers are like a refreshing facial treatment for your subfloor.
Make sure to choose a remover suitable for linoleum, follow the instructions carefully, and wear protective gloves and goggles. Your subfloor will thank you for this revitalizing experience.
For those who prefer eco-friendly options, hot water is the way to go. It’s like treating your subfloor to a luxurious hot tub session.
Fill a bucket with hot water, pour it over a small section of the flooring, and let it soak in for a few minutes before using a scraper or putty knife to lift up the linoleum.
Remember, whichever method you choose, take your time and follow safety precautions.
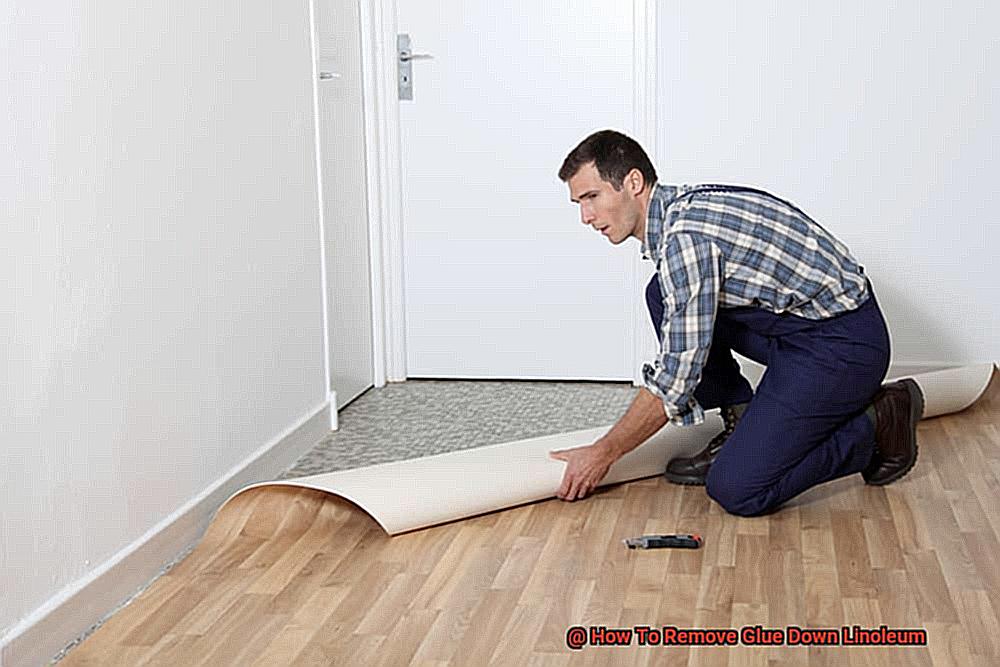
Pulling Up the Linoleum
Begin by gathering your tools: a putty knife, scraper, and utility knife.
Think of these as your pampering essentials for the ultimate subfloor experience. Next, it’s time to cut the linoleum into manageable pieces with your trusty utility knife.
Imagine this as snipping away at a sheet mask to make it easier to remove. Cut parallel lines about six inches apart, making sure not to damage the subfloor.
Now let’s begin peeling off the linoleum. Be gentle and work slowly to avoid any damage.
If you encounter stubborn areas, think of them as clogged pores that need a little extra attention. Use the putty knife to loosen them up and work around them slowly.
If the linoleum doesn’t come off easily, don’t worry. You can use a heat gun or hairdryer to soften the adhesive.
Imagine this as applying a warm towel to your face before removing your sheet mask. Hold the heat gun or hairdryer about six inches away from the surface and work in small sections.
Once you’ve removed all the linoleum, it’s time for toning. Inspect the subfloor for any remaining glue residue, and if there is any left, use a solvent-based adhesive remover.
Follow the manufacturer’s instructions carefully and allow enough time for the solvent to penetrate the glue before scraping it off. Finally, take a moment to admire your newly revealed subfloor.
Remember, pulling up linoleum is crucial but can be done without damaging your subfloor with patience and the right tools.
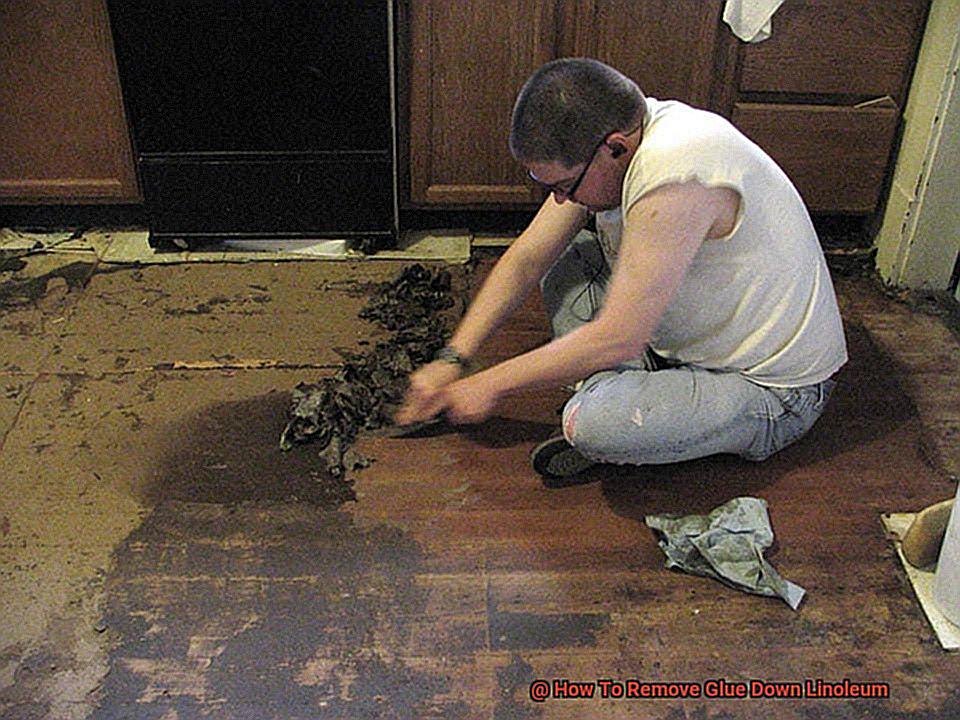
Removing Residual Adhesive
Removing residual adhesive may seem like a daunting task, but it’s a crucial step in the process of removing glue down linoleum.
You don’t want any leftover adhesive to cause problems with your new flooring installation. But fear not.
With the proper tools and materials, you can easily transform your subfloor into a clean and smooth canvas for your new flooring.
Gather your supplies
You’ll need a putty knife or scraper, adhesive remover, a bucket, a sponge or cloth, and safety gear such as gloves and eye protection.
Start by gently scraping off as much of the adhesive as possible using your putty knife or scraper. Be careful not to damage the subfloor while doing this.
Think of it like giving your skin a gentle exfoliation, removing any rough patches without causing any harm.
Apply the Adhesive Remover
Next, apply the adhesive remover according to the manufacturer’s instructions.
Some adhesive removers require dilution with water, while others can be used straight out of the bottle.
Apply the solution generously to the remaining adhesive and allow it to sit for the recommended time.
This is like applying a soothing mask to your skin, allowing it to soak in all the nourishing ingredients. Using a scraper or putty knife, gently scrape away any remaining adhesive.
It should come off easily after being treated with the adhesive remover. This is like revealing smooth and refreshed skin after gently removing a mask.
Once all the adhesive has been removed, rinse the area thoroughly with clean water and allow it to dry completely before installing new flooring.
Remember that different types of adhesive removers are available for different types of adhesives. Make sure you choose an adhesive remover that is specifically designed for linoleum adhesive residue.
You don’t want to use the wrong product and end up causing more harm than good. In conclusion, removing residual adhesive can be a tedious process, but it’s a necessary step in ensuring your subfloor is ready for new flooring installation.
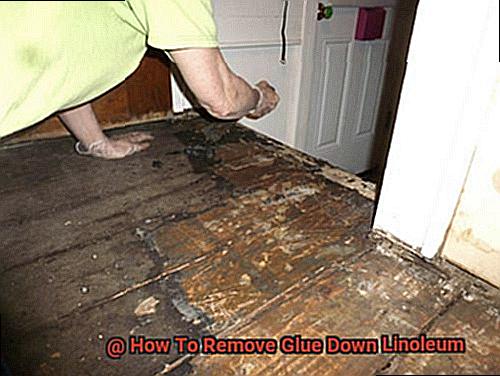
Cleaning the Subfloor
We’ve got you covered with the essential steps to properly clean your subfloor.
Step 1: Remove Loose Debris
First, remove any loose debris from the subfloor using a broom or vacuum cleaner. This step is crucial to ensure that dirt and debris won’t interfere with the new flooring installation.
Step 2: Remove Adhesive Residue
Next, use a scraper or putty knife to remove any remaining adhesive residue.
It’s important to use a scraper that won’t damage the subfloor surface. Take your time and be thorough during this step to ensure that all adhesive residue is removed.
Step 3: Clean the Subfloor
Thoroughly After scraping, it’s time to give your subfloor a deep clean.
Use a damp mop and cleaning solution to remove any remaining adhesive residue and dirt. Remember, the cleaning solution should be specific to your subfloor type, so make sure to read the manufacturer’s instructions before using it.
Step 4: Rinse the Subfloor
Once you’ve applied the cleaning solution, rinse the subfloor with clean water and let it dry completely.
A fan or dehumidifier can help speed up the drying process, but remember that a dry subfloor is crucial for proper flooring installation. Step 5: Repair Any Uneven or Damaged Areas
If your subfloor is uneven or damaged, it needs to be repaired before installing new flooring. Make sure any repairs are completed before cleaning the subfloor.
bM8xckiGDsU” >
Conclusion
In summary, removing glue down linoleum may seem like a daunting task, but with the right tools and techniques, it can be a stress-free DIY project.
To get started, you’ll need five essential tools: a scraper, heat gun or hairdryer, solvent, protective gear, and floor sander. The step-by-step guide to removing glue down linoleum is easy to follow.
First, cut the linoleum into manageable sections. Then heat up the adhesive using a heat gun or hair dryer before scraping it off with a floor scraper or putty knife.
For stubborn areas where adhesive remains, apply adhesive remover. Clean up any remaining debris with a damp cloth or mop and allow the subfloor to dry completely before proceeding with any further installation.
Softening the adhesive is crucial in this process. There are several methods available that will leave your subfloor feeling pampered and refreshed such as using a heat gun or hairdryer to melt the adhesive or using chemical adhesive removers.
This important step ensures that your subfloor is ready for new flooring installation.