You’re about to conquer the world of DIY plumbing, and your CPVC pipe installation is almost complete. You’ve meticulously measured, sliced, and joined those pipes together like a pro. Now, the million-dollar question looms over you: how long do you have to wait before turning on that sweet, sweet water?
Ah, patience my friend. Rushing this crucial step could spell disaster for your plumbing system. Leaks? No thank you. We want a reliable water flow that will stand the test of time. So, in this blog post, we’re going to spill all the tea on the essential waiting period after gluing CPVC pipe.
So, sit tight with your favorite cup of joe and prepare to be enlightened.
What is CPVC?
Contents
- 1 What is CPVC?
- 2 What Adhesive Should I Use for CPVC Pipe?
- 3 Curing Time for CPVC Glue
- 4 Factors That Affect the Curing Time of CPVC Glue
- 5 Maximum Strength of the Joints
- 6 Turning on the Water Supply Before Full Curing Time Has Elapsed
- 7 Colder Temperatures and High Humidity Environments
- 8 Regularly Inspecting the Glued Joints After Turning On the Water Supply
- 9 Conclusion
CPVC pipes are the go-to choice for plumbing systems that require durability and the ability to handle hot water. A crucial aspect of CPVC installation is understanding when you can turn on the water after gluing. In this comprehensive guide, we will explore the ins and outs of CPVC, including its curing process, recommended curing time, factors affecting curing time, and tips for successful installation.
Understanding the Curing Process:
CPVC glue creates a strong bond between pipes and fittings. However, it’s important to note that the glue needs time to cure and achieve maximum strength. The curing process is crucial in ensuring leak-free joints and a secure plumbing system.
Recommended Curing Time:
Most CPVC glues require a minimum curing time of 2 hours before turning on the water. However, it’s essential to consult the manufacturer’s instructions for specific guidelines, as curing times may vary. Remember that even if the glue seems dry to the touch after the recommended curing time, it can take up to 24 hours to fully cure and reach its maximum strength.
Factors Affecting Curing Time:
Several factors influence CPVC glue’s curing time. Temperature, humidity, and the brand of glue used all play a role in how quickly the adhesive sets. Consider these factors when determining the appropriate curing time for your specific installation.
Tips for Successful Installation:
To ensure a successful CPVC installation without leaks or failures, follow these expert tips:
- Follow Manufacturer’s Instructions: Read and adhere to the manufacturer’s instructions provided with your CPVC glue. These instructions offer specific guidelines on curing time and other considerations for optimal results.
- Handle Joints with Care: Once the glue is applied, avoid disturbing or applying pressure to the joints during the curing process. Handling glued pipes gently preserves joint integrity and minimizes the risk of leaks.
- Gradually Increase Water Pressure: If you need to turn on the water supply before the recommended curing time has elapsed, gradually increase water pressure instead of immediately using full force. This precaution reduces stress on the joints and minimizes the likelihood of leaks.
- Regularly Inspect Joints: After turning on the water supply, regularly inspect the glued joints for any signs of leaks or dripping. Address any issues promptly by reapplying glue and allowing for proper curing time.
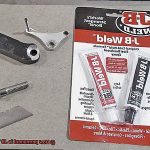
What Adhesive Should I Use for CPVC Pipe?
When it comes to plumbing projects, ensuring a strong and reliable bond between CPVC pipes and fittings is essential for a leak-free system. But with a wide range of adhesive options available, selecting the right one can be overwhelming. In this comprehensive guide, we will walk you through the factors to consider when choosing an adhesive for CPVC pipe, empowering you to tackle your plumbing project with confidence.
Factor 1: Type of Adhesive
The first step is to select an adhesive that is specifically labeled for use with CPVC pipe. Using the wrong type of adhesive can result in weak joints or even system failure. One highly recommended choice is CPVC solvent cement, which contains a blend of solvents and resins designed to chemically bond CPVC pipes and fittings together.
Factor 2: Size and Type of Pipes
Consider the size and type of pipes you are working with. Different adhesives may have specific recommendations for certain pipe sizes or materials. Ensure that the adhesive you choose is compatible with your specific pipe dimensions and composition.
Factor 3: Temperature and Pressure Conditions
Take into account the temperature and pressure conditions your plumbing system will experience. Some adhesives are formulated to withstand higher temperatures or higher pressure ratings, so it is crucial to select an adhesive that meets the requirements of your specific application.
Factor 4: Cure Time
Cure time refers to the duration required for the adhesive to fully harden and create a strong bond between the pipes. Most CPVC adhesives necessitate at least one hour of cure time before water can be turned on in the system. However, it is essential to consult the manufacturer’s instructions for the specific adhesive being used, as cure times can vary.
Factor 5: Environmental Factors
Environmental factors such as temperature and humidity can affect the adhesive’s cure time. Therefore, it is important to consider these factors when planning your plumbing project to ensure a successful bond between the pipes and fittings.
Expert Tip: Allow Sufficient Cure Time
To avoid compromising the integrity of the adhesive and weakening the bond between pipes and fittings, it is crucial to allow sufficient cure time before turning on the water. Premature exposure to water can lead to leaks down the line. Patience is key – let the adhesive do its job.
Curing Time for CPVC Glue
Understanding the intricacies of CPVC glue curing time is crucial. Also known as solvent cement, this adhesive is specifically designed for CPVC pipes and fittings, ensuring a strong and leak-free bond. In this comprehensive guide, we’ll delve into the nuances of CPVC glue cure time, equipping you with all the knowledge you need for a successful plumbing endeavor.
Factors Influencing Curing Time:
- Brand of Glue: Different manufacturers may prescribe varying curing times for their CPVC glues. Adhering to the instructions provided by the specific brand you’re using is vital for optimal results.
- Temperature and Humidity: The surrounding environment wields a substantial influence on the speed at which the glue cures. Higher temperatures and lower humidity levels accelerate the drying process, while cooler temperatures and higher humidity can elongate it.
- Pipe Size: The size of the pipes being joined can impact curing time. Larger pipes necessitate more time for the adhesive to thoroughly dry.
Recommended Curing Time:
While most CPVC glues mandate a minimum of two hours of drying time before water can be turned on, it is highly recommended to wait 24 to 48 hours for optimal outcomes. Hastening the process risks leaks or joint failures, an undesirable outcome for any DIY enthusiast or professional plumber.
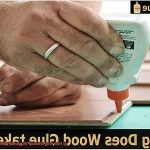
Proper Preparation and Application:
To achieve a bond that withstands the test of time, adhering to proper preparation and application techniques is crucial:
- Immaculate Surfaces: Thoroughly cleanse the surfaces to be glued, eliminating any remnants of dirt, grease, or debris.
- Thin Layer Application: Apply a thin layer of CPVC glue evenly to both surfaces that will be joined.
- Firm Pressure: Immediately press the pipes together firmly after applying the glue, creating a secure and robust bond.
Choosing the Right Glue:
Not all CPVC glues are created equal. Opting for a high-quality adhesive that offers a sturdy bond and reliable performance is essential. Reading customer reviews and seeking recommendations from professionals can help you make an informed decision.
Factors That Affect the Curing Time of CPVC Glue
The curing time of CPVC glue is influenced by several factors that must be taken into consideration for optimal drying and a strong bond. One of the most significant factors is temperature. Warmer temperatures accelerate the drying process, while colder temperatures slow it down. CPVC glue requires a minimum temperature of around 50°F (10°C) for proper curing. Below this temperature, the adhesive may not cure adequately or may take an extended period to do so.
Humidity also plays a role in the curing time. Higher humidity levels tend to prolong the drying process, while lower humidity can expedite it. Moisture in the air interferes with the evaporation process of the solvent in the glue, affecting its ability to cure properly. It is advisable to work in an environment with moderate humidity levels to ensure optimal curing.
The type of CPVC glue used can also impact curing time. Different brands and types of CPVC glue have varying curing times. Some adhesives are specifically formulated for faster curing, while others require more time to fully set. Following the manufacturer’s instructions and using the recommended adhesive for your specific application ensures proper bonding and optimal curing time.
The fit of the joint and the amount of pressure applied during assembly can influence curing time as well. A tight and secure joint allows for better contact between surfaces, facilitating faster curing. Applying sufficient pressure during assembly ensures a strong bond and minimizes the risk of leaks or failures once water is turned on.
The size and thickness of the CPVC pipe being glued also impact curing time. Thicker pipes retain heat longer, expediting the curing process, while thinner pipes cool down more quickly, potentially extending the curing time. Additionally, larger diameter pipes may require more adhesive, affecting drying time as well.
Ventilation and airflow are significant in the drying process of CPVC glue since it cures primarily through solvent evaporation. Adequate ventilation removes solvent vapors, allowing the adhesive to dry and cure more efficiently.
Maximum Strength of the Joints
When it comes to the maximum strength of joints in CPVC pipes, there are several factors to consider to ensure a strong and reliable plumbing system. Let’s dive into the fascinating world of CPVC glue and explore how it can make all the difference in achieving maximum joint strength.
First and foremost, the type of glue used plays a significant role in joint strength. CPVC pipes are commonly joined using solvent cement, a specialized glue designed specifically for bonding CPVC materials. This glue chemically bonds the pipe and fittings together, creating a watertight connection that can withstand the test of time. However, it’s important to note that not all glues are created equal. Different brands and types of glue have varying curing times, so it’s crucial to follow the manufacturer’s instructions to ensure maximum joint strength.
Patience is key when it comes to achieving maximum joint strength. While most solvent cements require at least 2 hours to cure before water can be turned on, it is recommended to wait a full 24 hours before subjecting the joint to full water pressure. This waiting period allows the joint to fully cure and reach its maximum strength, reducing the risk of leaks or failures in the plumbing system. Trust me, it’s worth the wait.
Temperature and humidity also play a significant role in drying time. Warmer temperatures speed up the curing process, while colder temperatures slow it down. If you’re working in a chilly environment, consider cranking up the heat or finding a cozy spot for your project. Additionally, higher humidity levels can prolong drying time, while lower levels expedite it. It’s like a battle between moisture and glue. To ensure optimal curing, try to work in an environment with moderate humidity levels.
The fit of the joint and the amount of pressure applied during assembly can also influence drying time and joint strength. A tight and secure joint allows for better contact between surfaces, helping the glue cure more efficiently. So make sure everything fits snugly together and apply enough pressure to create a strong bond. We’re talking about ensuring a leak-free plumbing system here.
The size and thickness of your CPVC pipe also come into play. Thicker pipes retain heat longer, which speeds up the curing process. On the other hand, thinner pipes cool down more quickly, potentially extending drying time. Additionally, larger diameter pipes may require more adhesive, which can affect drying time as well. So keep these factors in mind when working with different pipe sizes.
Ventilation and airflow are crucial in the drying process of CPVC glue. Since it primarily cures through solvent evaporation, having proper ventilation helps remove those solvent vapors and allows the adhesive to dry and cure more efficiently. So crack open a window or turn on a fan to give that glue some fresh air to work with.
Remember, achieving maximum strength in your CPVC joints is not just about the glue itself. It’s also about handling and installing the pipes and fittings with care, regularly inspecting and maintaining the joints, and following local plumbing codes for critical applications or high-pressure systems.
Turning on the Water Supply Before Full Curing Time Has Elapsed
Today, we’ll be delving into the potential consequences of turning on the water supply before the full curing time has elapsed. So, grab your adhesive and let’s dive in.
CPVC pipe joints are typically created using solvent cement, a powerful bonding agent that forms a tight seal between the pipes. However, this bond needs time to fully cure and create a secure and leak-proof connection. The curing time can vary depending on factors like temperature, humidity, and the type of solvent cement used. That’s why it’s crucial to follow the manufacturer’s instructions and recommendations for the specific curing time.
Now, let’s talk about what happens if you rush the curing process and turn on the water supply too soon. Brace yourself, because it’s not pretty. First off, you may end up with leaks. The curing process allows the solvent cement to chemically bond with the CPVC pipe, creating a reliable connection. But if you disrupt this bonding process by turning on the water supply prematurely, you’re asking for trouble.
Imagine waking up in the middle of the night to find water dripping from your ceiling or pooling around your feet in the bathroom – not exactly a pleasant sight, is it? By rushing the curing process, you’re increasing the likelihood of these nightmares becoming a reality.
Weak joints are another potential consequence of turning on the water supply too soon. The full curing time ensures that the joint reaches its maximum strength. Think of it like building a house – you wouldn’t want to move in before all the walls are properly constructed and secure, would you? Similarly, by skipping this waiting period, you’re compromising the integrity of the joint and setting yourself up for potential failures down the line. And nobody wants that.
To avoid these issues, it’s recommended to wait at least 24 hours before turning on the water supply after gluing CPVC pipe. This gives ample time for the solvent cement to fully cure and create a rock-solid joint. However, keep in mind that longer curing times may be necessary in certain situations, such as extreme temperatures or high humidity.
During this crucial waiting period, it’s essential to avoid any stress or movement on the joint. Imagine if someone started jumping up and down on the half-built foundation of a house – it would collapse, right? The same principle applies here. Any external force can weaken or even break the bond you’ve worked so hard to create. So be patient, resist the temptation to test your handiwork prematurely, and let that adhesive work its magic.
In conclusion, turning on the water supply before the full curing time has elapsed for CPVC pipe joints can lead to leaks and weak connections. By being patient and allowing the solvent cement to fully cure, you ensure a reliable and long-lasting plumbing system. So remember, when it comes to glue and CPVC pipes, patience is truly a virtue.
Colder Temperatures and High Humidity Environments
Today, we’re diving into the fascinating world of CPVC pipe glue and how Mother Nature’s chilly temperatures and high humidity can throw a wrench in your plans. So, buckle up and get ready for a wild ride.
When it comes to colder temperatures, imagine this: you’ve just painstakingly glued your CPVC pipes together on a frosty winter day. You’re itching to test out your handiwork, but hold your horses. The cold weather puts the brakes on the chemical reaction that happens during the glue’s curing process. This means that it takes way longer for the glue to dry and create a strong bond between those pipes. So, friend, don’t rush it. Give it at least 24 hours before turning on that water and unleashing your plumbing prowess.
Now, let’s talk about high humidity environments. We’ve all experienced that sticky, humid feeling when we step outside on a muggy day. Well, guess what? That same moisture in the air can wreak havoc on your CPVC pipe glue. In extreme cases, excessive humidity can even prevent the glue from drying altogether. Can you imagine weak joints and potential leaks? No thank you. To combat this issue, it’s crucial to follow the manufacturer’s instructions and potentially wait longer than 24 hours before turning on the water in high humidity environments.
But wait, there’s more. If you’re itching to dive deeper into the world of CPVC pipe glue, there are other factors to consider too. Pipe size and thickness, glue application technique, and ambient airflow can all influence drying time. So if you’re feeling extra curious, dig into these sub-topics for optimal results.
To wrap things up, remember this: patience is key when it comes to gluing CPVC pipes. Colder temperatures and high humidity environments can significantly impact drying time and the curing process of your glue. So, resist the temptation to turn on that water too soon and let your adhesive work its magic for at least 24 hours in colder temperatures and potentially longer in high humidity environments. This will ensure a successful installation and prevent any potential leaks.
Regularly Inspecting the Glued Joints After Turning On the Water Supply
Subtitle: Ensuring the Integrity and Longevity of Your Plumbing System
Introduction:
Welcome to the fascinating world of CPVC pipe glue, where precision and attention to detail are paramount. Today, we will explore the crucial step of regularly inspecting glued joints after turning on the water supply. Join us as we dive deep into the intricate dance between glue and water, and discover why this inspection is vital for ensuring secure CPVC pipe joints.
Visual Examination: Unveiling Potential Leaks
The first step in inspecting glued joints is a thorough visual examination. It’s time to put on your detective hat. Look closely at the joints for any signs of leakage. Keep an eye out for water stains or wet spots around the joints, as these can be telltale signs of trouble. Additionally, check for visible cracks or gaps in the joint area, as they may indicate weakened bonding that could lead to leaks.
Pressure Testing: Stress-Testing the Bonds
To truly ensure the integrity of your glued joints, it is highly recommended to perform a pressure test. This involves pressurizing the system with water and vigilantly monitoring for any pressure drops or signs of leakage. Equip yourself with a trusty pressure gauge during this process to accurately assess pressure levels and identify potential weak points.
High-Stress Zones: A Watchful Eye
Certain areas of your plumbing system are subjected to more stress and movement than others, such as those near pumps or valves. These zones demand extra vigilance during inspections, as they are more susceptible to joint weakening or failure over time. Regularly check and reinforce these high-stress areas to ensure long-lasting performance and peace of mind.
Prompt Action: Nipping Problems in the Bud
If any issues are detected during the inspection, swift action is imperative. Ignoring or neglecting problems can have dire consequences, from water damage to pipe failure. Don’t hesitate to re-glue joints or replace faulty components to maintain the integrity of your CPVC pipe system. Procrastination is not an option when it comes to the health of your plumbing.
Curing Times: The Bonding Journey
It’s important to note that curing times for CPVC pipe glue can vary depending on factors such as ambient conditions and the type of glue used. Patience is key. To ensure a strong bond before turning on the water supply, follow the manufacturer’s instructions for curing times diligently. Embrace the glue’s journey and allow it the time it needs to form a robust connection between your CPVC pipes.
wxTq_5szm4g” >
Conclusion
When it comes to turning water on after gluing CPVC pipe, timing is crucial.
You want to make sure that the glue has fully cured before you start using the water supply. The general rule of thumb is to wait at least two hours before turning the water back on.
This allows sufficient time for the adhesive to set and create a strong bond between the pipes. Rushing this process can lead to leaks or even pipe failure, which can be a costly and inconvenient problem to fix.
So, exercise patience and give the glue ample time to do its job effectively.