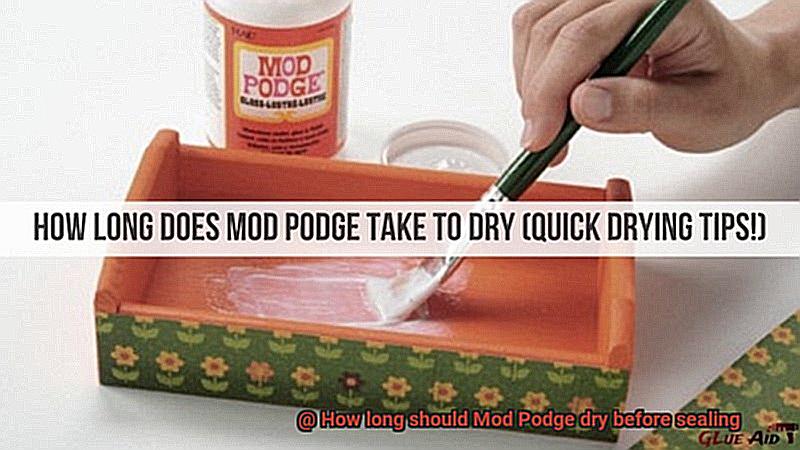
If you’re a fan of Mod Podge’s boundless possibilities, then you know its adhesive prowess is unmatched. This all-in-one wonder has been a trusted companion on countless DIY journeys, adding that extra touch of magic to our projects. But what about sealing? How long should we wait before protecting our Mod Podge creations?
In this blog post, we’re diving deep into the realm of drying times for Mod Podge before sealing. Whether you’re tackling decoupage or unleashing your inner collage artist, understanding the optimal drying period is key to achieving jaw-dropping results and preserving your masterpiece for years to come.
Join us as we explore the art of timing in Mod Podge. We’ll uncover the secrets behind perfect drying and sealing techniques that will make your creations burst with professionalism and finesse. So grab your brushes, folks, because it’s time to embark on a journey where creativity meets practicality.
What is Mod Podge?
Contents
- 1 What is Mod Podge?
- 2 Drying Time of Mod Podge
- 3 Factors Affecting the Drying Time of Mod Podge
- 4 General Guidelines for Drying Mod Podge
- 5 Why Is It Important to Wait 24 Hours Before Sealing?
- 6 Types of Sealants Used for Mod Podge Projects
- 7 How to Seal a Mod Podge Project
- 8 Tips for Handling and Protecting Your Finished Project
- 9 Conclusion
This versatile crafting adhesive has been capturing the hearts of DIYers and artists for decades, and for good reason. In this blog post, we will explore what Mod Podge is, its various uses, and how it can elevate your craft projects to new heights.
What is Mod Podge?
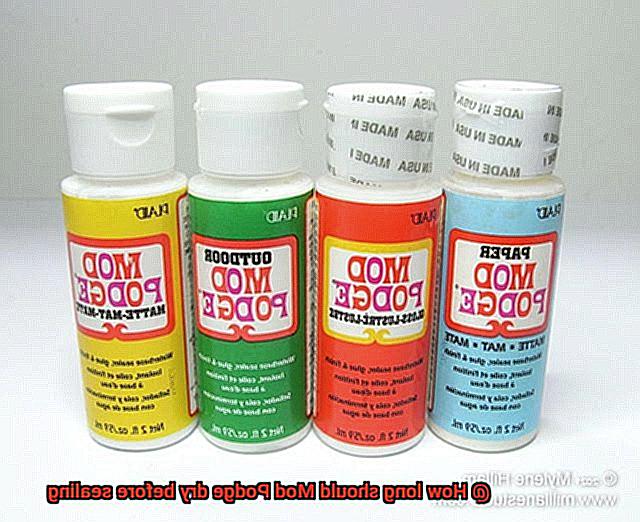
Mod Podge is a water-based sealer, glue, and finish that offers a world of possibilities to crafters. Created in the 1960s by Jan Wetstone, this iconic adhesive has become a household name in the crafting community. With its wide range of formulations, including Matte, Gloss, Satin, and Sparkle, Mod Podge allows you to achieve the desired finish for your projects.
Versatile Uses:
The beauty of Mod Podge lies in its ability to adhere different materials together and provide a protective coating. It can be used on surfaces such as wood, paper, fabric, glass, and even plastic. Whether you’re working on a decoupage project, creating personalized home decor items, or transforming old furniture into something new, Mod Podge is the glue for you.
Easy Application Process:
Using Mod Podge is as easy as 1-2-3. Simply apply a thin layer of the adhesive onto your desired surface. Next, place your chosen material on top and smooth out any wrinkles or air bubbles. Once dry, seal your project with additional coats of Mod Podge for added durability and longevity. Its non-toxic formula ensures it’s safe for children and adults alike.
Protective Finish:
Mod Podge not only bonds materials together but also acts as a sealer and finisher. By applying it as a topcoat over your project, you create a protective barrier against moisture, dust, and UV rays. Say goodbye to worries about your crafts getting damaged over time – Mod Podge preserves and enhances your creations.
Drying and Sealing:
Allowing sufficient drying time is crucial when working with Mod Podge. While it may feel dry to the touch after 15-20 minutes, it’s recommended to wait at least 24 hours for it to fully cure and become completely dry. Once your project is dry, seal it with a compatible sealer of your choice to add an extra layer of protection and achieve the desired finish.
Drying Time of Mod Podge
Dive into the enchanting world of Mod Podge as we unveil the secrets behind its drying time. Whether you’re a seasoned pro or a newbie in the crafting realm, understanding how long it takes for Mod Podge to dry is vital for achieving impeccable results.
Let’s delve into the factors that influence the drying time of Mod Podge. First and foremost, the thickness of your application plays a significant role. If you’re working with multiple layers or applying a generous coat of Mod Podge, be prepared to exercise patience, my friend. The thicker the application, the longer it will take to dry. Embrace the art of waiting.
Now, let’s talk about surfaces. Different materials possess varying levels of absorbency, which directly affect drying time. For instance, porous surfaces like wood may require more drying time compared to non-porous surfaces like glass. Keep this in mind when embarking on your crafting adventure.
But wait, there’s more. Environmental conditions can also come into play. If Mother Nature decides to unleash high humidity or cold temperatures upon us, it might slow down the drying process. To ensure your Mod Podge dries promptly, choose a well-ventilated area with moderate temperature and humidity levels. Stay one step ahead by checking the weather forecast before diving into your project.
Now that you’ve gracefully embraced the waiting game, how do you know when your Mod Podge is ready for sealing? Allow at least 24 hours for all layers of Mod Podge to fully dry and bond with the surface. This ensures a robust and long-lasting finish that will make your masterpiece shine.
But hold on. While you await the glorious moment when your Mod Podge dries completely, you might be tempted to speed up the process with a fan or a hairdryer set on low heat. Beware. Apply excessive heat at your own peril, as it could cause unsightly bubbles or cracks in your Mod Podge. Let’s avoid that, shall we?
Once your Mod Podge has dried, it’s time to seal your project for protection and a flawless finish. Choose from an array of sealers, such as acrylic sealer sprays or brush-on sealers. Remember to follow the instructions provided by the sealer manufacturer to achieve the best results.
But patience is still key. Allow your sealed project to cure for an additional 24 hours before handling or displaying it. This ensures that the sealer fully dries, creating a durable finish that will withstand the test of time.
Keep in mind that Mod Podge may continue to cure and become even more durable over time. To preserve the longevity of your masterpiece, shield it from excessive moisture or harsh conditions.
Factors Affecting the Drying Time of Mod Podge
As we embark on this creative journey, it’s crucial to understand the factors that can affect the drying time of our beloved glue. From the thickness of application to environmental conditions, let’s uncover the secrets behind achieving a flawless finish.
Application Thickness:
Thin is in. Applying Mod Podge in thin, even coats is essential for faster drying. Thick layers take longer to dry and can result in unsightly bubbles or cracks. So, grab that trusty foam brush and spread your Mod Podge evenly for a quicker drying time.
Humidity and Temperature:
Mother Nature holds the power here. Higher humidity levels slow down drying, while lower humidity speeds it up. Similarly, warmer temperatures expedite drying, while colder ones prolong it. To optimize drying time, find a well-ventilated room with moderate temperature and humidity levels – your crafts will thank you.
Type of Mod Podge:
Did you know? Mod Podge offers a range of formulas, each with its own unique drying time. The original formula dries between coats in 15-20 minutes and cures within 24 hours. But beware. Specialized formulas like Mod Podge Super Gloss require longer drying times and may take a few days to fully cure.
Surface Type:
Your canvas matters. Porous surfaces like wood or fabric absorb moisture from Mod Podge, resulting in longer drying times. Non-porous surfaces like glass or plastic, however, allow for quicker drying. Adjust your expectations accordingly based on what you’re crafting on.
Ventilation:
Let your crafts breathe. Proper ventilation is essential for efficient drying. Good airflow helps evaporate moisture content, speeding up drying time. Open those windows or use a fan for optimal results. Your crafts will dry faster and smell divine.
Number of Coats:
Patience, my friends. Applying multiple thin coats allows each layer to dry faster and prevents tackiness or uneven drying. Wait for each coat to dry completely before adding the next one – trust me, it’s worth the wait.
Use of Heat:
Speed demons, beware. While some crafters use heat tools to expedite drying, caution is advised. Low heat settings are essential to prevent damage to the surface or Mod Podge itself. Exercise judgment and keep that masterpiece safe.
General Guidelines for Drying Mod Podge
In this comprehensive guide, we will walk you through the general guidelines for drying Mod Podge, ensuring that your crafts turn out flawlessly every time.
Let’s start with the initial drying time. Within 15-30 minutes, your Mod Podge will typically dry to the touch. But be cautious. This is merely the beginning of the drying process. To achieve a fully cured and crystal-clear finish, it may take longer.
Now, let’s dive into the specifics. For small projects or thin layers of Mod Podge, allow it to air dry for about 24 hours before adding additional layers or sealing it. This timeframe guarantees that your Mod Podge dries and sets properly.
But what about those larger projects or thicker layers? Fear not, my crafty friend. Give your Mod Podge a minimum of 72 hours to dry before sealing. This extended period allows the Mod Podge to fully cure and harden, resulting in a robust bond and a durable finish that can withstand the test of time.
Of course, environmental conditions can influence drying times. High humidity levels or colder temperatures may prolong the process, while warmer temperatures and low humidity can speed it up. So, keep an eye on the weather forecast and plan your crafting accordingly.
But how do you know if your Mod Podge is completely dry? It’s simple. Perform a touch test. Gently caress the surface with your fingertip. If it feels tacky or sticky, it means that the Mod Podge is not entirely dry yet and requires more time. On the other hand, if it feels velvety smooth and dry to the touch, it is ready for sealing.
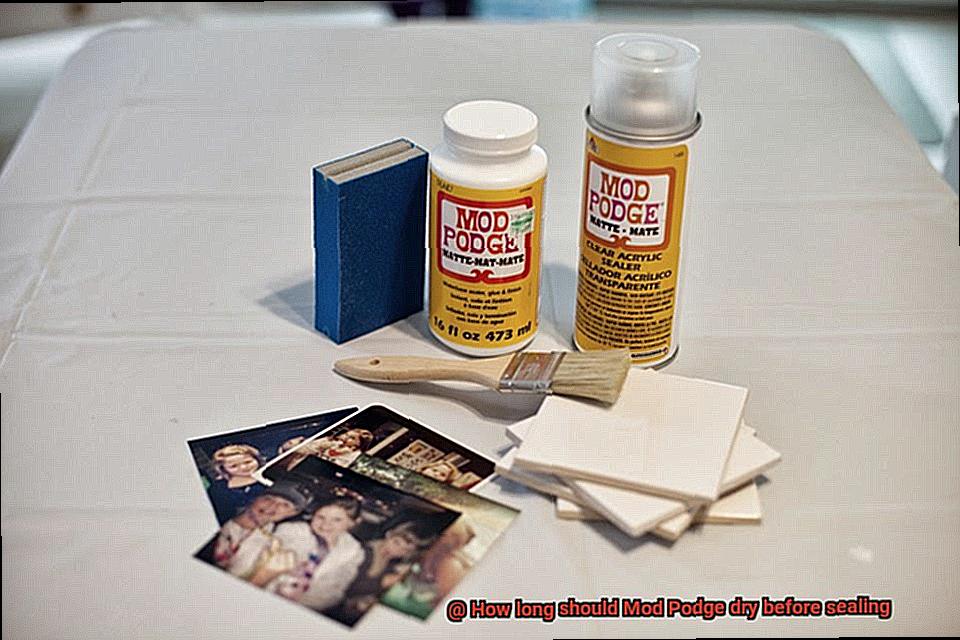
Speaking of sealing, once your Mod Podge has dried completely, you can proceed with applying a sealer to protect your masterpiece and give it a lustrous or matte appearance. Choose from a range of sealers, such as Mod Podge Clear Acrylic Sealer or Mod Podge Dimensional Magic, and apply it over the dried Mod Podge layer. Ensure that you follow the manufacturer’s instructions and allow the sealer to dry entirely before handling or using the finished project.
Why Is It Important to Wait 24 Hours Before Sealing?
Well, get ready to have your crafting world turned upside down as we delve into the secrets behind this waiting game.
First things first, let’s get acquainted with what Mod Podge actually is. It’s not just any run-of-the-mill adhesive; it’s a versatile crafting glue that can work its magic on a wide range of materials. Whether you’re working with paper, fabric, or even wood, Mod Podge is your go-to adhesive.
Now, let’s unravel the mystery of the 24-hour wait. Trust me, it’s more than just a test of your patience. Here are a few reasons why this waiting period is so crucial:
- Curing Time: Mod Podge needs time to undergo a magical transformation. During those precious 24 hours, the adhesive goes through a chemical reaction that transforms it from a liquid state to a solid state. This curing process ensures that the Mod Podge forms a strong bond with the materials it’s adhering to, creating a stable foundation for your masterpiece.
- Moisture Evaporation: Remember that old saying “patience is a virtue”? Well, in the world of crafting, patience can save you from frustrating mishaps. Allowing Mod Podge to dry for a full day ensures that all moisture has evaporated from the adhesive. If you seal your project too soon, trapped moisture can cause bubbling or wrinkling – no one wants that. By giving it enough drying time, you can avoid these pesky issues and achieve a smooth finish that will make your project shine.
- Bubbles Be Gone: We all know how annoying air bubbles can be when working with glue. But fear not. Waiting for 24 hours allows any trapped air bubbles to rise to the surface and escape like little crafty Houdinis. It’s like giving your project a chance to breathe and say goodbye to those pesky bubbles. The result? A flawless finish that will make your heart skip a beat.
- Perfecting Your Craft: The waiting period isn’t just about letting the glue do its thing; it also gives you the opportunity to assess your project and make any necessary adjustments before sealing it. If you spot any imperfections or areas that need touch-ups, this waiting game allows you to fix them with ease. Rushing to seal the project too soon can lead to a sealed finish that locks in any mistakes or flaws, leaving you with a less-than-perfect final product.
- Building a Solid Foundation: Waiting for 24 hours provides a solid and durable base for any additional layers or sealant that you might want to add. Mod Podge acts as a protective barrier, shielding your creation from moisture, dust, and other external elements that could potentially damage it. By allowing it to dry thoroughly, you ensure that the Mod Podge has formed a sturdy foundation for the final sealing step, giving your project the longevity it deserves.
So there you have it, my crafty comrades. Waiting for 24 hours before sealing with Mod Podge is essential for achieving the best results in your crafting projects. It might test your patience, but trust me when I say it’s worth every minute.
This waiting game allows the adhesive to cure, evaporate moisture, release air bubbles, perfect your masterpiece, and create a durable finish that will stand the test of time.
Types of Sealants Used for Mod Podge Projects
Crafting with Mod Podge is a fun and creative way to make unique and personalized projects. However, to ensure that your creations last and maintain their beauty, it is crucial to seal them properly. In this article, we will explore the different types of sealants used for Mod Podge projects and how they can benefit your crafty endeavors.
Clear Acrylic Sealer:
A popular choice for sealing Mod Podge projects is a clear acrylic sealer. This sealant not only protects your creation from moisture and UV rays but also adds a glossy finish that makes your project shine like a diamond. It enhances the colors and details of your artwork, giving it a professional and polished look.
Matte Sealer:
For those who prefer a more subtle or natural look, a matte sealer is the perfect choice. This type of sealant offers the same level of protection as a clear acrylic sealer but without the glossy finish. It creates a soft, non-reflective surface, making it ideal for projects that require a more understated aesthetic.
Waterproof Sealer:
If you are working on an outdoor project or making something that will be exposed to water, a waterproof sealer is essential. This superhero-like sealant creates a mighty barrier against moisture, protecting your Mod Podge masterpiece from potential damage or discoloration caused by water exposure. Rain or shine, your creation will withstand the elements.
Additional Features:
Some sealants go above and beyond by offering extra features such as heat resistance or non-yellowing properties. These nifty traits can be incredibly beneficial for specific projects or if you want to ensure the long-lasting beauty of your Mod Podge creations. Heat-resistant sealants are perfect for items that may come into contact with hot objects, while non-yellowing sealants maintain the clarity and vibrancy of your artwork over time.
Choosing the Right Sealant:
When selecting a sealant for your Mod Podge project, it is crucial to choose one that is compatible with Mod Podge and suitable for your specific project. Take the time to read labels and instructions carefully to ensure you are making the best choice.
Additionally, consider factors such as the desired finish, the materials you are working with, and any additional features you may need. Each project is unique, so selecting the right sealant will help guarantee the longevity and beauty of your creation.
How to Seal a Mod Podge Project
If so, you’re in for a treat. This comprehensive guide will take you through the necessary steps to seal your Mod Podge masterpiece, ensuring its longevity and beauty. So, grab your trusty apron and let’s dive into the world of sealing.
Step 1: Allow Your Mod Podge to Dry Completely
Before sealing your project, it’s crucial to let your Mod Podge creation dry fully. The drying time may vary depending on factors like climate and the thickness of your application. Exercise patience and resist the urge to rush this important step.
Step 2: Choose Your Sealing Method
Now that your Mod Podge is dry, it’s time to decide how you’ll seal it. You have two popular options: clear acrylic sealer spray or clear varnish. The sealer spray guarantees an even finish, while varnish offers controlled application for those who desire precision.
Step 3: Sealing with Clear Acrylic Sealer Spray
Opting for the clear acrylic sealer spray? Find a well-ventilated area or venture outdoors. Place your project flat on a protected surface and position the can about 12 inches away. Apply an even coat over the entire project, ensuring every nook and cranny is covered. Follow the specific drying times mentioned on the can – usually around 15-20 minutes.
Step 4: Sealing with Clear Varnish
If varnish is your preference, grab a foam brush or a soft-bristle brush. Apply a thin and even coat of varnish to your project, taking care not to overbrush or create pesky bubbles. Allow the varnish to dry completely before adding additional coats if desired. For optimal protection, it’s recommended to apply at least two coats of varnish.
Step 5: Consider Your Desired Finish
When sealing your Mod Podge project, think about the finish you desire. Craving a glossy sheen? Opt for a sealer or varnish that provides a glossy finish. If you prefer a more subdued look, matte sealers or varnishes are the way to go. The choice is yours – embrace your creativity.
Tips for Handling and Protecting Your Finished Project
Now that you’ve put in all the time and effort, it’s important to handle and protect your finished creation properly to ensure its longevity and durability. In this guide, we will provide you with some valuable tips to help you care for your finished Mod Podge project.
Allow Sufficient Drying Time:
Before handling your finished project, make sure that the Mod Podge has completely dried. It is generally recommended to wait at least 24 hours for the Mod Podge to dry fully. To check if it’s dry, touch a small, inconspicuous area of your project. If it feels tacky or sticky, give it more time to dry undisturbed.
Handle with Clean, Dry Hands or Gloves:
To avoid leaving fingerprints or smudges on your project, handle it with clean, dry hands or wear gloves. Oils from your hands can transfer onto the surface of the project and spoil its appearance. Taking this precaution will keep your finished piece looking pristine.
Use a Clean and Flat Surface:
When handling your project, place it on a clean and flat surface. This will prevent accidental spills or scratches. You can also place a soft cloth or mat underneath for added protection and stability while working with your finished piece.
Protect During Transport and Storage:
If you need to transport or store your finished project, use protective materials such as tissue paper, bubble wrap, or foam sheets to prevent damage. Wrap your project carefully and secure it in a box or container to ensure its safety.
Seal Your Project:
Sealing your Mod Podge project adds an extra layer of protection and enhances its overall appearance and durability. Wait for the Mod Podge to dry completely before applying any sealant. There are various sealants available, such as acrylic sealers or clear varnishes. Follow the manufacturer’s instructions for the specific sealant you choose.
Clean Your Tools:
After using Mod Podge and sealants, remember to clean your brushes and tools properly. Rinse them thoroughly with warm water and mild soap to remove any residue. Properly cleaning your tools will ensure their longevity and maintain their effectiveness for future projects.
zVpbXu0AItY” >
Conclusion
The drying time of Mod Podge before sealing is an important factor to consider when working on craft projects. It’s crucial to allow enough time for the Mod Podge to fully dry before applying a sealant, as this will ensure the best results and longevity of your project.
So, how long should you wait? Well, the general rule of thumb is to let the Mod Podge dry for at least 24 hours before sealing. However, it’s always a good idea to check the specific instructions on the Mod Podge bottle or packaging, as different formulas may have slightly different drying times.
During this drying period, it’s essential to keep your project in a well-ventilated area with good air circulation. This will help expedite the drying process and prevent any potential issues like bubbling or smudging.
While waiting for your Mod Podge to dry, resist the temptation to touch or handle your project too much. This can leave fingerprints or smudges on the surface and interfere with the final result. Patience is key here.
Once the Mod Podge has dried completely, you can then proceed with sealing your project. Sealing helps protect your work from moisture, dirt, and other external factors that could potentially damage it over time.
To seal your project effectively, choose an appropriate sealant based on your specific craft materials and desired finish. There are various options available such as acrylic spray sealants or brush-on sealers. Follow the instructions provided by the sealant manufacturer for application techniques and drying times.
In conclusion, allowing adequate drying time for Mod Podge before sealing is crucial for achieving optimal results in your craft projects. Remember to be patient during this process and follow any specific instructions provided by both the Mod Podge and sealant manufacturers.