When it comes to conquering your DIY projects or hanging up items around the house, having an adhesive you can trust is absolutely crucial. Whether you’re a seasoned pro or just a weekend warrior, understanding the weight-bearing capabilities of your chosen adhesive is the secret to success. Today, we dive deep into the world of Liquid Nails, that legendary construction adhesive everyone’s been raving about, and unravel the mystery of just how much weight this bad boy can handle.
Liquid Nails has earned its reputation as the go-to adhesive for professionals and DIY enthusiasts alike, thanks to its exceptional bonding strength. This versatile glue forms an unbreakable bond between a wide range of materials – think wood, metal, concrete, ceramics – you name it. But when it comes to supporting heavy loads, does Liquid Nails have what it takes?
Well, curious minds have put this sticky wonder to the test, and let me tell you, the results are downright jaw-dropping. The Heavy Duty formulation of Liquid Nails has been subjected to rigorous evaluations and estimated to hold up to a whopping 1000 pounds per square inch (PSI) when applied correctly on suitable surfaces. That’s right folks – we’re talking superhero-level strength here. So whether you’re looking to hang shelves that could double as boulders or secure structural elements with confidence, Liquid Nails is your ultimate wingman.
But wait…there’s more. This adhesive powerhouse doesn’t stop there. With Liquid Nails by your side (or should we say “underneath”), you can expect nothing less than outstanding bonding power and peace of mind for years to come. Say goodbye to wobbly shelves and flimsy installations – Liquid Nails has got your back (literally.).
So buckle up and get ready for an adventure as we explore the application techniques, recommended surfaces, and various formulations of Liquid Nails tailored to meet your specific needs. Let’s unlock the full potential of this construction adhesive and unleash your creativity like never before.
Stay tuned, my friends. The mighty strength of Liquid Nails is about to blow your mind.
Different Types of Liquid Nails
Contents
- 1 Different Types of Liquid Nails
- 2 Factors to Consider When Determining How Much Weight Liquid Nails Can Hold
- 3 Bonding Lightweight Materials with Liquid Nails
- 4 Bonding Heavy Materials with Liquid Nails
- 5 Preparing the Surfaces Before Applying Liquid Nails
- 6 Application Technique for Maximum Holding Capacity
- 7 Structural Loads and Mechanical Fasteners vs. Liquid Nails
- 8 Checking the Manufacturer’s Specifications for Weight Capacity Estimations
- 9 Conclusion
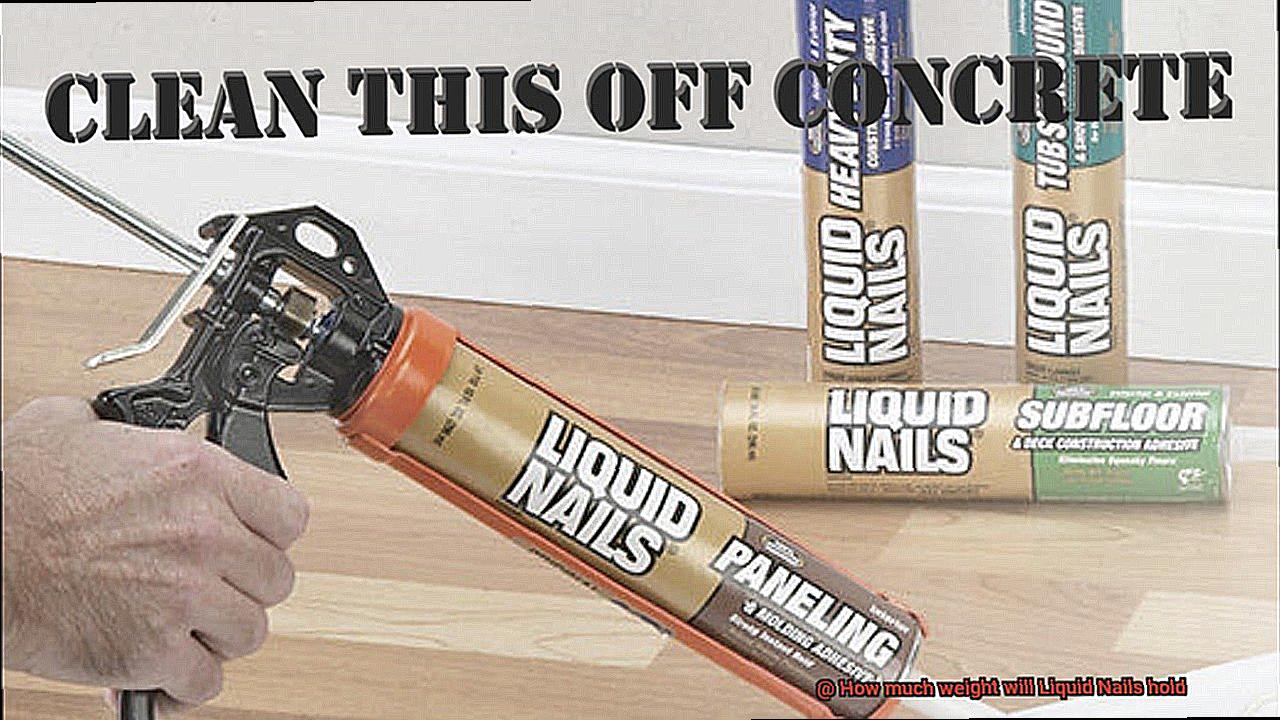
Liquid Nails, a beloved construction adhesive brand, is renowned for its ability to bond a wide range of materials together. However, when undertaking a project, it is crucial to understand the weight-bearing capacity of Liquid Nails. In this article, we will delve into the various types of Liquid Nails and their respective weight limits, enabling you to select the perfect adhesive for your project and guarantee a steadfast and enduring bond.
The Original Liquid Nails:
The Original Liquid Nails formula stands as a versatile adhesive that boasts a weight-bearing capacity of up to 10 pounds per square inch (psi). Ideal for lightweight applications such as attaching baseboards, crown molding, or small decorative items to walls, this adhesive provides a dependable bond for common household tasks.
Heavy Duty Liquid Nails:
For more demanding projects, Heavy Duty Liquid Nails proves itself to be a stalwart choice. This specialized formula exhibits an increased weight-bearing capacity of up to 20 psi. Specifically designed for heavy-duty applications like securing countertops or hefty wall panels, Heavy Duty Liquid Nails bestows superior strength and bonding power, ensuring an unwavering and long-lasting connection.
Subfloor and Deck Construction Adhesive:
When tackling subflooring and deck construction, the Subfloor and Deck Construction Adhesive emerges as the optimal choice. This unique formula possesses an unwavering bond that can withstand heavy loads, with a weight capacity typically ranging from 30 to 40 psi. It grants the necessary support for structural elements, guaranteeing stability and durability.
Factors Influencing Weight-Bearing Capacity:
While Liquid Nails specifies weight limits for each type, it is essential to consider additional factors that can impact its overall strength. Proper surface preparation is crucial; clean, dry surfaces are imperative for achieving optimal bonding. Temperature and curing time also influence the adhesive’s performance. To achieve the desired results, it is vital to follow the manufacturer’s instructions and allow adequate curing time before applying any stress or weight.
Choosing the Perfect Liquid Nails:
Selecting the appropriate type of Liquid Nails for your project is paramount. Consider the materials being bonded and the weight they need to support. The Original Liquid Nails suffices for lightweight materials, while Heavy Duty or Subfloor and Deck Construction Adhesive are ideal for heavier applications. Making a wise choice ensures a robust and reliable bond.
Conclusion:
Liquid Nails, a versatile construction adhesive, offers an array of types with different weight-bearing capacities. From common bonding tasks to heavy-duty projects, there exists a Liquid Nails formula suitable for every situation. By comprehending the characteristics of each type, considering surface preparation, and adhering to correct application techniques, you can achieve optimal results and forge enduring bonds.
Factors to Consider When Determining How Much Weight Liquid Nails Can Hold
When it comes to tackling DIY projects, having a reliable adhesive is essential. One popular choice among DIY enthusiasts is Liquid Nails. But just how much weight can this miracle glue hold? In this article, we’ll delve into the factors that determine the weight-holding capacity of Liquid Nails, ensuring that you have all the knowledge you need to make your projects a success.
Factor 1: Substrate Material

Liquid Nails is designed to bond various materials, such as wood, metal, concrete, and drywall. However, it’s important to consider the porosity and texture of the surface you’re working with. Rough and porous surfaces, like concrete, provide better adhesion compared to smooth and non-porous ones, such as glass. So when choosing Liquid Nails for your project, take into account the material you’re working with.
Factor 2: Surface Preparation
Preparation is key. Before applying Liquid Nails, ensure that your surface is clean, dry, and free from any debris or oil. Properly roughening the surface with sandpaper or using a primer can significantly enhance the bonding strength. Don’t skip this step if you want your adhesive to hold up under pressure.
Factor 3: Environmental Conditions
Mother Nature plays a role in determining how well Liquid Nails performs. Extreme temperatures or high humidity levels can weaken the bond or prolong the curing process. To achieve optimal results, check the manufacturer’s guidelines for specific temperature and humidity ranges in which Liquid Nails should be applied.
Factor 4: Weight Distribution
Liquid Nails performs best when weight is evenly distributed across the entire bonded area. If weight is concentrated in one spot or there are significant stress points, it may compromise the adhesive bond and reduce its holding capacity. Ensure your weight distribution is well-balanced for maximum strength.
Factor 5: Application Method
Follow the manufacturer’s instructions regarding the correct amount of adhesive to apply and the recommended application technique. Applying too little adhesive may result in a weak bond, while using too much can lead to excess squeeze-out and reduced contact between surfaces. Finding the Goldilocks zone of application is crucial.
Factor 6: Curing Time
Patience is a virtue. Allow sufficient curing time before subjecting the bonded surfaces to weight or stress. Rushing this step may result in a weaker bond and decreased weight-holding capacity. Follow the manufacturer’s instructions for the recommended curing time.
Bonding Lightweight Materials with Liquid Nails
Liquid Nails, the unrivaled construction adhesive, is renowned for its exceptional bonding capabilities. In this comprehensive guide, we will delve into the art of bonding lightweight materials using Liquid Nails. Whether you’re working with foam, plastic, or wood, this versatile adhesive is your go-to choice. Join us as we explore the factors that contribute to a strong bond and provide expert tips to ensure successful adhesion.
Surface Preparation:
To achieve a bond that stands the test of time, proper surface preparation is crucial. Begin by meticulously cleaning the surfaces, ensuring they are free from dust, dirt, and pesky grease. A thorough wipe-down with a suitable cleaner or solvent will do the trick. By preparing the surfaces properly, you create an optimal environment for the adhesive to penetrate and bond effectively.
Application Technique:
Consistency is key when it comes to applying Liquid Nails to lightweight materials. Begin by evenly applying the adhesive across the entire surface. Don’t be shy; generously coat your materials to ensure proper coverage and maximum bonding capability. By achieving a consistent application, you lay the foundation for a bond that won’t let you down.
Curing Time:
After applying the adhesive, it’s time to bring your materials together and hold them firmly in place for the recommended curing time. Keep in mind that curing time may vary depending on factors such as temperature and humidity. To stay on track, consult the manufacturer’s instructions for specific guidance. Giving your bond ample time to cure ensures it reaches its full strength potential.
Strength and Durability:
Once fully cured, Liquid Nails delivers an unparalleled bond that can withstand lightweight loads and vibrations with ease. Its specially formulated composition allows it to seamlessly bond porous and non-porous surfaces alike. Whether you’re diving into crafts, tackling DIY projects, or making home repairs, Liquid Nails guarantees reliable results that stand the test of time.
Bonding Heavy Materials with Liquid Nails
When it comes to bonding heavy materials, you need an adhesive that can handle the weight like a superhero. Look no further than Liquid Nails. This construction adhesive is renowned for its exceptional bonding strength and durability, making it the go-to choice for professionals and DIY enthusiasts alike. In this guide, we’ll walk you through the process of using Liquid Nails to securely bond heavy materials together.
Selecting the Right Liquid Nails Product:
Liquid Nails offers a variety of formulations designed for specific applications and materials. Whether you’re working with wood, metal, or stone, there’s a Liquid Nails formula that’s perfect for your needs. Choose the correct product to ensure optimal bonding strength and success.
Surface Preparation:
To achieve a strong bond, proper surface preparation is crucial. Thoroughly clean the surfaces you plan to bond, removing any dust, dirt, or grease. This step ensures a clean and smooth bonding surface, maximizing the effectiveness of the adhesive.
Application Technique:
When applying Liquid Nails, use a continuous bead or follow the manufacturer’s instructions. Apply enough adhesive to provide sufficient coverage without excess that would squeeze out when the materials are pressed together. This technique ensures even distribution and an effective bond.
Curing Time:
While Liquid Nails may initially bond quickly, it takes time for the adhesive to fully cure and reach its maximum strength. Patience is key. Allow at least 24 hours for the adhesive to cure before subjecting it to weight. This patience will ensure that your bond can handle heavy loads without compromising its integrity.
Weight-Holding Capacity:
Liquid Nails has a weight-holding capacity of up to 10 pounds per square inch of adhesive coverage when properly applied and cured. However, factors like temperature, humidity, and the materials being bonded can affect this capacity. If you require extra strength or are dealing with heavier loads, consider using mechanical fasteners like screws or nails in conjunction with Liquid Nails for added security.
Testing and Safety:
Before embarking on larger projects, always test the bonding strength of Liquid Nails on a small, inconspicuous area. This precaution ensures that the adhesive meets your specific requirements and provides the desired level of strength and durability. Additionally, follow all safety instructions provided by the manufacturer to ensure proper usage and protection.
Preparing the Surfaces Before Applying Liquid Nails
Liquid Nails is renowned for its exceptional strength and durability, making it a go-to adhesive for various projects. However, achieving a long-lasting bond requires proper surface preparation. In this comprehensive guide, we will take you through the crucial steps to prepare surfaces before applying Liquid Nails.
Step 1: Thoroughly Clean the Surfaces
To ensure a strong bond, it is vital to start with clean surfaces. Dirt, dust, and grease can hinder the adhesive’s ability to grip effectively. Use soap and water or a suitable solvent to eliminate any contaminants. Remember, cleanliness is the first step towards a successful bond. Allow the surfaces to dry completely before moving on.
Step 2: Roughen the Surfaces
Enhancing adhesion requires roughening the surfaces. Sandpaper or a wire brush can be used depending on the material involved. The goal is to create a slightly coarse texture that allows the adhesive to cling tightly. Be careful not to overdo it and cause excessive damage or scratching.
Step 3: Dry the Surfaces Thoroughly
Moisture is the enemy of a strong bond with Liquid Nails. After cleaning and roughening, give ample time for the surfaces to air dry completely. Alternatively, use a clean cloth to ensure they are entirely dry. This step is crucial for maximizing the adhesive’s effectiveness.
Step 4: Additional Preparation for Specific Materials
Certain materials may require special treatment for optimal bonding. For example, some plastics may need a specific primer before applying Liquid Nails. Consult the manufacturer’s instructions or an expert if you are uncertain about how to prepare specific materials. Taking these additional steps will ensure the best possible bond.
Step 5: Follow Manufacturer’s Instructions for Application
To achieve optimal results with Liquid Nails, it is essential to follow the manufacturer’s instructions carefully. Use the recommended amount of adhesive and spread it evenly over the surface. Applying too much or too little can compromise the holding capacity and overall performance.
Application Technique for Maximum Holding Capacity
In the world of adhesives, Liquid Nails reigns supreme when it comes to bonding materials together. With its exceptional strength and durability, this construction adhesive is a go-to choice for professionals and DIY enthusiasts alike. However, to unlock its full potential, you must master the art of application. In this article, we will explore the techniques that can help you maximize the holding capacity of Liquid Nails and achieve rock-solid bonds.
Preparing the Surface:
Before diving into the application process, proper surface preparation is critical. Cleanliness is key. Ensure that the surface is pristine – clean, dry, and free from any dust, dirt, grease, or loose particles that may compromise adhesion. A quick wipe with a suitable cleaning solution followed by thorough drying will work wonders for your bond’s longevity.
Determining the Right Amount:
While it’s tempting to squeeze out a generous amount of Liquid Nails, striking the right balance is essential. Excessive adhesive can lead to waste and weaker bonds, while using too little may not provide sufficient strength. Consult the manufacturer’s guidelines for the recommended coverage rate based on the specific Liquid Nails product you are using.
The Perfect Application Technique:
To achieve maximum holding capacity, apply Liquid Nails in a zigzag pattern or as small dots along the surface. Avoid continuous lines as they can create air pockets that compromise bond strength. Remember, even application is crucial – not too thick or too thin.
The Power of Pressure:
After applying Liquid Nails, don’t just stand back and admire your work. Immediately press the two surfaces together firmly. Applying pressure ensures proper contact between the adhesive and materials being bonded. It eliminates air gaps and allows for superior adhesion. So go ahead, give it a good squeeze.
Extra Support while Curing:
Depending on your project, additional support may be necessary while the Liquid Nails cures. Clamps, weights, or temporary supports can hold everything in place until the adhesive sets. This extra step ensures a secure bond and peace of mind.
Patience is a Virtue:
As eager as you may be to put your project to use, exercise patience and allow sufficient time for Liquid Nails to cure. Curing times vary based on factors like temperature and humidity, so refer to the manufacturer’s instructions for specific guidance. Rushing this step can compromise the bond’s strength, so sit back, relax, and let it work its magic.
Considering Material and Weight:
While Liquid Nails boasts impressive bonding capabilities, it’s essential to consider the weight and type of materials being bonded. For heavier loads or structural applications, consult with a structural engineer or explore alternative adhesive options specifically designed for those purposes. Safety first.
Structural Loads and Mechanical Fasteners vs. Liquid Nails
In this comprehensive guide, we compare and contrast these two methods of bonding materials together, examining their advantages, disadvantages, and how to make the best choice for your project.
Structural Loads and Mechanical Fasteners:
Let’s begin with the tried-and-true classics: structural loads and mechanical fasteners. Nails, screws, and bolts have stood the test of time, offering reliable strength and durability. Here’s what you need to know about them:
Advantages:
Versatility: They can be used in various applications, from woodworking to construction projects.
Disadvantages:
- Labor-Intensive: Installing mechanical fasteners requires drilling, screwing, or nailing, which can be time-consuming.
- Visible Fasteners: These traditional methods leave visible holes or marks on the surface, which may not be desirable for certain projects.
Liquid Nails:
Now let’s shift our focus to Liquid Nails, a popular construction adhesive that offers a glue-based alternative to mechanical fasteners. Let’s explore its features:
Advantages:
- Strong Bonding Power: Liquid Nails creates a robust bond between different surfaces, eliminating the need for mechanical fasteners.
- Ease of Use: Applying Liquid Nails is simple – just squeeze out the right amount onto the surface and press the materials together.
No Visible Fasteners: Say goodbye to unsightly holes or marks on your precious surfaces.
Disadvantages:
- Weight Limitations: While Liquid Nails can hold a substantial amount of weight, heavy loads or high-stress areas may require additional mechanical fasteners.
- Durability Concerns: Over time, factors like temperature changes and moisture exposure can affect the long-term performance of Liquid Nails.
In the ongoing battle between structural loads and mechanical fasteners versus Liquid Nails, there is no definitive winner. The choice ultimately depends on your project requirements, weight-bearing needs, and personal preferences.
For lighter applications like installing baseboards or crown molding, Liquid Nails can be the perfect solution, providing a strong bond without the need for visible fasteners. However, when it comes to heavy loads or high-stress areas, mechanical fasteners may be necessary to ensure maximum strength and durability.
Remember to follow manufacturer instructions, properly prepare surfaces, and evaluate the demands of your project. By understanding the strengths and limitations of both methods, you can make an informed decision and achieve a successful and long-lasting bond.
Checking the Manufacturer’s Specifications for Weight Capacity Estimations
When it comes to estimating weight capacity, nothing beats the manufacturer’s specifications. Whether you’re a dedicated glue enthusiast or just someone looking for the perfect adhesive for your project, checking the manufacturer’s specifications is essential for ensuring a strong and reliable bond. So, let’s dive into the world of weight capacity estimations and discover how to accurately assess the capabilities of Liquid Nails using these valuable details.
First and foremost, you need to locate the manufacturer’s specifications. These can typically be found on the product packaging or the manufacturer’s website. Once you have them in hand, look for specific information regarding weight capacity. This could be stated as a maximum weight limit or a recommended weight range. It’s important to pay attention to both to ensure safety and effectiveness.
But wait, there’s more. The manufacturer’s specifications may also provide additional details on factors that can affect the weight capacity of Liquid Nails. Keep an eye out for information on surface type, temperature conditions, curing time, and application method. These factors can significantly impact the strength of your bond and should not be overlooked.
Now, here’s where things can get a bit tricky. In some cases, the manufacturer’s specifications may not give an exact weight capacity for Liquid Nails. This could be because the product is designed for general use without specific weight limitations or because the manufacturer recommends alternative methods for heavy-duty applications. When faced with such ambiguity, it’s best to reach out to the manufacturer directly or consult an adhesive expert. They can provide the clarity and guidance needed to make an informed decision.
It’s crucial to remember that exceeding the weight capacity specified by the manufacturer can have dire consequences. Bond failure or damage can occur, jeopardizing your project and potentially causing harm. To avoid such scenarios, always play it safe and follow the guidelines provided by the manufacturer.
If you find yourself unable to locate specific weight capacity details or if your project requires heavy-duty applications, consider exploring alternative adhesives or methods. There are specialized adhesives available that are specifically designed for high weight capacities. Consulting with a professional in adhesive technology can also provide valuable insights and ensure you’re using the right glue for your project.
Conclusion
Liquid Nails, renowned for its adhesive prowess, is a reliable and robust solution for holding weight.
With its remarkable strength, it can support an impressive amount of load. Whether you’re hanging shelves, securing molding, or mounting heavy objects to walls, Liquid Nails has got you covered.
So rest assured, when it comes to weight-bearing capabilities, Liquid Nails will not disappoint.