Imagine this: you’ve finally stumbled upon the perfect glue for your ambitious DIY project, but doubts linger in your mind. Will it withstand the test of time? Fear not, my friend, for Liquid Nails has arrived to save the day. This extraordinary adhesive has earned a well-deserved reputation for its unwavering durability and steadfast grip.
Whether you’re tackling woodworking, tile setting, or general construction, Liquid Nails stands head and shoulders above other traditional adhesives with its remarkable resilience. But here’s the burning question: just how long can it hold? Today, we embark on a journey into the realm of Liquid Nails to provide you with a comprehensive understanding of its bonding capabilities and answer that pressing query: “How long will Liquid Nails hold?”
From uniting materials in commercial construction projects to securing decorative elements in your humble abode, Liquid Nails has proven itself as a trustworthy and long-lasting solution. So, roll up your sleeves and join us as we delve into the science behind this incredible adhesive, debunk some common misconceptions, and uncover the key factors that contribute to its astonishing longevity.
Prepare yourself to plunge deeper into the world of Liquid Nails and discover why it has become both professionals’ go-to choice and DIY enthusiasts’ secret weapon.
Factors Affecting the Longevity of Liquid Nails
Contents
- 1 Factors Affecting the Longevity of Liquid Nails
- 2 Surface Preparation for Maximum Bond Strength
- 3 Application Technique for Optimal Results
- 4 Environmental Conditions and Their Impact on Liquid Nails
- 5 Types of Liquid Nails Products Available
- 6 Longevity Expectations for Different Applications
- 7 Testing and Certifications of Liquid Nails
- 8 Maintenance and Care to Maximize Bond Strength
- 9 Conclusion
Liquid Nails, a trusted name in construction adhesives, is known for its strong bonding capabilities. However, to ensure that your projects withstand the test of time, it’s crucial to understand the factors that can impact the longevity of this adhesive. In this article, we will explore key considerations that affect the lifespan of Liquid Nails. From surface preparation to environmental exposure and everything in between, we will delve into the factors that contribute to a strong and durable bond.
Surface Preparation:
“Preparation is key” holds true for Liquid Nails as well. To achieve a strong bond, ensure that surfaces are clean, dry, and free from dust, grease, or debris. Properly preparing the surface enhances the adhesive’s durability and ensures a long-lasting bond.
Temperature and Humidity:
Extreme temperatures can affect Liquid Nails’ performance. Both hot and cold temperatures impact the adhesive’s ability to bond effectively. High humidity levels slow down curing, while low humidity levels cause the adhesive to dry too quickly. Consider these factors during application and curing to maximize longevity.
Substrate Material:
Different materials require specific adhesive formulations. Liquid Nails offers products designed for wood, metal, concrete, and more. Choosing the right product for your substrate material is crucial for achieving a strong bond that lasts.
Weight and Stress:
Consider the weight and stress applied to bonded surfaces. Liquid Nails provides different strengths and formulations to accommodate load-bearing capacities. Using an adhesive unsuitable for the intended weight or stress results in a weaker bond and reduced longevity.
Environmental Exposure:
Environmental factors such as sunlight, moisture, chemicals, or harsh weather conditions impact Liquid Nails’ longevity. UV radiation degrades certain adhesives over time, while constant exposure to moisture or chemicals compromises effectiveness. Select the appropriate product based on expected environmental conditions.
Application Technique:
Proper application technique is crucial for a strong and long-lasting bond. Follow manufacturer’s instructions regarding application thickness, curing time, and pressure applied during bonding. A well-executed application ensures optimal performance and durability.
Maintenance and Care:
Regular maintenance and proper care contribute to Liquid Nails’ longevity. Keep bonded areas clean and free from excessive stress or impact. Conduct periodic inspections to identify signs of weakening or failure, allowing prompt repairs if necessary.
Surface Preparation for Maximum Bond Strength
Surface preparation is vital when it comes to achieving maximum bond strength with Liquid Nails. Just like building a house on a solid foundation, a strong bond requires a solid base. Let’s dive into the steps involved in preparing surfaces for glue application.
- Cleanliness is crucial: Before applying Liquid Nails, ensure the surface is clean. Remove dirt, dust, grease, or any other substances that may be present. Use a mild detergent or solvent suitable for the surface material. A clean cloth or sponge can be used to apply the cleaning solution and remove debris.
- Dry it out: Moisture is the enemy of adhesion. Make sure the surface is completely dry before applying the adhesive. Air dry it or use a clean cloth or towel to speed up the process.
- Roughen it up: Smooth surfaces don’t provide much grip for glue. To enhance adhesion, use sandpaper or a wire brush to create a textured surface. This creates microscopic grooves or scratches for the adhesive to grip onto.
- Remove debris: After roughening up the surface, remove any dust or debris generated during the process. Wipe it with a clean cloth or use compressed air to blow away loose particles.
Proper surface preparation ensures optimal adhesion by providing a clean and dry surface for the adhesive to bond to. Contaminants on the surface can hinder bonding and weaken the bond over time, while moisture can interfere with proper bonding.
Roughening up the surface creates more area for the adhesive to grip onto, enhancing bond strength. Think of it like Velcro – more hooks and loops mean a stronger bond.
In addition to surface preparation, consider other factors for maximum bond strength. The type of surface, temperature, and humidity can all impact adhesive performance. Different Liquid Nails products may have specific temperature requirements for optimal performance, so refer to manufacturer instructions. Extreme temperatures or high humidity levels can affect adhesive curing, so work within recommended ranges.
Application Technique for Optimal Results
Get ready to learn some pro tips and tricks for optimal results when using liquid nails. Let’s dive into the application technique that will make your bonds stick like never before.
Surface Preparation:
Before applying liquid nails, clean, dry, and debris-free surfaces are key. Use a suitable cleaning agent or solvent to remove any contaminants. For an extra boost of bonding strength, roughen up the surface with sandpaper.
Adhesive Application:
Apply liquid nails in a continuous bead or a series of dots onto one surface. Avoid applying too much adhesive; aim for a coverage of approximately 1/8 inch thick.
Bonding Surfaces:
Press the surfaces together firmly and evenly, ensuring proper alignment before applying pressure. For overhead projects or ceilings, additional support may be needed until the adhesive fully cures.
Clamping and Curing:
In some cases, clamping may be necessary to achieve maximum bonding power. Check the manufacturer’s instructions for specific clamping requirements. Allow sufficient curing time, which can take around 24 hours depending on temperature, humidity, and materials being bonded.
Temperature Considerations:
Apply liquid nails within a temperature range of 40°F to 100°F (4°C to 38°C) for optimal performance. Extreme temperatures can hinder the curing process and weaken the bond.
Clean-Up:
Clean up any excess adhesive immediately using a solvent or recommended cleaning agent. Once cured, removing adhesive becomes difficult without damaging the surfaces.
By following these application techniques, you’ll optimize the bonding strength and longevity of liquid nails. Remember to refer to the manufacturer’s guidelines and product specifications for accurate information tailored to your specific application.
Environmental Conditions and Their Impact on Liquid Nails
In this engaging exploration, we will delve into the fascinating world of adhesives and uncover how temperature, humidity, moisture, substrate compatibility, and UV exposure can significantly influence the performance of Liquid Nails.
Temperature:
Just like Goldilocks searching for the perfectly balanced porridge, Liquid Nails perform optimally within a specific temperature range. Extreme temperatures can wreak havoc on adhesive properties.
In scorching heat, Liquid Nails may soften and lose their bonding strength, leaving your project vulnerable to failure. Conversely, in frigid conditions, they may become brittle and less effective at creating durable bonds. To achieve ideal results, consult the product packaging recommendations and ensure that your application falls within the specified temperature range.
Humidity:
Humidity is not just an inconvenience for your hair; it can also impact the curing process of Liquid Nails. High humidity levels can extend drying time, delaying your project’s completion and leaving you frustrated.
Conversely, low humidity levels can cause the adhesive to cure too quickly, resulting in weakened bonds that can jeopardize the integrity of your work. To navigate this challenge successfully, consider the humidity levels in your environment before applying Liquid Nails, striking a delicate balance between efficient curing and strong adhesion.
Moisture:
Moisture is a formidable adversary when it comes to bonding surfaces with Liquid Nails. Excessive moisture or exposure to water can compromise the adhesive’s strength and durability. Therefore, it is crucial to ensure that surfaces are dry and free from moisture before applying Liquid Nails.
For applications in areas prone to water exposure, such as bathrooms or outdoor projects, selecting a waterproof variant of Liquid Nails is essential for long-lasting bonds that withstand the test of time.
Substrate Compatibility:
Not all Liquid Nails are created equal. Different variants of this versatile adhesive are formulated to bond effectively with specific substrates such as wood, metal, or concrete. Before embarking on your project, identify the material you intend to bond and choose the appropriate variant accordingly. Failure to do so may result in weaker bonds or even failure to adhere properly, jeopardizing the structural integrity of your project.
UV Exposure:
Sunlight can be a double-edged sword for Liquid Nails. While some products are formulated to withstand UV exposure, others may degrade over time when exposed to prolonged sunlight. For outdoor applications, be sure to select a UV-resistant variant of Liquid Nails and take appropriate measures to protect the bonded surfaces from excessive sunlight. By doing so, you ensure the longevity of your adhesive bonds and maintain the structural integrity of your projects for years to come.
Types of Liquid Nails Products Available
With its strong hold and versatility, Liquid Nails offers a range of products designed for various materials and applications. This article will delve into the different types of Liquid Nails products available, helping you make an informed decision for your next project.
Original Liquid Nails:
The original Liquid Nails is a high-strength construction adhesive suitable for indoor and outdoor applications. It bonds effortlessly with wood, metal, concrete, and ceramics, making it ideal for home renovations or craft projects. No matter the temperature or moisture levels, the original Liquid Nails ensures a reliable and long-lasting bond.
Heavy-Duty Liquid Nails:
When it comes to demanding projects requiring extra-strong bonding properties, Heavy-Duty Liquid Nails is the answer. This variant boasts a higher viscosity, providing superior adhesion for installing countertops, cabinets, or floorboards. It can withstand substantial weight and stress, making it perfect for structural bonding that requires maximum strength.
Mirror Adhesive Liquid Nails:
Specifically formulated to securely bond mirrors to various surfaces, Mirror Adhesive Liquid Nails offers excellent adhesion properties. It can withstand vibrations and movement often associated with mirrors while resisting moisture. Bathrooms or other damp environments are no problem for this adhesive, ensuring your mirrors stay firmly in place.
Subfloor and Deck Construction Adhesive:
For heavy-duty construction projects like subfloors or decks, Subfloor and Deck Construction Adhesive is the ultimate choice. This specially formulated adhesive provides exceptional strength and durability to ensure secure flooring over time. Additionally, it reduces squeaks and movement in flooring while offering resistance to moisture.
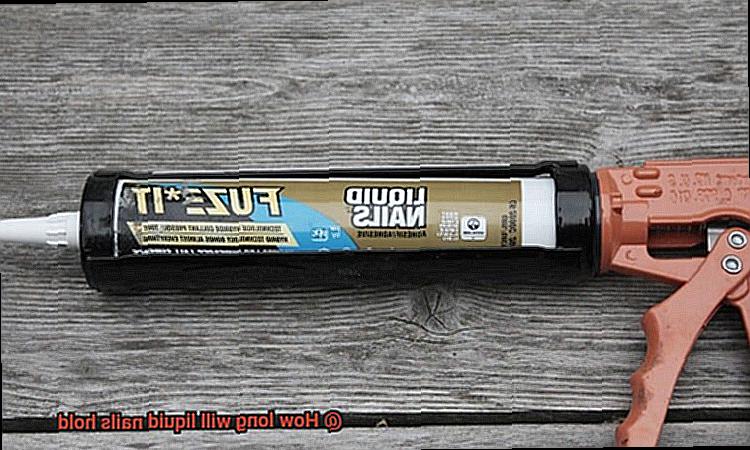
Fuze*It All Surface Construction Adhesive:
With the Fuze*It All Surface Construction Adhesive, versatility and convenience meet innovation. This game-changer can bond almost any material to any surface, including wood, metal, concrete, ceramic, plastic, and more. Its exceptional strength and flexibility allow for expansion and contraction of materials without compromising the bond.
Longevity Expectations for Different Applications
Liquid Nails, the adhesive of choice for countless DIYers and professionals, is renowned for its exceptional strength and versatility. But how long can this powerhouse really last?
In this article, we will delve into the fascinating world of liquid nails and explore the factors that influence its longevity in different applications. So sit back, relax, and prepare to uncover the secrets behind a bond that defies the test of time.
Factor 1: The Surface Matters:
The type of surface to which liquid nails is applied plays a crucial role in its longevity. For interior applications like baseboards or paneling, liquid nails can hold strong for years without fail. However, it is essential to ensure that the surfaces are meticulously cleaned and free from any grease or debris. This simple step sets the stage for an unyielding and enduring bond.
Factor 2: Conquering the Great Outdoors:
When using liquid nails for exterior applications, such as attaching trim or molding, one must consider the formidable challenge posed by harsh weather conditions. Rain, heatwaves, freezing temperatures – Mother Nature spares no mercy. To overcome these obstacles, opt for a specialized formula designed specifically for outdoor use. These formulas are expertly crafted to withstand the elements and provide unwavering durability.
Factor 3: Follow Instructions for Success:
To unlock optimum performance and longevity, always adhere to the manufacturer’s instructions. They possess unrivaled knowledge of their product and can provide invaluable guidance on curing time, temperature limits, and other critical considerations. Neglecting this step could mean the difference between a bond that stands tall for years and one that falters prematurely.
Factor 4: One Size Does Not Fit All:
It is important to note that liquid nails may not be suitable for all applications. When bonding non-porous surfaces like glass or plastic, you must seek out a specialized adhesive designed explicitly for these materials. By choosing the right product for the task at hand, you guarantee a bond that is both reliable and enduring.
Factor 5: Weight and Stress:
Weight and stress exerted on the bond must be taken into account. Liquid nails are available in varying load-bearing capacities, making it imperative to select the appropriate product for your project. Whether it entails heavy-duty bonding for countertops or securing subfloors, only the adhesive capable of shouldering the load will guarantee an unyielding and long-lasting bond.
Factor 6: Embrace Regular Maintenance:
Over time, changes in temperature or humidity levels can weaken even the strongest bonds. To counteract this inevitable aging process, regular inspections are essential. These inspections enable the timely identification of any signs of deterioration or failure, ensuring that necessary measures are taken to preserve the adhesive bond and prevent costly repairs in the future.
Testing and Certifications of Liquid Nails
In this article, we will take a deep dive into the extensive testing and certifications that Liquid Nails undergoes to ensure its quality, performance, and adherence to industry standards.
Testing for Strength and Endurance:
Liquid Nails undergoes rigorous testing to determine its ability to hold materials together. The shear strength test measures how well the adhesive withstands forces that cause one material to slide or shear against another. This test evaluates the bond’s strength by applying force until it fails.
Furthermore, the tensile strength test determines the amount of force required to pull apart two bonded surfaces. This test assesses Liquid Nails’ ability to withstand tension or pulling forces.
Evaluating Quality and Performance:
Liquid Nails is subjected to evaluations that ensure its overall quality and performance. These evaluations include resistance tests for heat, cold, water, and chemical exposure. By simulating real-world conditions, these tests determine how long the adhesive will hold in different environments.
Certifications for Safety and Compliance:
To guarantee that Liquid Nails meets industry standards and safety regulations, it obtains certifications from independent testing laboratories or organizations. Notably, the American National Standards Institute (ANSI) certification verifies that the adhesive meets specific requirements for performance, durability, and safety.
Environmental Impact:
Liquid Nails also holds the GREENGUARD Certification, recognizing its commitment to indoor air quality. This certification confirms that it conforms to strict standards for low volatile organic compound (VOC) emissions, making it safe for use in indoor environments.
Maintenance and Care to Maximize Bond Strength
Today, we embark on an exciting journey into the realm of maintenance and care, unlocking the full potential of Liquid Nails for unparalleled bond strength. As an expert in the field, I am thrilled to share invaluable tips and tricks that will elevate your adhesive game. So let’s dive in and discover the secrets to maximizing the strength of your bonds.
Proper Surface Preparation:
Before reaching for that trusty tube of Liquid Nails, take a moment to prepare your surface with meticulous care. Cleanliness is key here – ensure that the surface is pristine, dry, and devoid of any dust, grease, or debris. By going the extra mile in this step, you lay a solid foundation for an unbreakable bond.
Achieving Adequate Application:
Consistency is the secret ingredient when it comes to applying Liquid Nails. Like a symphony conductor directing each note with precision, apply the adhesive evenly across the entire surface. Pay attention to every nook and cranny, ensuring complete adhesion. Remember to consult the manufacturer’s instructions for recommended quantities and any specific application techniques that will ensure a flawless bond.
Embrace Patience: Allowing Sufficient Curing Time:
In our fast-paced world, patience may seem like a forgotten virtue. However, when it comes to Liquid Nails, patience is rewarded with unmatched bond strength. After applying the adhesive, grant it ample time to cure and achieve its full potential.
Bear in mind that curing times may vary depending on temperature and humidity levels. Consult the product label or manufacturer’s instructions for precise guidance.
Battling Moisture: Shielding Your Bonds:
Even superheroes have their weaknesses – for Liquid Nails, excessive moisture or water exposure can compromise its grip. Shield your bonded surfaces from prolonged contact with water or high humidity levels. Consider implementing waterproofing measures or sealing techniques, fortifying your bonds against the elements.
Temperature Considerations: The Balance of Heat and Cold:
Extreme temperatures can be the nemesis of Liquid Nails. Avoid applying the adhesive in scorching hot or freezing cold conditions, as it may adversely impact bond strength and curing. Optimal performance is achieved by maintaining moderate temperatures during both application and curing stages. Strike the perfect balance for enduring bonds.
Vigilance Through Regular Inspections and Maintenance:
To preserve the strength and longevity of your bonds, adopt a vigilant mindset. Regularly inspect your bonded surfaces for any signs of damage or weakening. Act promptly by reapplying or reinforcing Liquid Nails as needed. This proactive approach ensures that your bonds remain unyielding in the face of adversity.
WSoaX4kgMeg” >
Conclusion
When it comes to the question of how long liquid nails will hold, there are a few factors to consider. The type of surface you’re bonding, the conditions it’s exposed to, and the specific product you’re using all play a role in determining its longevity.
Liquid nails are designed to create a strong bond that can last for years. However, it’s important to note that they may not be as durable as other adhesive options like screws or nails.
In general, liquid nails can hold up well under normal conditions and provide a reliable bond for various applications such as construction projects or DIY crafts. They can withstand moderate temperature changes, humidity, and even some level of moisture exposure.
However, if you’re dealing with extreme temperatures or excessive moisture levels, the bond may weaken over time. It’s also worth mentioning that continuous stress or heavy loads can affect the adhesive’s performance.
To ensure optimal results and maximize the lifespan of your project, it’s essential to follow the manufacturer’s instructions carefully. Proper surface preparation, application technique, and curing time are crucial steps in achieving a strong and long-lasting bond.
Ultimately, while liquid nails offer convenience and versatility in many situations, it’s important to assess your specific needs and consider alternative methods if necessary. Consulting with professionals or conducting thorough research can help you make an informed decision based on your unique circumstances.