As a woodworking enthusiast myself, I understand the importance of using wood glue to create sturdy joints that stand the test of time. But here’s the burning question: how long should you wait after applying wood glue for optimal results?
In this blog post, we’ll delve into the secrets behind the ideal waiting period and provide you with valuable information to enhance your woodworking skills. Whether you’re working on a complex furniture piece or a simple DIY project, understanding when to proceed can make all the difference.
The Waiting Game:
Contents
- 1 Types of Wood Glue and Their Drying Times
- 2 Factors That Affect the Drying Time of Wood Glue
- 3 How to Tell When Wood Glue Is Fully Cured
- 4 Tips for Speeding Up the Drying Process
- 5 Clamping Pressure and Its Impact on Bonding Strength
- 6 Testing Your Wood Glue Before Use
- 7 Working in a Well-Ventilated Area
- 8 Consulting the Manufacturer’s Guidelines
- 9 Conclusion
When it comes to wood glue, patience is key. Rushing ahead without giving it enough time to cure can jeopardize your hard work. While factors like humidity and glue type can influence curing time, there’s a general rule of thumb.
For most woodworking projects, experts suggest waiting at least 24 hours before subjecting the glued joint to significant stress or strain. This allows the wood glue to dry and form a strong bond that will endure over time. Keep in mind that different glues may have varying cure times, so always refer to the product instructions for specific guidance.
Factors That Influence Cure Time:
While 24 hours is a good starting point, several factors can affect how long it takes for wood glue to cure. Humidity levels play a big role; higher humidity prolongs curing time while lower humidity speeds it up. The type of wood being glued, its thickness, and surface roughness also impact curing time.
Additionally, different types of wood glue have varying cure times as well. Some glues like PVA (polyvinyl acetate) and hide glue dry relatively quickly and achieve sufficient bond strength within hours. On the other hand, adhesives such as epoxy require longer waiting periods due to their chemical composition and strength.
In the world of woodworking, patience and precision go hand in hand. While waiting for wood glue to cure may feel tedious, rushing through it can compromise your project’s structural integrity. Take the time to let the glue work its magic, and you’ll be rewarded with a strong and durable masterpiece.
Remember, each project is unique, so always refer to the specific instructions provided by the wood glue manufacturer. With a little patience and attention to detail, you’ll master the art of timing when it comes to applying wood glue and achieve exceptional results in your woodworking endeavors.
Types of Wood Glue and Their Drying Times
Wood glue is an essential adhesive for woodworking projects, ensuring a strong bond between pieces of wood. However, understanding the different types of wood glue and their respective drying times is crucial for achieving successful and durable results. In this article, we will explore the various types of wood glue available in the market and discuss their drying times.
PVA Glue (Polyvinyl Acetate):
PVA glue, also known as white glue, is the most common type of wood glue. Its versatility and ease of use make it ideal for general woodworking projects. PVA glue typically dries within 30 minutes to an hour, depending on environmental conditions such as temperature and humidity. This quick drying time allows for efficient work progress and reduces the waiting time between assembly and further finishing processes.
Aliphatic Resin Glue (Yellow Glue):
Aliphatic resin glue, commonly referred to as yellow glue or carpenter’s glue, offers a stronger bond than PVA glue. It is also water-resistant, making it suitable for outdoor projects or areas prone to moisture exposure. Yellow glue has a longer drying time compared to PVA glue, usually taking around 1-2 hours to fully dry. This extended drying period provides ample time for adjustments or alignment of wood pieces before the bond becomes permanent.
Epoxy Resin Glue:
Epoxy resin glue consists of two components – a resin and a hardener – that need to be mixed together prior to application. This type of glue offers excellent bonding strength and durability, making it suitable for heavy-duty woodworking projects. The drying time for epoxy resin glue can vary significantly, ranging from 1 to 24 hours, depending on the specific product and environmental conditions. It is important to allow sufficient curing time for epoxy resin glue to achieve its maximum strength and durability.
Cyanoacrylate Glue (Super Glue):
Cyanoacrylate glue, commonly known as super glue, is a fast-drying adhesive suitable for wood bonding. It sets within seconds to a few minutes, making it perfect for quick repairs or small-scale woodworking projects. Its rapid drying time allows for immediate handling and reduces the waiting time between assembly and further work. However, it is important to exercise caution when using super glue, as its quick setting time leaves little room for adjustment or realignment once the bond is formed.
Polyurethane Glue:
Polyurethane glue is renowned for its strong bond and resistance to water and heat. It requires a longer drying time compared to other wood glues, usually taking around 4-6 hours or more to fully cure. This extended drying period allows for proper chemical reactions to take place, resulting in a reliable and durable bond. While the longer drying time may require patience, it ensures the longevity of the bonded wood even under challenging environmental conditions.
Factors That Affect the Drying Time of Wood Glue
Wood glue is the unsung hero of the woodworking world, holding together intricate pieces and ensuring the longevity of projects. However, not all wood glues dry at the same rate. In this article, we will explore the various factors that can affect the drying time of wood glue, equipping you with the knowledge to plan your projects effectively and achieve optimal results.
Type of Wood Glue:
Wood glues come in different types, each with its own unique drying time. The most common types include Polyvinyl Acetate (PVA) glue, epoxy glue, and polyurethane glue. PVA glue is popular for its quick drying time, typically taking between 30 minutes to an hour to cure. Epoxy glue, on the other hand, requires several hours or even overnight to dry completely. Polyurethane glue falls somewhere in between, taking anywhere from 6 to 24 hours to fully set. Understanding the type of wood glue you are using is essential in estimating drying time accurately.
Temperature and Humidity:
The environment in which you work plays a significant role in how fast wood glue dries. Higher temperatures and lower humidity levels expedite the drying process by accelerating water evaporation from the glue. Conversely, lower temperatures and higher humidity levels slow down drying times. To create optimal drying conditions, choose a well-ventilated workspace with moderate temperature and humidity levels.
Wood Moisture Content:
The moisture content of the wood being glued together can impact drying time as well. Wood with high moisture content takes longer to dry as both the wood and the glue joint need to lose moisture. It is crucial to ensure that your wood is properly seasoned or dried before applying glue to avoid extended drying times and potential issues with adhesion.
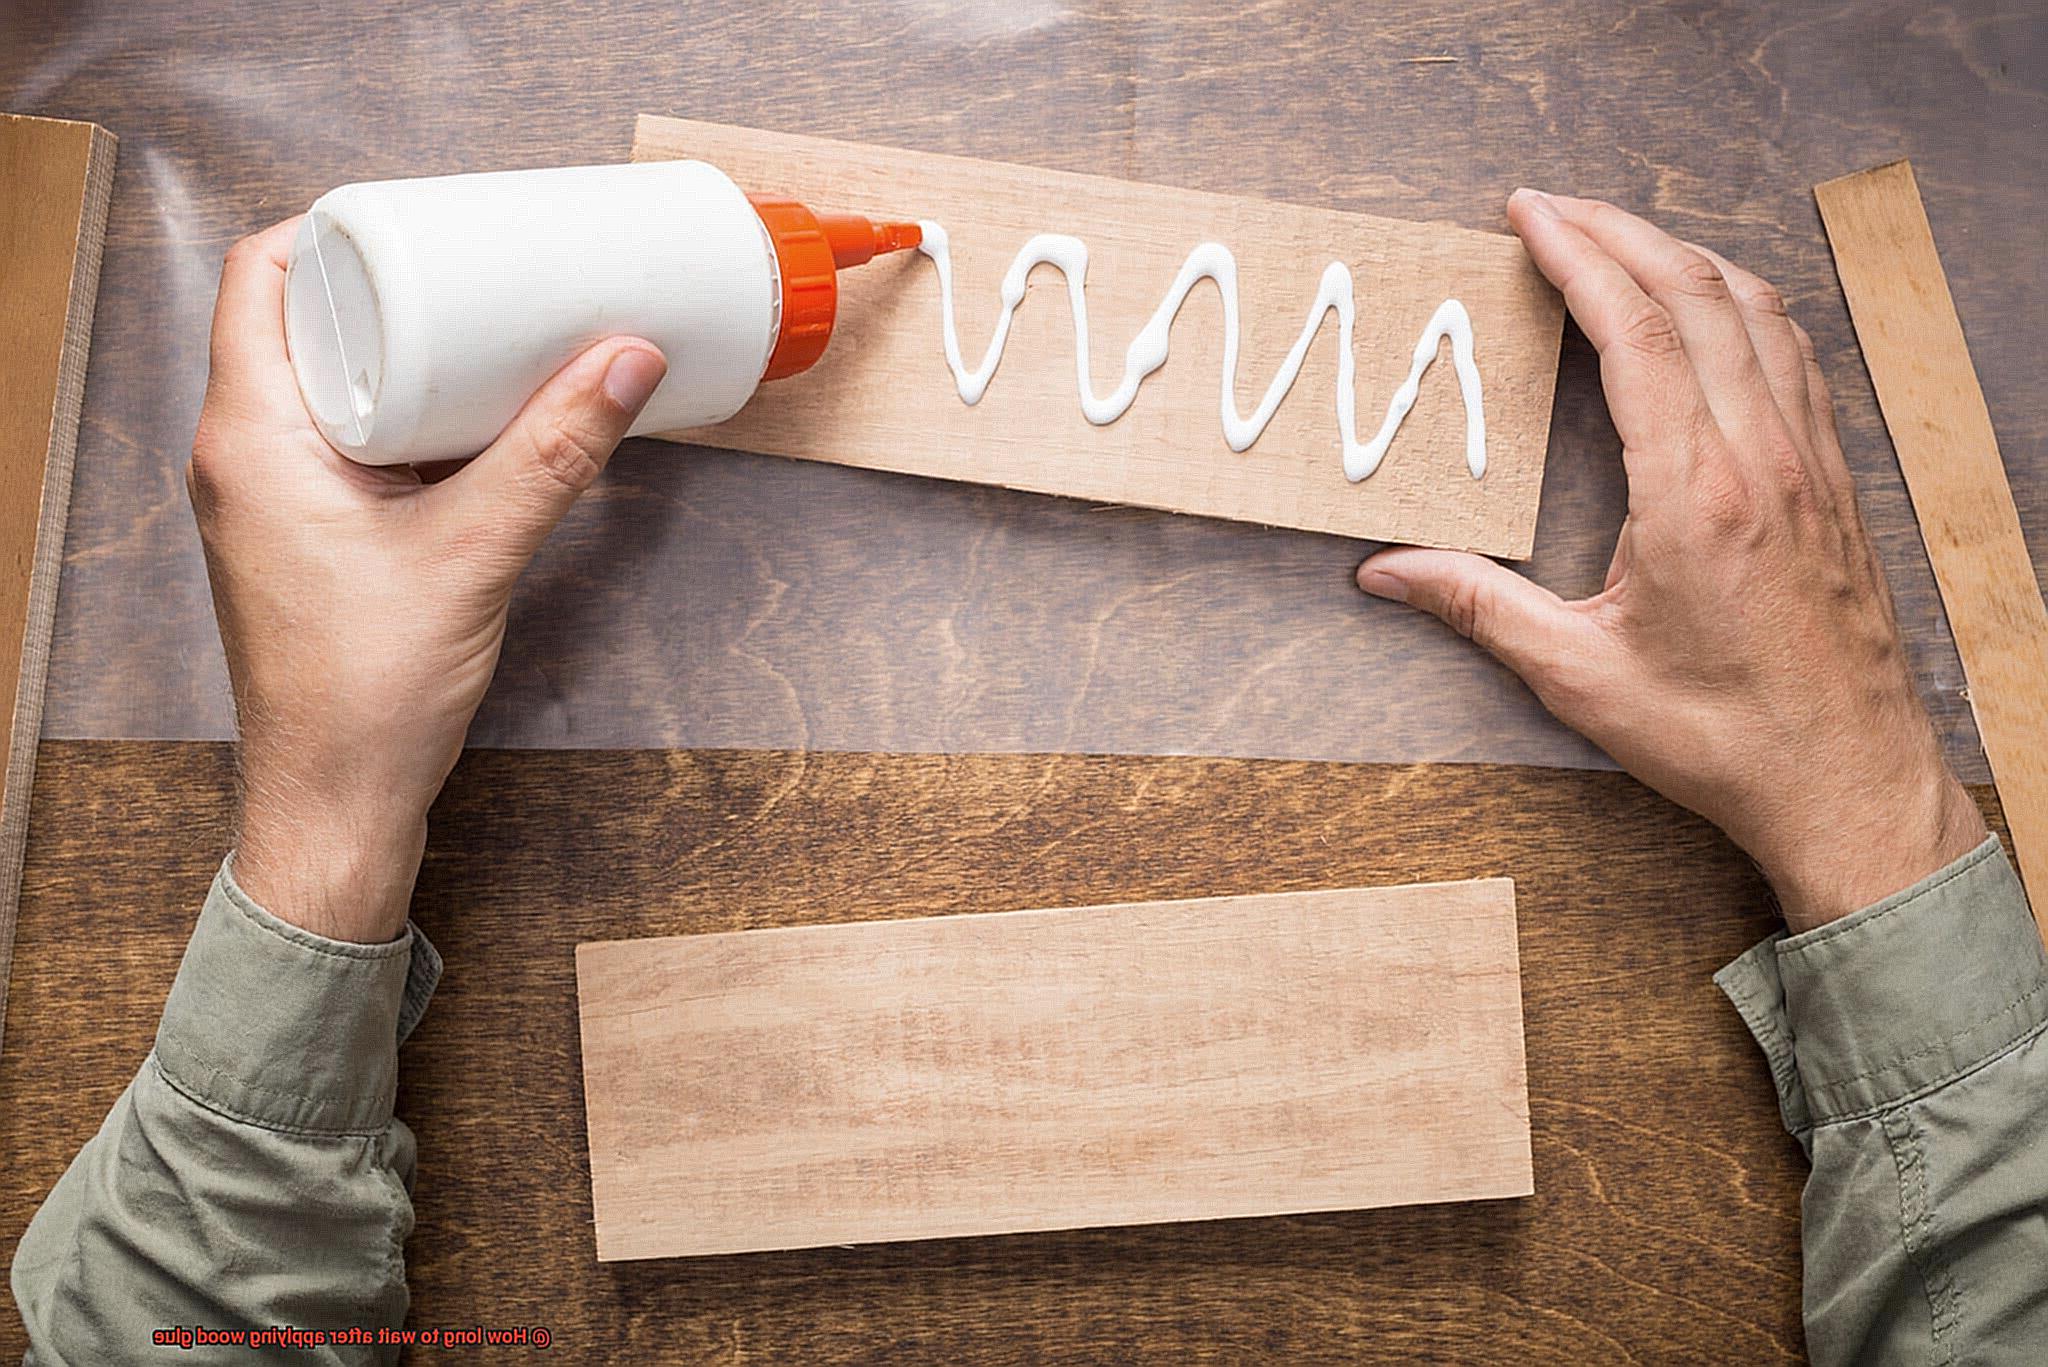
Glue Application Thickness:
The thickness of the glue layer also affects drying time. Thicker layers take longer to dry due to the increased water content that needs to evaporate. To expedite drying times and achieve a stronger bond, apply an even and thin layer of glue.
Clamping Pressure:
Applying pressure through clamping is often necessary to create a secure bond. However, it is important to consider the amount of pressure applied during clamping, as it can impact drying time. Too much pressure can squeeze out excess glue, resulting in longer drying times, while too little pressure may lead to weaker bonds. Follow the manufacturer’s instructions regarding clamping pressure for optimal results.
Type of Wood:
Different types of wood absorb moisture differently, which affects drying time. Dense hardwoods, such as oak or maple, tend to absorb less moisture, leading to faster drying times. On the other hand, softer woods like pine or cedar may absorb more moisture, resulting in longer drying times. Take into account the type of wood you are working with when estimating drying time.
How to Tell When Wood Glue Is Fully Cured
Wood glue is a remarkable adhesive that securely binds pieces of wood together, but how can you determine when it’s fully cured and ready for use? Let’s explore some foolproof methods to ensure your wood glue is fully cured and your project is a success.
Visual Clarity
A telltale sign that wood glue is fully cured is its color. Initially, the glue appears white or yellowish when wet, but as it dries and cures, it gradually becomes clear or translucent. If the glue has transformed into a transparent state, you can rest assured that it has fully cured and is ready for action.
Tactile Firmness
To assess the curing of wood glue, touch it gently. When the glue is wet, it feels soft and sticky. However, as it dries, it hardens and becomes firm. Apply slight pressure with your finger – if the glue feels solid and leaves no marks or indentations, it is likely fully cured.
Olfactory Dissipation
Did you know that your sense of smell can also help determine if wood glue is fully cured? Freshly applied wood glue emits a strong odor that gradually dissipates as it dries. Once the smell has completely vanished, it signifies that the glue has fully cured.
Time Factor
While most wood glues require approximately 24 hours to fully cure, some may necessitate more time. To ensure optimal results, it’s best to wait at least a full day before subjecting the glued pieces to any stress or load-bearing activities. Remember, patience is the key to a strong bond.
Environmental Influence
Temperature and humidity can significantly impact the curing time of wood glue. Higher temperatures and lower humidity levels expedite the process, whereas lower temperatures and higher humidity levels slow it down. For faster curing, create a controlled environment with ideal conditions.
Tips for Speeding Up the Drying Process
Wood glue is an essential adhesive in woodworking projects, providing a strong and durable bond between wood pieces. However, waiting for wood glue to dry can be a test of patience. In this article, we will explore effective tips and techniques for speeding up the drying process of wood glue, ensuring that your projects can be completed more efficiently.
Factors Affecting Drying Time:
The drying time of wood glue can be influenced by various factors, including the type of glue used, temperature, humidity, and the size and complexity of the project. Understanding these factors is crucial to determining the appropriate drying time for your specific project.
Recommended Drying Time:
In general, most wood glues require at least 24 hours of drying time before they can withstand significant stress or load. It is essential to follow the manufacturer’s instructions and recommendations for the specific wood glue you are using. Remember, patience is key to achieving optimal results.
Applying Heat:
Applying heat can accelerate the drying process of wood glue. However, it is important to use moderate heat sources such as a hairdryer or a heat gun set on low heat. Excessive heat can cause bubbling or uneven drying, compromising the quality of the bond.
Proper Ventilation:
Ensure proper ventilation in the drying area to facilitate faster drying. Good air circulation helps remove moisture from the glue, allowing it to dry more quickly. Opening windows or using fans can aid in this process. However, avoid directing airflow directly onto the glued surface, as it may cause the glue to dry too quickly and result in a weaker bond.
Choosing Fast-Drying Glue:
Some wood glues are specially formulated for quick-drying purposes. These glues often contain additives that promote faster evaporation of moisture. Check the label or consult with a knowledgeable professional to select the appropriate fast-drying glue for your needs.
Applying Thin Layers:
To speed up drying time, apply thin layers of glue instead of thick ones. Thicker layers contain more moisture that needs to evaporate, prolonging the drying process. By spreading a thin layer of glue evenly on the surfaces being joined, you can significantly reduce drying time.
Temperature and Humidity Control:
Ensure that temperature and humidity levels in the drying area are within the recommended range for optimal drying. Most wood glues have specific requirements for temperature and humidity. Following these guidelines closely will help achieve the desired results in a shorter amount of time.
Clamping Pressure and Its Impact on Bonding Strength
Wood glue bonding strength is heavily influenced by the application of clamping pressure. This article aims to explore the vital role that clamping pressure plays in achieving strong and durable bonds in woodworking projects. By understanding the impact of clamping pressure, craftsmen can optimize their glue application techniques and enhance the overall quality of their work.
The Significance of Clamping Pressure:
Ensuring Solid Bonds:
Clamping pressure acts as a superhero for wood glue bonds by tightly holding the glued surfaces together. This compression allows the glue to deeply penetrate the wood fibers, resulting in a robust bond. Weak or failed joints can be avoided through proper clamping pressure application.
Achieving the Ideal Squeeze:
The appropriate amount of clamping pressure required depends on factors such as wood type, glue type, and joint complexity. A general guideline is to apply enough pressure to squeeze out a thin bead of excess glue along the joint. This excess indicates that the joint is fully saturated with glue, maximizing bonding strength.
Caution Against Excessive Pressure:
While clamping pressure is crucial, excessive force can have negative consequences. Excessive pressure may cause an excessive amount of glue to be forced out of the joint, resulting in weakened bonds. It can also lead to misalignment or warping of the wood pieces, compromising joint integrity. Care should be taken to avoid over-clamping.
Tips for Optimizing Clamping Techniques:
Selecting the Right Clamps:
Investing in clamps specifically designed for woodworking projects is essential. These specialized clamps provide even pressure distribution across the entire joint, minimizing gaps or weak spots. Using multiple clamps spaced evenly along the joint ensures a uniform bond.
Timing Is Key:
Maintain clamping pressure until the glue has cured sufficiently. Most wood glues require at least 30 minutes to an hour of clamping time for initial bonding strength. Patience is crucial during this phase.
Adhering to Manufacturer’s Guidelines:
Each type of glue has different curing times and specific recommendations for clamping duration. Reading and following the manufacturer’s instructions is vital. These instructions often contain valuable information about temperature and humidity conditions that may impact the curing process.
Testing Your Wood Glue Before Use
In the world of woodworking, the bond created by your wood glue can make or break your project. Imagine the disappointment of seeing your carefully crafted piece fall apart due to a weak adhesive. To avoid such catastrophes, it is crucial to test your wood glue before use. This article delves into the significance of testing wood glue, covering important aspects such as drying time, bond strength, compatibility, staining issues, and storage requirements.
Drying Time:
Different wood glues have varying drying times, making it essential to adhere to the manufacturer’s instructions. By testing the drying time on a scrap piece of wood, you can ensure that you allocate enough time for the glue to set properly. This step sets the foundation for a strong and reliable bond.
Bond Strength:
Applying a generous amount of glue between two pieces of wood and testing the strength of the bond after it has dried will instill confidence in its adhesive properties. A robust bond guarantees that your project will withstand the test of time, providing durability and stability.
Compatibility:
Not all wood glues work well with every type of wood. To avoid potential issues, it is wise to test the glue on a small area before applying it to larger projects. This precautionary measure helps identify any compatibility issues, enabling you to select the right adhesive for your specific wood type. By doing so, you ensure optimal adhesion and minimize the risk of weak bonds.
Staining Issues:
If you plan on applying a finish or stain to your wood, testing for any potential staining or discoloration caused by the glue becomes crucial. This step allows you to find an alternative glue that won’t interfere with your desired finish. By conducting this test beforehand, you can achieve a flawless and aesthetically pleasing end result.
Storage Requirements:
Understanding the shelf life and storage requirements of your wood glue is vital to ensure its effectiveness. Following the manufacturer’s instructions regarding storage and expiration dates preserves its adhesive properties over time. By adhering to proper storage practices, you can avoid using expired glue that may result in weak bonds and project failure.
Working in a Well-Ventilated Area
Today, we’re going to delve into the crucial topic of working in a well-ventilated area when using wood glue. While it may not be as glamorous as discussing the intricacies of different wood joints or the beauty of a finely sanded surface, prioritizing safety is essential to ensure both our health and the longevity of our projects.
The Hazards of Wood Glue Fumes:
Wood glue, our trusty ally in woodworking endeavors, can also pose risks if not handled properly. During the drying process, this adhesive releases fumes that contain chemicals harmful to our health. Inhaling these fumes can lead to respiratory issues, eye irritation, headaches, and other health complications.
Why Ventilation Matters:
A well-ventilated area allows fresh air to circulate, effectively dissipating these potentially harmful fumes. Opening windows and doors, utilizing fans or ventilation systems, or even taking your work outside are all strategies to achieve proper ventilation. Not only does this safeguard your health, but it also expedites the drying time of the wood glue, resulting in a stronger bond.
Considerations and Best Practices:
Different wood glues have varying levels of volatile organic compounds (VOCs) and drying times. It is crucial to read the manufacturer’s instructions and adhere to their guidelines regarding ventilation requirements and drying times specific to the type of wood glue being used.
Safety First:
While ventilation is vital, let’s not forget about personal protective equipment (PPE). Regardless of ventilation conditions, always wear gloves and goggles when working with wood glue. These simple precautions protect against direct contact with the adhesive and any potential splashes or spills.
By prioritizing safety and working in a well-ventilated area, we ensure our well-being and optimize our woodworking results. So, let’s take a deep breath, open those windows, and embrace the fresh air. Together, we’ll create woodworking masterpieces that stand the test of time, leaving a legacy for generations to come. Happy woodworking, and breathe easy.
In conclusion, working in a well-ventilated area is of utmost importance when using wood glue. The fumes released during the drying process can be harmful to our health if inhaled. Adequate ventilation allows fresh air to circulate, effectively dissipating these fumes and reducing the risk of respiratory issues and other health complications.
Proper ventilation not only safeguards our health but also expedites the drying time of the wood glue, resulting in a stronger bond. It helps evaporate the moisture content in the glue, allowing it to cure faster and provide a more durable adhesive.
It is crucial to consider the specific requirements of different wood glues regarding volatile organic compounds (VOCs) and drying times. By reading the manufacturer’s instructions and following their guidelines, we can ensure that we are working in an appropriately ventilated area for optimal results.
Additionally, personal protective equipment (PPE) such as gloves and goggles should be worn at all times when working with wood glue, regardless of the ventilation conditions. These simple precautions protect against direct contact with the adhesive and any potential splashes or spills.
Consulting the Manufacturer’s Guidelines
And that’s where wood glue comes into play. But have you ever wondered why it’s absolutely crucial to consult the manufacturer’s guidelines when it comes to determining the waiting time after applying wood glue? In this article, we’ll dive deep into the reasons why these guidelines are so vital, unlocking the secrets to achieving durable and long-lasting bonds that will leave you in awe.
The Marvel of Drying Time:
The manufacturer’s guidelines hold the key to understanding the recommended drying time for your wood glue. Different types of wood glue require varying durations to reach their optimal strength. By adhering to these guidelines, you ensure that your project won’t fall apart or weaken prematurely.
Influential Factors on Drying Time:
Temperature and humidity levels act as the supporting actors in this wood glue drama, exerting significant influence on drying time. Higher temperatures and lower humidity levels speed up the process, while cooler temperatures and higher humidity levels slow it down. By taking these factors into consideration and following the manufacturer’s instructions, you’ll achieve consistent results every single time.
Masterful Bonding Techniques:
Some projects demand more than simply applying glue and sticking pieces together. The manufacturer’s guidelines may recommend clamping or applying pressure to create a secure bond. These techniques are especially crucial for larger or heavier pieces of wood, ensuring that your masterpiece remains intact.
Optimal Post-Application Care:
Ever wondered when you can finally sand or finish your glued joint? The manufacturer’s guidelines provide valuable insights into post-application care. Some glues allow immediate sanding or finishing, while others require additional curing time for optimal results. By consulting these guidelines, you’ll know exactly when to proceed with the next steps, avoiding any potential mishaps and achieving professional-grade results.
Building Unwavering Trust in Your Craft:
By faithfully following the manufacturer’s guidelines, you’re placing your trust in extensive research and testing conducted by true experts in the field. These guidelines are designed to provide you with accurate, reliable information for achieving strong and durable bonds. By building unwavering trust in your craft, you can create woodworking masterpieces that stand the test of time, leaving a lasting impression on all who behold them.
gnG0FNxisvk” >
Also Read: How To Glue Wood To Concrete Without Drilling?
Conclusion
When it comes to applying wood glue, patience is key. You might be eager to move on with your project, but rushing the drying process can lead to disastrous results. So, how long should you wait after applying wood glue? Well, the answer depends on a few factors.
Firstly, it’s important to consider the type of wood glue you’re using. Different glues have different drying times and instructions, so always refer to the manufacturer’s guidelines for specific recommendations.
In general, though, most wood glues require some time to set and cure properly. This allows the adhesive to bond effectively and create a strong hold. Typically, you’ll need to wait anywhere from 30 minutes to 24 hours before moving or clamping the glued pieces.
Factors such as temperature and humidity also play a role in drying time. Warmer temperatures and lower humidity levels tend to accelerate the drying process, while cooler temperatures and higher humidity can prolong it.
Now, I know waiting can be frustrating when you’re itching to finish your woodworking project. But trust me when I say that taking the time to let the wood glue dry properly will pay off in the end. Rushing it could result in weak joints or even complete failure of your project.
So be patient, my fellow woodworkers. Allow the wood glue ample time to work its magic. Use this waiting period wisely by planning ahead for other aspects of your project or working on other tasks. Before you know it, your glued pieces will be ready for their next steps.
Remember, good things come to those who wait – especially when it comes to applying wood glue. So take a deep breath, resist the urge to rush, and give that adhesive the time it needs to bond securely.