Today, we’re tackling a burning question: how long should you clamp Titebond 2 for the best results? Now, Titebond 2 is like the Beyoncé of woodworking adhesives – it’s super popular and known for its rock-solid bond.
But to make that magic happen, you’ve gotta follow some guidelines, starting with the almighty clamping step. In this blog post, we’ll break down the recommended clamping time for Titebond 2, factors that might sway that duration, and some nifty tips to ensure your bond is as strong as Hercules.
So grab a cuppa joe and let’s unravel the mystery behind Titebond 2’s clamping requirements.
Clamping Time Basics
Contents
- 1 Clamping Time Basics
- 2 Factors that Affect Clamping Time
- 3 Recommended Minimum Clamping Time
- 4 Longer Clamping Times for Larger Projects
- 5 Curing Process of Titebond 2
- 6 Temperature and Humidity Levels Impacting the Curing Process
- 7 Manufacturer’s Instructions and Guidelines for Clamping Times in Different Conditions
- 8 Proper Clamping Pressure for Optimal Results
- 9 Conclusion
When it comes to woodworking, clamping is a critical step in creating a bond that’s not only strong but also built to last. And when it comes to glue, Titebond 2 is the go-to choice known for its unwavering strength and reliability. But how long should you clamp when using this powerhouse adhesive? Let’s delve into the basics of clamping time and gain a deeper understanding of this crucial concept.
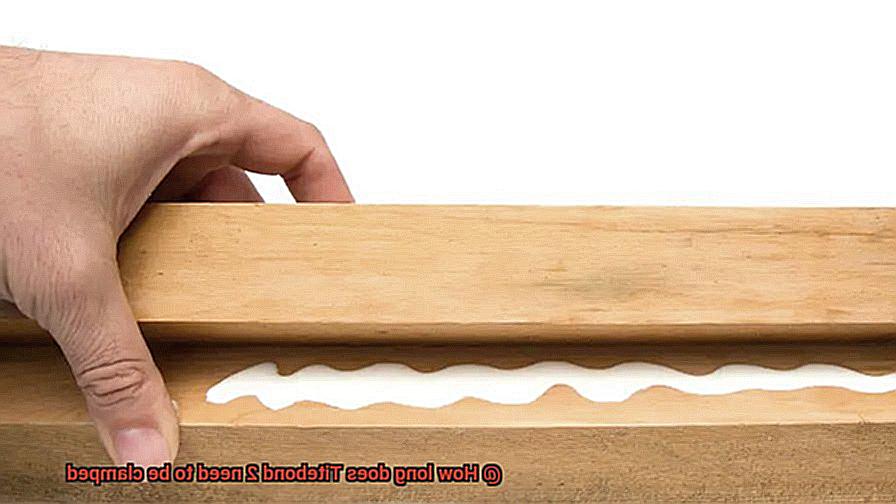
Clamping time refers to the duration during which glued pieces need to be held together with pressure until the glue has fully cured. This step is of utmost importance as it allows the glue to seep into the wood fibers and establish a rock-solid bond. For most woodworking applications involving Titebond 2, a minimum clamping time of 30 minutes is recommended.
However, it’s vital not to confuse clamping time with drying time. Although the glue may feel dry to the touch after a certain period, this doesn’t necessarily mean that the bond has fully cured. The clamping time ensures that the glue is granted enough time to set and forge a robust connection between the wood pieces.
Various factors can influence the clamping time of Titebond 2, such as temperature and humidity. Higher temperatures expedite the curing process, while lower temperatures slow it down. Likewise, higher humidity levels accelerate curing, whereas lower humidity levels impede it. Therefore, it’s essential to take these factors into account when determining your optimal clamping time.
In some instances, additional pressure may be necessary during clamping to ensure proper bonding. This can be achieved through the use of clamps, weights, or even specialized tools meticulously crafted to apply consistent pressure across the glued surfaces.
To ensure optimal results, it’s important to carefully follow the manufacturer’s instructions regarding specific clamping times and techniques when working with Titebond These instructions may vary depending on the application or project at hand. Therefore, a thorough reading and adherence to the guidelines are crucial.
Once the recommended clamping time has elapsed, it’s important to resist the temptation to rush. Allow the glued pieces to fully cure before subjecting them to any stress or load. Typically, this process takes around 24 to 48 hours, contingent upon the prevailing conditions and specific application.
It’s imperative to remember that patience is key when it comes to clamping and curing with Titebond Hastening the process can compromise the bond’s strength and durability, potentially leading to failures or weakened joints down the line.
Factors that Affect Clamping Time
Achieving a strong and durable bond with Titebond 2 glue relies on understanding the factors that influence clamping time. These factors encompass various elements that can impact the overall strength and integrity of the glued joint. By considering these factors, woodworkers and craftsmen can optimize their results and ensure a secure and long-lasting bond.
- Type of Material: The nature of the material being glued is a crucial factor in determining clamping time. Different materials have varying absorption rates, porosities, and densities, all of which affect the drying and bonding process. For instance, porous materials like wood require longer clamping times compared to non-porous materials such as metal or plastic. Considering the characteristics of the material being used and consulting Titebond’s recommendations or product instructions provides essential guidelines for clamping time.
- Ambient Temperature and Humidity: Environmental conditions, including temperature and humidity, significantly influence the drying time of Titebond 2 glue. Higher temperatures accelerate drying, while lower temperatures slow it down. Likewise, higher humidity levels prolong clamping time as moisture takes longer to evaporate from the glue joint. Conversely, lower humidity levels facilitate faster drying. Working within Titebond’s specified temperature and humidity ranges ensures optimal clamping results.
- Glue Application Technique: The manner in which Titebond 2 glue is applied also affects clamping time. Applying an even layer of glue on both bonding surfaces ensures thorough coverage and facilitates a strong bond. Following Titebond’s recommended application techniques, such as using a brush or roller, guarantees uniform distribution of glue. Uneven application may result in weak spots or incomplete bonding, necessitating extended clamping times to compensate.
- Bond Thickness: The thickness of the bond line, representing the amount of glue applied between surfaces, impacts clamping time with Titebond Thicker bond lines require more time to dry and cure compared to thinner ones. Maintaining a consistent and appropriate bond thickness, as advised by Titebond, ensures optimal results. Adjustments in clamping time may be necessary depending on the thickness of the glue line.
- Joint Design and Pressure: The design of the joint and the amount of pressure applied during clamping influence the overall clamping time required for Titebond Well-designed joints with proper alignment and mating surfaces maximize contact between materials, resulting in better bonding. Applying sufficient pressure during clamping promotes uniform glue spread and minimizes air pockets, ultimately leading to a stronger bond. Adhering to Titebond’s guidelines regarding joint design and recommended clamping pressures guarantees desired outcomes.
Recommended Minimum Clamping Time
When it comes to creating strong and secure bonds with Titebond 2 glue, the recommended minimum clamping time is a vital factor to consider. Though it may not be the most exhilarating topic, adhering to this guideline is crucial if you want your projects to withstand the test of time.
So, why is it so important to follow the recommended minimum clamping time? Let’s break it down.
First and foremost, clamping plays a crucial role in ensuring that the pieces being glued together stay in place while the glue sets and dries. It’s like giving your project a big bear hug to keep everything in its rightful position. After all, nobody wants their hard work to go to waste because of shifting or falling apart.
But clamping isn’t just about holding things together; it also contributes to creating a powerful bond between the two surfaces. It acts as the secret ingredient that adds strength and durability to your project. And let’s face it, who doesn’t want their creations to be sturdy and long-lasting?
Now, here’s an important point to remember – the recommended minimum clamping time can vary depending on factors such as temperature, humidity, and the type of materials you’re working with. It’s essential to consult Titebond’s instructions for specific guidance tailored to your project. They’ve got you covered with all the details.
Here’s a handy tip – don’t go overboard with clamping. Excessive pressure can squeeze out too much glue from the joint, weakening the bond. Striking a balance between enough pressure for proper bonding and avoiding excessive force is key.
Furthermore, once you’ve clamped everything in place, exercise patience and allow some drying time before subjecting your project to any stress or strain. Rushing this step can compromise the integrity of the bond you worked so hard to create.
To be precise, Titebond 2 recommends a minimum clamping time of 30 minutes. This duration ensures that the glue has ample time to set and bond properly. However, remember that this is a general guideline, and it’s always wise to consult the manufacturer’s instructions for specific applications.
So, glue enthusiasts, armed with this knowledge, go forth and clamp your projects with confidence. By following the recommended minimum clamping time, you’ll ensure that your creations possess the strength and security they deserve.
Longer Clamping Times for Larger Projects

Today, let’s delve into the intriguing topic of longer clamping times for larger projects. So grab a cup of coffee, sit back, and let’s explore the science behind this phenomenon.
When it comes to woodworking, one glue that stands out is Titebond This remarkable adhesive is a favorite among woodworkers for its exceptional bonding capabilities, ensuring sturdy and durable pieces. However, there’s an important catch – for Titebond 2 to work its magic, it needs ample time to set properly.
So, what exactly is clamping time? It refers to the duration during which the glued pieces need to be held together with pressure until the glue fully sets. Typically, Titebond 2 requires a clamping time ranging from 30 minutes to 1 hour. However, keep in mind that this timeframe can vary depending on factors such as temperature, humidity, and most significantly, the size of your project.
As we venture into larger projects, we encounter a fascinating truth – bigger surfaces necessitate longer clamping times for effective bonding. Why is that? Well, my friend, it all boils down to physics. Larger projects generate more internal stresses that must be balanced and distributed throughout the glued joint.
To achieve this delicate equilibrium, the glue requires adequate time to penetrate and bond the wood fibers together. Imagine it as a slow dance between the glue and the wood, a dance that demands extended clamping time for larger projects.
But wait, there’s more. It’s crucial to consider other factors like the type of wood used, the condition of the wood surfaces, and any additional stress or weight that will be applied to the glued joint. These variables can significantly impact the overall clamping time required.
Now you might be wondering how to determine the ideal clamping time for your specific project. Fear not. Simply follow the manufacturer’s instructions and guidelines. They have meticulously researched their glue and know it best. However, when working on larger projects, it’s always safer to extend the clamping time beyond the minimum recommended duration. Patience is key, as it ensures a robust and long-lasting bond, unlike rushing and risking a weak joint.
In conclusion, my fellow craftsmen and women, size does matter in the glue world. Larger projects demand longer clamping times due to increased surface area, internal stresses, and the need for proper bonding. So remember, shower your big projects with some extra love and clamping time to create masterpieces that will withstand the test of time.
Curing Process of Titebond 2
Once applied, Titebond 2 undergoes a chemical reaction called cross-linking, allowing the glue to transform from a liquid to a solid state and creating a strong bond between the pieces of wood.
The curing time of Titebond 2 can vary depending on several factors: temperature, humidity, and the type of wood being glued. To ensure a strong bond, it is recommended to clamp the glued pieces together for at least 30 minutes to 1 hour. This allows for proper pressure and time for the glue to set.
Here are some key points about the curing process of Titebond 2:
- Clamping Time: It is advisable to clamp the glued pieces together for at least 30 minutes to 1 hour. This allows the glue to set and ensures a strong bond. For larger or more complex projects, it may be necessary to extend the clamping time to allow for proper penetration and bonding.
- Finding the Right Balance: Excessive clamping pressure can squeeze out too much glue, weakening the bond. It is important to find the right balance between applying enough pressure for a strong bond and avoiding excessive pressure that can lead to glue wastage.
- Full Strength Bond: While initial bonding occurs during the clamping period, Titebond 2 continues to cure over time. The full strength of the bond is achieved within 24 hours. It is advisable to wait at least 24 hours before subjecting the glued project to stress or load-bearing activities.
- Environmental Factors: It is crucial to keep the glued project in a well-ventilated area with moderate temperature and humidity levels during the curing process. Extreme temperatures or high humidity can affect the curing time and overall performance of Titebond 2.
- Excess Glue Cleanup: Cleaning up any excess glue immediately after clamping is essential. Dried glue can be difficult to remove once cured, so it’s best to take care of it while it’s still wet.
Temperature and Humidity Levels Impacting the Curing Process
Crafting and woodworking are art forms that require attention to detail, especially when it comes to adhesive curing. Titebond 2, a popular adhesive in the woodworking community, relies heavily on temperature and humidity levels for its curing process. In this passage, we will explore how these factors influence the glue’s performance and provide tips for achieving optimal results.

Temperature: The Goldilocks Zone
Titebond 2, like Goldilocks, seeks the perfect temperature range for its curing process. Not too hot, not too cold – just right. The recommended temperature for applying and clamping Titebond 2 falls between 50°F and 90°F (10°C to 32°C). If it’s too cold, the curing process slows down significantly, resulting in longer wait times for a robust bond. Conversely, excessive heat can lead to rapid curing, compromising the bond’s strength. Finding that sweet spot is essential for achieving optimal results.
Humidity: The Dance of Moisture
Temperature alone doesn’t hold all the cards in Titebond 2’s curing process; humidity is also a key player. An ideal relative humidity range of 35% to 55% creates the perfect environment for Titebond 2 to work its magic. High humidity can extend drying time, testing your patience. Conversely, low humidity levels can speed up curing, catching you off guard. Excessive moisture in the air hinders Titebond 2’s ability to penetrate and bond effectively, potentially weakening the final result. Balancing humidity is crucial for a successful bonding experience.
Storage: A Controlled Haven
To ensure Titebond 2 reaches its full potential, store and use it in a controlled environment. In colder conditions, warm up both the glue and surfaces before application. This trick speeds up curing, resulting in a stronger bond. In hot and humid conditions, cool down the glue and surfaces to prevent rapid curing and bonding issues. Remember, different materials may have specific temperature and humidity requirements, so consult the manufacturer’s instructions for optimal results.
Manufacturer’s Instructions and Guidelines for Clamping Times in Different Conditions
Woodworkers and craftsmen alike understand that achieving the perfect balance of factors is essential for successful projects. When it comes to using Titebond 2 glue, following the manufacturer’s instructions and guidelines for clamping times in different conditions is crucial. In this article, we will explore the importance of adhering to these instructions and discuss the various factors that can affect clamping times.
Temperature Matters:
The temperature at which you apply Titebond 2 can significantly impact the curing process. This adhesive performs best within the range of 50°F to 90°F (10°C to 32°C). It’s important to note that lower temperatures may slow down curing, while higher temperatures can speed it up. By following the manufacturer’s instructions and ensuring that the temperature falls within this range, you create an ideal environment for curing.
Humidity: A Dance Partner:
Humidity levels also play a crucial role in determining clamping times for Titebond High humidity can extend curing times as moisture in the air interferes with the glue’s drying process. Conversely, low humidity levels can accelerate curing, catching you off guard. Maintaining an ideal relative humidity range of 35% to 55% creates the perfect environment for Titebond 2 to work its magic.
Material-Specific Considerations:
Different materials may require specific clamping times due to their porousness or oiliness. Some woods need longer clamping times to ensure a strong bond. Always test the bonding strength before removing the clamps completely to ensure a secure and durable joint.
Proper Storage Techniques:
To ensure optimal performance of Titebond 2, proper storage is essential. In colder conditions, warm up both the glue and surfaces before application to speed up curing and strengthen the bond. Conversely, in hot and humid environments, cooling down the glue and surfaces can prevent hasty bonding issues.
Patience Is Key:
While Titebond 2 may reach initial strength within the recommended clamping time of 30 minutes to an hour, it is crucial to allow the glued joint to cure for at least 24 hours before subjecting it to stress or load-bearing activities. This patience ensures that the bond achieves its maximum strength and durability.
Proper Clamping Pressure for Optimal Results
Today, we’re going to delve deep into the world of glue and unlock the secrets to achieving optimal results when using Titebond 2 glue. One crucial aspect that often gets overlooked is the proper clamping pressure. So, let’s buckle up and discover the art of clamping for a strong and durable bond.
The Importance of Proper Clamping Pressure:
Proper clamping pressure is the key to success when working with Titebond 2 glue. It directly affects the strength and durability of your bond. Applying too much pressure can starve your joint, resulting in a weak bond, while too little pressure can cause unsightly gaps. So, finding that sweet spot is essential.
Factors to Consider:
- Material Types: Different materials require different levels of clamping pressure. Hardwoods like oak or maple have tighter cell structures, so they need slightly more pressure. On the other hand, softer woods like pine or cedar need less pressure. Adjusting the pressure based on the material being glued is crucial for optimal results.
- Surface Area of Joint: The size of the joint also plays a role in determining the appropriate clamping pressure. Larger joints require more pressure to ensure even distribution of glue and bonding across the entire surface. Smaller joints may only require minimal pressure. Consider the size of your joint to determine the appropriate amount of clamping pressure.
- Desired Bond Strength: Titebond 2 glue cures through the evaporation of water. Applying excessive pressure won’t speed up the drying process; it may lead to a weaker bond instead. Allow sufficient time for your glue to dry and cure fully for maximum strength.
Determining the Proper Clamping Pressure:
A good rule of thumb is to apply enough pressure that causes a small amount of glue to squeeze out along the joint, indicating that it’s adequately filled. However, excessive squeeze-out may mean you’re applying too much pressure. Aim for a balance between good contact and minimal squeeze-out.
Choosing the Right Clamps:
Use clamps that apply even pressure across the joint. Bar clamps or parallel jaw clamps are excellent options. Distribute the clamps evenly along the length of the joint to ensure consistent pressure throughout. This will prevent any weak spots and ensure a strong bond.
gnG0FNxisvk” >
Conclusion
The clamping time for Titebond 2 is an important consideration when working on woodworking projects. It ensures that the adhesive bonds properly and provides the necessary strength and durability.
Titebond 2 is a popular type of wood glue known for its strong bond and versatility. It can be used on various types of wood, including hardwoods, softwoods, and even porous materials like particleboard and MDF.
To achieve optimal results with Titebond 2, it is recommended to clamp the glued surfaces together for at least 30 minutes. This allows the glue to cure properly and create a strong bond between the two pieces of wood.
However, it’s important to note that the clamping time may vary depending on factors such as temperature and humidity. In colder temperatures or high humidity conditions, it may be necessary to extend the clamping time to ensure proper bonding.
During the clamping process, it’s essential to apply even pressure across the entire glued surface. This can be achieved by using clamps or other tools specifically designed for woodworking projects.
Once the recommended clamping time has elapsed, it’s advisable to leave the glued project undisturbed for an additional 24 hours. This extra curing time allows the adhesive to fully set and ensures maximum strength.
In conclusion, when using Titebond 2 wood glue, it is best practice to clamp the glued surfaces together for at least 30 minutes.