Picture this: you’ve painstakingly crafted a woodworking masterpiece, meticulously applying high-quality wood glue to join the pieces together. But when put to the test, your creation crumbles under pressure. It’s a frustrating setback that can leave any DIY enthusiast or woodworking artisan feeling defeated. Fear not, my fellow craftsmen. The secret to unbreakable bonds lies in understanding the art of clamping wood glue.
Clamping wood glue is an art form that unlocks the adhesive’s full potential, resulting in joints that can withstand the test of time. While applying wood glue may seem like child’s play, many enthusiasts overlook the critical step of clamping – where true magic happens. The duration of clamping can either make or break the strength of your bond, making it essential to understand how long wood glue needs to be clamped for optimal results.
In this blog post, we’ll dive deep into the importance of clamping wood glue, exploring various factors that influence clamping duration and uncovering the ultimate goal: achieving connections that are unyielding and unwavering. So grab your safety goggles, slip on those work gloves, and let’s embark on a journey to master this vital aspect of woodworking perfection.
What is Wood Glue?
Contents
When it comes to woodworking, creating a strong bond between pieces of wood is essential. And that’s where wood glue comes into play. This remarkable adhesive is specially designed to forge durable and long-lasting connections between wooden surfaces. In this article, we will delve into the wonders of wood glue, explore its different types, and provide you with tips on how to effectively use it in your woodworking projects.
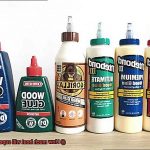
Types of Wood Glue:
Wood glue comes in various types, each with its own unique properties and applications. Let’s take a closer look:
PVA Glue (Polyvinyl Acetate):
PVA glue, also known as polyvinyl acetate glue, is the most common type of wood glue. It’s water-based, dries clear, and is non-toxic. Perfect for general woodworking projects and crafts, PVA glue is easy to use and readily available in hardware stores.
Polyurethane Glue:
If you’re seeking a stronger bond that can withstand moisture and outdoor conditions, polyurethane glue should be your go-to option. This powerful adhesive expands as it cures, effectively filling gaps in wood joints and providing excellent resistance to water.
Epoxy Glue:
Renowned for its incredible strength and gap-filling properties, epoxy glue consists of two components – resin and hardener – that are mixed together prior to application. Though it requires careful mixing and precise application, epoxy glue delivers an exceptionally robust bond.
Using Wood Glue:
To achieve optimal results when working with wood glue, follow these steps:
Preparation:
Ensure that the surfaces you’re bonding are clean, dry, and free from any contaminants like grease or dust. If necessary, sand the wood pieces to create a smooth surface.
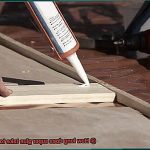
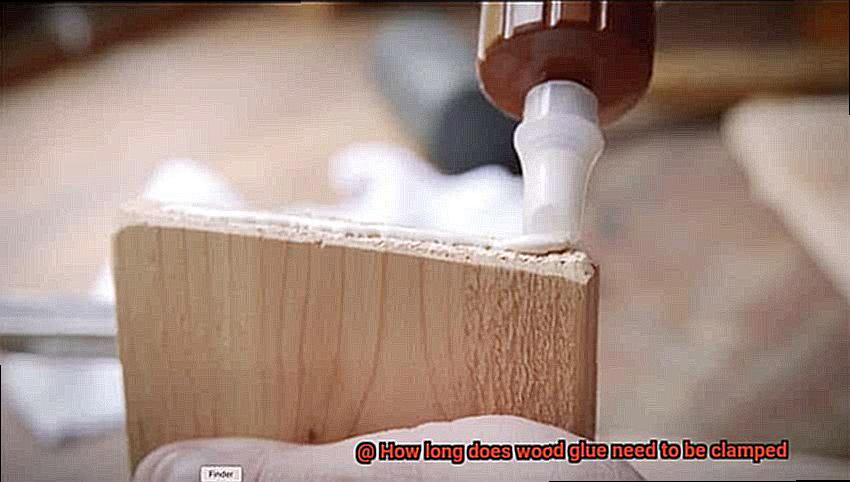
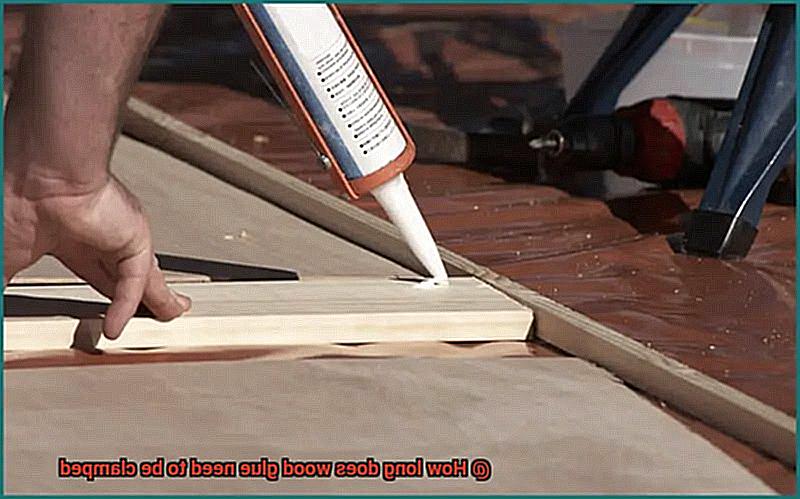
Application:
Apply an even coat of wood glue to both surfaces using a brush or spreader. It’s important to achieve good coverage without excessive glue, so exercise caution during this step.
Clamping:
To create pressure and ensure a strong bond, clamp the glued pieces together firmly. The recommended clamping time varies depending on factors such as the type of glue, wood species, temperature, and humidity conditions. Typically, most wood glues require at least 30 minutes to an hour of clamping time.
Curing:
During the clamping time, avoid disturbing or moving the glued pieces as it may weaken the bond. Once the recommended clamping time has passed, you can clean up any excess glue using a damp cloth or sandpaper.
What Factors Determine Clamping Time?
Woodworking enthusiasts understand the importance of a strong and durable bond when working with wood. Achieving this bond requires not only choosing the right glue but also understanding the factors that determine clamping time. In this article, we will delve into the fascinating world of wood glue, exploring the various factors that influence clamping time. So, grab your favorite woodworking tools and let’s unlock the secrets of clamping time.
Factor 1: Type of Wood:
The type of wood being bonded plays a significant role in determining clamping time. Softwoods, such as pine, have a higher absorbency rate than hardwoods like oak or maple. Consequently, softwoods may require shorter clamping times to achieve an adequate bond. Hardwoods, on the other hand, may need a bit more time for the glue to fully penetrate and create a strong connection.
Factor 2: Type of Glue:
The type of glue used is another crucial factor in determining clamping time. Different glues have different characteristics and recommended application methods. For example, polyvinyl acetate (PVA) glues are commonly used in woodworking projects and usually require a clamping time of around 30 minutes to an hour. Epoxy glues, known for their exceptional strength, may require longer clamping times to ensure a secure bond. It is essential to carefully follow the manufacturer’s instructions regarding clamping time for the specific type of glue being used.
Factor 3: Environmental Conditions:
Temperature and humidity levels significantly impact the drying and curing process of wood glue. Higher temperatures and lower humidity levels accelerate drying, resulting in shorter clamping times. Conversely, lower temperatures and higher humidity levels can extend drying time and require longer clamping periods. Consider these environmental factors when determining the appropriate clamping time for wood glue.
Factor 4: Size and Complexity of the Joint:
The size and complexity of the joint being glued together should not be overlooked. Larger or more intricate joints may require longer clamping times to ensure a secure bond. The adhesive needs sufficient time to spread and penetrate the wood fibers fully. In complex joints, there may be more areas that need to be clamped together, necessitating additional time for the glue to cure effectively.
Factor 5: Pressure Application:
Finding the right balance of pressure during clamping is vital. Applying excessive pressure can squeeze out excess glue and weaken the bond, while insufficient pressure may result in a weak connection. Apply firm, even pressure to ensure proper adhesion without compromising the joint’s integrity.
General Clamping Time Guidelines
Woodworking, an art that demands precision and attention to detail, relies on the proper use of wood glue and understanding clamping time for a strong and secure bond. This blog post delves into general clamping time guidelines for wood glue in woodworking projects, empowering you to achieve optimal results.
Factors Influencing Clamping Time:
- Type of glue used: Different wood glues possess varying curing times. Adhering to the manufacturer’s instructions ensures the best outcome.
- Temperature and humidity: Curing accelerates under higher temperatures, while low temperatures slow it down. High humidity extends clamping time, whereas low humidity shortens it.
- Wood characteristics: Hardwoods typically necessitate longer clamping times than softwoods. Furthermore, larger or more intricate projects may require extended clamping periods to guarantee effective bonding.
General Guidelines:
- Minimum clamping time: As a rule of thumb, most wood glues necessitate clamping for at least 30 minutes to an hour. This allows the glue to cure fully, fostering a robust bond between wood surfaces.
- Manufacturer’s recommendations: Always consult the glue manufacturer’s instructions for specific clamping time recommendations.
- Even pressure distribution: Apply clamps evenly and with sufficient pressure to disperse the glue across the joint, effectively preventing gaps or weak spots in the bond.
- Post-clamping curing time: Once the recommended clamping time lapses, leave the glued pieces undisturbed for at least 24 hours, enabling the glue to completely cure and optimize strength and durability.
The Role of the Type of Wood Being Glued
The type of wood being glued plays a significant role in determining how long the wood glue needs to be clamped. Softwoods, such as pine or cedar, are generally more porous and absorbent than hardwoods, like oak or maple. This means that softwoods may require longer clamping times to ensure a strong bond. If you’re working with pine, for example, it’s recommended to clamp it for at least 30 minutes to an hour to allow the glue to fully set and create that rock-solid connection.
On the flip side, hardwoods generally have tighter grain structures, which means they might not need as long of a clamping time. In most cases, 15-30 minutes of clamping should do the trick for hardwoods.
But it’s not just about porosity and grain structure. Different types of wood also have varying densities and moisture content, which can affect how well the glue penetrates the wood fibers. This means that even within the softwood or hardwood categories, there can be variations in clamping time requirements.
To make things even more interesting, some woods are just plain finicky when it comes to bonding. Exotic or oily woods, for instance, can sometimes inhibit the bonding properties of regular wood glue. In these cases, you may need to use a specialized adhesive or prepare the wood differently before applying the glue.
So how do you determine the ideal clamping time for your specific project? Well, it’s important to consider the characteristics of the wood you’re using and follow the manufacturer’s recommendations for the particular type of glue. And don’t forget to do a test run on a scrap piece of wood to ensure that your glue and clamping time are providing the desired results.
Temperature and Humidity Considerations
In the world of woodworking, the strength of your bond can make or break your project. Wood glue has long been a go-to adhesive for joining wood pieces together, but did you know that temperature and humidity are secret ingredients that can affect its curing time? In this captivating article, we will delve into the importance of maintaining optimal conditions for a robust bond and explore the various factors that influence the strength of wood glue bonds.
Temperature:
Picture this: a woodworker’s workshop, where the temperature sets the stage for the glue’s performance. When it’s too chilly, the glue takes its sweet time to dry, extending clamping time and leaving you tapping your fingers. But beware, when the heat is cranked up too high, the glue may dry in a flash, jeopardizing its bonding abilities. Following temperature recommendations from the glue’s manufacturer is essential for achieving that perfect bond.
Humidity:
In woodworking, humidity is more than just a buzzword. It’s the air’s moisture level that can act as an ally or foe to your wood glue. Imagine high humidity levels slowing down the drying process, forcing you to wait longer for a firm hold. On the flip side, low humidity can cause the glue to snap into action prematurely, resulting in a bond that’s as weak as a wilted flower. Striking a balance with moderate humidity levels is key to unlocking optimal results.
Other Environmental Factors:
Temperature and humidity aren’t the only players on this stage. Enter airflow and ventilation—the supporting cast that can make or break your glue’s star performance. Poor airflow may trap moisture and extend drying times, leaving you exasperated. But excessive airflow? That could cause your glue to evaporate quicker than water in a desert storm.
Maintaining Optimal Conditions:
To achieve that sought-after strong bond, you must create an environment with controlled temperature and humidity levels. Think of it as crafting the perfect stage for your glue’s grand performance. Use dehumidifiers or humidifiers to fine-tune the conditions as needed. And don’t forget, different wood glues have their own unique requirements, so always consult the manufacturer’s guidelines for precise information.
Application Techniques Matter
In the world of woodworking, the strength and durability of your glue joints can make or break your project. But did you know that how you apply the glue is just as important as the type of glue you use? In this article, we will explore the crucial role of application techniques in creating strong and long-lasting glue joints. So, grab your tools and let’s dive in.
Cleanliness is Key:
Before applying any glue, take the time to ensure that the surfaces to be glued are clean, dry, and free from any dirt or debris. Even the tiniest contaminants can hinder proper adhesion, leading to weak bonds. Wipe down the surfaces with a clean cloth or sandpaper to remove any dust or rough spots.
Choose the Right Glue:
Different wood glues have varying drying times and requirements for optimal bonding. Read and follow the manufacturer’s instructions carefully. Some glues may need longer clamping times than others, so choose wisely for your project.
Apply an Even Coat:
The amount of glue you apply directly affects the strength of your bond. Too little glue results in weak adhesion, while too much causes excessive squeeze-out and messy joints. Use a brush or roller to apply a thin, even layer of glue on both surfaces. Cover the entire surface without going overboard.
Proper Clamping Technique:
When it comes to clamping, even pressure is key. Apply clamps evenly across the joint to distribute pressure uniformly. Make sure enough pressure is applied to squeeze out excess glue while keeping the pieces tightly together. Too much pressure weakens the bond, while too little results in a loose joint.
Consider Environmental Factors:
Temperature and humidity levels in your workspace can affect glue drying time. Lower temperatures and higher humidity require longer clamping periods. Conversely, warmer temperatures and lower humidity expedite the drying process. Adjust your clamping time accordingly.
Exercise Patience:
Once the glue is applied and the pieces are clamped, be patient during the drying process. Avoid moving or disturbing the glued pieces until the glue has fully cured. Prematurely removing clamps or stressing the joint compromises the bond and weakens the connection.
U0hhFjjW5EU” >
Also Read: How to Make Glue Dry Faster
Conclusion
In conclusion, the duration of clamping wood glue is a crucial step in achieving sturdy and long-lasting bonds in woodworking projects. The recommended clamping time can vary depending on factors such as the type of glue, wood species, temperature, and humidity conditions. But fear not. There are some general guidelines to follow that will ensure your project stands the test of time.
For most wood glues, you’ll need to allow at least 30 minutes to an hour of clamping time for the glue to fully cure and create a rock-solid bond between the wood surfaces. However, don’t forget to consult the manufacturer’s instructions for specific recommendations regarding clamping time for your chosen glue.
But wait, there’s more. The type of wood being glued, environmental conditions like temperature and humidity, the size and complexity of the joint – all these factors come into play when determining the ideal clamping time. It’s like a delicate dance between science and craftsmanship.
To achieve optimal results, make sure to prep those surfaces like a pro. Clean them thoroughly and apply an even coat of glue. And when it comes time for clamping, apply firm and even pressure like a master craftsman wielding their tools with precision. This helps distribute the adhesive evenly across the joint, creating a bond that would make any carpenter proud.
Now here’s where patience becomes your secret weapon. After the recommended clamping time has passed, resist the urge to disturb or move those glued pieces until the glue has fully cured. Give it at least 24 hours – let it work its magic behind closed doors.
So there you have it – armed with this knowledge and armed with your trusty bottle of wood glue – you can unleash its power and become a true master of clamping in your woodworking endeavors.